


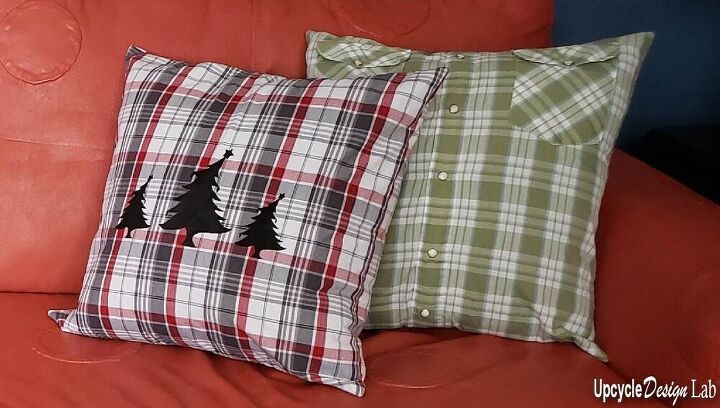
Upcycled Pillow Covers From Men’s Shirts
Advertising Disclosure: Upcycle Design Lab may be compensated in exchange for featured placement of certain sponsored products and services, or your clicking on links posted on this website.
This project allows you to quickly change the look of a chair, love seat or couch.
Hi there welcome to the lab.
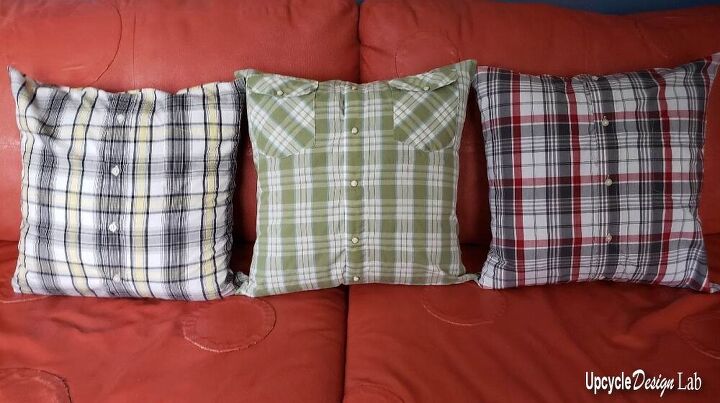
Today’s project is great for folks who are just learning how to sew. It is a simple, fast, and easy project that comes together in about a 1/2 an hour. If you want to spend a little extra time you can also make it a more personalized item just by using your creativity and imagination. I personalized my pillow covers with a holiday theme using my Cricut cutting machine and some fabric paint. But there are so many other ideas you could try, beading, applique, adding pom-poms or tassels. Or if you want you can leave them as they are and just enjoy the cute button front and pocket.
For this project you will need
- Throw Pillow
- Men’s Button Down Shirt
- Tape Measure
- One Piece of Newspaper
- Black Sharpie
- Straight Pins
- Scissors for Paper and Fabric
- L square or Ruler
- Sewing Machine
- Thread
- Pinking Shears (optional)
- Iron (optional)
Step 1 – Measure the pillow from seam to seam. For square pillows, one measurement is all you need. If you are using a rectangular pillow measure both lengths. Add 1 1/4 inches to both the width and height. For my 18″ square pillows I made my pattern 19 1/4″ x 19 1/4.”
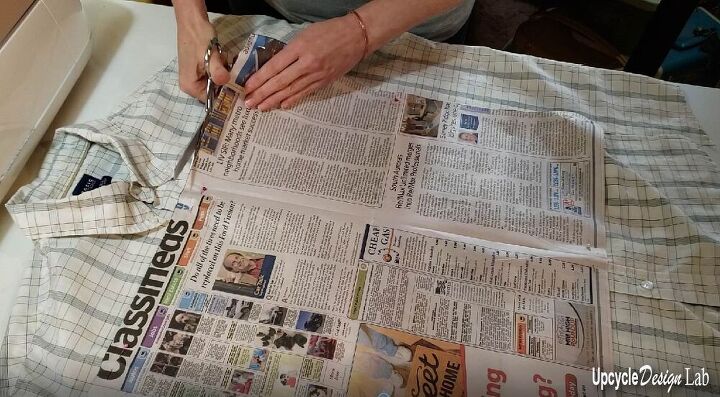
Step 2 – Use the L-square or ruler and the sharpie to draw out the pattern on the piece of newspaper.
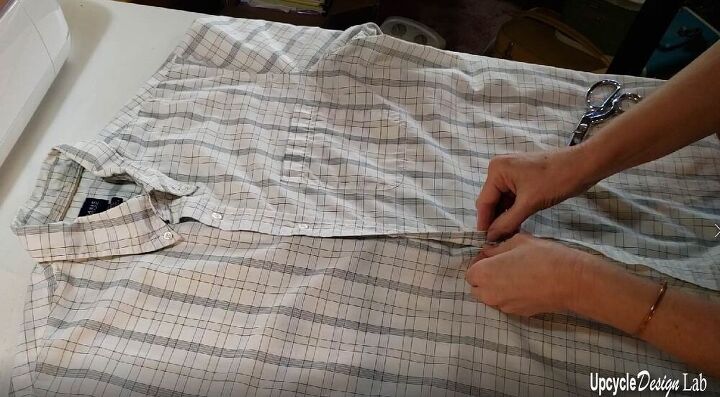
Step 3 – Button the shirt and cut through the back layer of the shirt along the yoke seam. Flatten and smooth the two layers of the shirt.

Step 4 – Lay the newspaper pattern on the front of the shirt. Check placement before pinning the pattern down. Consider where the pockets, buttons, and back of the shirt are where they will be on the finished pillow cover.
Step 5 – Cut through both layers of the shirt around a the paper pattern.
Step 6 – Remove the pattern and flip both pieces so the the right sides of the fabric are facing each other. Pin the edges together.
Step 7 – Start anywhere on the edge of the pillow cover and sew all the way around.

Step 8 – Use pinking shears to trim down the seam allowance. Unbutton and turn inside out. Press if desired.
Step 9 – Insert pillow and rebutton.

Note depending on the embellishment if you have one you may want to add it after step 8 or after step 5.
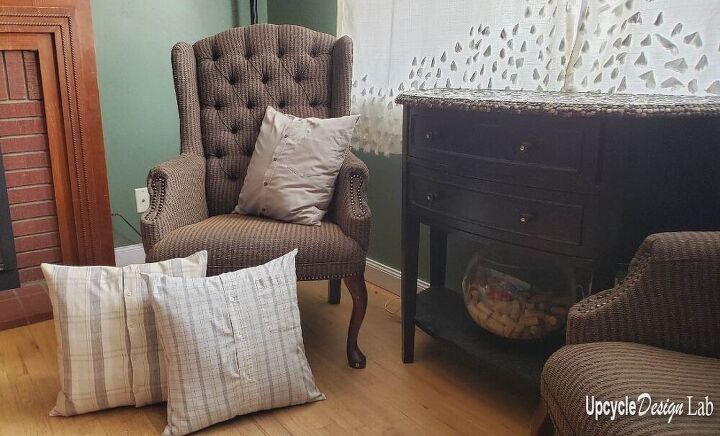
I made one set with no embellishment and one set for the holidays.
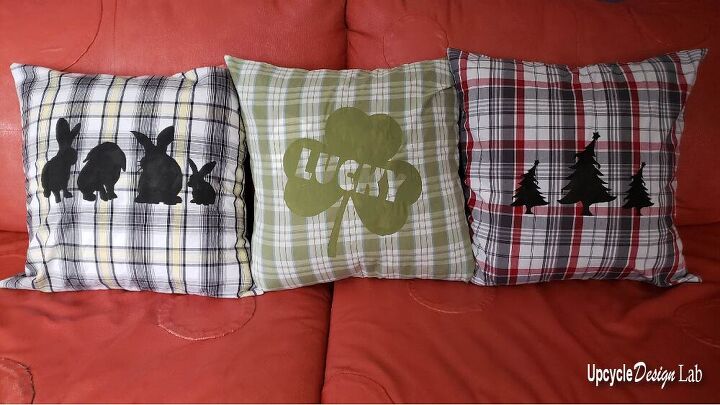
If you would like more information on how I made these designs with my new cutting machine you can check out my last post here.
I hope you enjoyed today’s quick little project. Thanks for stopping by. If you would like more details and instructions please watch the video tutorial below.
Happy Upcycling,

Advertising Disclosure: Upcycle Design Lab may be compensated in exchange for featured placement of certain sponsored products and services, or your clicking on links posted on this website.
Resources for this project:
See all materials


Comments
Join the conversation
-
My husband collected tropical shirts and about sixty when he died. I plan to make a quilt with them. I plan to make throw pillows to match! Thanks.
-
Those are super cute!!


Frequently asked questions
Have a question about this project?