


Quick Lights for My Deck Stairs You Can Put Almost Anywhere

Something simple - that's not easily broken
Hometalk Recommends!
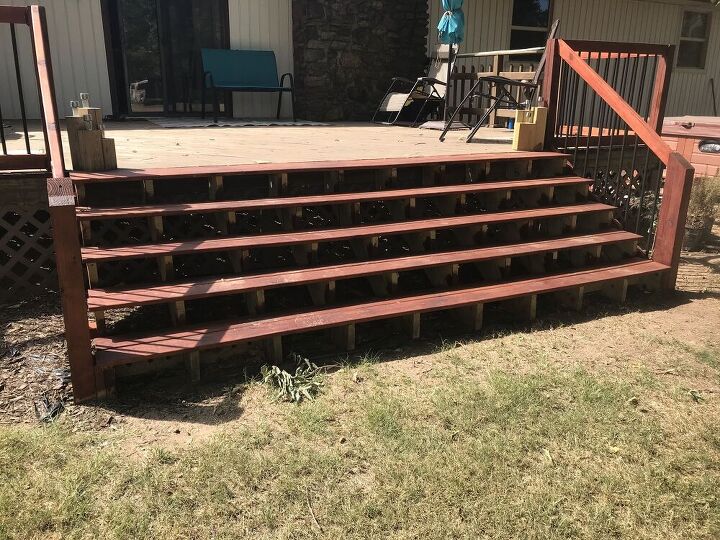
I built some new stairs for my deck last summer. I ran out of warm weather, and haven't installed the riser boards yet (the boards that keep your feet from sliding thru) which will have LED lights in them to illuminate the stairs. Meanwhile I have to take a flashlight outside every time it's dark. I looked back at my very first Hometalk post and saw something inspiring in the questions/comment section
I had lit up the front stairs at home like this, but the lower lights got beat up by a snow shovel all the time, and the upper ones had to be re-aimed once in a while, so I wanted something less prone to damage. ( I really liked to look of all the lights on the house in the evening: ). One of the questions posed in the earlier post was about lights on a fence, so I found some L-brackets like I had suggested to that Hometalker.
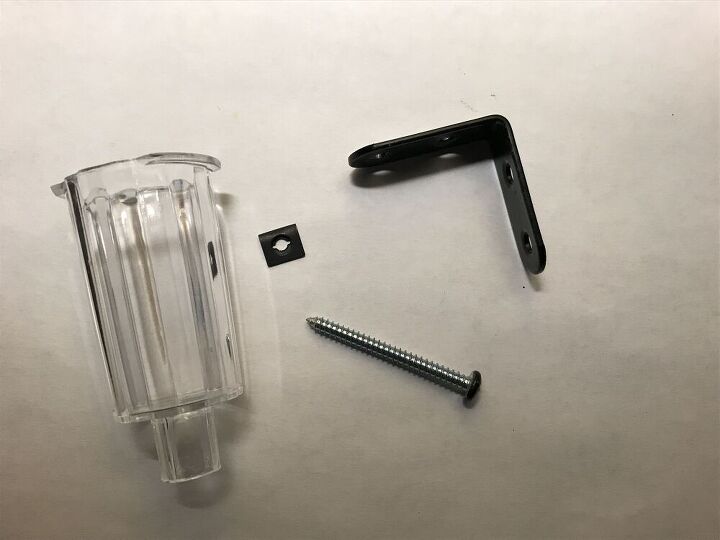
Since the new look of the deck had black balusters I found some black solar lights locally (a buck each) and found these black L-brackets on Amazon. 16 Brackets with mounting screws were $9. ( You have to hunt a while to find the best deal on quantity vs price sometimes). Also pictured is a 1.5" No. 8 sheet metal screw, and a No. 8 speed-nut. Speed-nuts are very common in the auto body world, because the line up/assemble so easily. You can use a regular nut and bolt, but these are VERY simple to assemble down inside the plastic globe of the solar light. I got the speed-nut and screw at a nearby hardware store.
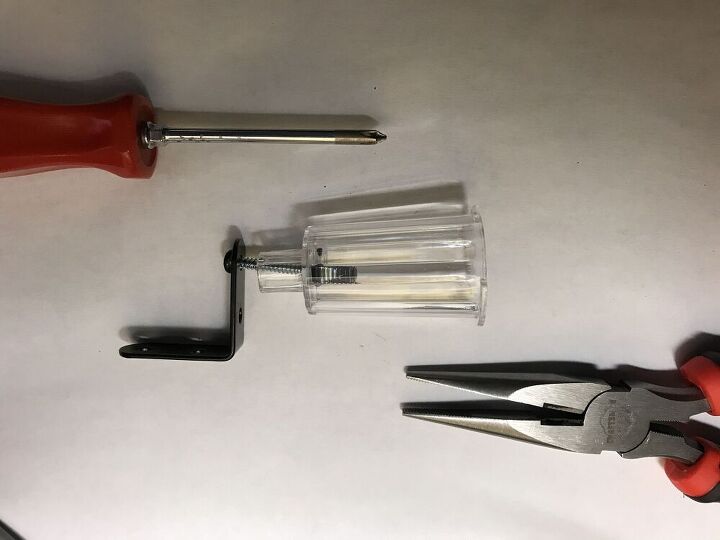
Here's a pic of the 'loose' assembly. I used a regular phillips screwdriver and needle-nosed pliers to tighten it all up.
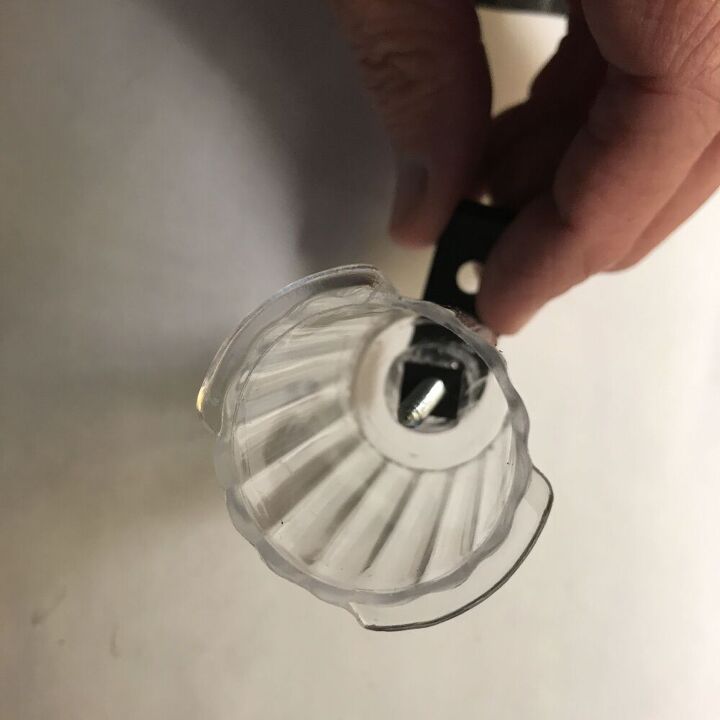
Looking down into the globe you can see the speed-nut sitting flat. A 70 cent part vs a 20 cent part, but for the hassle, it's worth it : )
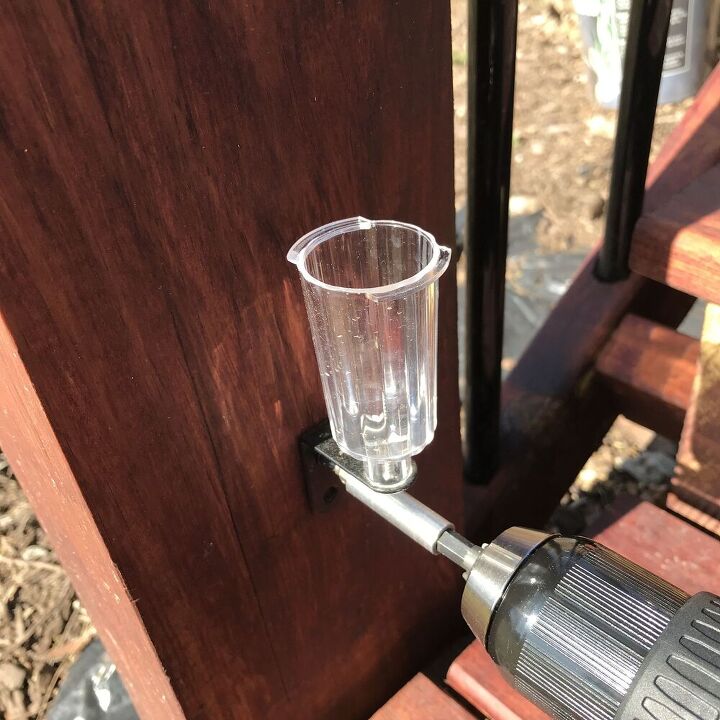
I used one of the screws that came with the L-bracket to attach the assembly to one of my handrail uprights with a power drill.
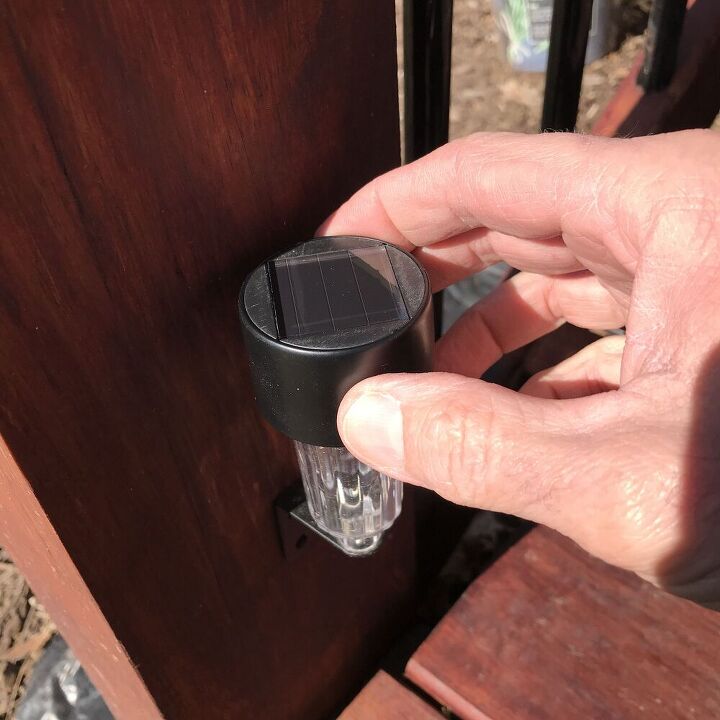
Pull the battery tab from the solar cap and attach. Now we just wait for dark....
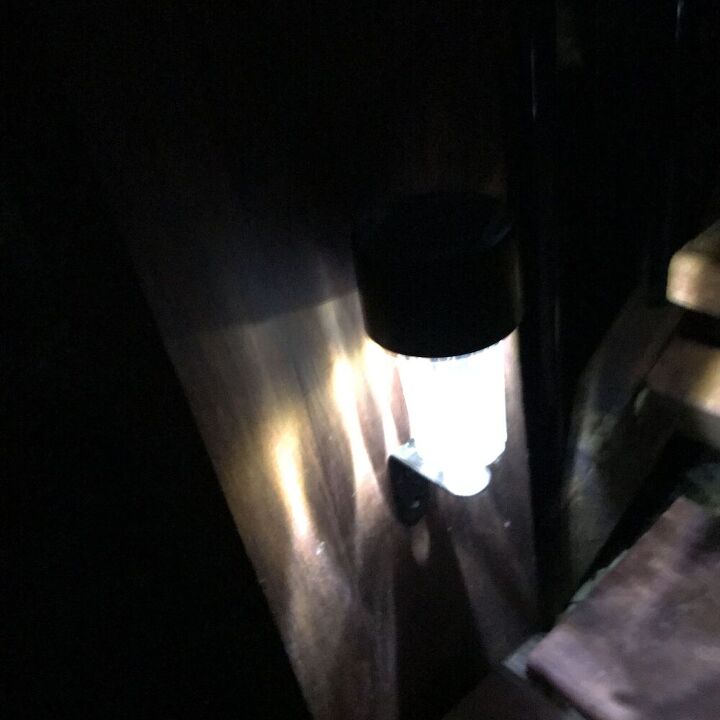
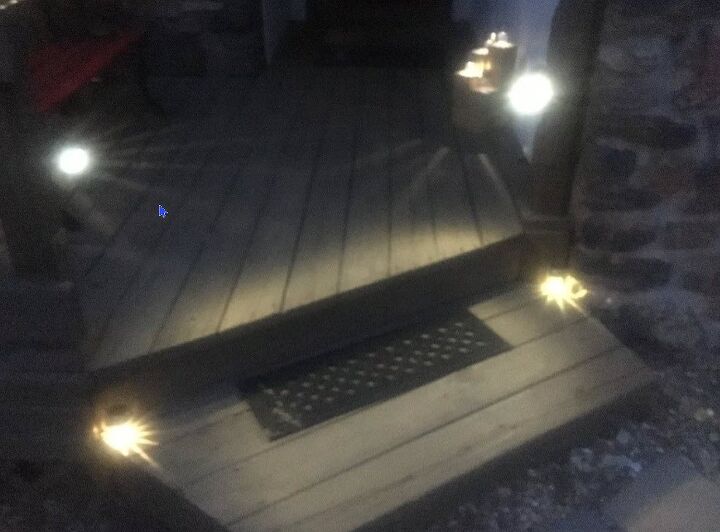
Here it is lit up the first night.
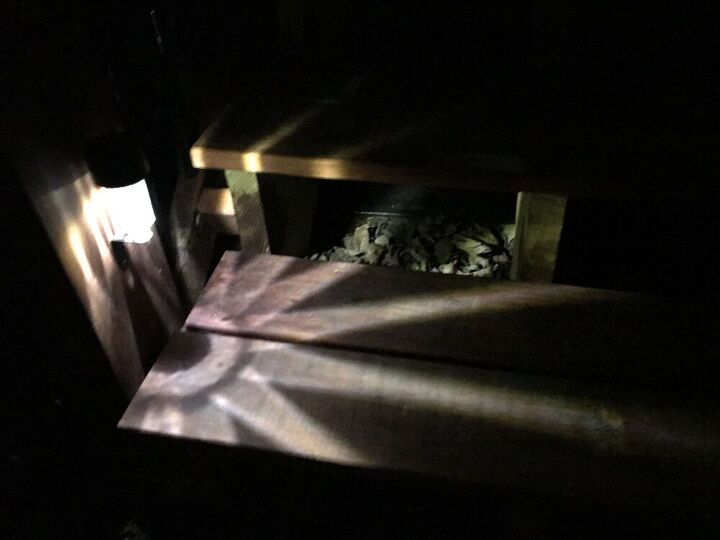
And even better, it spreads light out about 3 feet along the step. Not the whole 12 feet of step, but enough to get me up and down until we finish the project. This took less than 10 minutes not counting the hardware store run. Easy too. Around $3 each, I'll add a few around the outside of the deck as well where I used to have my solar lanterns. I have a color theme in mind, don't be surprise if you see colored gels in the globes some time in the future 🟨🟨🟨
BTW these lights are quite common. When the lights fail, I just replace the tops, no tools necessary.
Holler if you have any questions, and Happy Hometalking!
Resources for this project:
See all materials


Comments
Join the conversation
-
I like this idea. Thanks
-
Just get motion lights less hassle better lighting and they last forever.


Frequently asked questions
Have a question about this project?
Won’t the shovel destroy them in the winter?
Wher would you purchase " the tops"?
When the $3 lights fail, isn't the cost of the tops greater than purchasing the entire solar light again?
But of course that then means you have to find a use for the "bottoms" lol!
I’m not trying to be a sour puss, but do you live in the country? I do and I get so tired of people building large homes out here and the lighting the outside of their houses every night. I live in the county for peace, quiet and dark at night (to see the stars and listen for wildlife, etc.). You can’t see much of anything with all the houses lit like Christmas every darn night. I wish people would figure out the joy of living in the country rather than, a. Showing off their expensive homes, or b. Being afraid of the dark! That being said, I do love your project. That’s it, done gunching.