


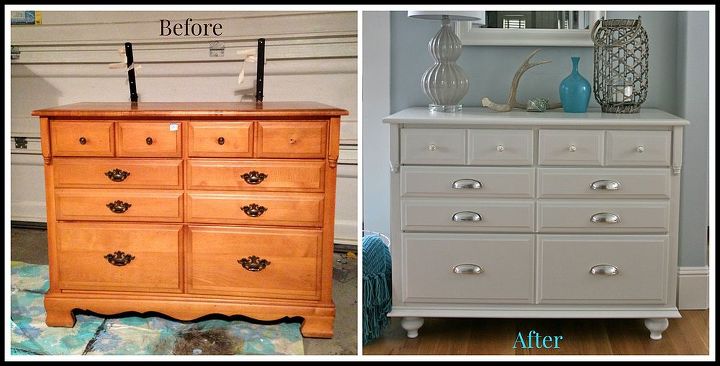
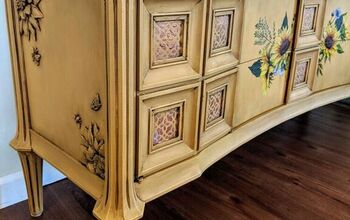
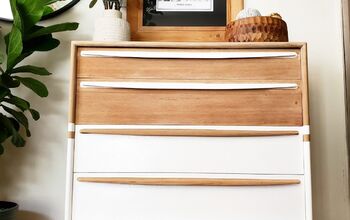
How to Add Feet to a Dresser - Before and After
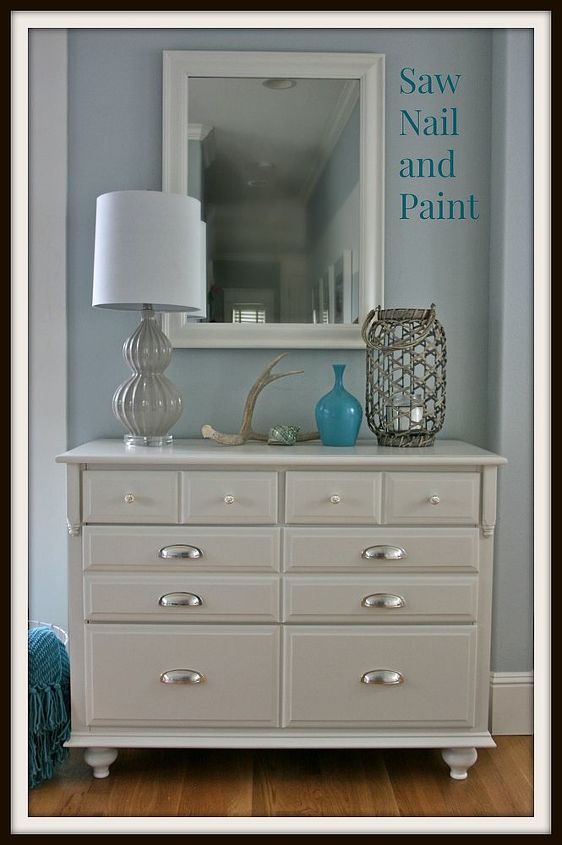
This dresser got a fresh new look with paint, hardware, and the addition of new "feet" and trim.
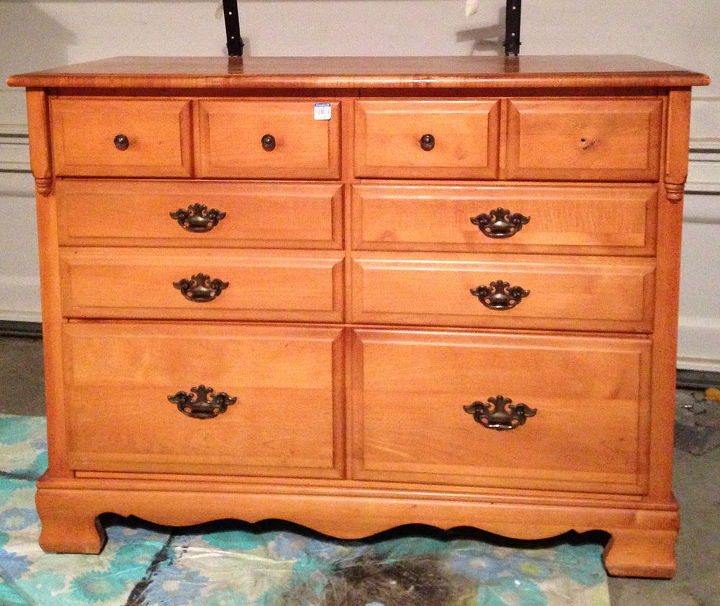
I see honey colored maple dressers just like this one all of the time in thrift shops. You probably do, too. You might even have one in your home. I decided give this one a major update.
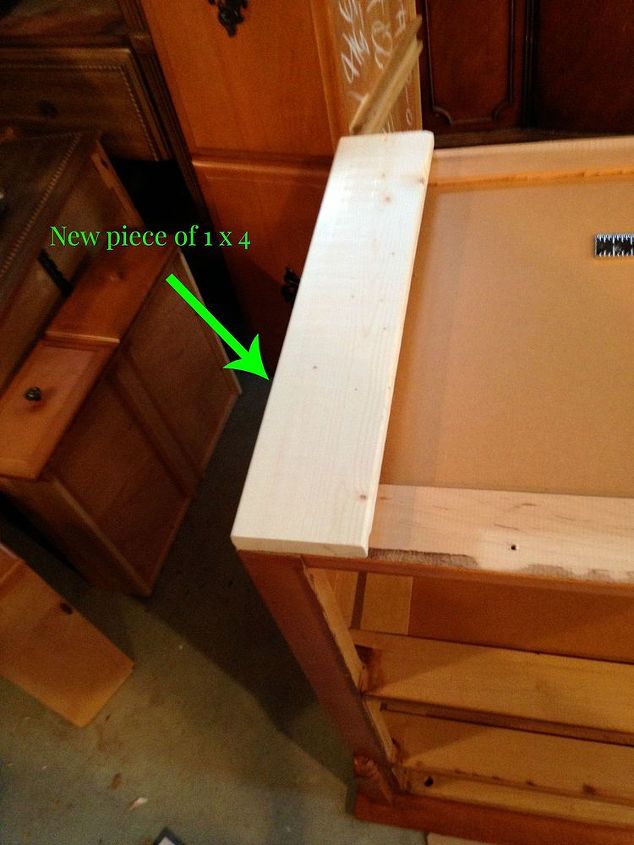
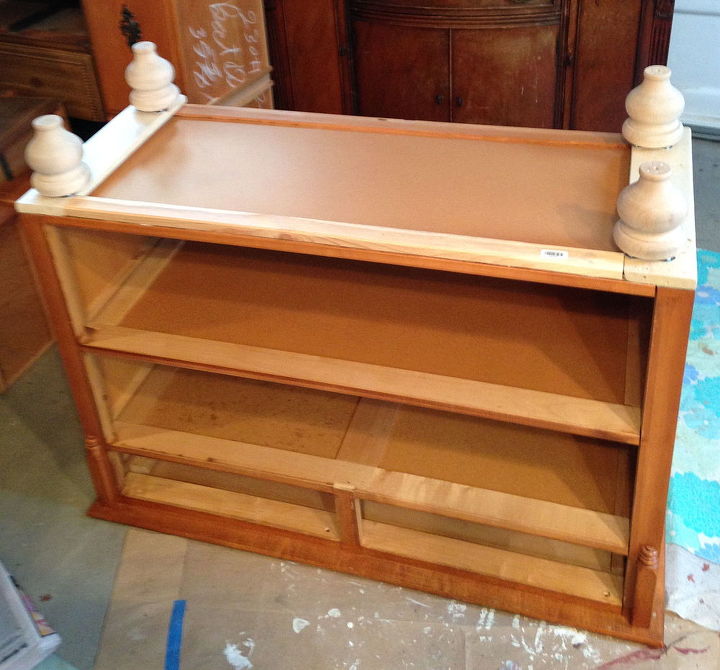
I started by removing the skirt along the bottom. I was able to simply unscrew the skirt and pry off a few nails and the entire bottom came off. I then attached 1 x 4 and 1 x 3 pieces of wood along the bottom edges to create a surface for attaching the brackets.
I then attached brackets to the four corners and screwed in the new feet.
I mitered, glued, and nailed a new piece of trim along the bottom to ease the transition between the dresser and the new feet. Finally, a few coats of a soft white paint and new hardware and the updated look was complete.

Want more details about this and other DIY projects? Check out my blog post!
Comments
Join the conversation
2 of 142 comments
-
Sweet!
-
I am turning my childhood dresser into a kitchen hutch, but it is too low. I want to add new, taller feet, and you showed me how! Thank you!


Frequently asked questions
Have a question about this project?
What kind of pain , should I us???
Where do you get the feet.?
I have a dresser that is made of press board and that thin "papery stuff" that's made to look like wood. Can I paint that as well and add feet? Is there any kind of prep first? What kind of paint do I need to use? Thank you! I love this idea!