


DIY Nightstand Makeover – Anthropologie Dupe Using Resin
23 Materials
$150
10 Hours
Medium
My DIY Nightstand Makeover has been a long time coming.Tired…..Dated…..Lost a few pieces of hardware along the way…..Way back in the day, I bought a bedroom set from Thomasville. You know the kind – the one with all the matching pieces.Anyhoo……the nightstand with the marble top was part of the package.I love the lines of this piece of furniture.So much potential.The piece needed to be stripped down completely, but I did not know where I wanted to go from there…….Until I saw the most magnificent piece of furniture on Anthropologie’s website.My brain started working overtime……Now I had inspiration galore.And, a great starting point for my one of a kind nightstand makeover!Tips and Tricks For Using the ResinIt took about 10 minutes, and they turned white as they formed.Remove the pieces from the mold. The resin pieces get hard fast. It is easier to work with one piece at a time when it is still warm – especially when you are trying to gently bend it around the hardware or sides of the nightstand.For the flat areas that don’t need to be bent, try the pieces out by laying them out around the dresser.Next, I liberally applied the Titebond glue and pressed the resin piece onto the furniture. I then placed some type of weight onto the piece of resin to keep it from sliding around while the glue was still wet.Repeat this process over the entire dresser.For pieces that lay over where the dresser drawers open, you can cut them with scissors while they are still warm.

Tired, Dated, and Missing Hardware.

The Inspiration……
I allowed the piece to dry out for the afternoon before moving forward.Then I applied 2 coats of Minwax white wash over the entire nightstand by brushing it on with a foam brush. I wiped off the excess with a lint free cloth.

I removed the hardware before I sanded the nightstand down and then cleaned it well with a mix of denatured alcohol and water. I also used wood filler to fill in the extra holes that i did not need since I chose new knobs and not handles.

Paint the color wash on using a foam brush.

Wipe the color wash back using a lint free cloth.

Here is the dresser after two coats of color wash.

I wanted the hardware to have an aged gold finish so while the nightstand was drying, I painted some rub and buff, using color European gold, onto the new hardware pieces I had selected. I applied the Rub N Buff with a small paint brush, and then set the pieces aside to dry.I put the hardware back on the dresser so that i could form the resin pieces around the hardware. The knob on the left is without the rub n buff. The knob on the right is after I applied the rub n buff.

Following the directions on the resin kit, I poured each liquid into a cup. I made sure that I used 1:1 ratio of each liquid.

Then I combine the two liquids into one cup and stirred quickly to mix.

Pour the contents of the cup into each mold being careful not to overfill. If you do overfill them, you can trim the exess with regular scissors.

Allow the molds to sit approximately 10 minutes to set. They will turn white.

Position the molds around the nightstand as you like.

Glue each resin piece down onto the nightstand using Tite Bond Glue. Once I had the resin pieces attached to the entire dresser as I liked, I removed the hardware again so I could whitewash the entire piece again.

After the resin pieces have dried, apply another coat of Minwax Color Wash over the entire piece of furniture. I used a foam brush. I also ran a sanding block over the edges of the nightstand to remove some of the white wash and distress it.

And, then I used a paint brush to get in the crevices of the resin pieces.

Once the color wash has dried completely, apply clear wax to the entire piece of furniture to seal it. Once the wax is dry, buff it in with a lint free cloth.

Once the clear wax has dried, apply dark wax sparingly to age the resin pieces.
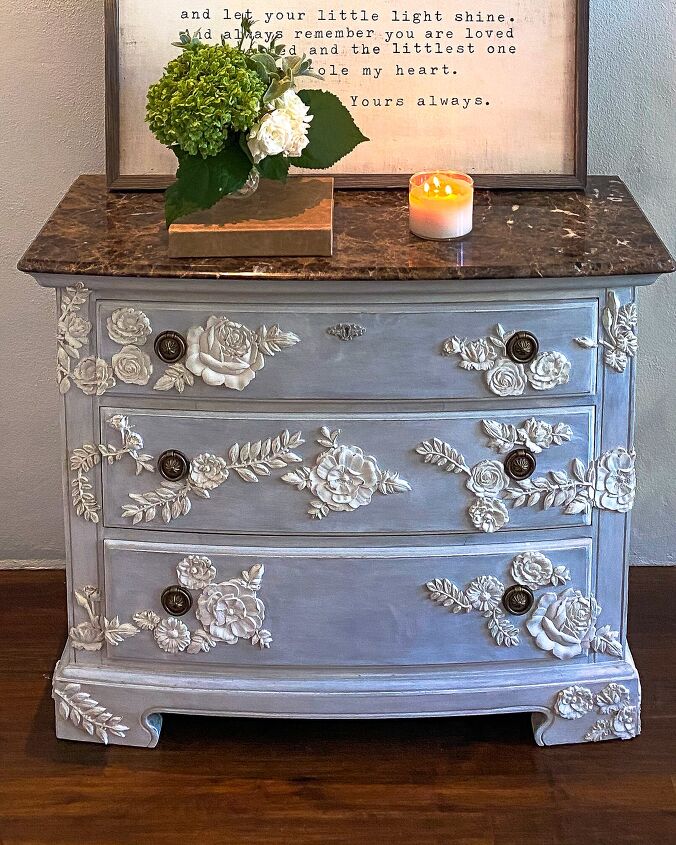
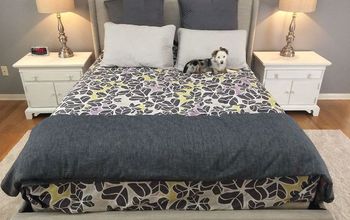
This finished and styled nightstand........

Want more details about this and other DIY projects? Check out my blog post!


Frequently asked questions
Have a question about this project?