


Thrift Shop Nightstand Renewed With Scrapbook Paper

8 Materials
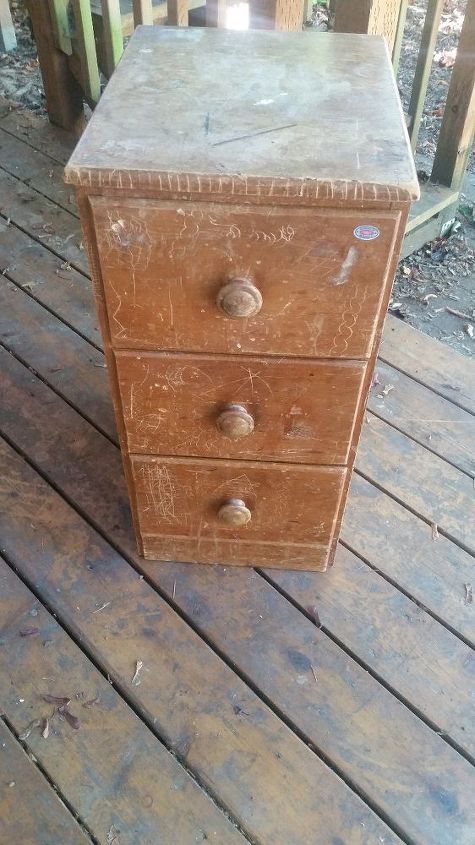
I spotted this poor soul at our local Goodwill Warehouse, which is different from the stores in that this is where the unsold items go for one last chance for sale. Amid the jumble of all of the stuff placed in large blue bins was this poor soul of a night stand, scarred and gouged from years of abuse.
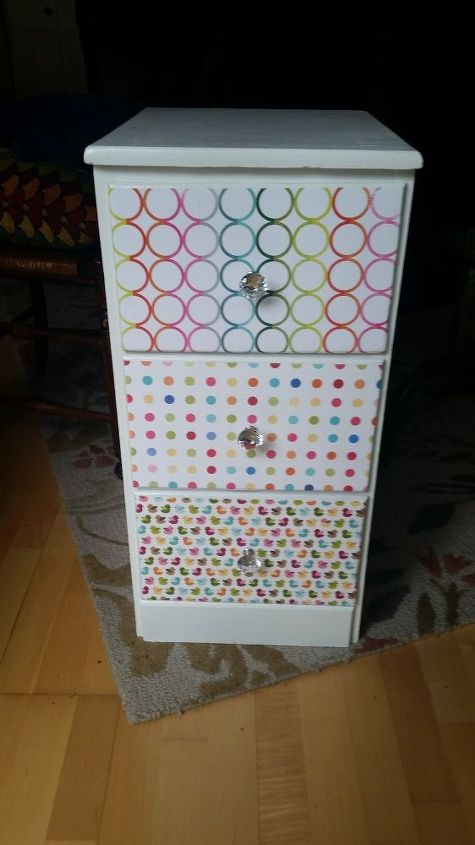
I started by removing the drawers and wooden drawer pulls, as well as gluing the bottom drawer base back into its place as it had come loose. Next, I cleaned it well with warm water and took off years of dirt and stickers. Some candle wax remained, so I took a plastic scraper to remove that. I used a belt sander to even out the worst gouges as well as to prep the surface for painting. After removing the dust, I painted the entire thing with high gloss paint, which hides lots of bumps. In the next step, I carefully measured scrapbook paper sheets to fit the front of the drawer. I then applied decoupage glue to the painted front and applied each sheet, being careful to press out the inevitable bubbles. The next step requires patience, but it's very important: waiting for the covered drawer to dry! If done correctly, no bubbles should remain after drying. Once that was dry, then an overcoat of decoupage glue was applied over the top of each sheet, sealing it in for good. Finally, I added some crystal knobs for a cute look ( I had some leftover from another project, though I could have just repainted the original knobs). The final result was an ugly duckling come back to life!
Comments
Join the conversation
3 of 12 comments
-
I forgot to mention.........I'm IN TO the crystal knobs.......they sure add to anything and especially antiques......great standout for your project!!
-
Love, Love, Love!!


Frequently asked questions
Have a question about this project?