


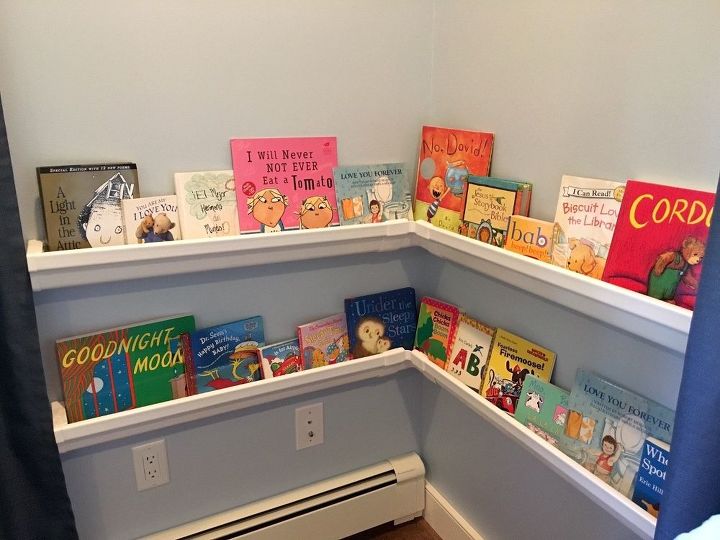
Rain Gutter Bookshelves

9 Materials
$50
1.5 Hours
Medium
For those of you who tuned in to the Hometalk Facebook Live Segment on mine and Rob's house a few weeks ago, you may remember someone tuning in and suggesting I do a rain gutter bookshelf project. You may also remember Miriam relaying a shout out from an audience member named Alex, telling me that, "Bo says, 'hi mommy!'" I knew that one of my best friends here on Long Island, Alex, was tuning in for the segment at her house while she babysat my son (Bo), but I had no clue until after the segment that she was the one who suggested rain gutter bookshelves. I wanted to do this project in Bo's room but I'm literally all out of space in there so I decided to put them together for Alex's son's nursery instead. She was super pumped when I asked her if I could do them at her house and I'm so excited to introduce this project to y'all! It took a little while for me to figure out what in the world I was doing but overall, it ended up being fairly easy and I'm so happy with the finished product.
SUPPLIES:
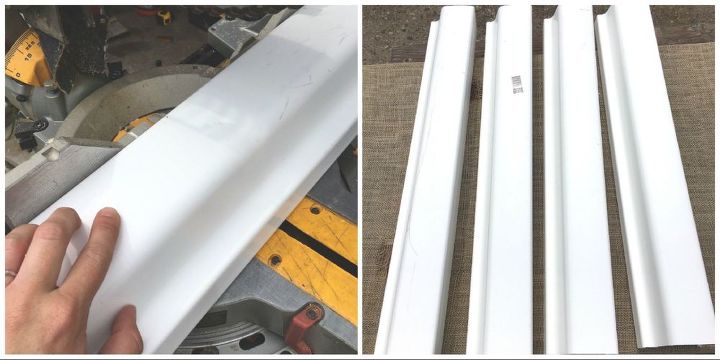
STEP 1: Cut gutter
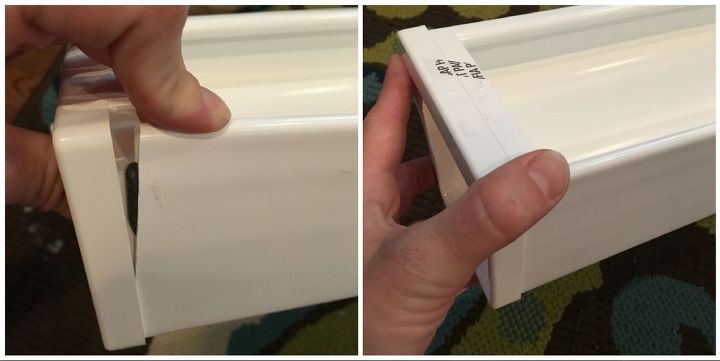
STEP 2: Attach end caps

STEP 3: Join gutters
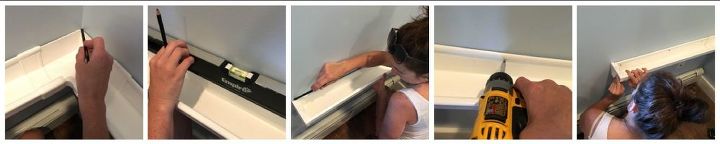
STEP 3: Mount shelves to wall
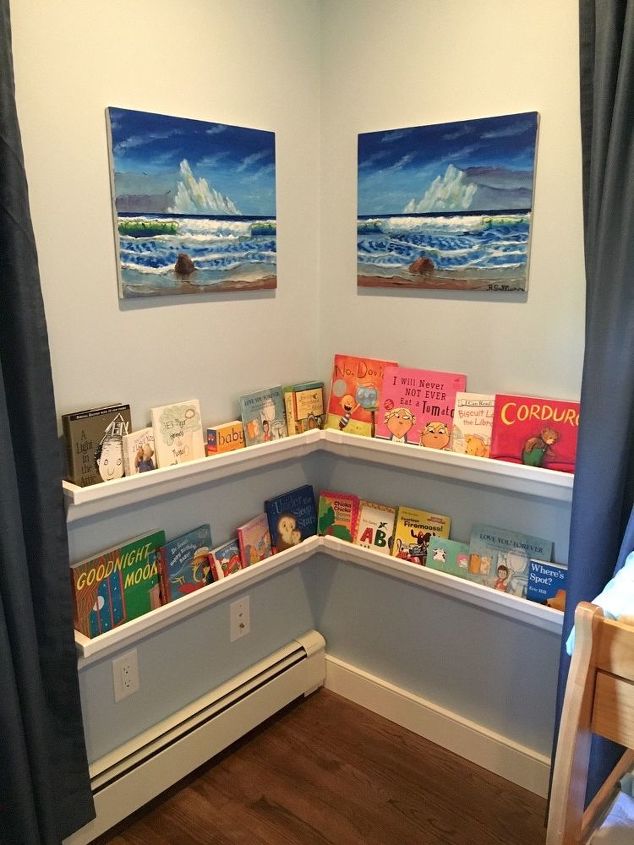
I'm so in love with this little reading nook for Ray J to hang out in when he gets old enough! Once Rob, Bo (our son) and I move, I plan to put several of these rain gutter bookshelves up in his new room.
Resources for this project:
See all materials


Any price and availability information displayed on [relevant Amazon Site(s), as applicable] at the time of purchase will apply to the purchase of this product.
Hometalk may collect a small share of sales from the links on this page.More info
Comments
Join the conversation
2 of 185 comments
-
Wow! I love the idea and concept! My mind got thinking of all the different places I stack books!!!! My first thought was my cookbooks! I collect church cookbooks and each one is from a church I have visited in the past. I thought, what a great way to store and display these cookbooks about my kitchen! Then, the bathroom where floor space is limited... it is limitless! I love this and will put this into practice right away! Painting with that chalk paint... sponge painting in multiple layers of colors!
-
It occurs to me that this project would also work as a picture rail, provided the frames weren't too heavy, and with the amount of light-weight, pretty frames available, that isn't really an issue!


Frequently asked questions
Have a question about this project?
where does one buy fancy plastic guttering?
Could you add gutter top that keeps out leaves to what’s shown here
to make shelf space for miniature cars, etc?
How wide can you get gutters? Or are they standard?