


DIY Dockside Corner Bench
Do you want to renovate or create a dock bench but don't know where to start? Then check out our step-by-step dock bench tutorial that we created with help from 84 Lumber!
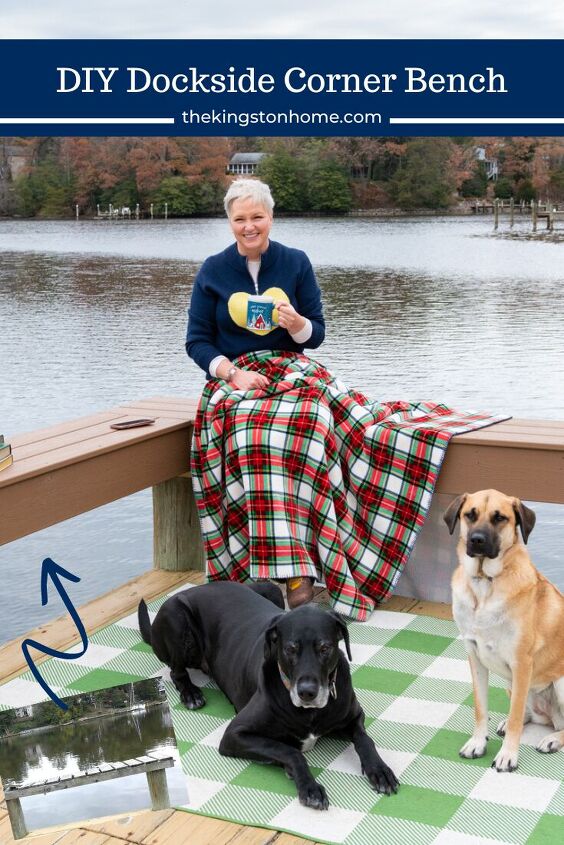
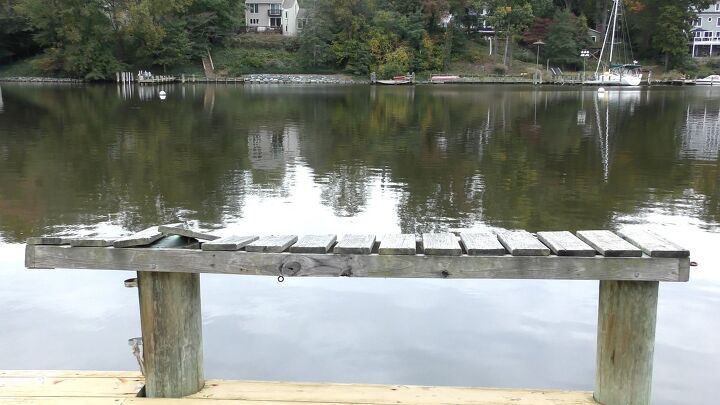
When our dock bench was damaged during a storm we needed something new, but wanted to add more room for seating, a place to put food, and something that was sturdier than the sad wood bench that was here when we bought the house. 84 Lumber to the rescue! They helped us figure out what materials we needed (and how much) to make a corner bench, gave us great suggestions for alternative materials when what we needed wasn’t in stock (thanks global supply chain issues) and delivered everything right to the house. Their customer service was a welcome personal touch backed by expert knowledge and we couldn’t be more thrilled with the results. Who’s ready to come over for a party? {This post is sponsored by 84 Lumber but the project and the content are all mine!}
MATERIALS
- Circular Saw
- Mitre Saw
- 3” Galvanized Screws
- 2 1/2" Galvanized Screws
- TrapEase Screws
- Speed Square
- Hammer
- Power Drill
- Measuring Tape
- Flashing Tape
- 2”x4”x10’ - Pressure Treated
- 2”x6”x8’ - Pressure Treated
- 4”x4”x6’ - Pressure Treated
- 5/8" x 8” Galvanized Lag Bolts and washers
- 1/2" x 5” Galvanized Lag Bolts and washers
- 16’ Trex Deck Boards - we used Beach Dune color
- 12’ Trex Fascia Boards - we used Beach Dune color
Nice to Have: Impact Driver
DIY DOCKSIDE CORNER BENCH VIDEO
Whether you want to watch along or read along, we have you covered!
Check out the video above to see how this project came together or keep reading to see our step-by-step instructions.
DEMO AND BUILDING BENCH SUPPORT STRUCTURE
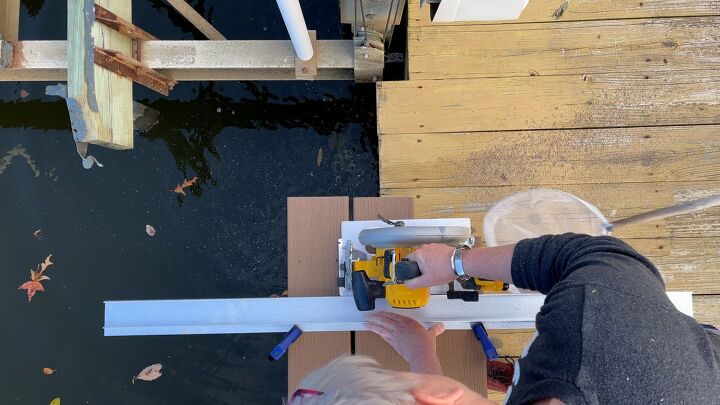
First things first, the demo! We used a reciprocating saw to cut through the old screws and removed all the hardware. Is it wrong that this is my favorite part of any project?
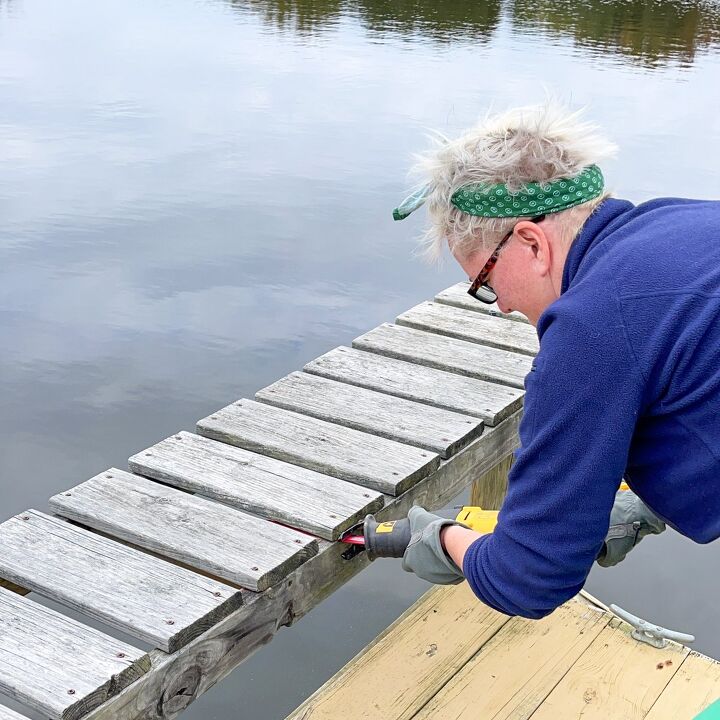
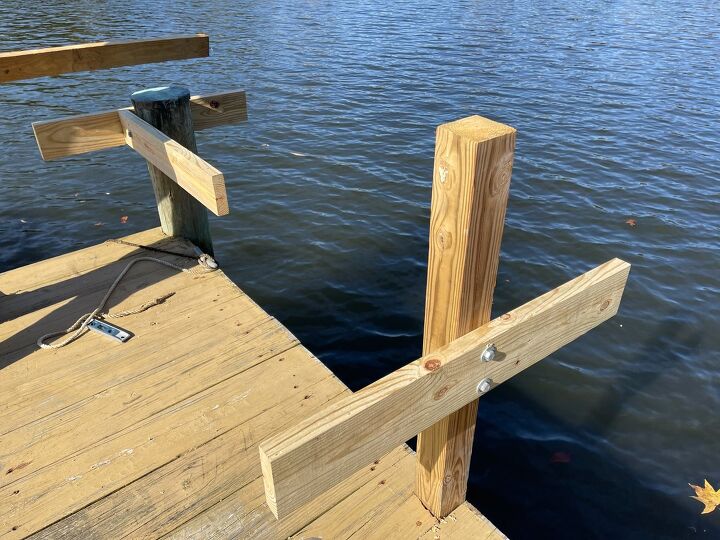
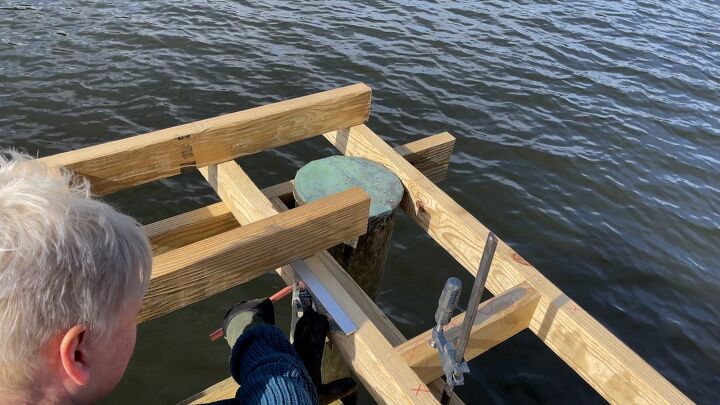
Since we were adding a side to the bench we needed a post to support the other end. We are on a dock so obviously can’t just drive another piling into the ground (or the water for that matter) so we cut a notch in the deck boards to mount the post directly to the dock using bolts.
If you are building on a surface that isn’t totally flat or has odd size materials (like an existing post/piling) create a level line for reference. Then mount your first support and clamp in place. Use the square to mark screw holes.
Use the level to carry your reference line to the other post, then mount your second support.
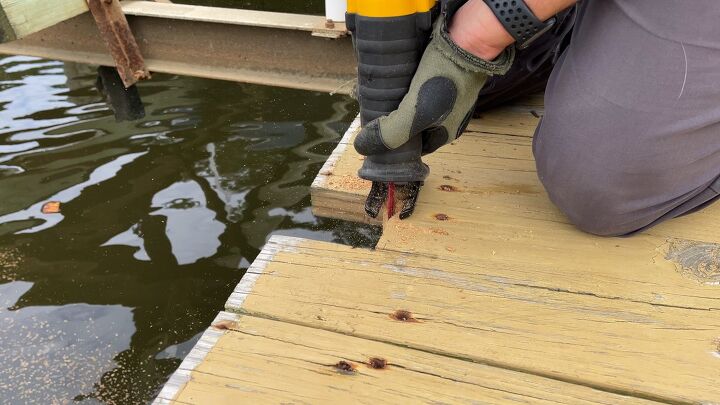
Use a level to double check the support is straight, then use screws to tack in place. Drill your bolt holes then use a ratchet to drive your bolts. Now attach your final support to the other end.
Once all of the support structure is built it’s time to build the bench frame.
BUILDING BENCH FRAME
Plan the width of your bench (we wanted ours three boards wide with ⅜” spacing in between and ½” overhang over the fascia boards).
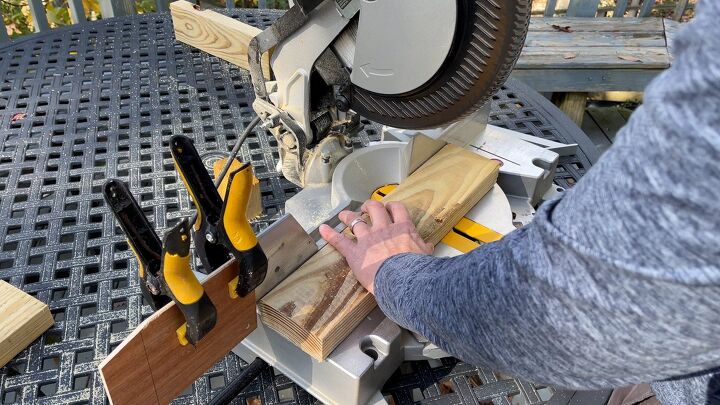
Use a piece of 2x4 to lay out your end piece so you can measure spacing for the internal framing. Make a mark every 12” to set your cross pieces.
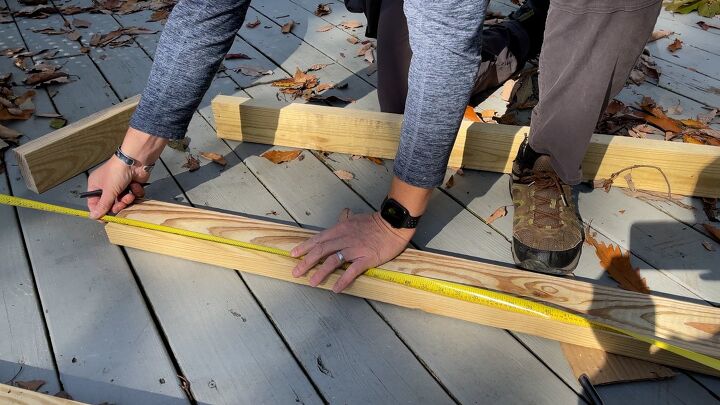
Rather than trying to mark each 2x4 individually, clamp two together and use the square to copy the layout lines across.
Cut your cross piece 2x4s based on the overall width of your bench frame. TIP: our biggest timesaver was attaching a piece of scrap wood to the saw to use as a stop so we could quickly cut our other pieces of wood the same size.
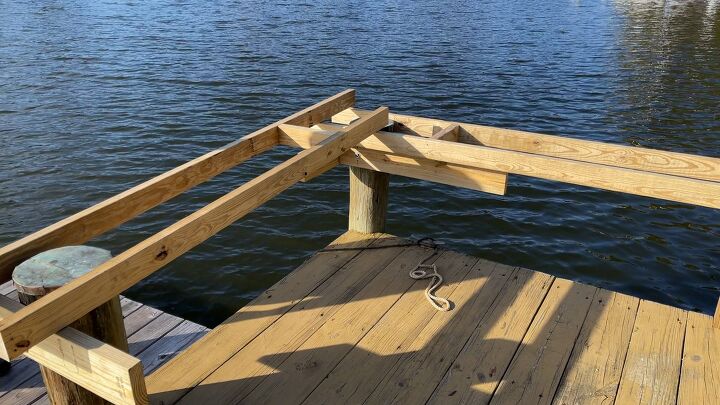
Assemble the beginnings of the bench frame and lay on top of the supports to double check the measurements. Then install the remaining cross members of the framing.
ASSEMBLING THE BENCH FRAME
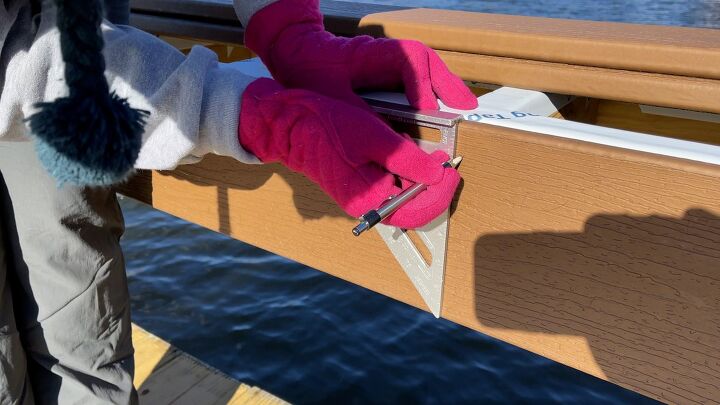
With the framing complete, it is time to assemble the two halves of the bench. Start by clamping the ends, then use a square where they come together. Mark down and up using a square, to guide your final cuts.
Remove the bench halves from the supports, cut them to finished length and then replace them on the supports. Using screws attach the two halves together. Add any remaining cross members of the framing, making sure you have a support where the deck boards will end.
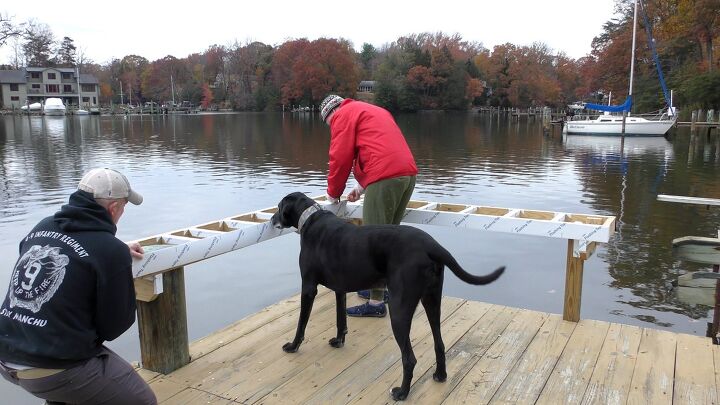
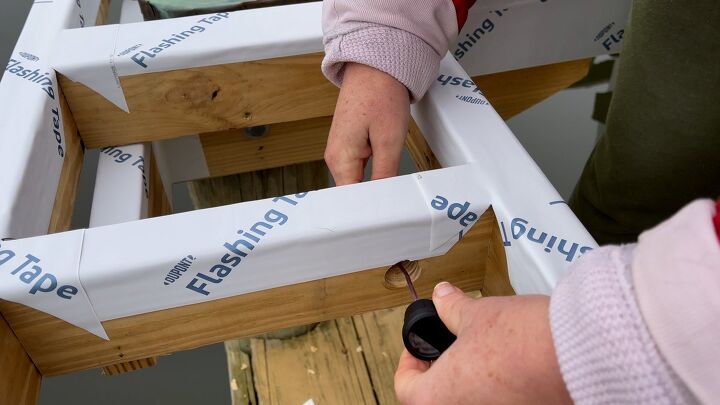
With all the work you put into building the bench frame you want to make sure it lasts for a long time so we strongly recommend using flashing tape. The flashing tape helps shed water - thereby reducing the chance of rot.
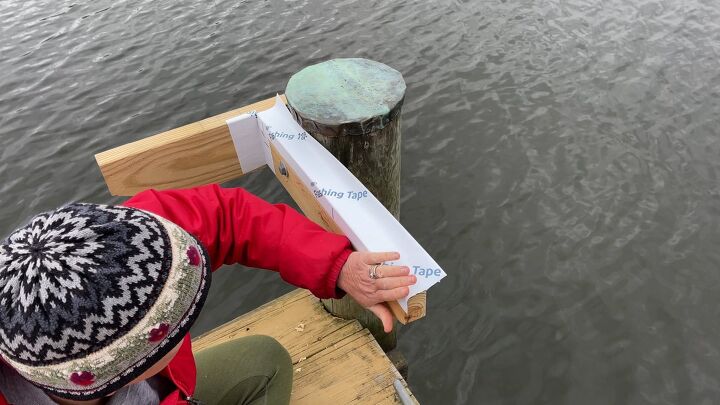
Put the bench back on to the supports. Measure then cut the flashing tape to go along the top and ends of the support - with about a ½” overlap. Do this anywhere materials will touch each other. Two of the most important places are where the 2x4 framing and the fascia boards meet and the tops of the cross members where the deck boards rest. Always work from the bottom to the top - this ensures the seams overlap in the correct direction and the water runs off.
INSTALLING LIGHTING
We used Trex LED riser lights and they were so easy to install! Use a 1” drill bit to drill a pocket for the light - make sure it doesn’t go all the way through the wood. Then switch to a smaller drill bit to create a hole for the wire to pass through. Mount the light and connect the wiring.
INSTALLING FASCIA BOARDS
We used Trex Enhance fascia and deck boards because Trex decking more durable than wood (they have a 25 year warranty!) and they are made with 95% recycled materials. Everyone should get in on this action!
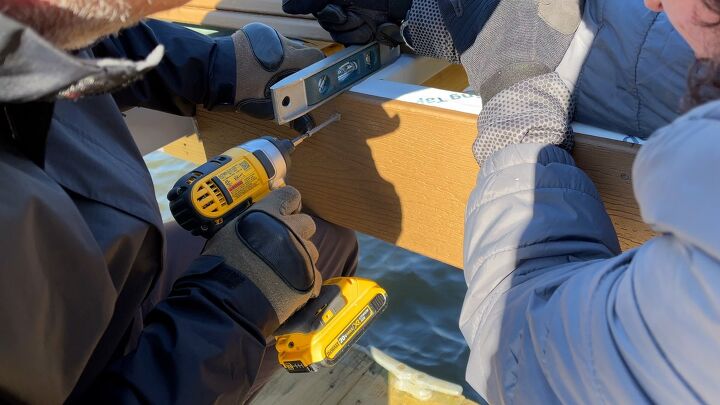
Measure your first fascia board to fit the length of the bench, ensuring you leave room for the 45 degree mitre. Clamp the board in place, then use the square to mark screw holes.
Use the level to make sure the board is flush with the top of the framing as you drive your screws. Repeat for the entire bench. TIP: to ensure a good fit on your mitred corners only go in one direction. In our case we went counter clockwise.
INSTALLING DECK BOARDS
Line up the first board where you want it to be (we laid ours out by eye rather than measuring), clamp it down then drive the screws. TIP:Wait to cut down the boards to their finished length until the very end so you can get a nice straight edge (see below).
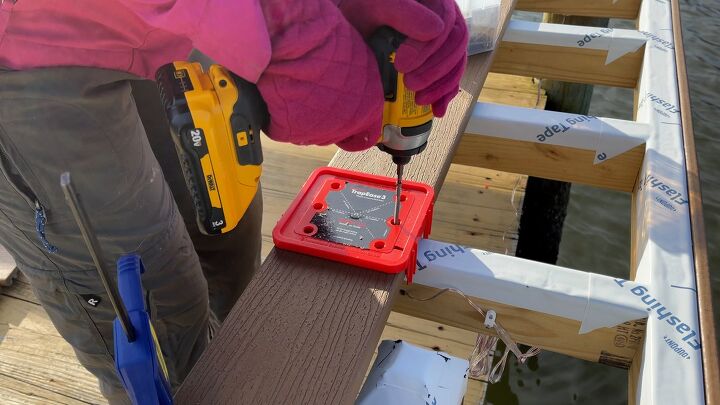
The TrapEase screws come with a guide on the lid of the box to give you consistent spacing on screws. It made installing the deck boards so much easier! When you are close to the ends of the boards, pre-drill to prevent splitting.
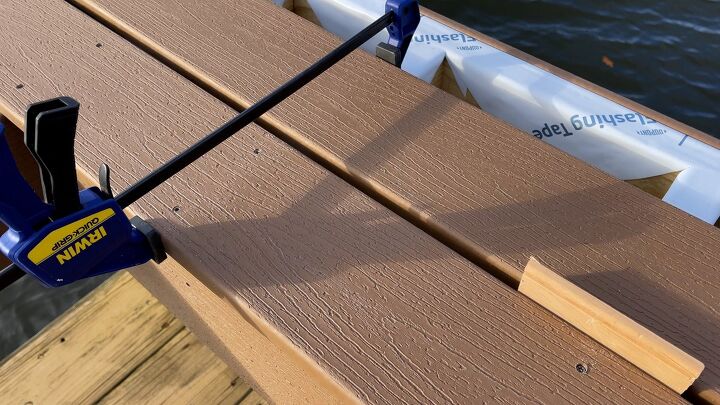
To get consistent space between the boards use pieces of scrap wood. You may need to use a clamp to pull it tight as boards can warp a little bit during storage.
When you are ready to cut your edge decide how much overhang you’d like (we chose ½”), mark it then use a ruler to mark your saw’s offset. Clamp a straight edge guide to the boards then cut. This gives you a beautiful clean edge in one cut!
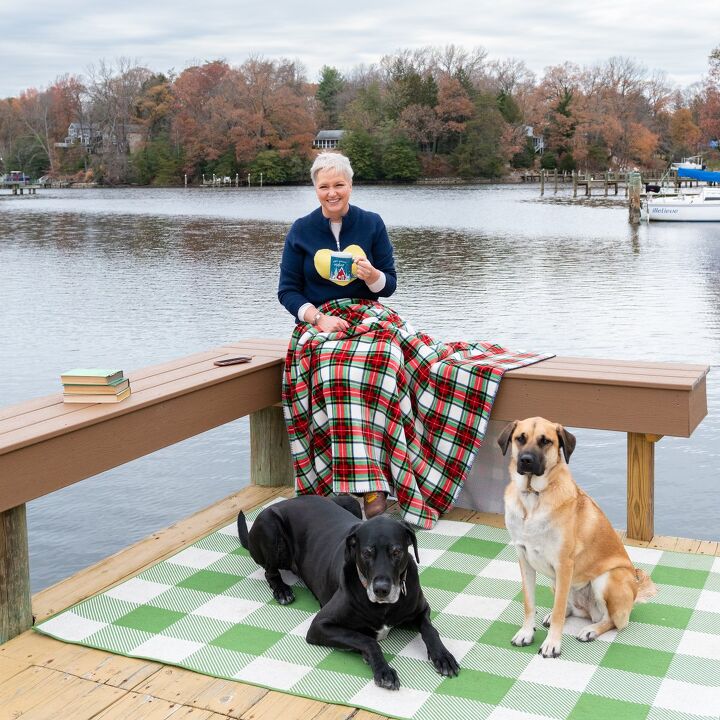
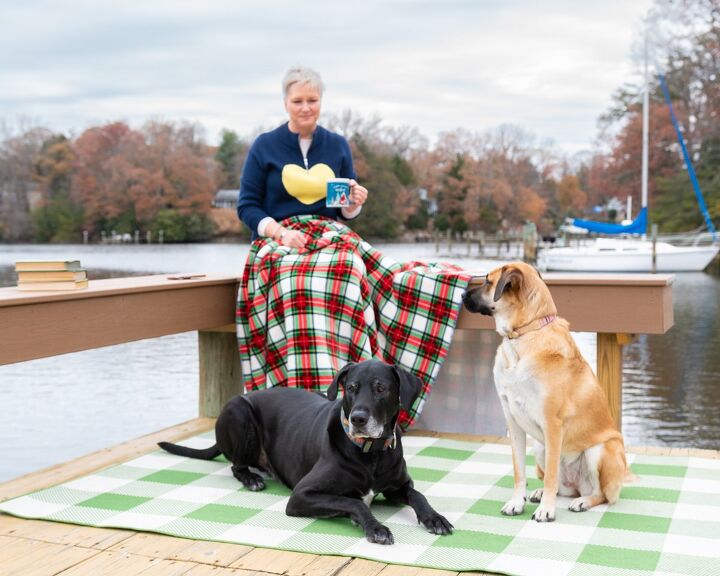
Thanks to 84 Lumber we were able to take a wasted space on our dock and create more seating, room to entertain and most importantly, a place to make more memories.

Resources for this project:
See all materials


Comments
Join the conversation
-
Very cozy and inviting. I have same rug on front porch in black and white (didn’t think to consider green). That alone elevates space to invitation to sir and relax. My front porch is neighborhood gathering spot to watch nature as I’m sure your dock bench is
-
oh that sounds heavenly! what a wonderful spot to relax!


Frequently asked questions
Have a question about this project?
Wonderful place to spend time with your friends, 2 & 4 legged.
Is the fawn one a Chinook?