


DIY Side Table

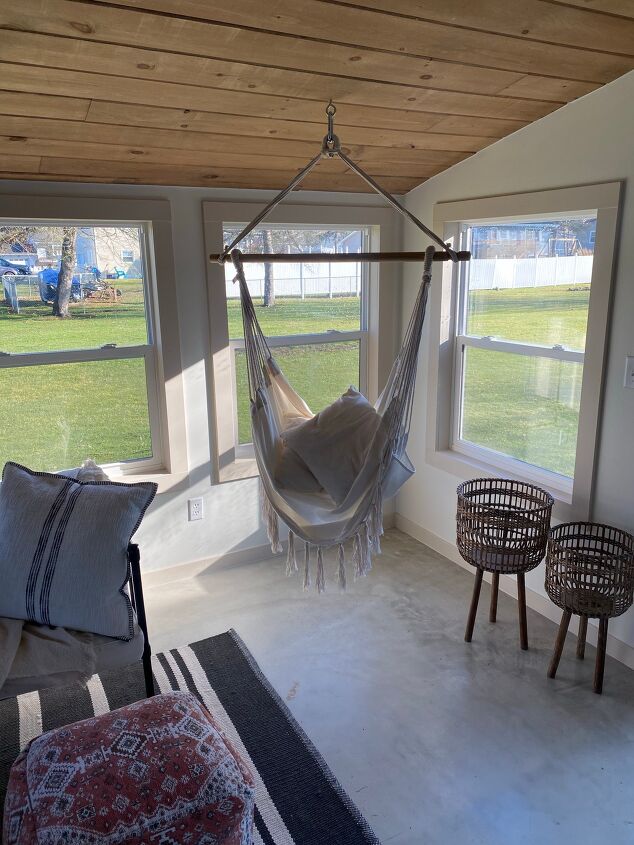
I had been in need of a little side table right next to my couch and hanging chair in my sunroom. A place to set drinks down when sitting out there! I had been looking on FB marketplace for quite some time. I finally had found one I liked, I messaged the seller, but sadly never got a reply! So I started searching Pinterest for some inspiration and decided to DIY one! Here is the space before, without the table!
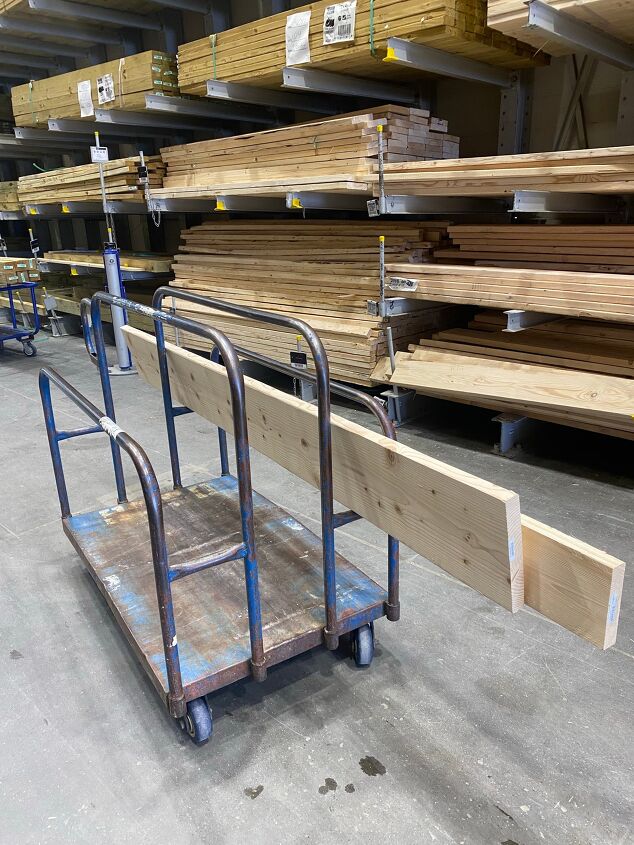
I found a table from @lifeonlittlecreek on Pinterest, and that was just the inspiration I needed. I then headed to Lowes and picked up some wood! I bought a 2x12x8 and a 2x8x8. With these two pieces along with the extra wood scraps I had at home, I had enough to make 2 of these side tables for about $50, really not bad at all! Make sure you aren’t just grabbing the first pieces of wood you find, inspect them thoroughly making sure they are straight and in good condition. This step is very important!
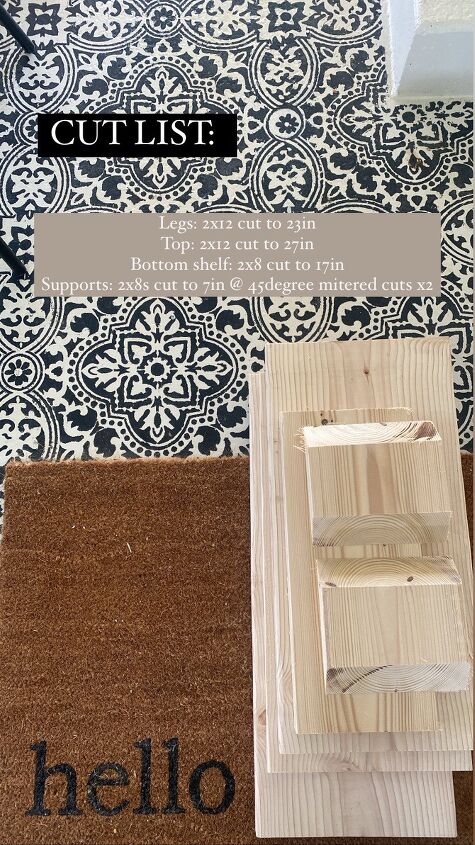
I started by making my cuts. I wanted the table to be 24.5 tall. This is just what looked the best next to my couch. You can always alter these measurements to best fit your space of course. Below, listed in the picture, are the cuts that I made!
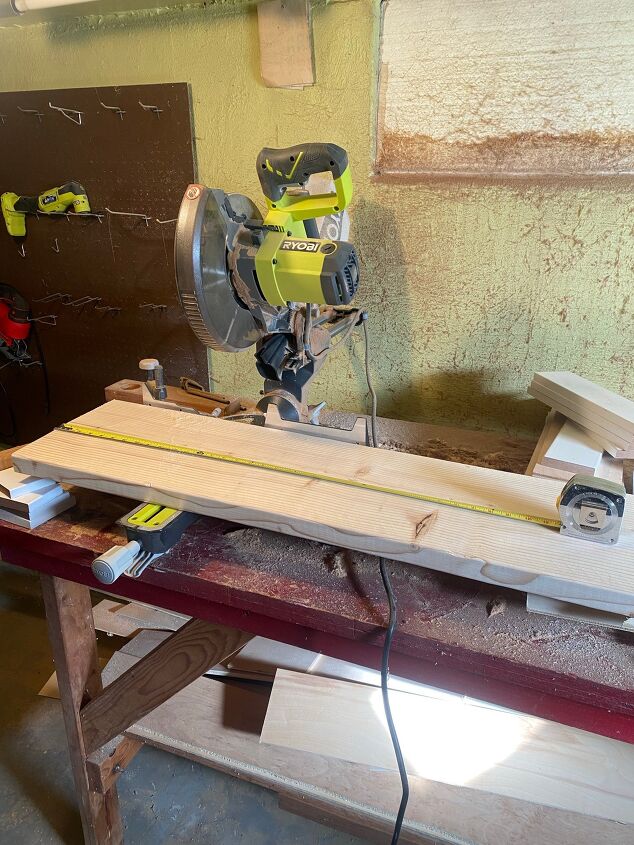
Before you make your cuts, you want to start by trimming off the end of the board with your miter saw. This will allow a nice clean cut for your first piece. Don’t mind my messy basement!!
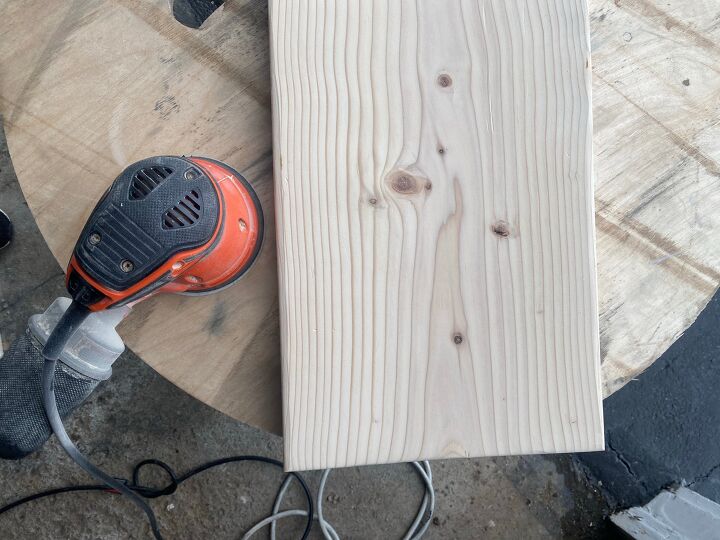
After making your cuts, it’s time to sand. I used my orbital sander and 120 grit sandpaper to smooth down the boards. On my piece of wood that is going to be the table top, the 2×12 cut to 27in, I used my sander to round the edges of the board. If you have a router this would come in handy for this step, I did not. I think it gives the table more of a finished look rather than leaving the straight cut from the miter saw.
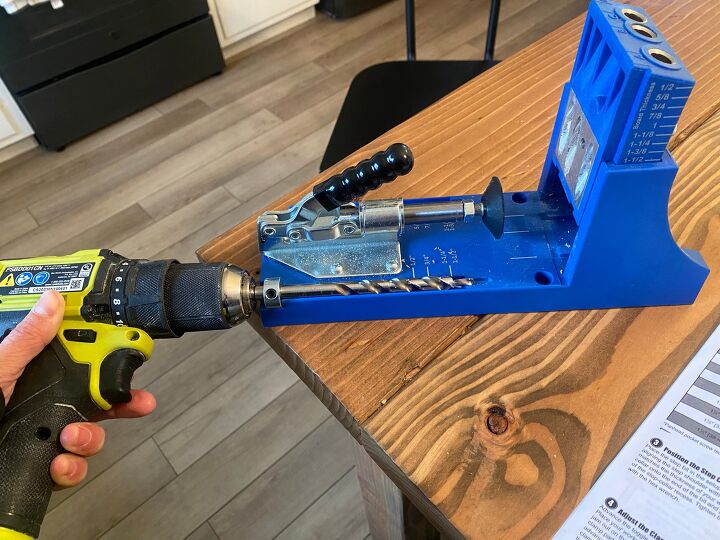
Next it’s time to set your Kreg Jig, because we need to make a few pocket holes! Since the thickness of the wood is all the same, you only need to set the Kreg Jig once which is nice! Our thickness is 1.5in so below is how I set my Kreg Jig!
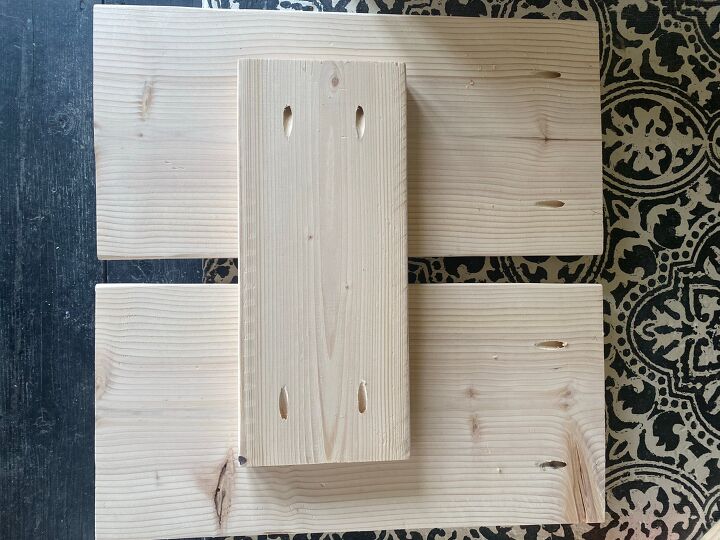
You will need to make a total of 8 pocket holes. 2 pocket holes on the top of your legs to secure to your table top, and 4 pocket holes on the under side of your bottom shelf to secure to your legs of the table. The pocket holes are pictured below in case you are a visual person like me!
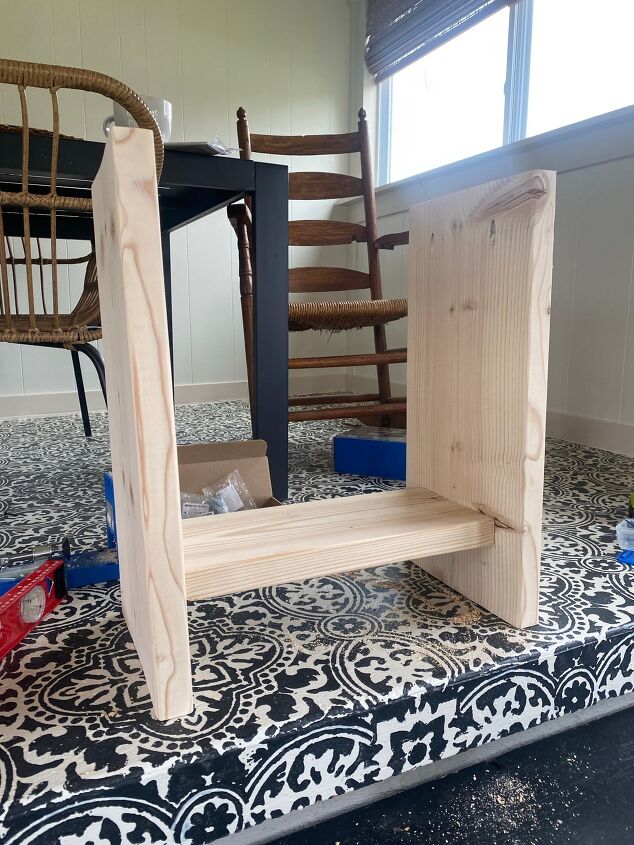
Now you are ready to start putting your side table together! I started by first making the base! I positioned my shelf at a 4in inset from the ground and made sure it was centered. Then I secured the shelf in place with 2.5in screws into the pocket holes. Make sure it’s nice and level!
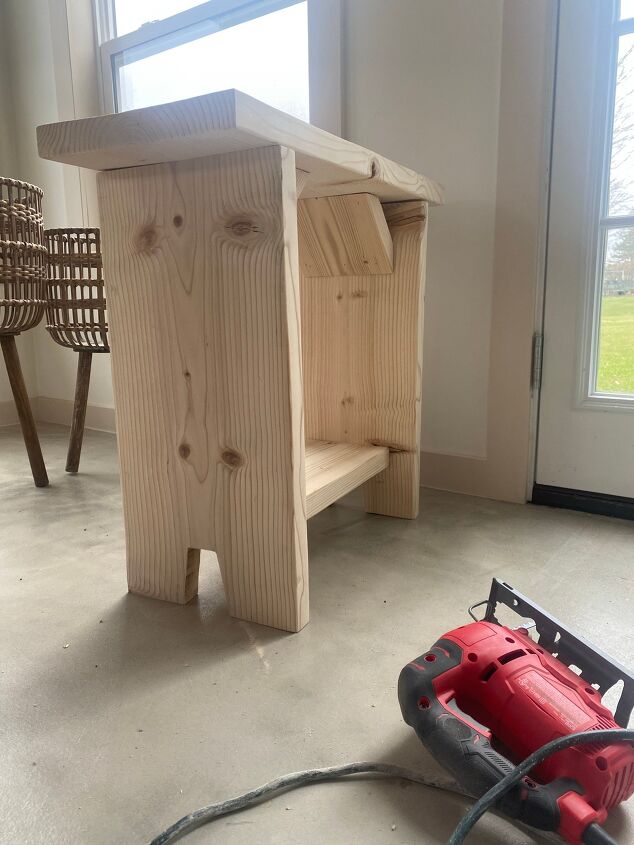
Next I secured the table top. I flipped the table upside down, lined up the top on the base, and made sure the overhang was equal on both sides. Then, again screwed 2.5in screws into the pocket holes to secure the top in place. I then added just decorative supports to the inside of the table. These really aren’t serving any purpose other than to add some character, the table is already sturdy. I used my nail gun and 2in brad nails to secure the decorative angled supports to the inside of the table just like pictured below.
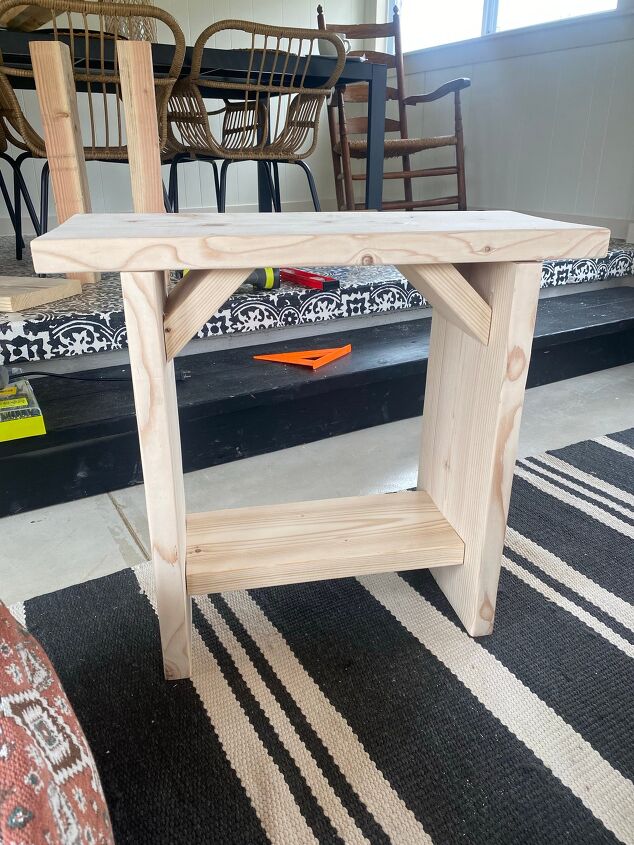
I then added some cut outs to the legs to give the table a little more character. This step would have been easier to do before putting the table together, but I totally forgot to do it. I kind of just wung it on these cut outs. They are 3.5in tall and 1.75in wide and the angle I just estimated! I drilled a large hole in the center and used my jigsaw to cut the shape out!
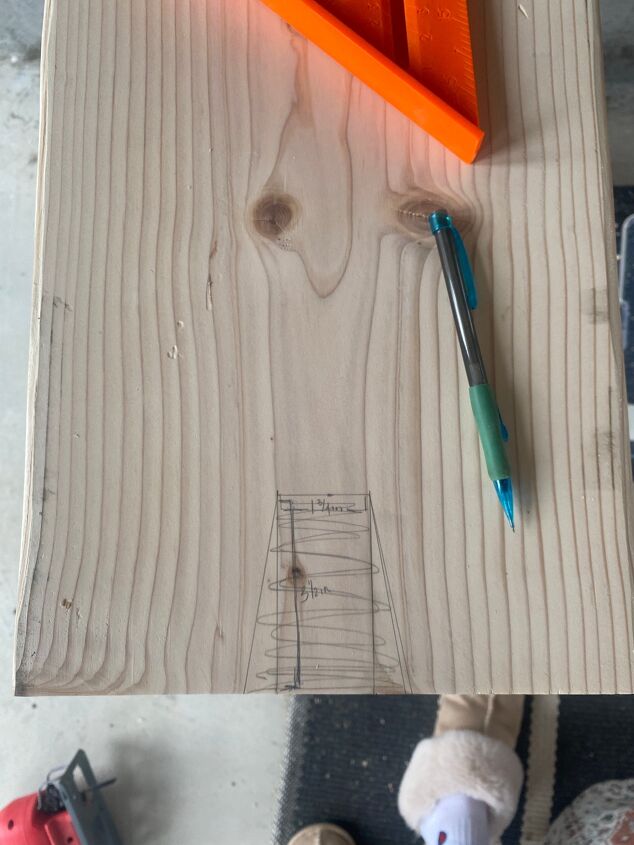
Adds a little character to the table! I then sanded the cut out down so it was nice and smooth!
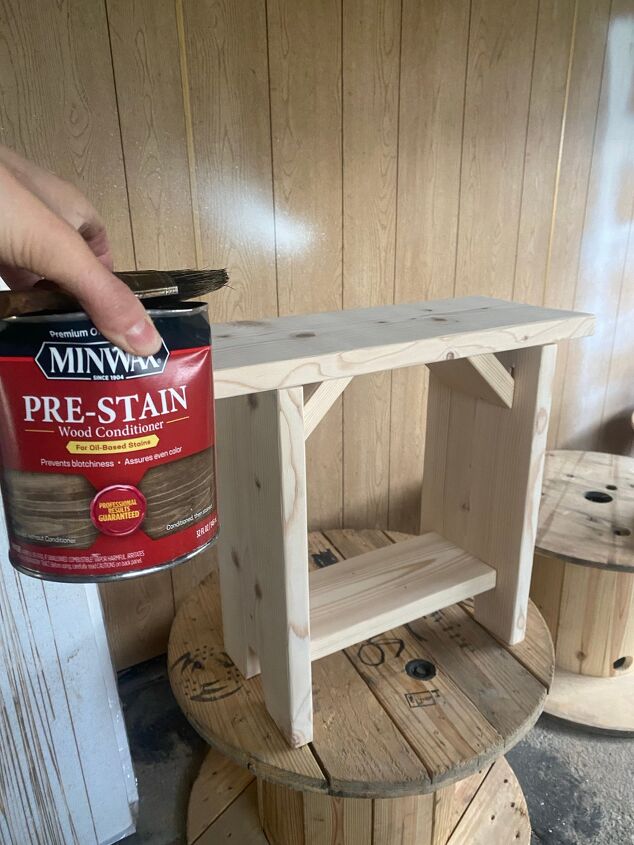
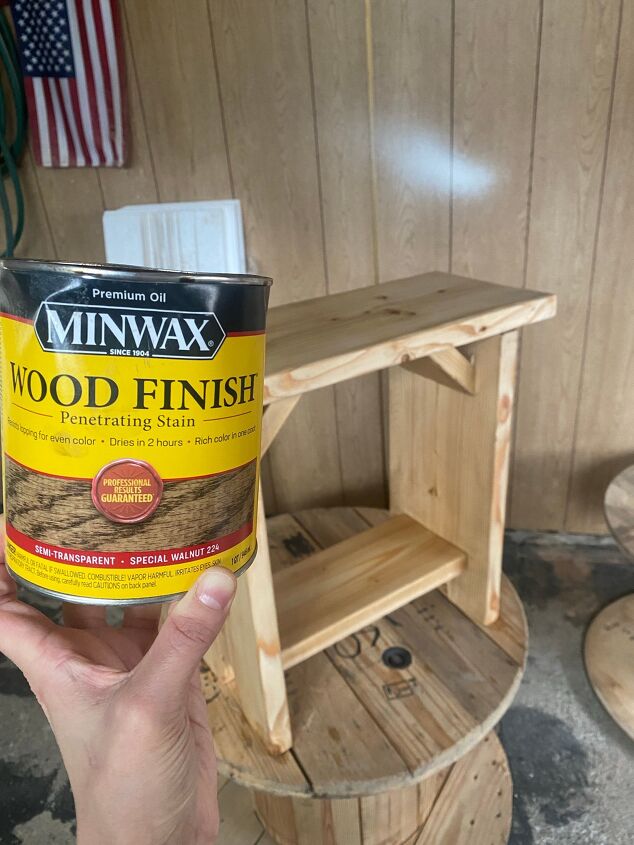
Next I was ready to stain! I first used Miniwax pre stain to condition the wood. Then, I stained it special walnut! I did not want it overly dark so I made sure to immediately wipe of the stain as much as I could while applying it. I only applied a thin layer!
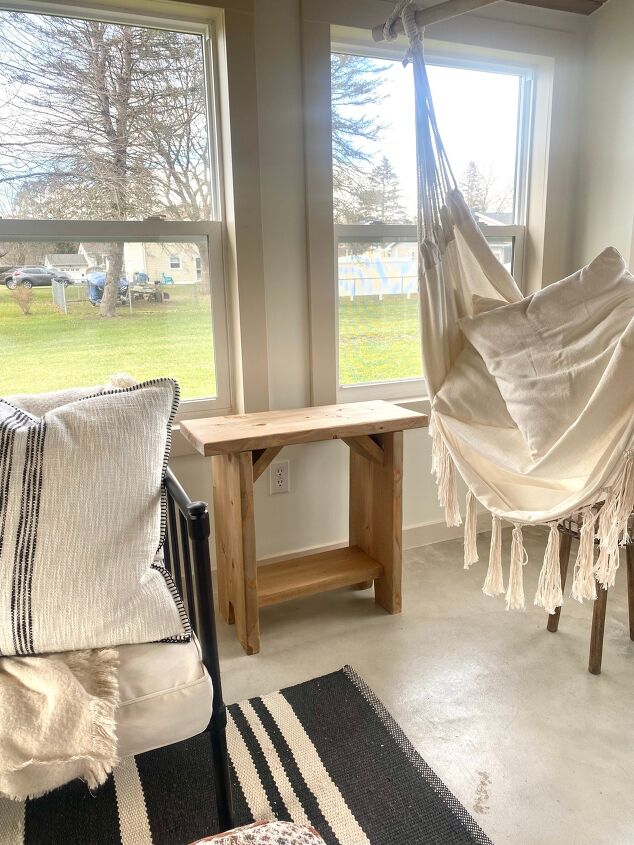
And DONE! I still need to apply a protective top coat, but I am so happy with how this DIY side table turned out! It is so perfect!! I hope this write up was helpful for anyone trying to replicate this or make something similar. It really was an easy build! If I can do it, you can do it!! If you are more of a visual learner like me, I have a highlight saved on my Instagram @abbbclark_homeee with videos saved of how I made this! Thanks so much for reading!


Frequently asked questions
Have a question about this project?