


How to Fill Large Wood Cracks/Knots With Epoxy
In this HomeTalk Tutorial, I show you how to fill large wood cracks with epoxy. Also, I show you tips and techniques to help you repair wood defects or stabilize reclaimed wood or decaying wood. I incorporate unique and reclaimed wood in most of my woodworking projects. Many of the reclaimed wood slabs I procure or salvage have structural issues that need to be addressed before I can use them for furniture. If used correctly, epoxy works great for filling large knots, cracks, voids and other wood defects. Although I used clear epoxy in this project, I often use colored epoxy, glow powder, or turquoise to fill cracks in wood.
Be sure to visit my blog and subscribe to my YouTube channel for more helpful DIY tutorials.
First, I use epoxy to fill wood large cracks, knots, and other wood defects. If the wood defects are small (size of a nail head or smaller), I use a different method which I will cover in my next HT post. Keep in mind, I repaired the wood defects in this wood slab while in the process of building a table. However, this process works for existing tables or other furniture as well.
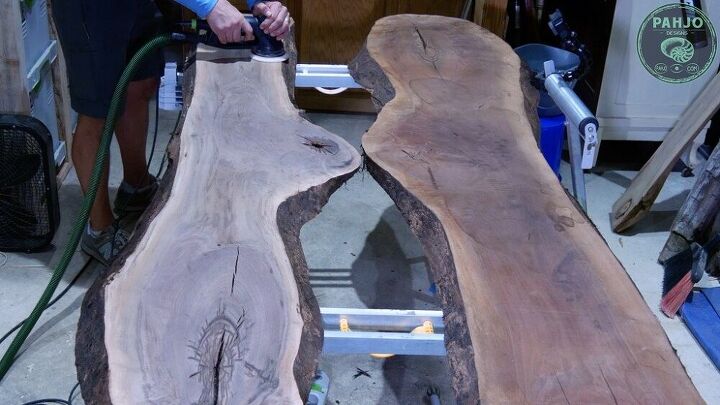
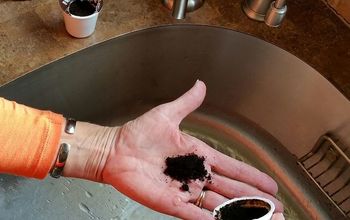
First, I rough sanded the surface with low grit sandpaper to expose small holes, cracks, and other wood defects. Rough sanding removes much of the dirt and debris which hide wood defects. Next, I loosened the debris with various tools and vacuum them up from within the wood voids. Ultimately, proper surface preparation is key for proper adhesion.
Seal Underside of Wood
Quick Tip: If the wood defect is large, it probably extends to the underside of the table. If so, be sure to put a piece of sheathing tape over the area (if visible) to prevent the epoxy from leaking through the bottom.
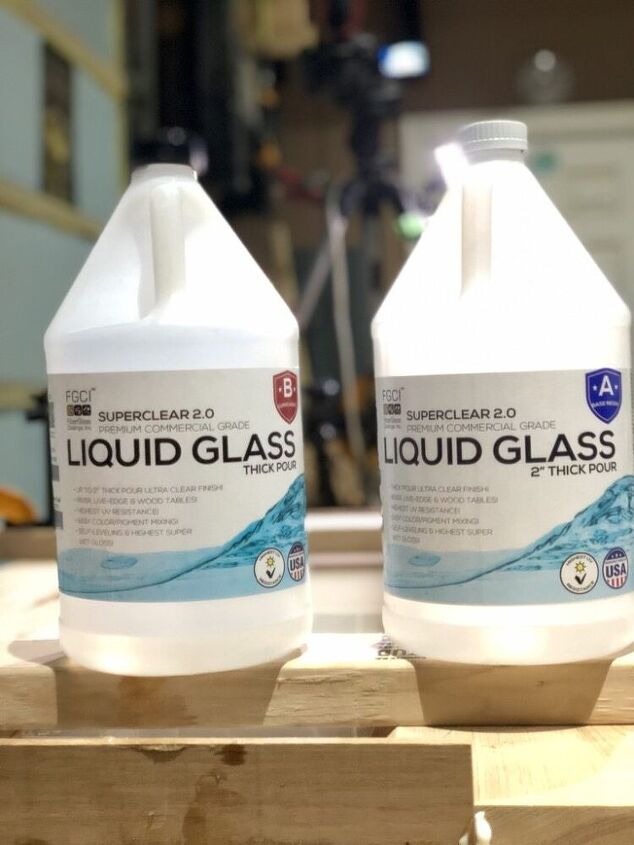
Although not always necessary, I use a 2-step process to properly fill defects in wood with epoxy. My 2 step process consists of using 2 different types of epoxy. First, I use deep pour epoxy to partially fill the wood voids, which is normally mixed at a 2:1 ratio. Deep pour epoxy penetrates and seals very well which allows it to fill all voids and soak into the wood fibers. It cures slower, which forms a stronger bond.
For the second step, I use an epoxy with a 1:1 mixing ratio. This epoxy (normally used for Table Top Coats) cures quickly and thicker than deep pour epoxy.
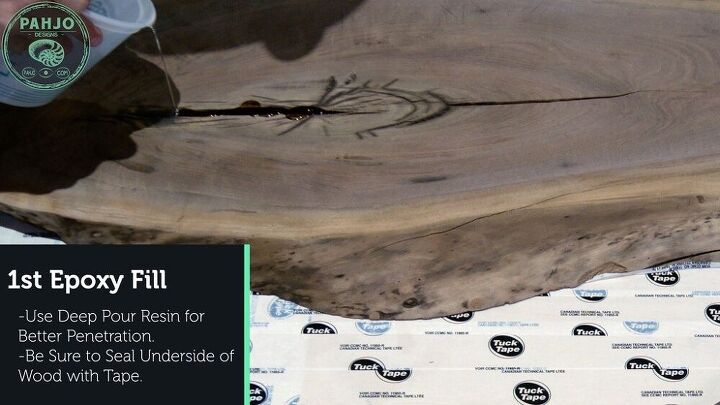
I filled the cracks, knots, and voids with deep pour epoxy.
I allowed the epoxy soak in for a few minutes and added more until the wood void was half full with epoxy. Also, some wood voids require more epoxy than others so be sure to keep an eye on it after you pour. Keep in mind, the purpose of the first epoxy layer is to penetrate and seal the wood. In turn, I pour enough to partially fill the hole.
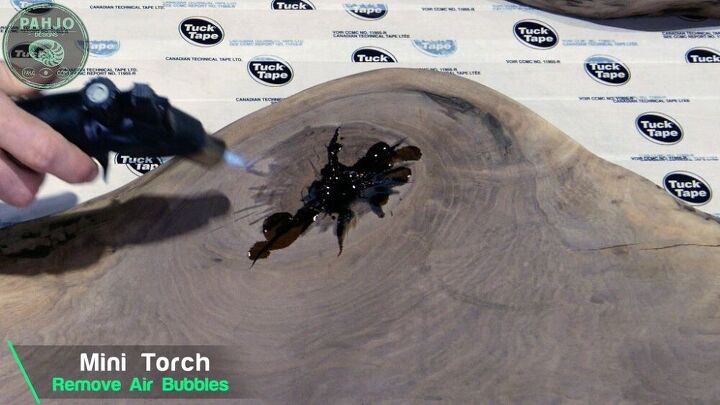
Next, I used a mini torch to heat the resin for even better penetration and to remove air bubbles. Then, I allowed the deep pour epoxy to cure for 24 hours. A 24 hour cure time allows the epoxy to partially cure and adhere to the next epoxy layer..

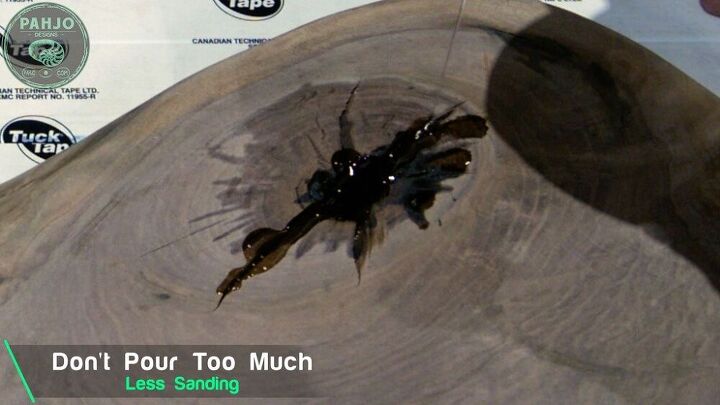
I used total boat table top epoxy to fill the wood voids, cracks, and knots. To avoid unnecessary sanding, I filled the wood void until it reached the wood surface. I allowed it to soak for a few minutes and poured more if needed. Ultimately, I needed to pour an epoxy river and flatten the walnut dining table. So, I wasn’t too concerned with the epoxy overflowing.
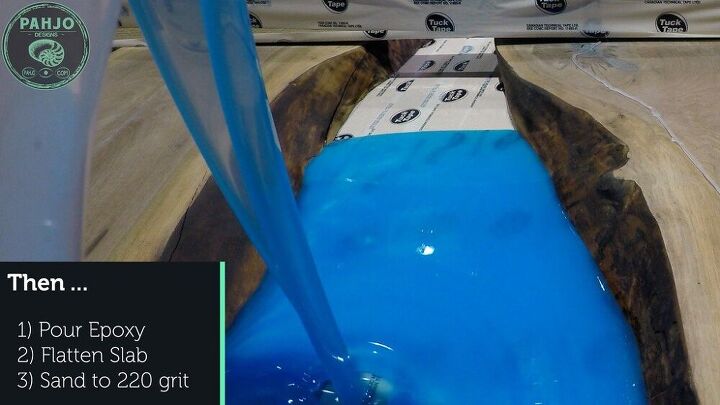
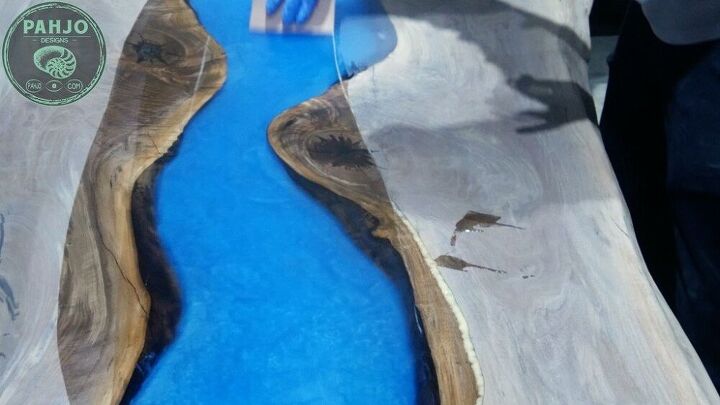
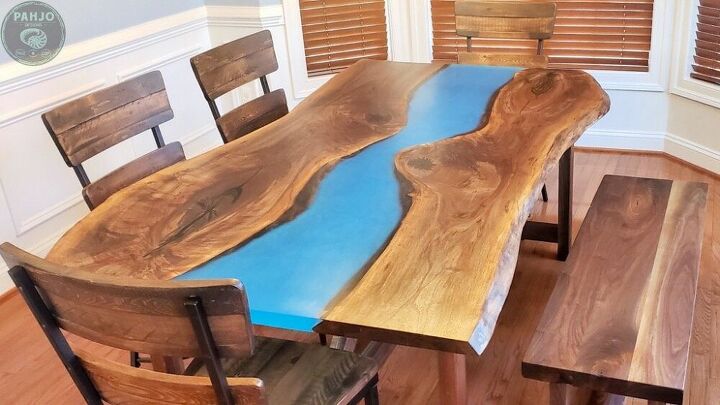
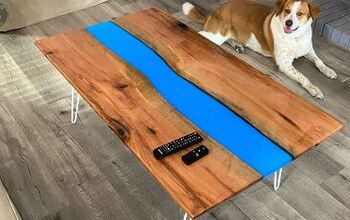
I completed other various steps to finish the table. I poured a blue epoxy river and flattened the wood slab with my router.
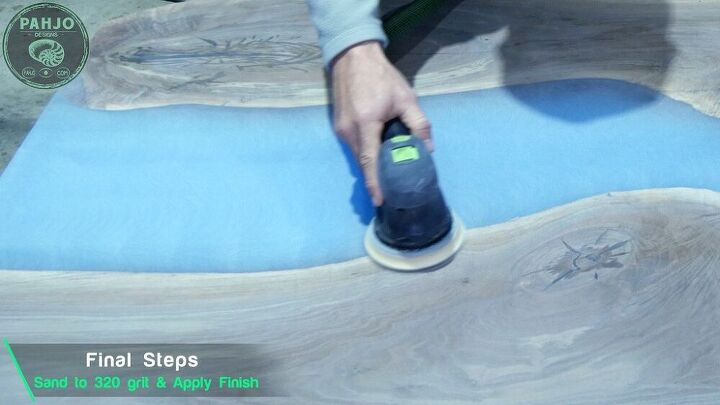
Whether you use epoxy to fill wood voids on an existing table or a new table, sanding is very important. The new epoxy must be sanded to sit flush with the table and blend in. Use an orbital sander and sand up to 320 grit on a new table. For existing furniture, sand the epoxy by hand over the area with 220 then 320. You may need to sand higher depending on the sheen you are trying to match..
After sanding, apply your favorite finish over the new surface or use a finish to match the existing surface. I like using Rubio Monocoat or a hard wax such as Odie's Oil to finish epoxy and wood projects. Checkout my Hometalk post regarding the best finishes for epoxy wood tables for more info..
Whether you are building a new table with reclaimed wood, repairing an existing table, or stabilizing decaying wood - using this epoxy technique works really well. In closing, I hope this HT tutorial provided you with value. Please leave a comment down below if you have any questions.
Resources for this project:
See all materials


Frequently asked questions
Have a question about this project?