


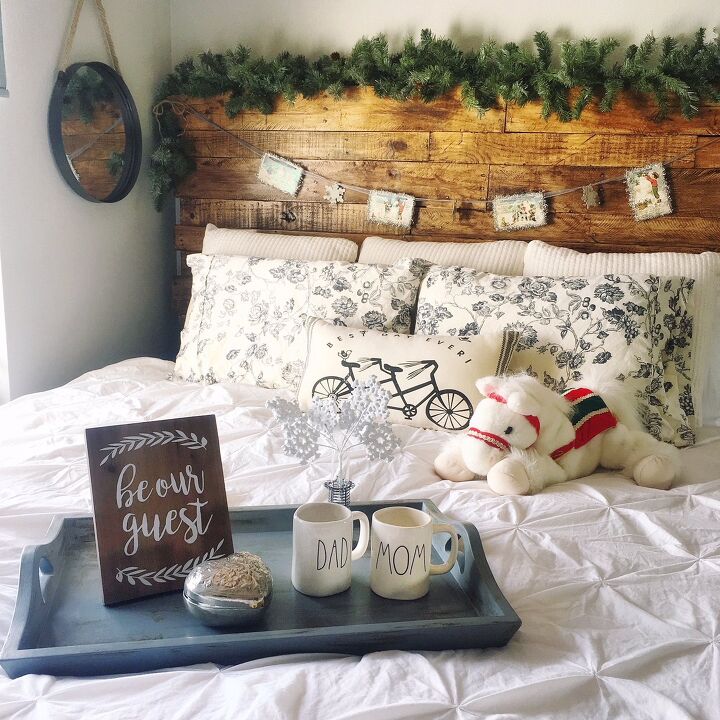
Pallet Headboard DIY
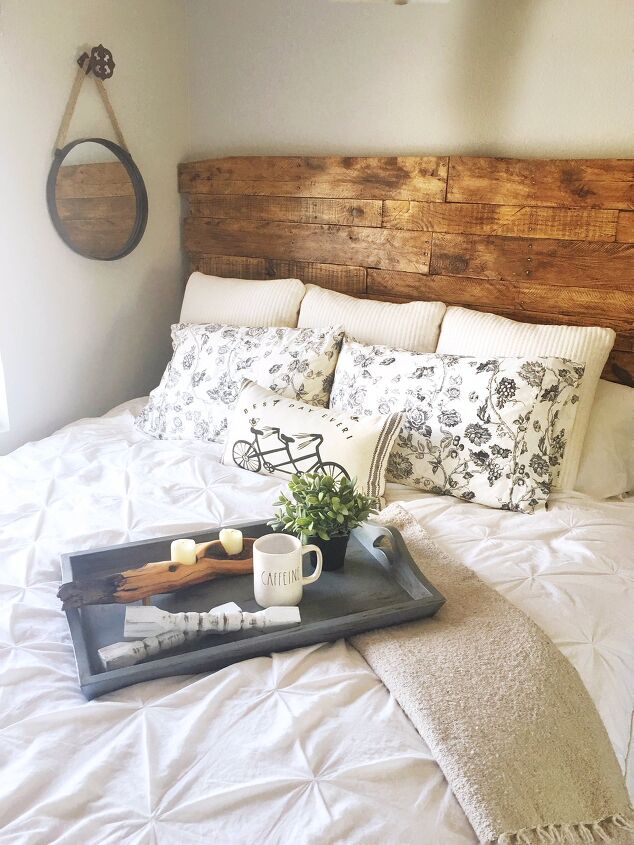
Today I am going to share with y’all a project that I get asked about ALL the time – my DIY pallet headboard that is in our guest room! It used to be in our master bedroom, but when we bought our house, we decided we wanted an Eastern King bed (we need the width because of Napa) instead of a Cal King bed (we are both
Now, this was a DIY project I did with my Dad back in 2015 – pre-ever thinking I would have a home decor/DIY blog, so forgive the lack of photos and detailed measurements (which wouldn’t really help you anyway unless you were specifically making a Cal King headboard)! I’ll do my best to explain as I go along! TIP: Do some research on what pallets are safe to use – some have been treated with chemicals, and you can tell by the stamps they have on them. There is a great post from TreeHugger that might help!
Step 1:
Gather your pallets! If using old ones, you can find them behind places like Home Depot, Walmart, Lowes, etc. Be sure to ASK before you take them – usually they don’t mind you taking a couple if you ask nicely!
Step 2:
Use your circular saw to cut apart your pallets. USE PROPER SAFETY EQUIPMENT AND PROCEDURES (safety glasses, mask, etc). You’ll want to make sure no rough nails/metal pieces are sticking through the front of the pallets where your head will be, but theres really no need to try to get all the nails completely out if you are using old pallets, as they add to the character of the boards! If you feel there are some rough parts, give your boards a quick sand with sandpaper.

Step 3:
Measure/Plan/Draw out your frame. Your frame will vary depending on a few things, including the size headboard you want to make, the height you want the headboard to rise above your mattress, and whether you want your headboard to have legs and be attached to your bed frame, or if you want the headboard to be attached to your wall (you will need to attach it to studs)!
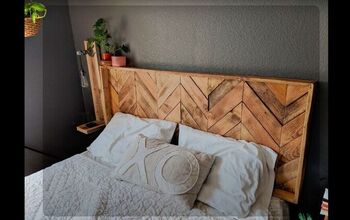
I knew I wanted to be able to move mine from room to room, so we opted for the leg version, which is what I will detail in this post. If you want to attach yours to the wall, just skip the leg part and be sure you attach to studs with STRONG anchors and mark your wall off well before you hang it! Our frame was made from 2×4’s – we had 2 long pieces for the legs, 2 horizontal pieces to connect the legs pieces, and then 3 shorter vertical pieces in between.
In order to decide how far apart your leg pieces should be, you’ll need to measure the screw holes of your bed frame, and line up the MIDDLE of your leg pieces with those screw holes. If you’re making a headboard for a full or twin, you likely will only need 1 or 2 (instead of 3) extra vertical pieces.
You’ll also want to decide how tall you want your headboard. Be sure to measure how high your mattress sits first. The bottom horizontal piece should be about 4 inches BELOW the top of your mattress, and the top horizontal piece should be about 1.5 inches below the top of your desired height of the headboard.
Step 4:
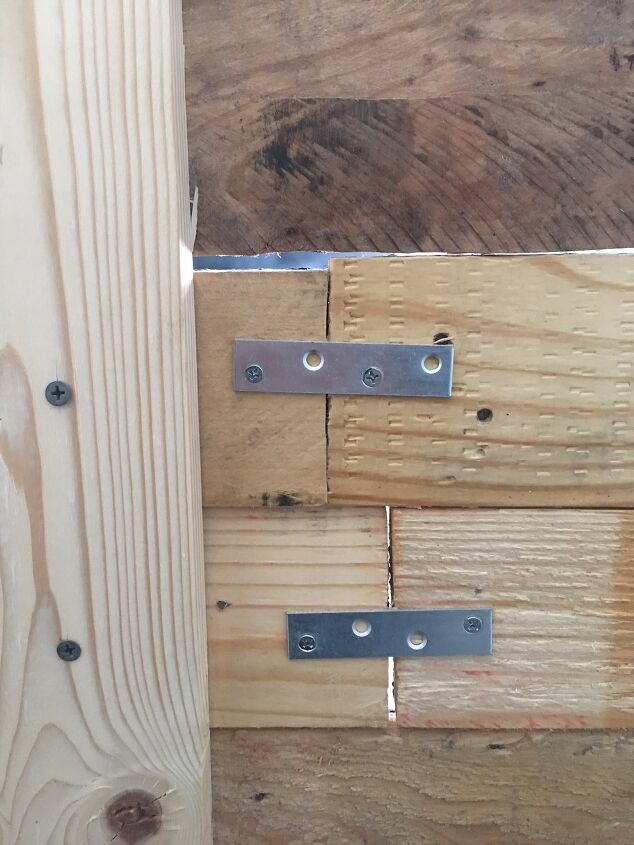
Use small metal brackets to secure your frame together with your 0.75″ screws. You can see below (and in the photo above as well) we put them at every “joint” of our frame.
Step 5:
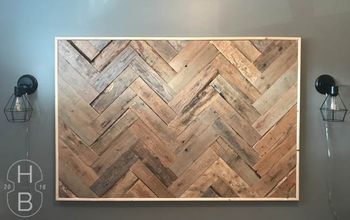
Flip over your frame and start arranging your pallets how you like them! We used a hand saw on a few boards that needed to be cut shorter, but we didn’t have many. I arranged mine in an uneven pattern to keep the look more rustic, but you can really arrange them however you please! Be sure the top and bottom rows extend a little bit above and below the top and bottom horizontal pieces of your frame, respectively.
Step 6:
Once your whole headboard is arranged how you like, use your hammer and nails to attach the pallet pieces to your frame. We used A LOT of nails. Again, I liked a more rustic/organic look, so adding extra nails to the front didn’t bother me. I just made sure they were fully driven into the wood and not sticking out. We also used a few 1.25″ screws in places that seemed to need a little extra support.
Step 7:
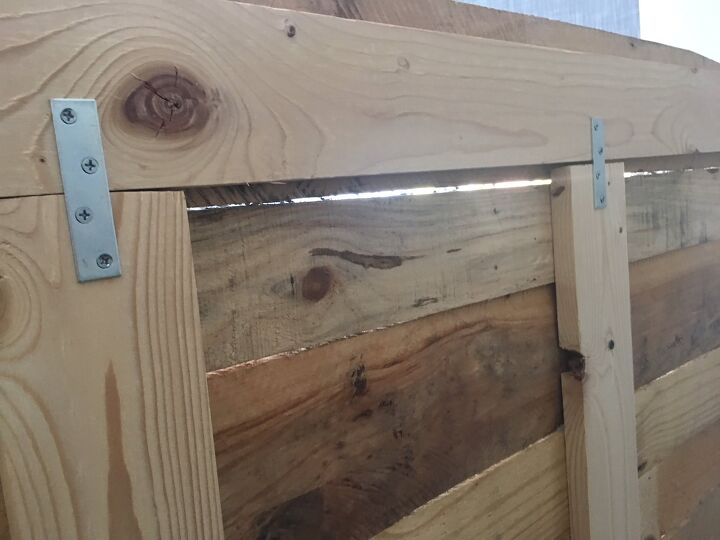
Flip your head board back over so it is back side up. Using your metal brackets and 0.5″ screws, attach wobbly pallet ends together so they are secure. (You may need shorter or longer dcrews depending on the thickness of your pallet boards – adjust accordingly to be sure the screws don’t stick out the front of the headboard!) You can see what I mean in the photo below.
Attaching these little brackets was necessary on pallet pieces that were only attached to the frame in ONE spot, as opposed to two.
Step 8:
Stand your headboard up against your bed frame and mark (measure twice, drill once!) where your frame will attach to the legs. Use your drill to drill holes in the legs for your screws that you will use to attach the frame to the headboard.
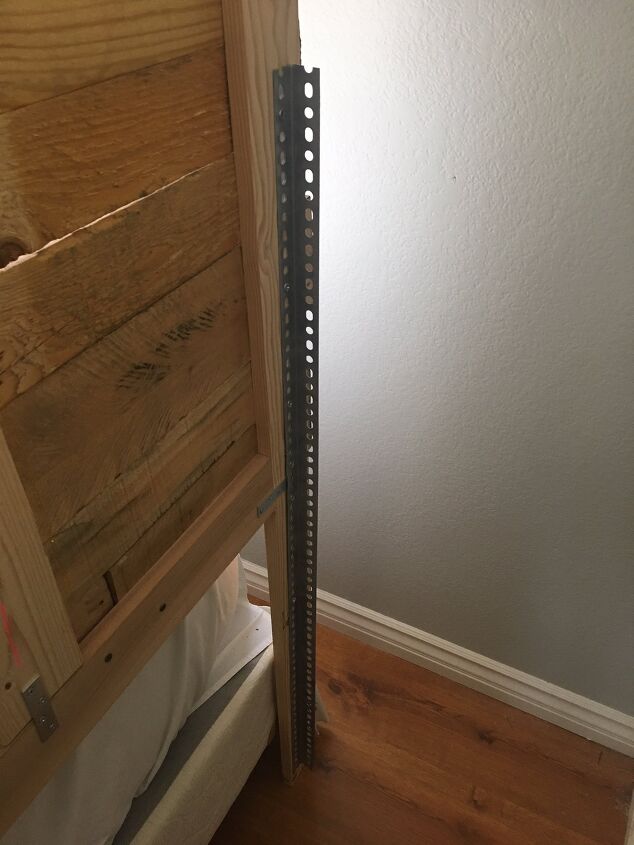
Step 9:
Attach your steel structural straps with 0.75″ screws to your legs slightly above the holes you just drilled.
Step 10:
Wax or stain if you so choose!
TIP: Your wax or stain will produce varying colors depending on the initial type and color of your wood. It’s always best to test out your color on a scrap piece before you commit to the whole project!
TIP: Wax will really help give your headboard a finished look, as it creates a kind of slick coating on top that helps to get rid of any rough edges you may not have gotten with your sandpaper. Think of it as butter going on top of your wood – everyone loves butter right?!
Step 11:
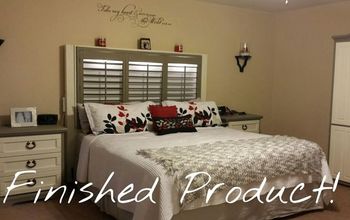
Attach your finished headboard to your bed frame (or the wall if you took that route) with screws and nuts to secure, and voila!
TIP: The steel straps likely will scratch your wall, so we attached a couple of old washcloths, one to either side, right onto the strap! This provided a cushion in between the strap and wall, minimizing scratching!
And finally, enjoy your new DIY headboard!
Head to the blog for MORE!


Frequently asked questions
Have a question about this project?