


WORX Landroid Review and DIY Rectangle Planter Box
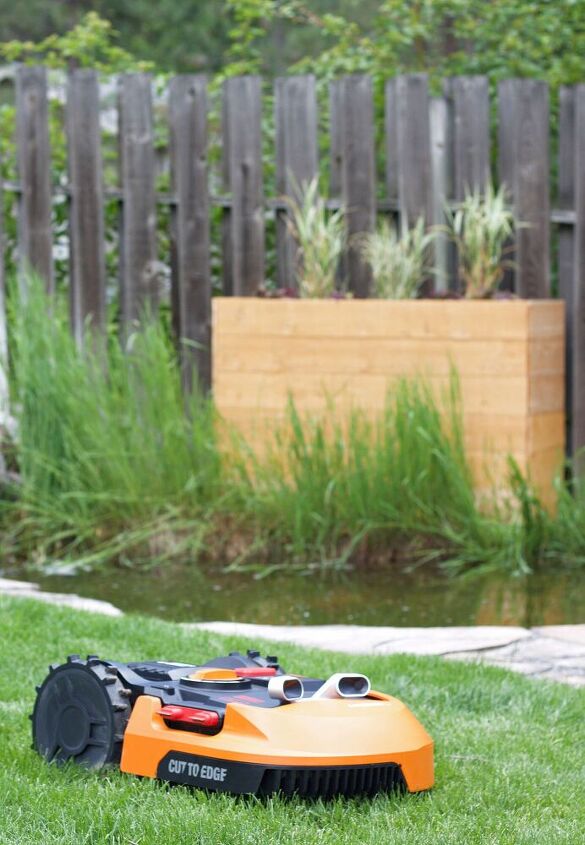
Oh my word, my life has been forever changed friends. We didn’t know we needed him, but once we got him we realized how much easier he made our life. Spoiler, he’s a WORX Landroid.
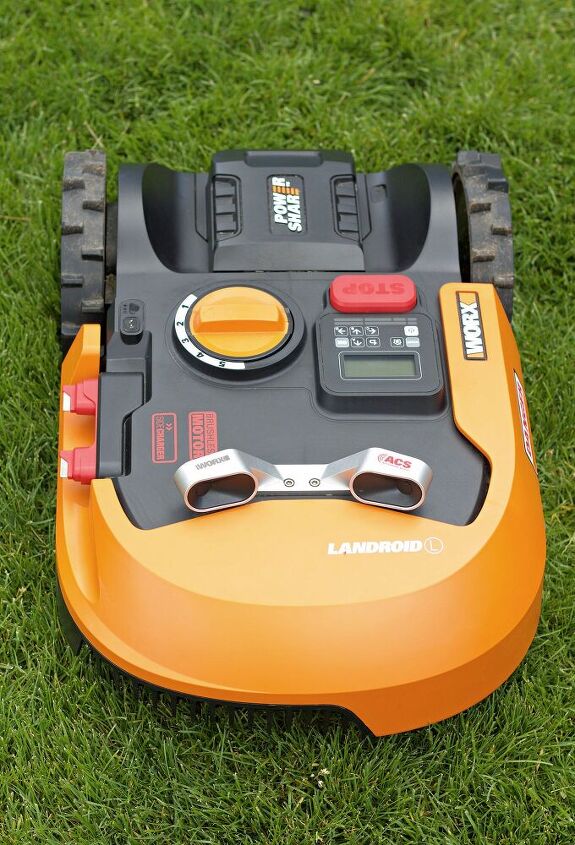
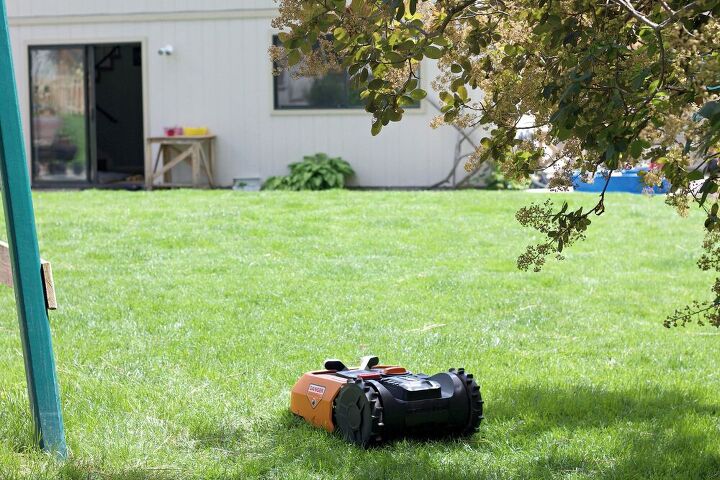
Let me introduce you to our newest family member. His name is Fred.
Fred is a WORX robotic lawnmower, also called a Landroid, and is named after one of our sweet Cayuga ducks that left this world too soon. Don’t ask me why we had to name our Landroid after a duck, ask my kids.
Disclosure: this post is in partnership with WORX, all opinions are my own.
When I told my husband, Travis, we’d be getting a WORX Landroid his eyes lit up like the day he brought home his classic car. Overjoyed is the best word I can use. Not only because it’s going to cut his time tending our yard into a fraction of what it was, but because it’s a new toy. And it has an app. And apparently that’s just super fun.
I was happy because my mind started spinning with all the new things I could have Travis build and do around the house in his now free-time. 😉 Travis was less excited about this, but still went along with it.
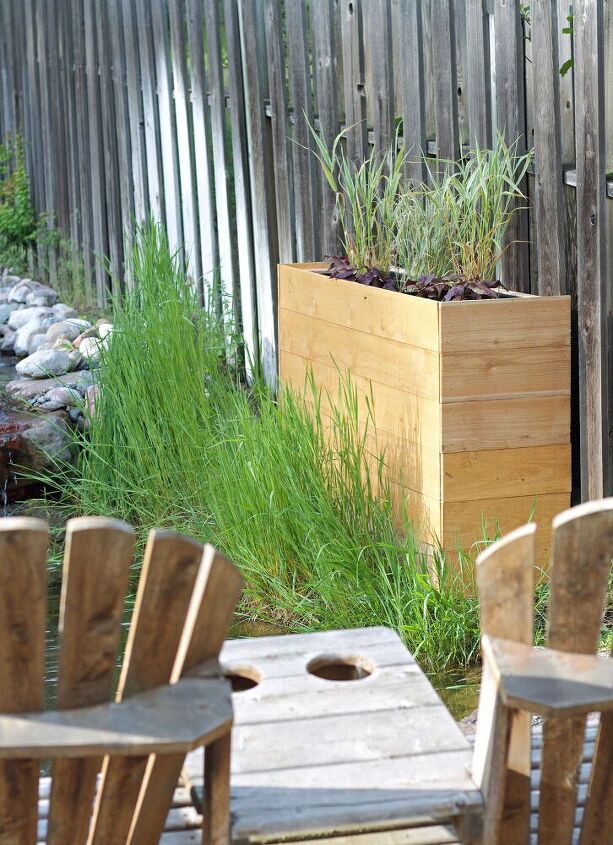
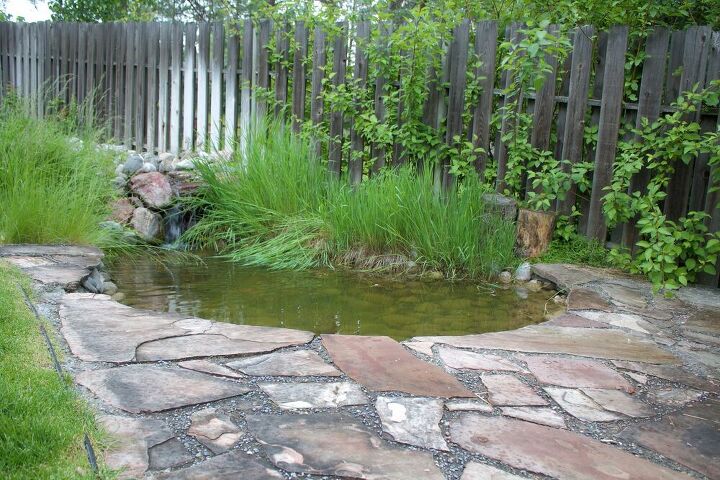
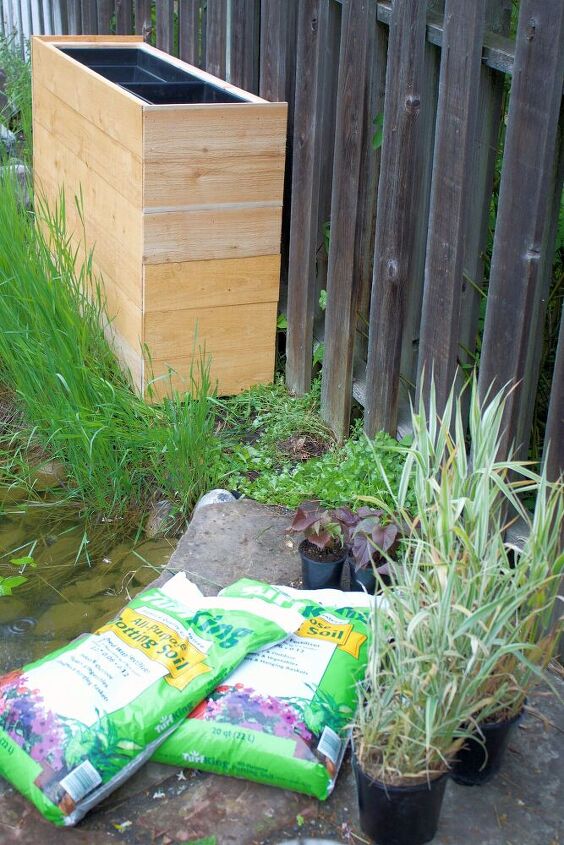
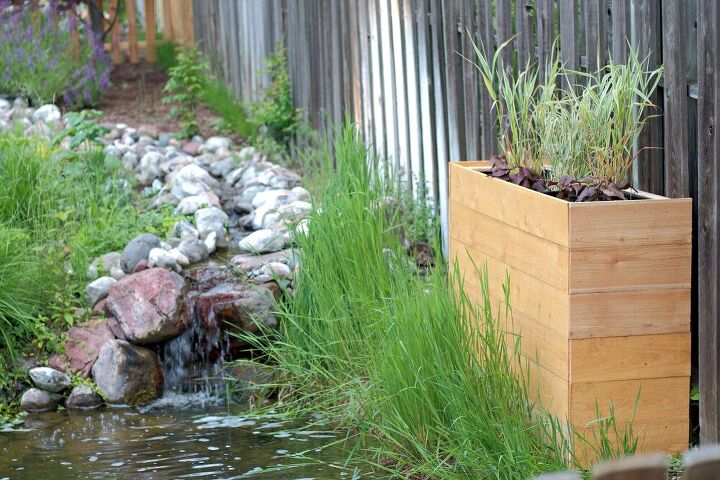
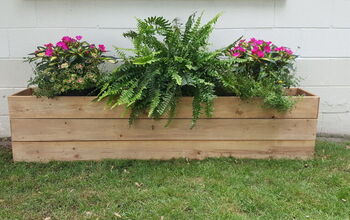
Right away after setting up Fred, (which was super easy) I wasted no time commissioning Travis to make a planter for beside the pond. I’ve been wanting one in that spot for over a year now!
As Fred scooted around the yard happily cutting our grass, (We’re pretending our Landroid has feelings. Okay?) Travis got busy making my planter. And, we wanted to share those plans with you!
We used this planter up against a fence, but it would be great for privacy or to section off a portion of the yard for a patio area!

PLANTER TUTORIAL:
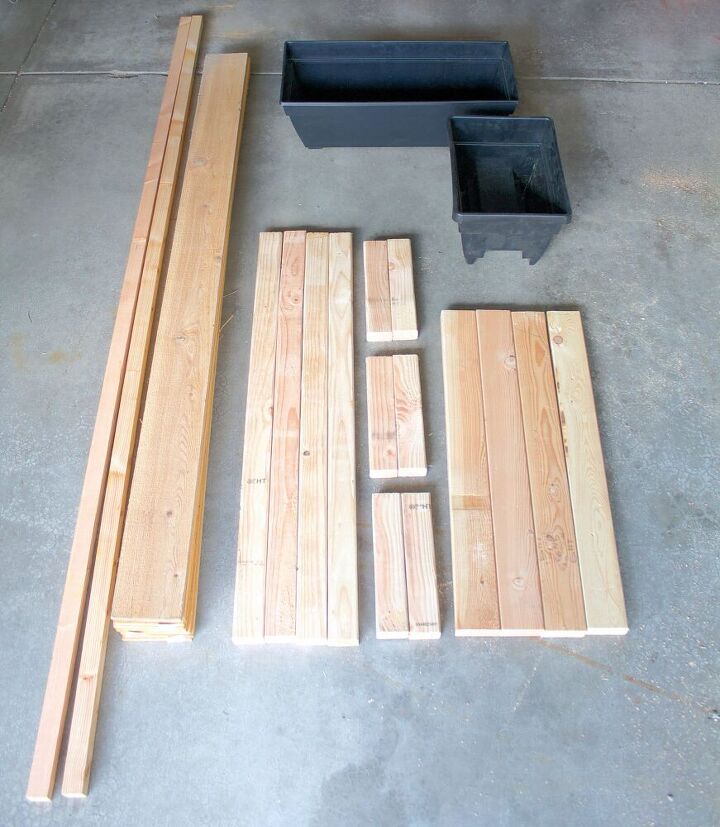
What you’ll need:
- 2 2x4x8 boards
- 3 2x3x8 boards
- 2 1x4x8 boards
- 7 cedar fence boards 5 3/8″ wide
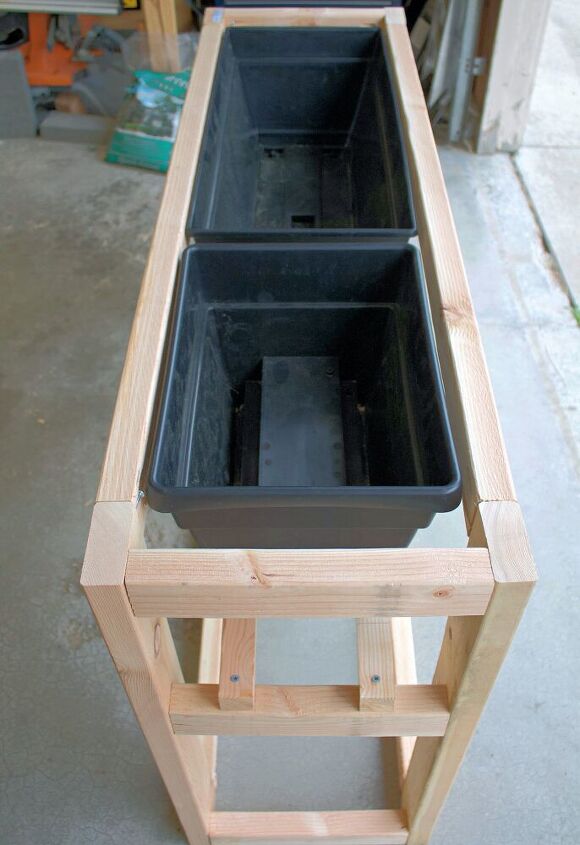
- Plastic planter boxes to fit inside planter
- Craig Tool & Pocket Hole Screws.
Cutting instructions for planter frame:
Take the 2x4x8’s and cut into 4, 32 1/2″ pieces.
Cut the 2×3’s into 4, 43″ pieces.
Cut the other remaining 2×3’s into 6, 12 1/4″ pieces.
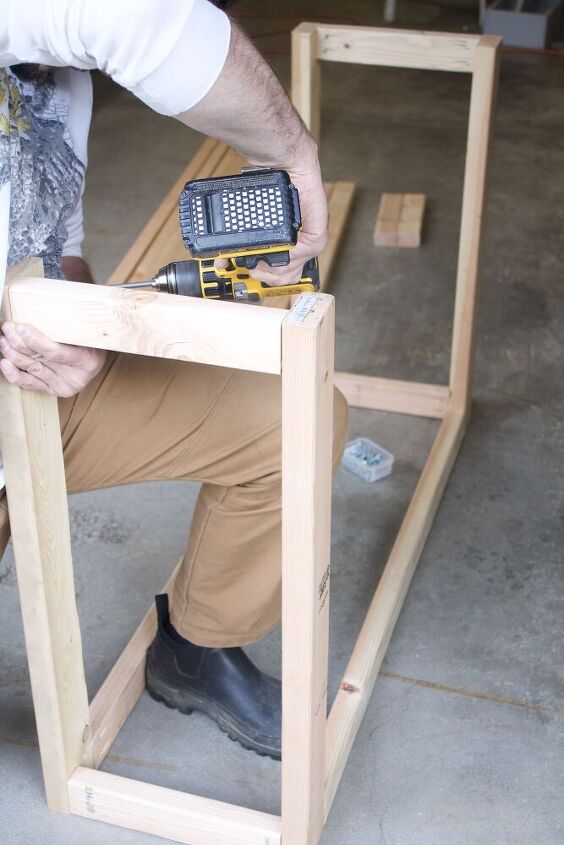
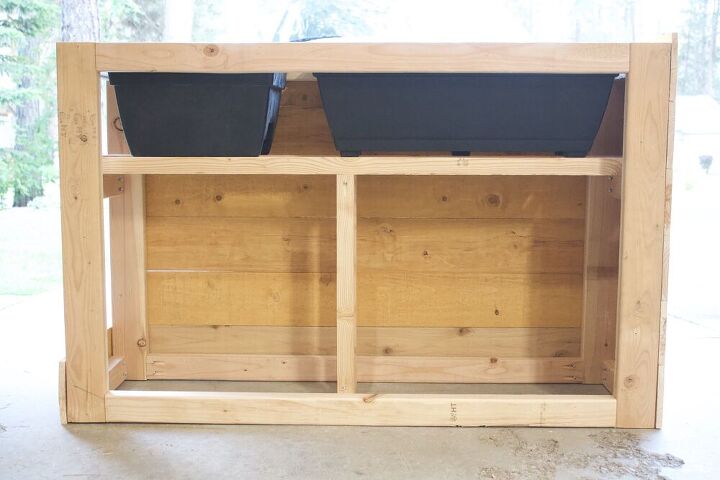
Step 1: Assemble the corners
To assemble the corners you’ll need the Craig hand tool to pre-drill pocket holes in all the 43 1/2″ and 12 1/4″ boards for the corners. Then, starting on a flat surface join each corner one at a time with Craig pocket screws.
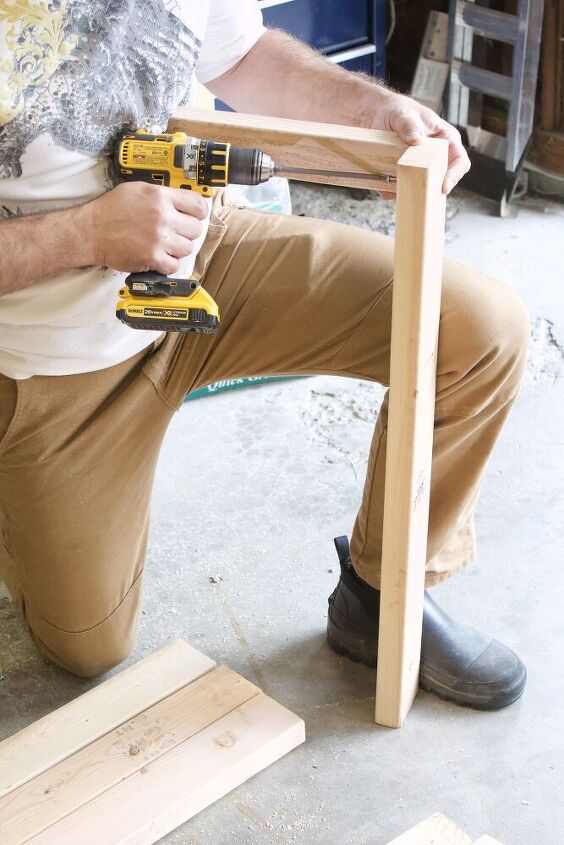
Repeat the process for all corners, top and bottom.
Step 2: Planter supports
For here, you have to measure the planters you purchased, and decide how deep you want them to sit in the planter. This is going to determine where to place your side supports.
These measurements will be personal to your project and the planters you have. Our planters were 7″ tall, for us that meant attaching the supports for the cross bars at planter depth, plus the width of the support bar, which equaled 9 1/2″ down. This is where we attached the support.
From there you have to cut to fit the cross bars that go on top of the side supports.
To create a center support use the same cross support boards and cut to size.

Create a base by putting in a center bottom board. This will provide the necessary support to hold the planters filled with soil.
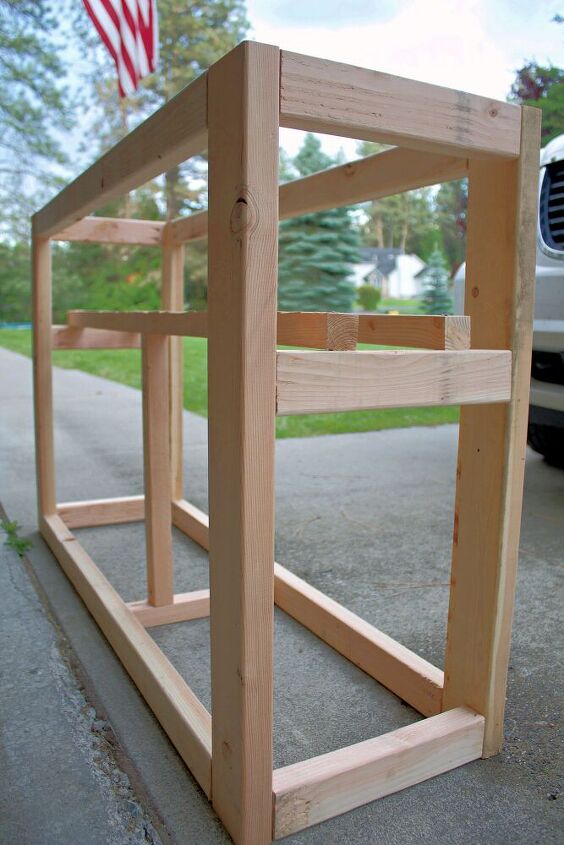
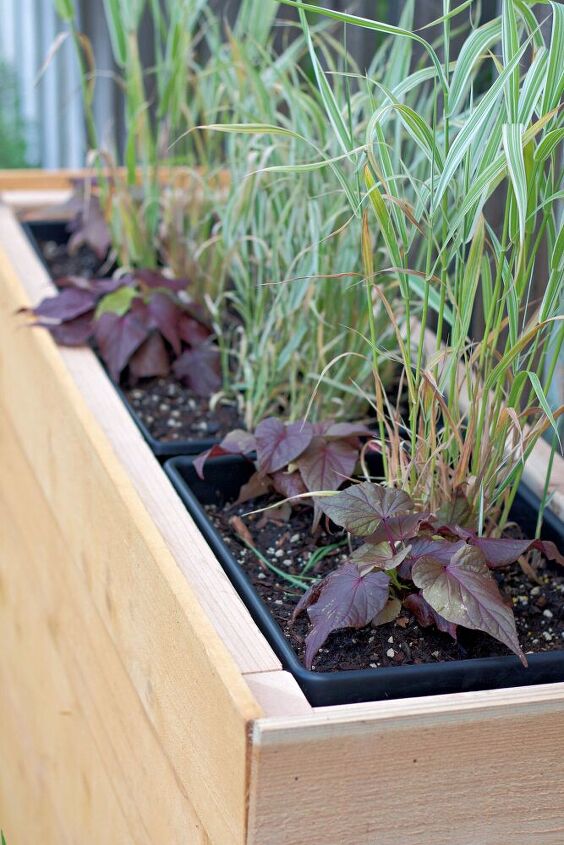
From here make sure the plastic inserts fit into the planter. Now we’ll start assembling the sides.
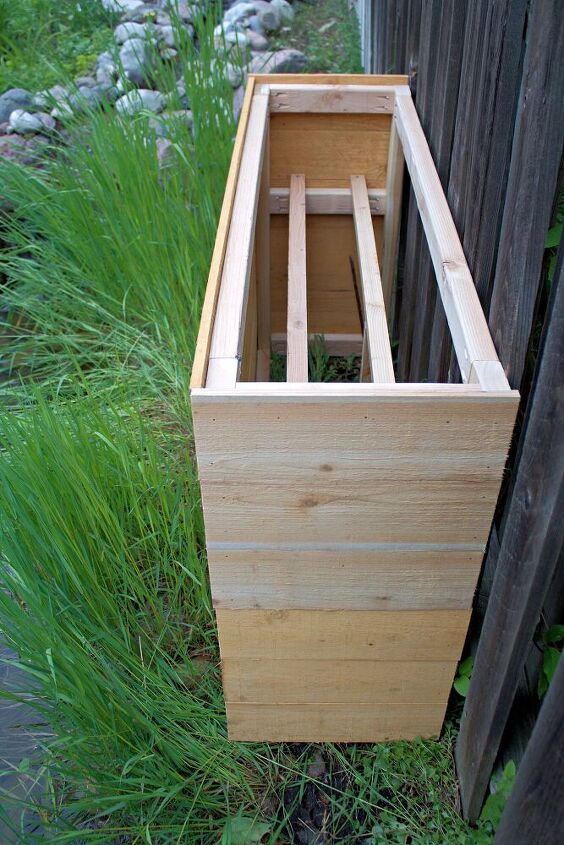
3. Assembling the exterior of the planter
To get the exact fit, take each board and measure it agains the planter frame, marking the sides and cutting to fit. Again, if you’re covering the whole planter and not just the front and sides like us, you’ll need additional cedar boards.
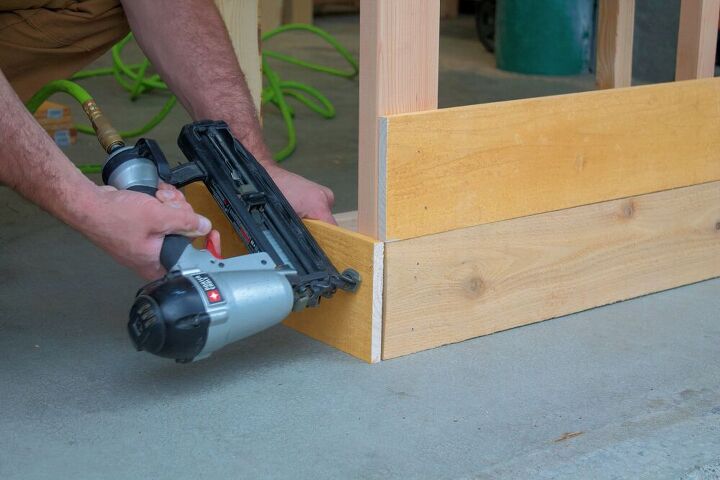
Before placing this out in the elements, make sure to stain and seal or paint the planter with exterior products.
Once it’s complete move to where you want your planter and fill with dirt and plants!
Tada!!! Looks so polished and finished beside the pond now!
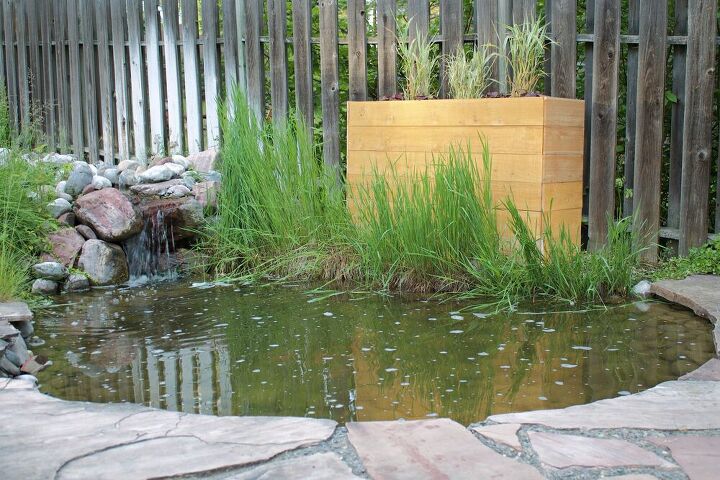
We chose tall grasses with ivy that will flow over the sides of the planter once full grown.
OKAY NOW BACK TO FRED!
When I shared him over on Instagram SO MANY people had questions! I put up an ask “me anything about Fred” box in IG stories and got a TON of people wanting to know more. I’d love to answer those quickly!
COMMON QUESTIONS ABOUT OUR WORX LANDROID
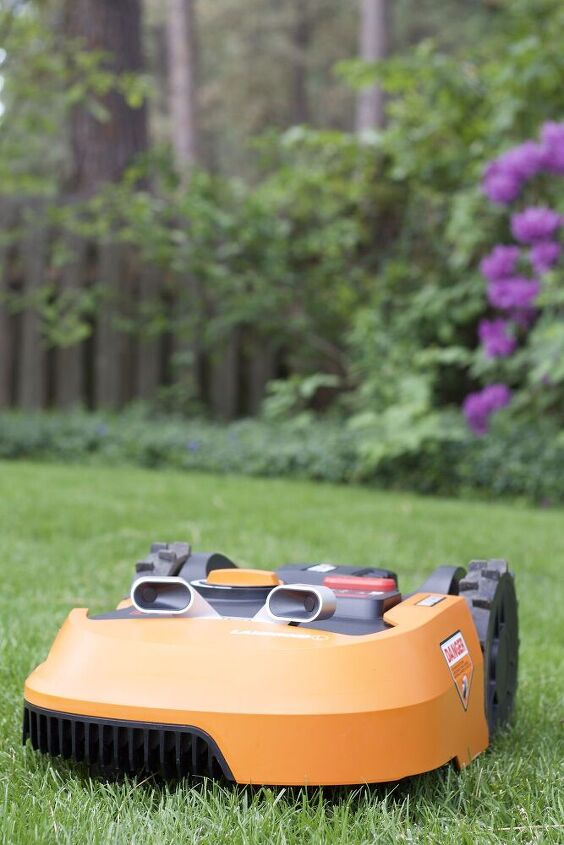
Which Landroid do you have?
We have the Landroid L 20V. It mows up to half an acre.
How often should it mow your lawn?
The Landroid comes with a recommended schedule. It also comes with a calculator to determine the size of your yard and how often it should be mowed.
We have Fred set on a schedule to go off Monday – Friday at 2pm for 90 minutes.
Does it have additional accessories you can purchase?
Yes!
We have the Find My Landroid GPS Location Anti Theft Device. It notifies through the mobile app if the Landroid has been removed from its mowing area.
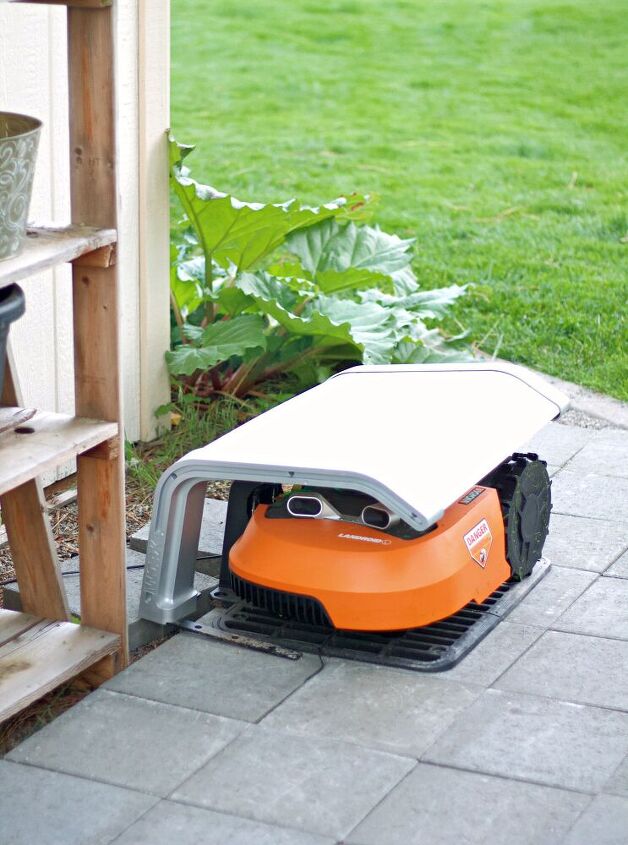
Also, we park Fred in the Landroid Garage, which provides the mower with an extra layer of protection against the elements like extreme heat, heavy rain or wind.
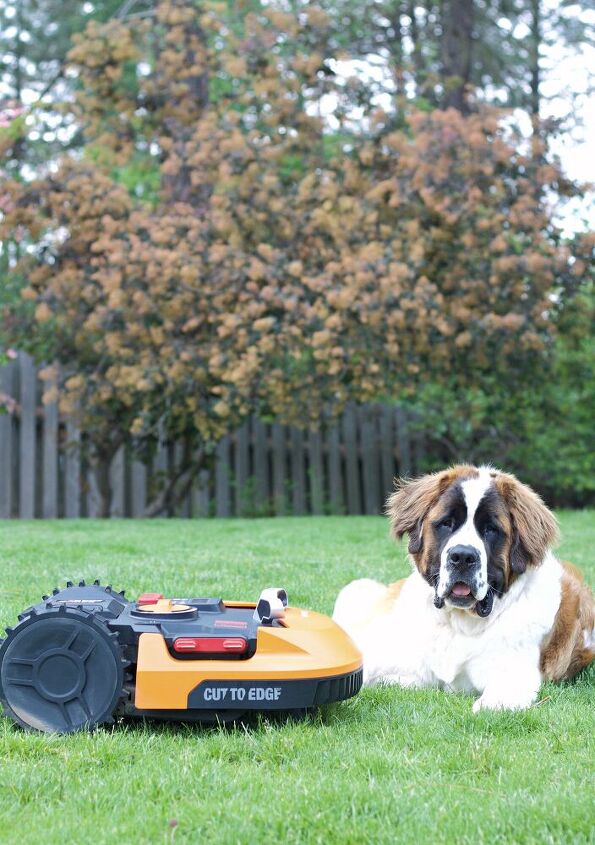
Lastly, we have the the Landroid Anti Collision accessory which uses ultrasonic detection to sense and navigate around obstacles other robotic mowers would bump into.
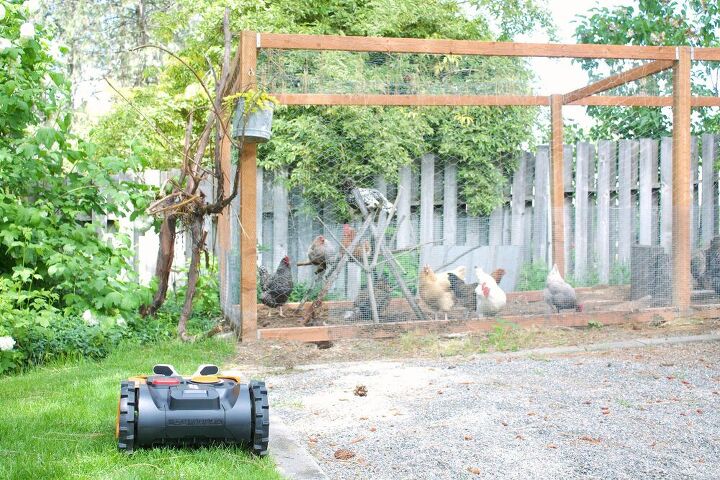
Case in point: Bruno, who never moves when Fred is coming at him.
Other accessories we don’t have but you can purchase are:
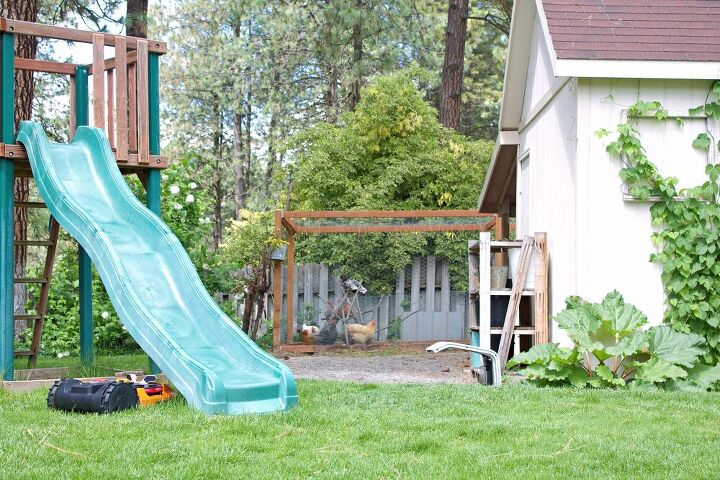
Off limits digital fence which is perfect for seasonal, non-permanent objects like trampolines, lawn furniture, and fire pits. Easy to install, simply insert the off limits module onto Landroid and lay magnetic strip around areas you do not want Landroid to enter.
How do you control him?
With the Landroid App! From the app you can set his schedule, manually turn him on and off, as well as send him home in the middle of a mow. It also tell you if he gets stuck for any reason, how much battery life he has left, and general information.

How does it know where to go? Around trees and such?
The Landroid knows to stay within the mowing area because you set up a perimeter wire, like you would an invisible fence for a dog. A small current runs through the wire and keeps the mower inside the designated area.
It’s easy to set up and is ground level, so there’s no tripping over it or pulling it up with clumsy feet.
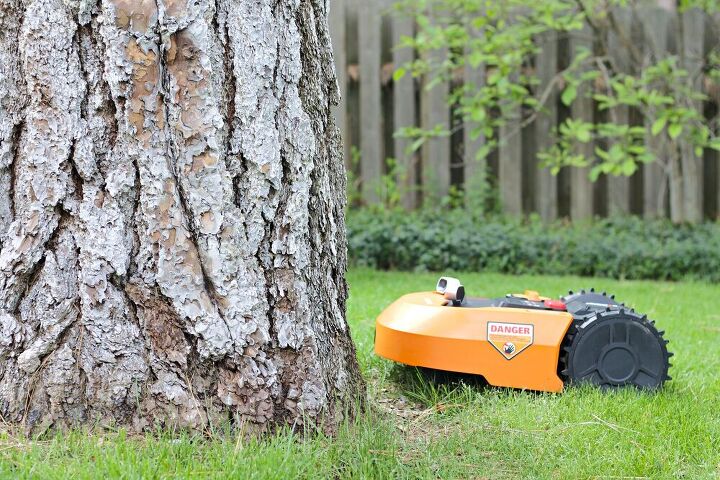
You can also make an “Islands” with the perimeter wire around larger objects like a playground or garden area or other spaces you wish the Landroid to avoid.
Does it pick up the grass?
No. The Landroid is a mulching mower, which is honestly the healthiest way to mow your lawn! Since he mows daily, he cuts the grass so minimally that it sinks to the dirt level and acts as fertilizer. This also means no tracking in grass clippings on tiny children feet and dog paws, which was a concern of mine. So far that hasn’t been a problem at all!
Do you need to keep your lawn free of debris for it to work?
The Landroid can’t see small obstacles, such as sticks, toys, pinecones, or dog poo. So, in a sense yes, you do need to tidy up the yard a bit before he mows. I’ve actually found this works in my favor! My yard is much nicer looking on a daily basis because I head out with the kids to tidy up a bit before Fred takes off. It’s worked well for us! If you don’t have animals, or live in a forest, then all the easier for you!
What kind of safety does it have? Like if someone tried to steal it?
When you register your Landroid you must make a personal pin. If the Landroid is ever removed from it’s mowing area the pin must be re-entered to start it. If someone was to attempt to steal your Landroid, they’d also have to steal the charging station, the wire around the yard, and know your pin. Not very likely to happen! If you have the Find My Landroid, additional accessory, you can also pinpoint where your Landroid is from GPS in the app.
Fred is a perfect addition to our yard and I’m so glad we get to hand him over the mowing duties so we can keep DIYing to our hearts content on other projects!
Thanks for helping out Fred!
Resources for this project:
See all materials


Frequently asked questions
Have a question about this project?
I love this and this is exactly the design I’ve been looking, but what modifications would I make to make the planters 3’ in height, but still using the same side potting containers?
Thank you