Making a Raised Garden From a Roofing Panel

Raised garden beds seem to be the in thing in gardening these days and there are lots of options out there to purchase but they are pricey . A 4x4 bed averages around $50, and let's face it that's not alot of space for a garden. My mom wanted to expand her raised bed this year and after searching for decent size ones and not finding any reasonably priced I decided to make my own. I remembered seeing roofing panels a lifetime ago when you could actually go into a store... Still not open here in Ontario Canada. Anyhow at the time I thought that would make an awesome raised bed. So I did some online shopping/ curbside pickup and got me a some roofing panels.
Hometalk Recommends!
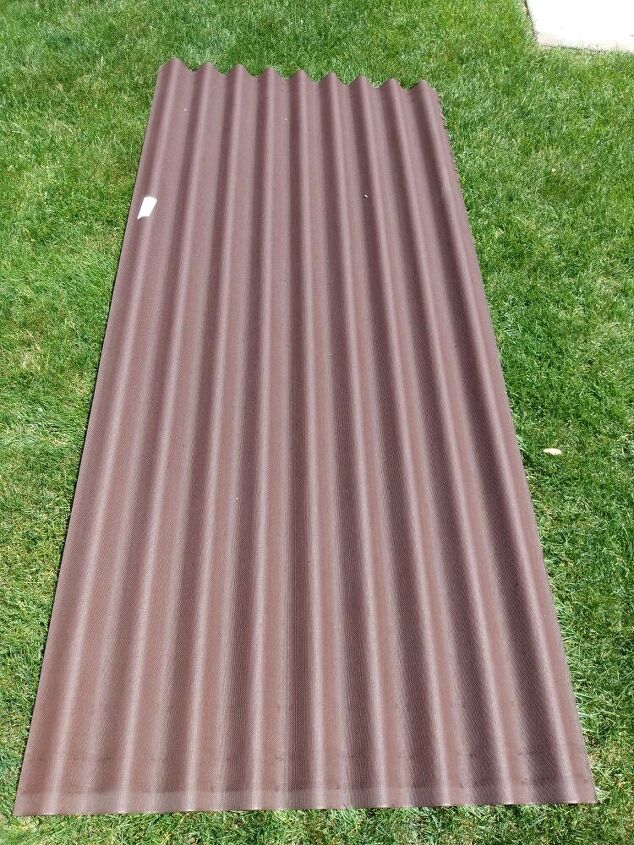
So here is the panel. I bought 2 . They come in a variety of sizes . This was 34.25in x79.
To cut this I used an exacto blade.
I laid my panel on the ground and measured out 12 inches. Then using my blade I scored the panel then snapped it off using my hands. It comes apart easily. You can use a saw but this was alot easier.
So here are my two sides. I did the same and cut out 4 ft lengths which will be my width.
Next I took some 1x1 inch board I had and cut 6 10 inch pieces.
Here are my cut boards. Yes there are two pieces missing in the picture! I will be using these to add support to my sides. ( Although once I got it together I didn't really need it as this is strong. Live and learn . If doing a longer bed I would recommend it.)
Next using a screwdriver and some small screws I am going to attach my 1x1 boards to the underside of my roofing panels.
Here they are attached. This is the inside of the bed.
This is what it looks like from the outside. I did two on each side of the long panel one each in the middle of the short panel. Now time to load my pieces for the 3 hour drive north to my mom's backyard where assembling will take place.
So to assemble the garden bed I bought 4 pieces of stair flashing in 10 inch length. You can buy this in 8 ft lengths but it is more expensive and I only needed 4 pieces.
So I laid the flashing on top of my cut panels. You are going to be attaching the flashing on the hills. The raised part of the panels. Using a marker I marked where my holes will go.
Using a cordless drill I drilled where I marked to make my 3 holes.
Continued doing all 4 pieces and did both sides of the flashing as seen in the picture.
I will be using stove screws, this is what I had on hand.
Using my drill I laid the first panel down and attached the screws. After attaching at both ends of my long panel I stood the panel up and attached the two smaller panels. Continuing until all panels are attached.
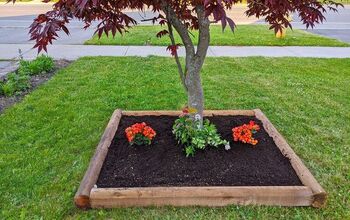
So here is the bed all put together. After assembled I cut plastic and laid underneath so we wouldn't have weeds coming through.
Next it was time to add my soil and my plants to their new bed!
This was a super easy project and cost me $30 to make. It is very strong and durable and we are sure to get many years use out of it.
Enjoyed the project?
Resources for this project:
See all materialsComments
Join the conversation
-
 Aun83897473
on Jun 07, 2023
The plastic is a bad idea as there is no way for the soil in the bed to get any moisture from the ground and you will have to water the beds constantly as they dry out very quickly. Landscape fabric and cardboard works much better; I speak from experience
-
-
 Susan Grekso
on Jun 13, 2023
Great idea
-
-















Frequently asked questions
Have a question about this project?
IS THIS METAL ROOFING PANELS ? I WANT TO TRY MAKING RAISED BEDS THIS WAY
I'm going to be making one of these but he's going to bed but is there anything else I can use instead of stair flashing I have everything else I even have some heavy duty brackets can I use those for the corners
is the top sharp and could cut you as you lean over it?