


Bathroom Shelf Solution

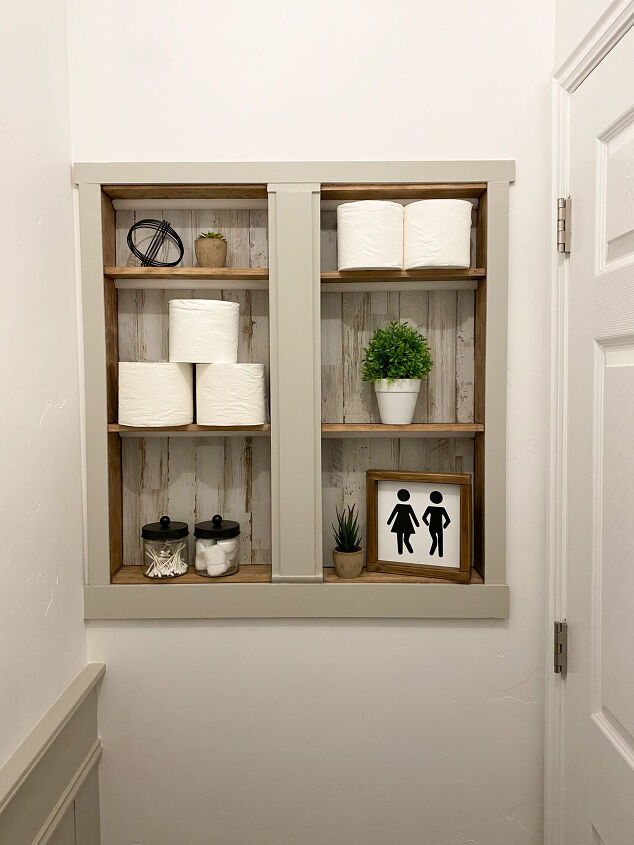
Small toilet closets can be tricky. They are small and don't have much storage. I hated storing our extra toilet paper on the floor still wrapped in its ripped plastic or the back of the toilet in a TP pyramid. So when I took on renovating our toilet room in our master bathroom I decided to go into the wall to create these recessed shelves.
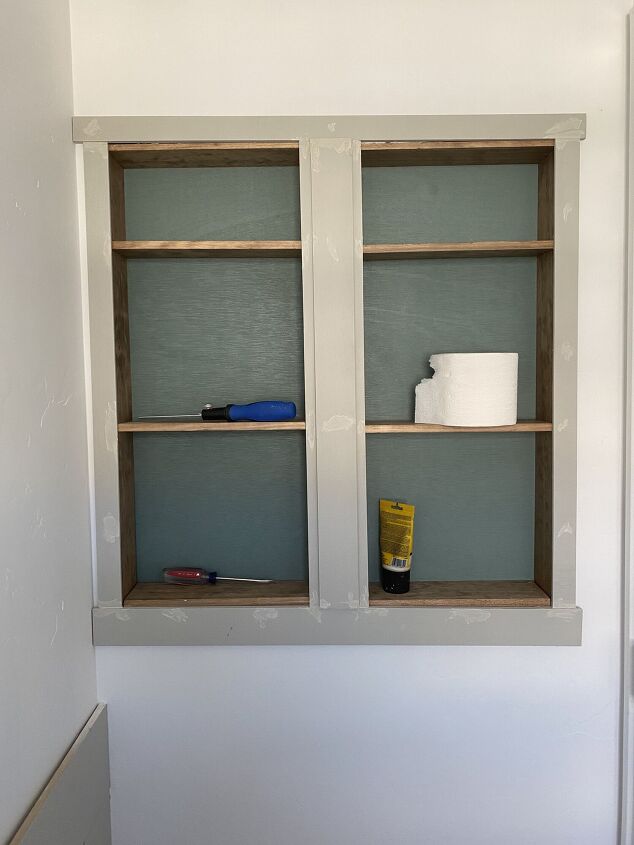
First thing first, before I dig into any walls in my home I like to look at the house plans just to see if there will be any issues. This isn't a fail safe. The guts of a house get changed all the time. After looking at the plants and seeing no potential issues next I just dig in. No better way to know what's there than to expose it. For this recessed shelf I originally wanted to do one shelf down the middle of this wall behind my door. When I marked my dry wall, scored it and snapped a piece out I noticed there was a stud running just off center down the length of this wall, so I had to pivot and change my plans. I took a second, sat down on the great white throne (a perk of renovating a bathroom- you always have a place to sit) and finally decided I'd do a 2 sided shelf where I could allow the stud to run in between. Since it didn't end up being centered on the wall I kept it shorter, not the full length of the wall.
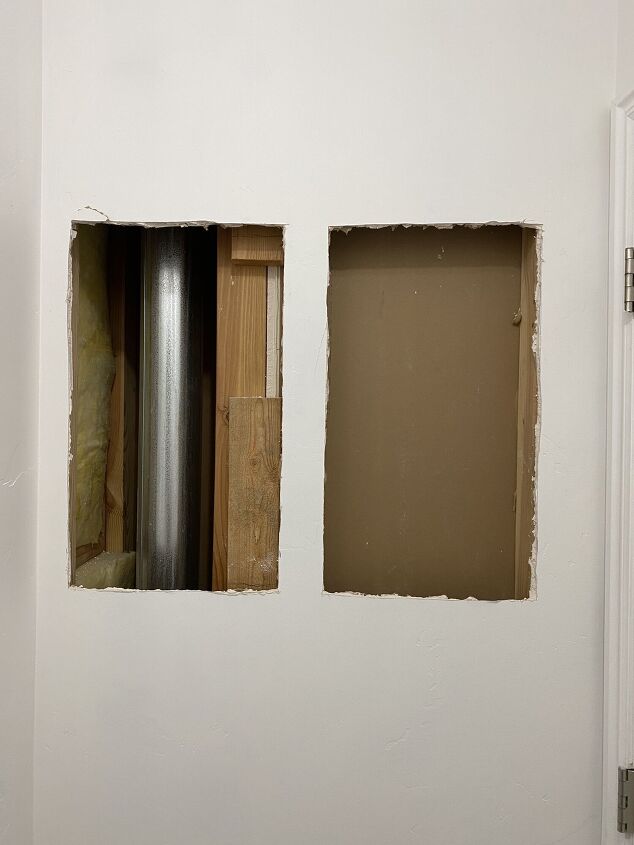
After I measured the shelves distance I used a straight edge to mark my scoring path. This took a bit of time, but I knew I wanted to be precise in removing the drywall to get the best fit for my shelves. Patients with the prep work makes life much easier down the line. It was a bit frightening and super messy to cut out these 2 chunks of dry wall, but I have the mindset that I can always fix it if I mess something up. I do have to take into consideration my husband. He stresses about this kind of project (but he is ALWAYS supportive and I love that!) I made sure to have this mess cleaned up BEFORE he got home. Marriage is all about respect for one another, I know home renovations cause him anxiety so I try to keep the mess and disruption to a minimum. Ok, my Dr. Phil moment is over...back to the DIY.

Now that I had my dry wall cleared out, I was able to measure the openings and head out to my garage to make the shelves. I goal was to build them and then slide them into their slot in the wall.
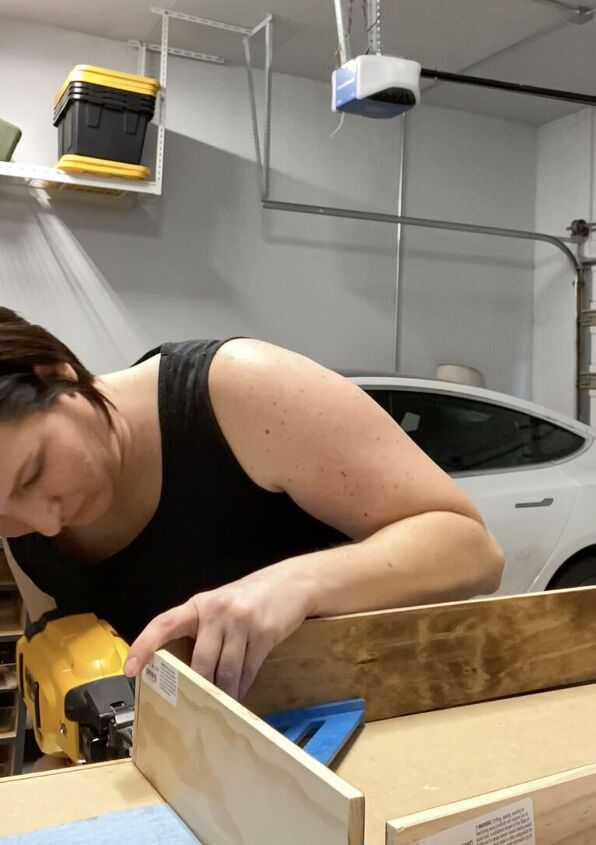
I used poplar wood that I had already stained from making beams for the ceiling in this space. I attached the sides, top, and bottom all together first, then the pre-painted plywood backs. I used a combination of wood glue, brad nails and clamps to hold them all together while they dried. This took a bit of work as I again was trying to be very precise. I used my speed square to insure each corner was square while I attached the pieces together. I let them dry overnight.
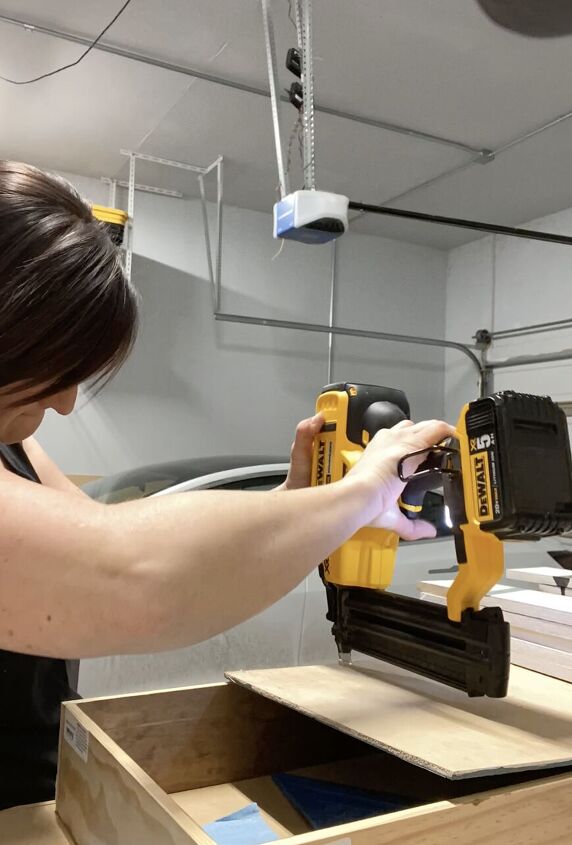
The next day, I added 2 poplar shelves to the inside of each dried box. Once those were dry it was time to slide the shelf units into place. This approach worked BEAUTIFULLY. They slid in no problem. I did have to add a few shims to make sure the fit was snug and that the shelves wouldn't be loose in their slots. Then I simply secured them to the studs on either side with nails.
I trimmed them out to make them look built in and finished off. Then painted the trim in this beautiful greige color. At this point I was almost done and only had to do caulk and wood filler....BUT, I like to make things more difficult and decided I didn't like the green as much as I thought I did. The shelves just didn't look finished.
I was NOT about to take the shelves all the way out and redo the backs, so I improvised. I had some left over wall paneling from another project. I measured each slot within the 2 shelf units and cut this paneling to fit. I added a little molding to the top of each piece to tie in the quarter round trim that I had placed in the middle of the outer greige molding. It turned out so much better than I thought it would. Now we have the perfect spot to store out extra toilet paper rolls! Plus it give us something cute to look at while sitting upon the porcelain throne.
0 views0 commentsPost not marked as liked
Resources for this project:
See all materials


Comments
Join the conversation
-
i did something similar but removed the vertical stuff part by adding a little header. But I see this would be much easier and less messy. One tip is that people should take into consideration the width of the boards used to make the frame and measure the interior if they are trying to store specific items.
I would probably paint the interior to match the trim or the walls because I'm a little boring, but I think you did an excellent job.
-
This is brilliant and it looks great. Fantastic solution for several areas of a house. Thanks!!!


Frequently asked questions
Have a question about this project?
How deep were the finished shelves?
You have done a great job! Kudos also for sensitively working around your husband's need for tidiness! Does it bother you or anyone in the family that the shelves are not centered on the wall?
It would set off my OCD so much that I would have been forced to address this concern during construction. I would consider widening the finish molding, possibly widening the center piece covering the center joist, so that the two openings appear symmetrical, no matter if the shelves themselves extended uneven amounts behind the molding. In the alternative, I would make the shelving units smaller and build back in the wall. Sorry to be me, {sigh} but it would bother me so much, I'd use another toilet or insist on installing curtains the full width of the wall to hide the inequities.