


Corner Shelves From a Wooden Spool

Wooden spools are interesting finds, and can be used for several decor styles. Here is how we converted one spoil into two corner shelves.
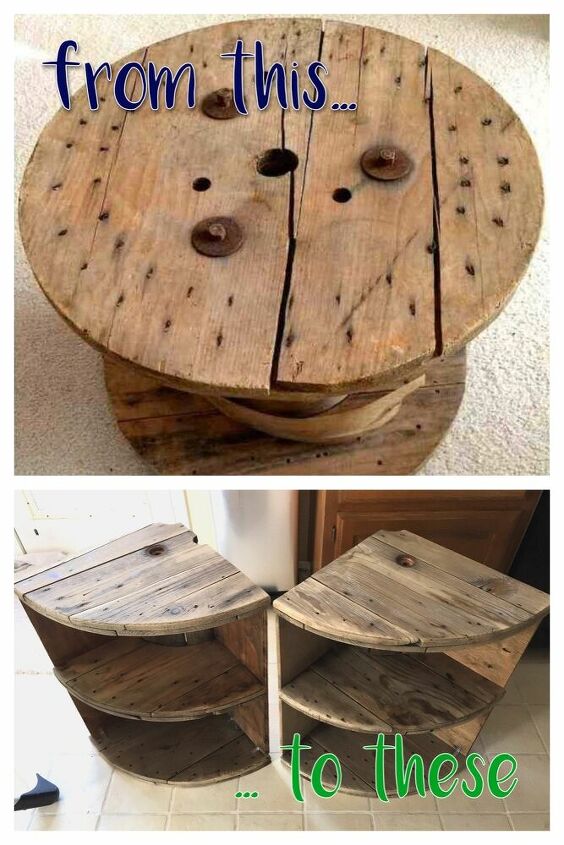
Being terrible at remembering to take before pictures, I don’t have one of the actual spool we used, but it was very similar to this one. There were a few cracks and some of the boards were warped.
In addition to the spool, we also used some scrap plywood pieces, corner L brackets and included screws, brad nails, and some extremely watered down grey paint and some wood stain to age the plywood to match the spools.
The first step is to disassemble the spool by removing the bolts. Depending on how rusty the hardware is, this could be easy, or really hard. You can cut the bolts with a metal grinder if you have to.
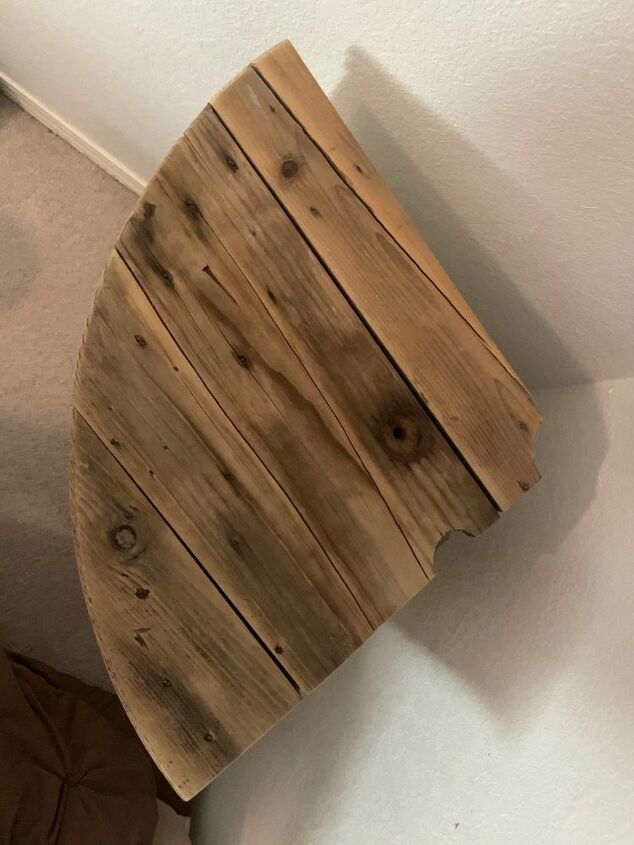
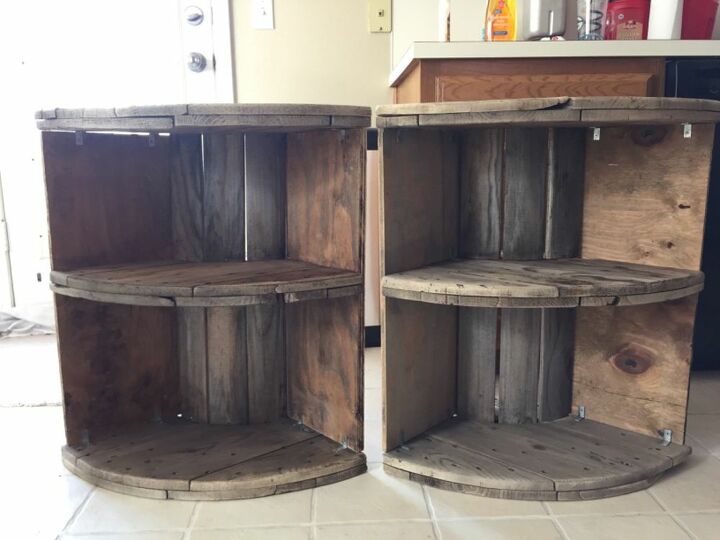
After the bolts are removed, the spool kind of falls apart. Prep the wood as needed, such as cleaning or sanding. Cut the top and bottom circles into quarters. We wanted two corner shelves, with two shelves on each, requiring a bottom, middle, and top. We picked the 6 best looking quarters of the 8.
You could easily adapt this for your needs; one tall corner shelf unit with 7 shelves, two units with 3 shelves each, etc.
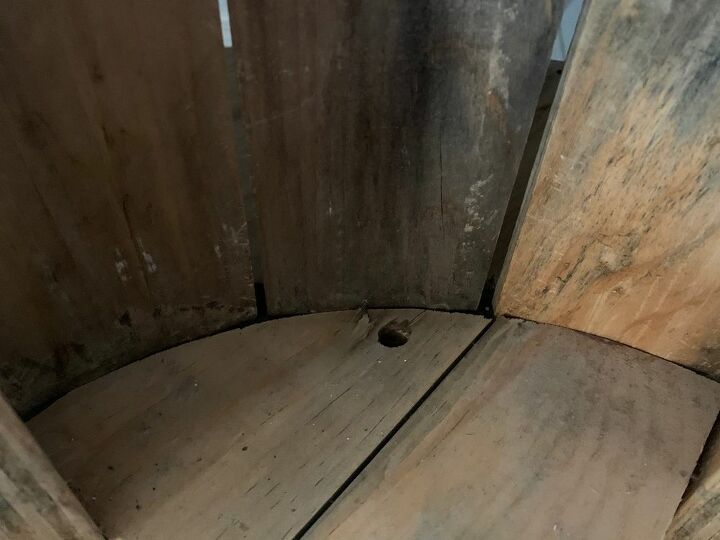
Cut the tall curved boards to desired height. We wanted the lower section to be a little taller than the top, so we cut the boards as such. The spool quarters have grooves on the one side where the vertical boards sit. Place the cut boards into the grooves.
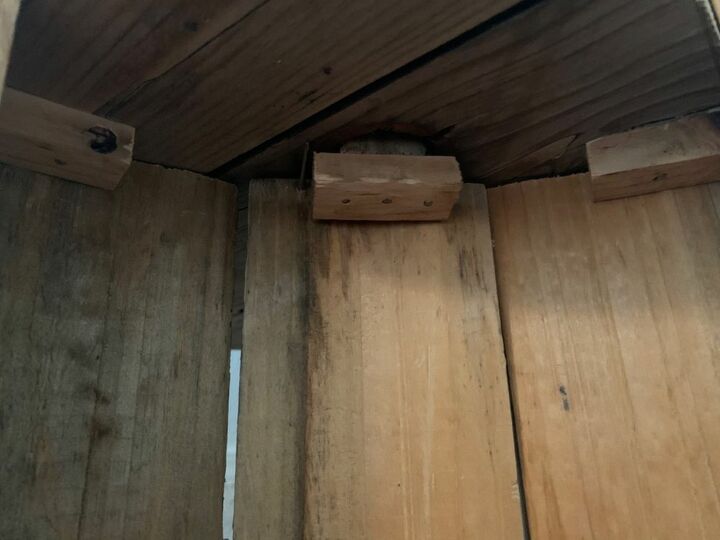
The grooves are only on one side, not both, so we nailed small blocks on the underside of the middle shelf to hold the curved boards in place.
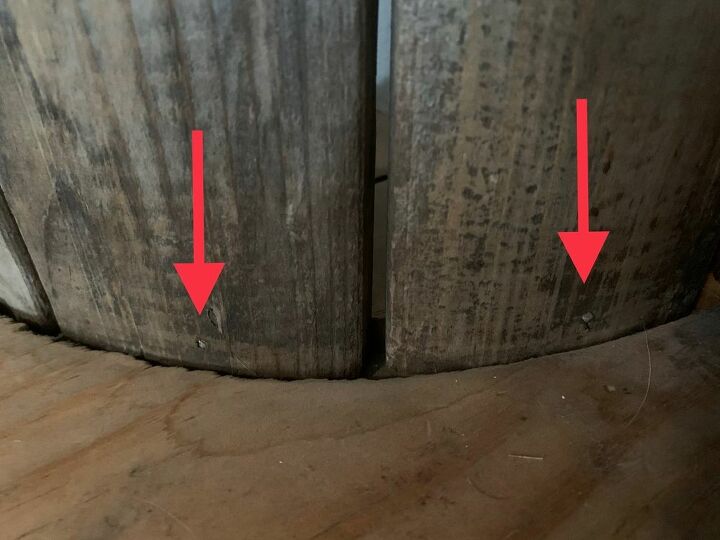
Because we are not reusing the bolts that held everything together with tension, we used brad nails inserted at an angle to hold the curved boards in place.
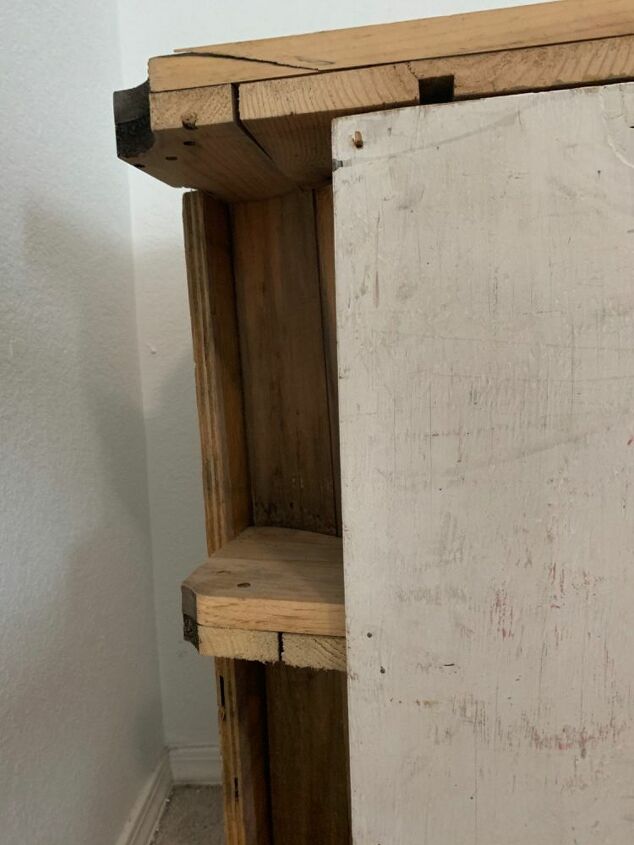
To finish the shelf off, we used leftover plywood scraps on the outside of the shelves. These were painted on one side, but we used stain and watered down grey paint to weather the other side to match the spool. Nails were inserted from the outside of the plywood into the middle shelf.

On the inside to stabilize the top and bottom shelves, we used corner L braces. You could also use mending plates on the outside to make them less visible, but we kind of liked the exposed hardware look.
Enjoy your new shelves!
The only thing we had to buy were the L brackets, which were around $5 for a big pack.


Comments
Join the conversation
-
I hv been using various size spools for numerous furniture pieces since the 1970’s because I like the nautical rough furniture feel & they last forever!!
-
A great idea. Well done


Frequently asked questions
Have a question about this project?
I've got 2 small plastic cable spools any suggestions besides tables!
Where are some places I might a Free spool
This is the most ingenuitive project I have seen on here in quite some time. Thank you