


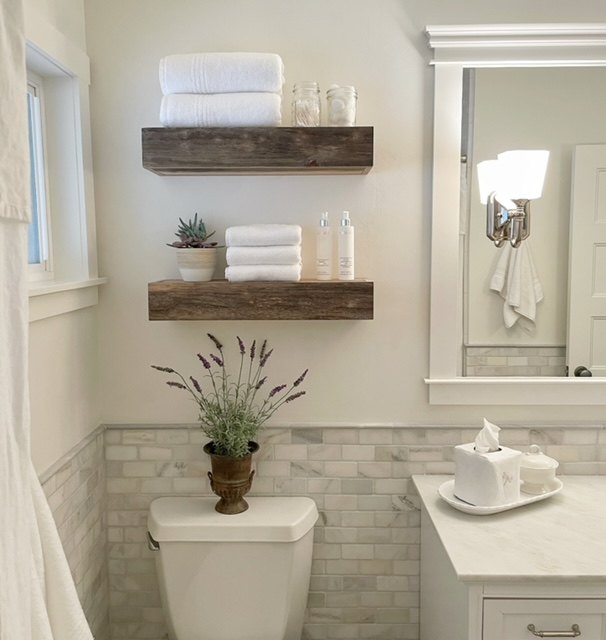
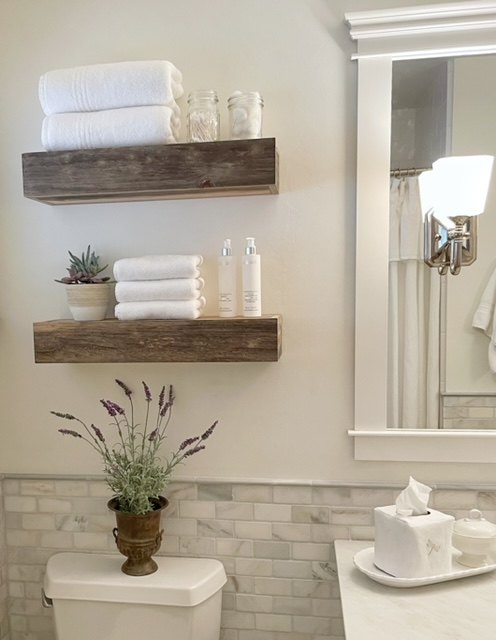
DIY Floating Box Shelves With Hidden Storage
These rustic shelves look so good in my guest bath! They were so easy to make and the added bonus is: the tops open up for extra storage inside!


So here’s how we made them:
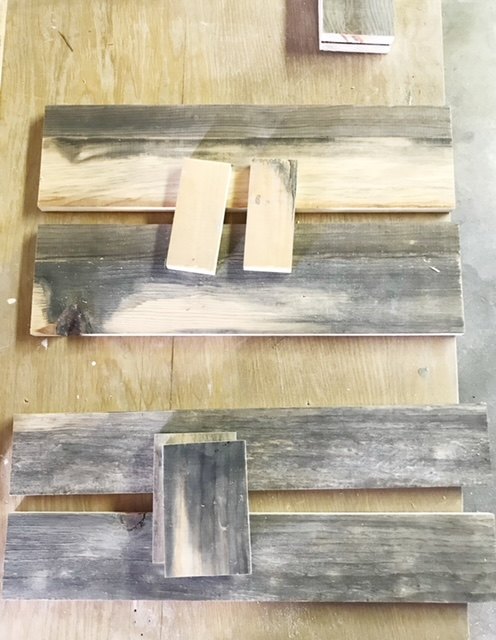
We used some of the old weathered pine
we’ve had since 1988 when we lived in Northern California (you can read the story about that HERE)
But don’t worry — if you don’t have authentic old weathered wood — there’s a stain you can use that will weather it.
Basically, you’re going to make a box that’s 24" long, 7 1/2" deep, and 4" high
Cut a front and a back piece that’s 24 long by 4 high
Cut a top and bottom that are 24 x 7/12 minus 2 thicknesses of your wood all the way around (the tops, bottoms and sides will be nailed inside these pieces)
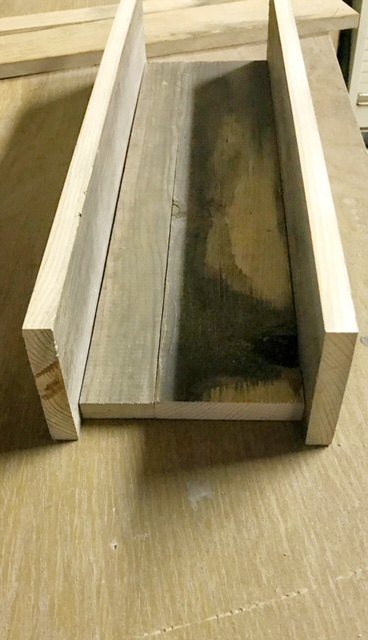
This is how it will fit together.
Next cut 2 sides 7 1/2 x 4 minus 2 thicknesses of your wood all the way around.
Nail the front of the box to the bottom and sides.
Then nail the back on.
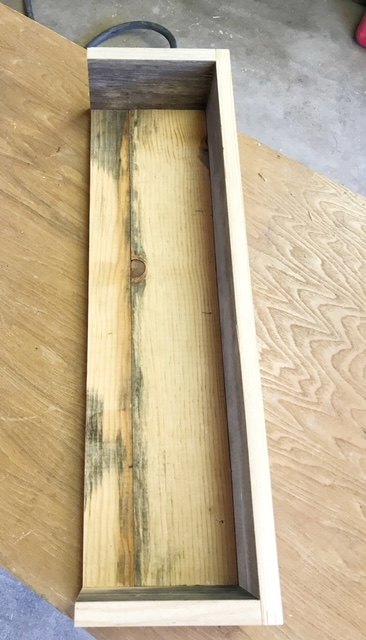
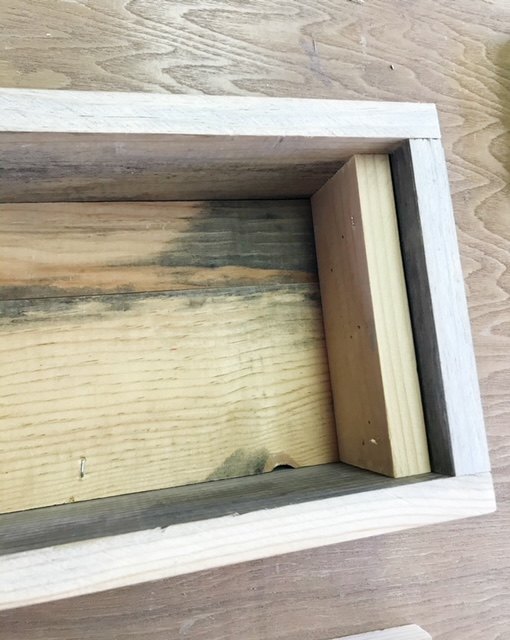
Cut 2 pieces of wood to go inside the ends that are just shorter than the thickness of the top and nail them to the sides.
This is what will support the top of the shelf.
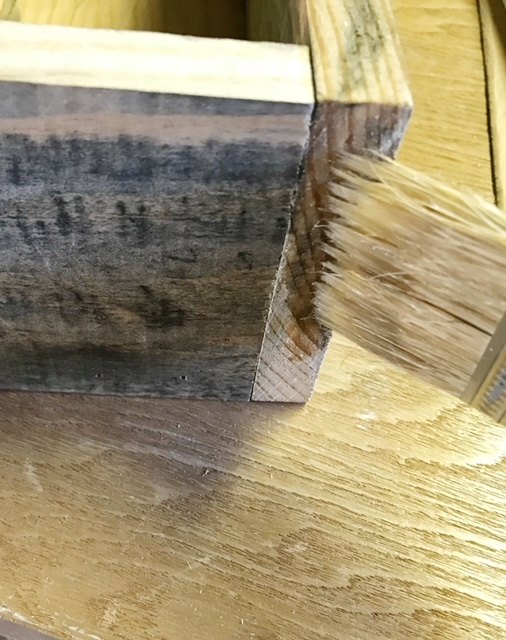
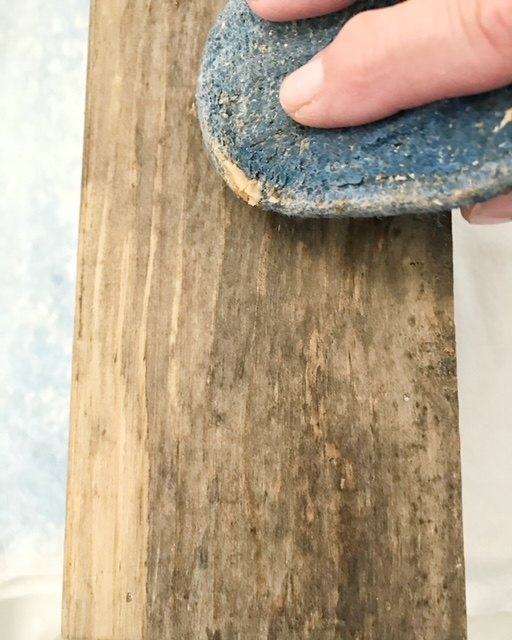
If you used weathered wood, you’re going to want to stain the raw edges with ‘weathered wood accelerator’ stain so it blends with the rest of the shelf.
If you didn’t use weathered wood but you want that look, stain the whole piece with accelerator stain. Let it dry overnight.
Apply a coat of clear finishing wax for a subtle low luster finish
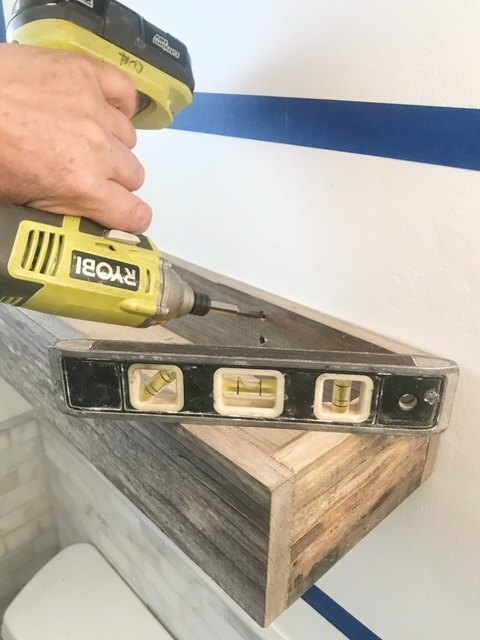
Screw the back of the box to studs in your wall making sure it’s level.
NOTE: Our box shelves were very light because we used old dried wood and I don’t put anything heavy in or on top of them. But if your box shelves are made with heavier wood, you should mount them to the wall using a floating shelf bracket system that will give them more support and keep them from falling off of the wall.
Place the lid on your box shelf and you’re done.
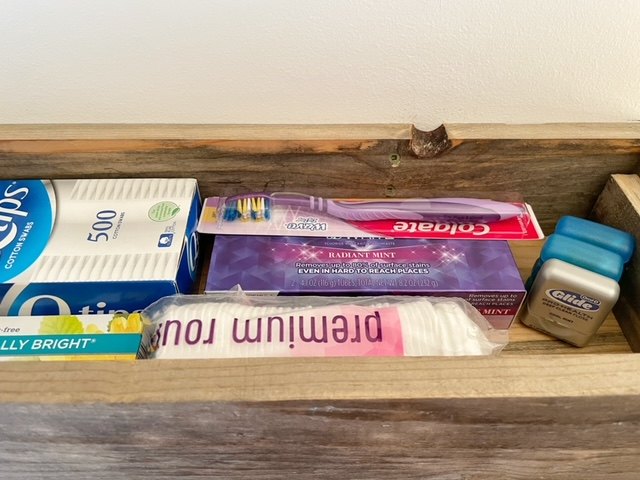
Just remove the top for access to storage inside.
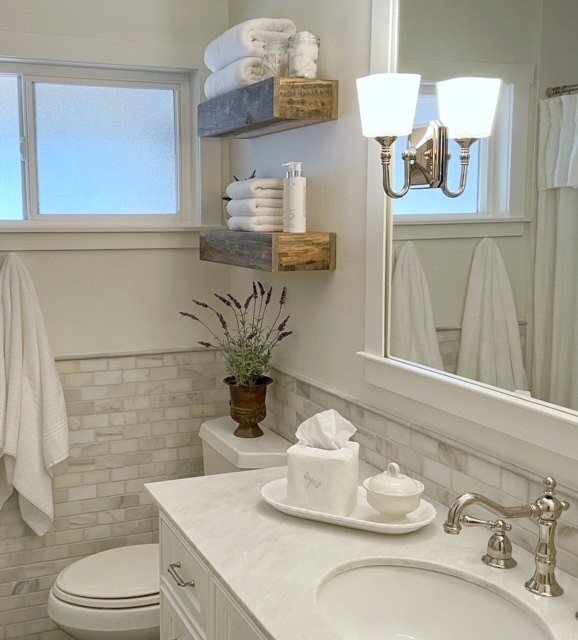
Who couldn’t use a little more storage in the bath right??
Click HERE to see the before and after of this Guest Bath DIY makeover
Resources for this project:
See all materials


Comments
Join the conversation
-
Nice idea. But I’m only 5’2”. And I would not be able to reach then
-
Love the look of these shelves but not as usable bathroom storage, too much trouble to get into the storage on a regular basis... eventually, our lazy butts would just leave the top off and we'd have two open containers on the wall, which might be alright, but we'd lose the pretty shelf space. However, as a secret hiddy-hole... now that's an idea!! Who'd think to look for your jewels in the bathroom, right?!!


Frequently asked questions
Have a question about this project?
Could you just hinge the front piece and use the front to lift up and show your items? That might be easier to use
Too much work 😉 but great idea. Where can I buy them?
They could be made to go anywhere. @InteriorRedoux Is just showing where, how she made and put them. These could be used in your living room or bedroom too. Or the kitchen. I knownim looking for an idea to put all my cooking utensils because i don't have a lot of drawer space.
Great idea! I love it. Could you link the kind of bracket you suggested to the post? Im a very new DUY'er. My father can't get out there anymore to make stuff. Thanks!! 😊