


How to Make a Built-In Spice Rack | Thistlewood Farms

Spice organization can get a little overwhelming.
The key to successful organization is to keep the spices where you can see them and keep them in a place where you can reach them.
That's why this built-in spice rack is perfect.
You use the back of the cabinet as part of the spice rack and build around it.
Here's the step-by-step on how we built it.
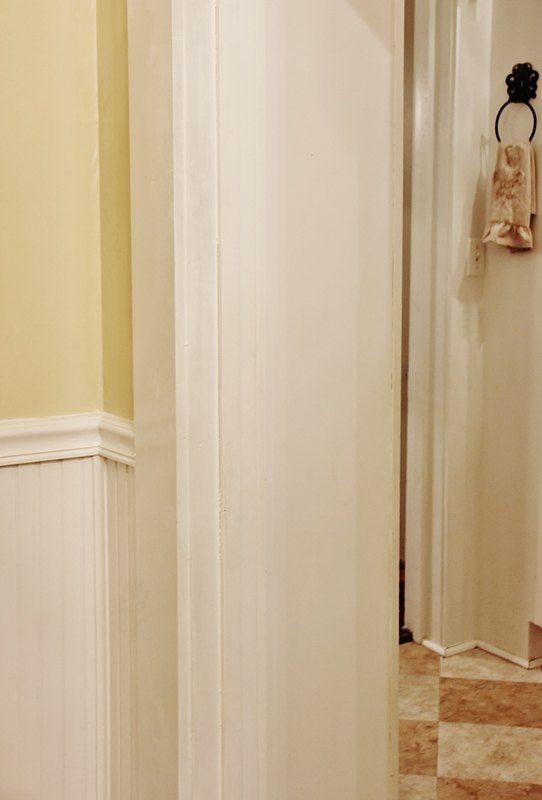
Step 1: Start with the blank side of a cabinet
This photo is the butler’s pantry with the empty side of the cabinet showing.
There's enough space to add wood to the side to create a raised panel surround.
It's the perfect place to keep spices in the butler's pantry.
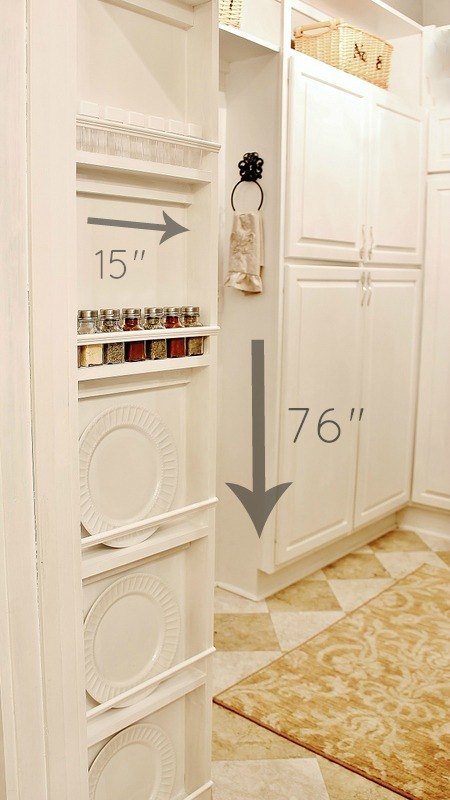
Step 2: Frame out side of cabinet with 1″ x 3″
We built a basic frame with the 1″x 3″ and nailed it to the side of the cabinet.
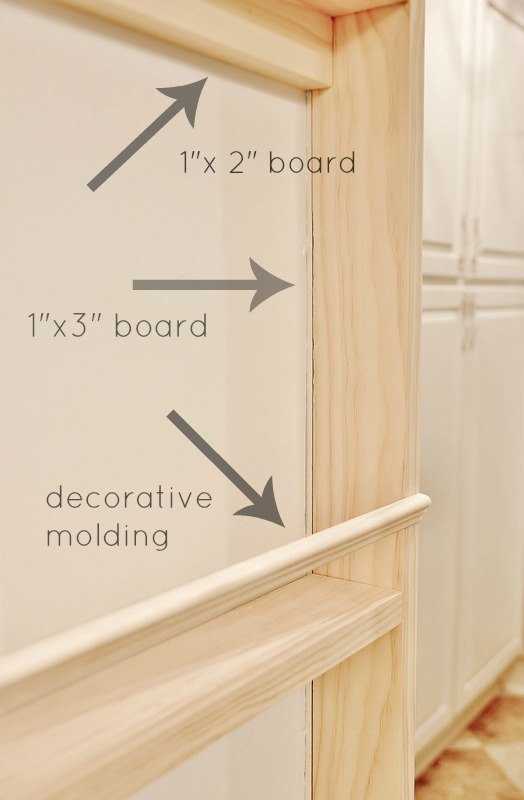
Step 3: Add shelving
Each shelf was a basic 1″x 3″ supported by a 1″x 2″ to hold it in place.
Each piece was cut to 15″.
The supports were nailed directly into the back of the cabinet and then the shelves were nailed into the supports.
Step 4: Add decorative molding
To keep the spices in place….a piece of decorative molding was nailed to the front of the shelf.
It was nailed 1 1/2 inches from the bottom of the shelf.
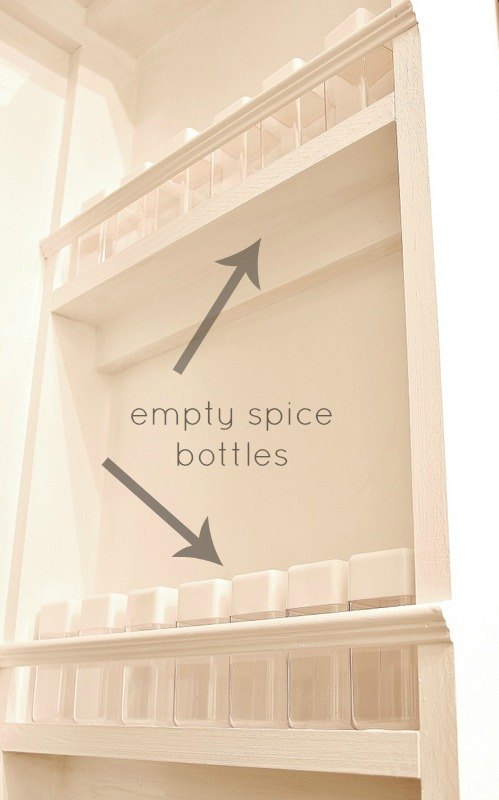
4.Add spice bottles
Fill bottles with spices.
Add them to the rack and line them up. We added about 18 spice bottles to the spice rack. You could add more rows if you have more spices.
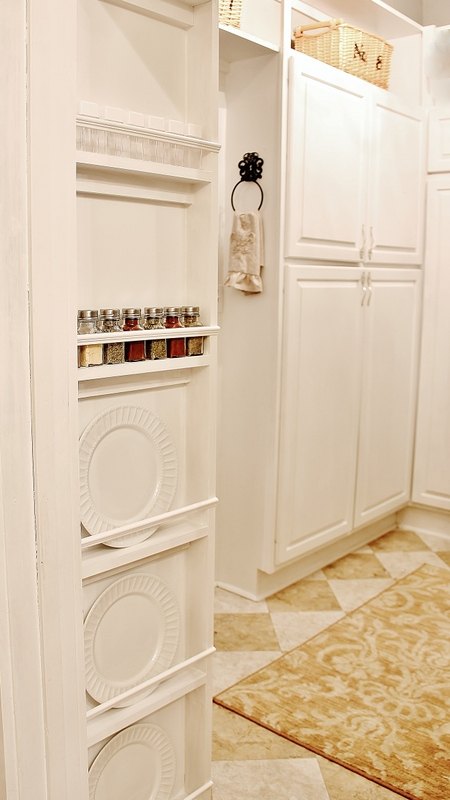
Here's the finished spice rack in our kitchen.
It's the perfect place to keep the spices and keep everything organized for easy recipe access.
Now? There's a place for everything and now everything is in its place.
If you like this project?
Here are a few more kitchen projects for you:


Comments
Join the conversation
-
Great idea. Can use it display pretty plates or other decorative items. Unfortunately I don't have any place to do this in my house but it's nice.
-
Great idea. So many, myself included, use cabinet closest to cooktop. Not ideal as heat reduces freshness of spices. (Only place I have). Your work is lovely


Frequently asked questions
Have a question about this project?
LOVE IT!! Two questions:
1 - What color paint did you use on the cabinets? It is such a soft, lovely color. Rust-oleum flat white is what you have listed under the materials. Did you paint all the cabinets with it? They sure look much warmer than flat white. Plus, that's a lot of Rust-oleum!
2 - In the step 4 picture you showed spice jars with square lids that blended beautifully with the cabinet. In the finished picture the filled bottles had silver tops. Where did you find the ones in step 4? They were perfect.
Thank you for the additional information. Very rich and functional project.