


Modern Farmhouse DIY Drop Zone - 804 Sycamore
We have a small space, the size of a small closet, right off our interior garage door. As soon as we walk into our house, we take off our shoes, jackets, hats, and bags. It’s the perfect location for a drop zone, but it’s quite small and the builder-grade version wasn’t built-out to its full potential. When I first approached the idea of making over our modern farmhouse drop zone, I measured it all and then used graph paper to sketch my design. I considered our family’s needs and the size I had to work with to create a practical design. Thinking bigger and better, I redesigned the sketch on graph paper and felt ready to move forward on my modern farmhouse DIY drop zone.
The only problem troubling me is that I was worried about cutting all the plywood correctly. Cut too small, it’s possibly unusable for this project. Cut too large… well let’s just say it’s very aggravating for an impatient person to have to recut the same piece two or even three times. It was stressing me out. My table saw is difficult for me to use, and it would take a lot of measuring, checking angles, marking boards, and cutting plywood with my circular saw to get each piece correct. It made me wonder if the trouble of cutting wood accurately is often a deterrent to some DIYers like myself. I love DIYing and the risk of wrong cuts is really stressful to me. But luckily, I stumbled upon Ana White’s Shelf Help website.
Modern Farmhouse DIY Drop Zone – Shelf Help Now
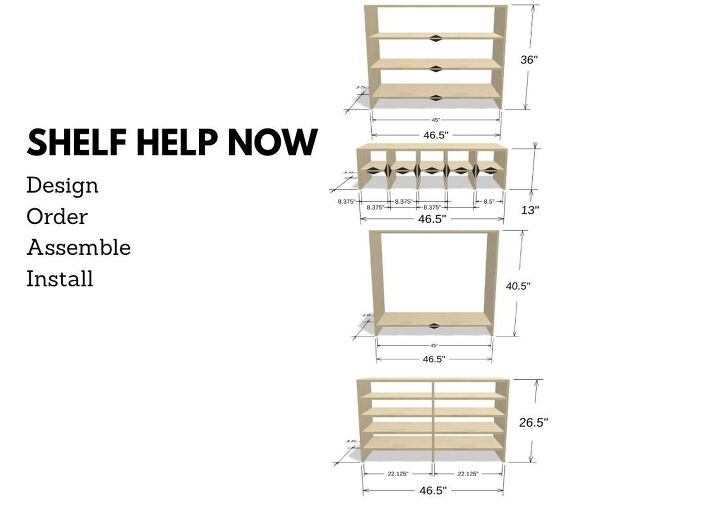
When I originally found the site and was thrilled to use her free design tool to help me design the entire modern farmhouse DIY drop zone. Forget the graph paper hassle and counting all those darn squares, her Shelf Help design tool was thrilling to say the least. Then I realized that once designed, I could order the plywood pieces needed to assemble my design. The Shelf Help website is easy to navigate and straight forward. Each step in the process has it’s own section where Ana gives direction and tips for that step of the process. That’s how I knew to design my drop zone units a little smaller width than the drop zone space. This is because wall aren’t usually perfectly square and you can use finish trim pieces to cover any gaps and give your built-in a professional look. She also advises to leave some space at the top so that you don’t damage the ceiling when installing the top box – a trim piece along the top covers the gap anyway.
The other amazing thing about ordering Shelf Help’s custom cut plywood is that the front side of each piece is finished which is a huge bonus and time saver for the DIYer. When you order your design, you can then download each design to see how the pieces will be assembled. Using the downloaded design makes assembly fool proof and seamless. Then you only need to make sure that all the finished fronts are facing the same side and that you drill your pocket holes in the correct placement.
I set up each carcass with the finished edge facing up. This way I would be able to easily know where to drill my pocket holes.
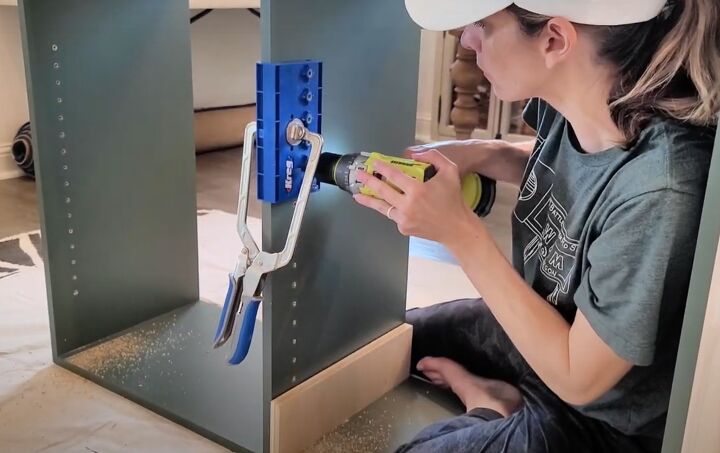
For Shelf Help designs, all you need is a pocket hole jig to securely fasten your pieces together. I have used my Kreg Pocket Hole Jig for many projects now and I can’t imagine not having it. The jig comes with easy instructions and all the bits you’ll need to drill the pocket holes and then fasten the Kreg screws. For the Shelf Help plywood, I used 1.25″ Kreg screws (be sure to not over-drive your screws and check the torque setting). Ana gives directions and tips for assembling your built-in boxes, information on how to build doors and drawers, stabilize the boxes, installation, and more. The plywood is nice too and shipped so quickly that I was amazed it could be cut and shipped so timely.
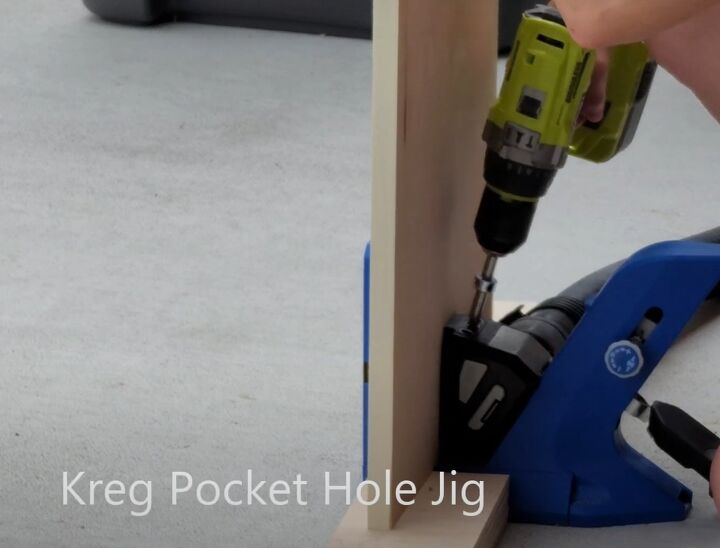
Drilling pocket holes is so easy with the Kreg jig. I also like to hook up my shop vac to the jig to help with sawdust clean up.
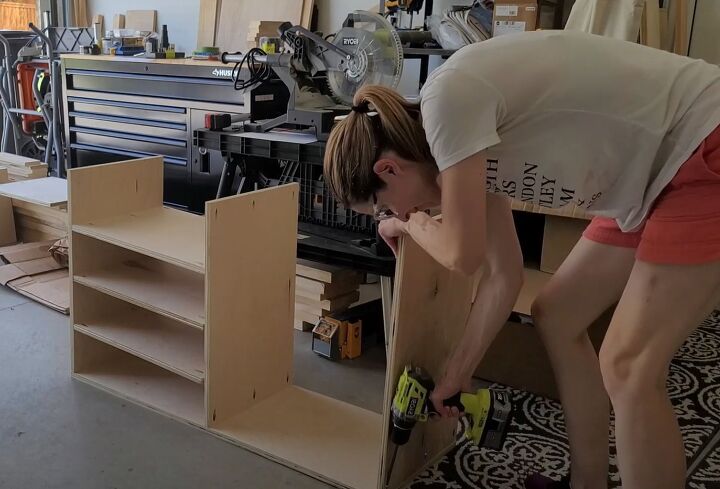
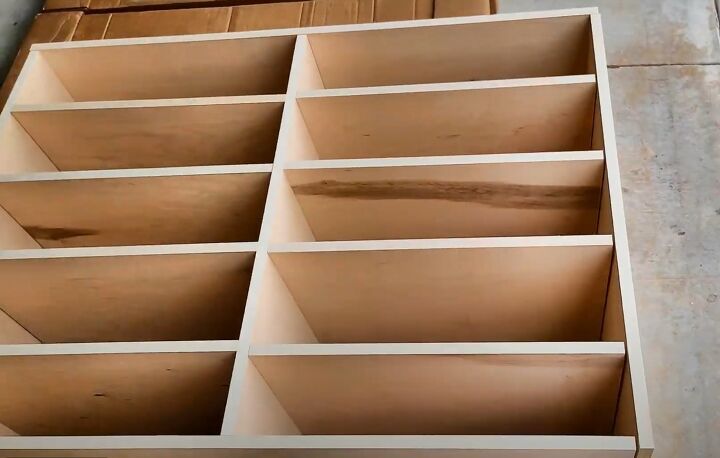
With all the pocket holes drilled, it was easy to assemble each carcass with a drill gun and Kreg screws. Make sure your finished edges are all facing out.
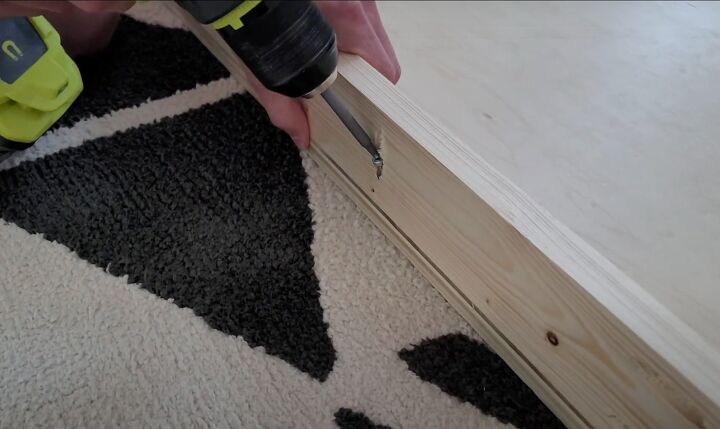
Some of the carcasses got a 1x3 pine board added along the top inside of the box. I just drilled pocket holes and attached the board to the box. Be sure to cut a snug fitting board as your bay support.

Our modern farmhouse DIY drop zone was a big project, especially for one person, but having Shelf Help to design my space and cut the wood was a major advantage to progressing this project along. Once all the boxes were assembled and secured with 1×3″ bay supports, I could move forward with priming and painting them as well as my shiplap backdrop boards. I wanted the back of the coat box to have a decorative look and some detail – shiplap was it for me. I used Kilz 2 primer, and Sherwin Williams 6208 Pewter Green with an additive to smooth out brush strokes.
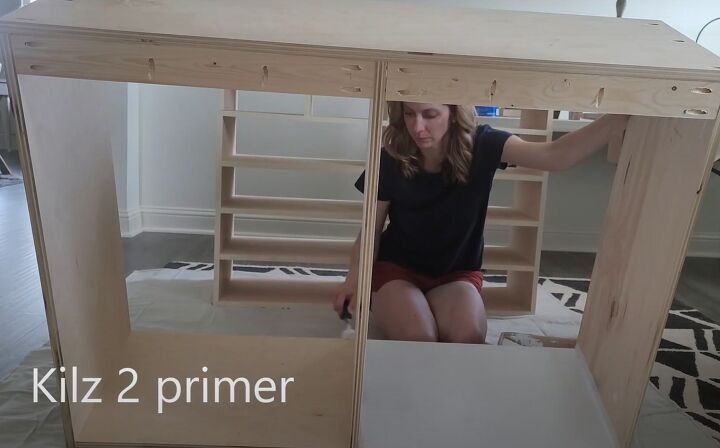
After all the boxes were built, I primed and painted them. Be sure to lightly sand the surface with a 220 grit sanding sponge in between coats. Each layer of paint should be completely dry before adding additional coats. I also added a layer of polyurethane to the shelves and highly used surfaces for extra durability.
At this point, I was ready to demo the existing drop zone and prep the area for installation. I had to get my stud finder out and make sure I took care attaching the boxes to the wall studs for a secure installation. I purchased several sizes of shims to fit in between my boxes and the wall. If you don’t use shims, you box will shift when you screw it into the stud. Jeremy helped me shim the entire drop zone. He would test out different sizes to get a snug fit, then I would saw the piece so that it lined up with the edge. Each box was then predrilled with a counter-sink bit so that the screw would be flush. I used 3.5″ screws to install the boxes to the studs. The boxes are also screwed together to add more stability and to prevent bowing.
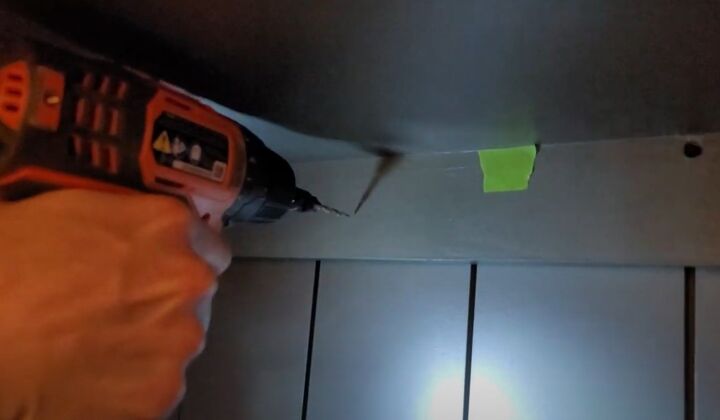
Add shims to get the carcass level, and then predrill holes to attach each box directly into the studs. The bay support provides a surface to drill into and attach this carcass to the wall.
Once all four boxes were level, shimmed, and secured into the wall studs, I patched the screw holes with DAP DryDex Spackling and once dry sanded them smooth. I like the time-indicator spackle so that I know when it’s safe to sand and paint. Be sure to clean the surface of dust after sanding, before you paint. My next step was building the face frame using 1×2 primed pine boards. Shelf Help directs you to assemble the face frame all together with some pocket holes connections and then set it in place to secure with brad nails. Because of my baseboards and ceiling fixtures, I couldn’t preassemble. So, I cut the outside face frame boards the full length of the built-in and then measured, cut, and installed the horizontal boards.
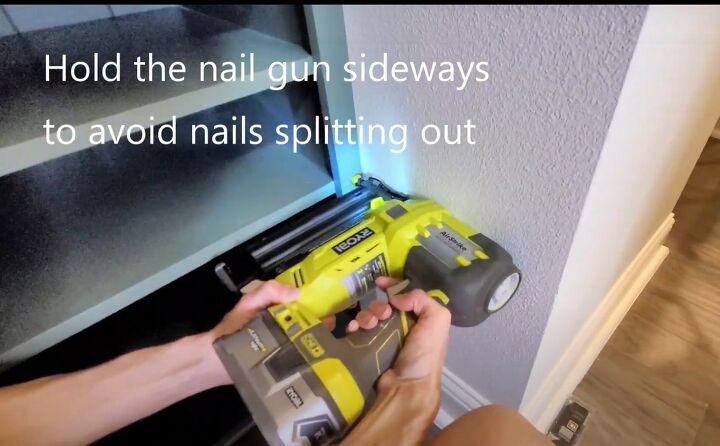
The direction you hold the brad nail gun makes a difference. Hold the nail gun sideways to avoid the nail splitting out of the side of the box. A nail will only split to the left or right (not vertically).
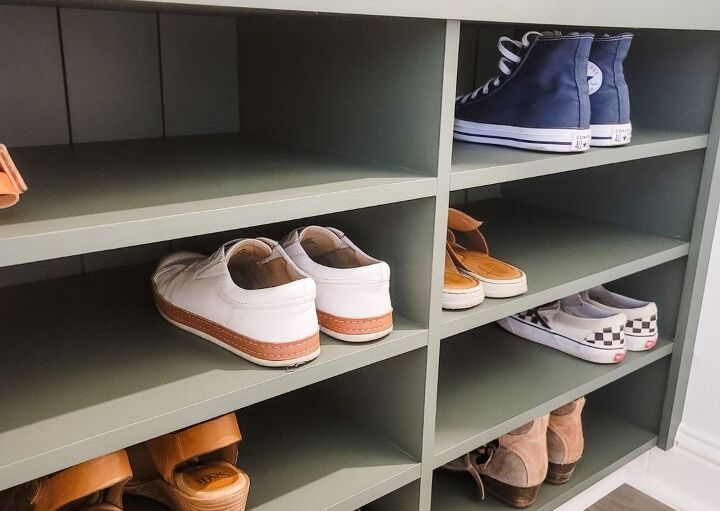
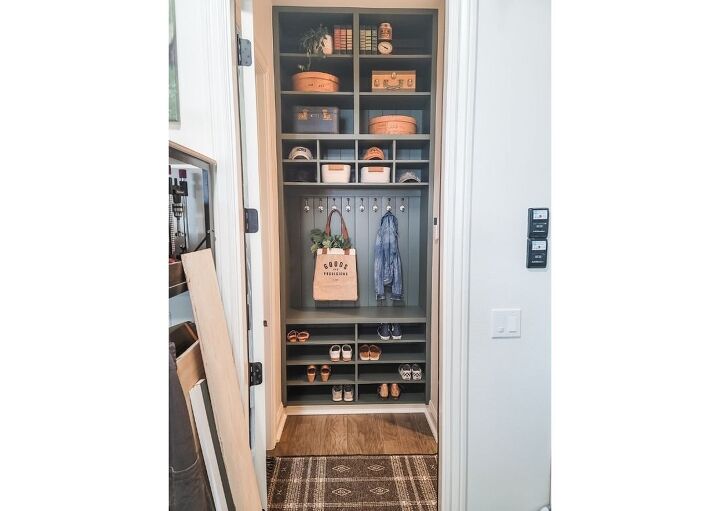
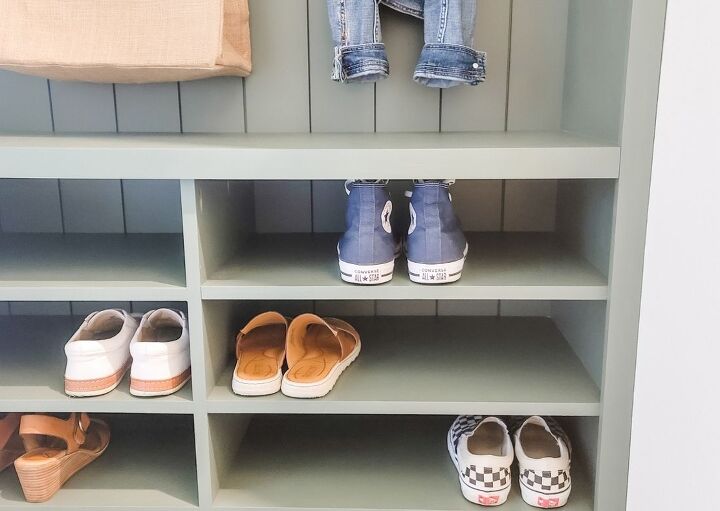
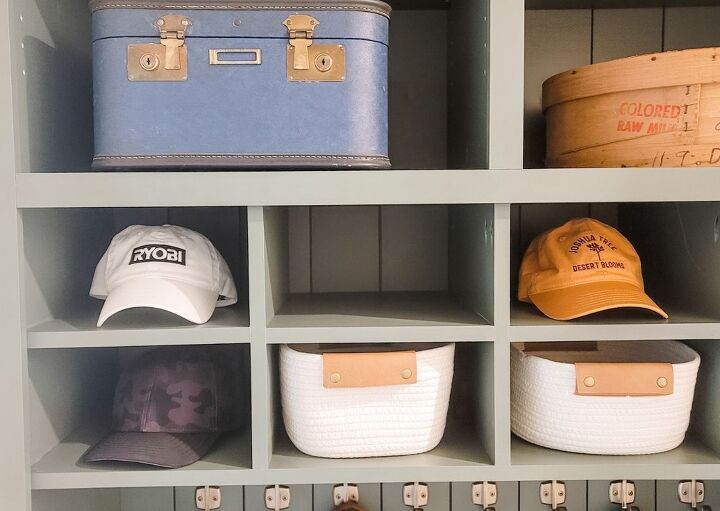
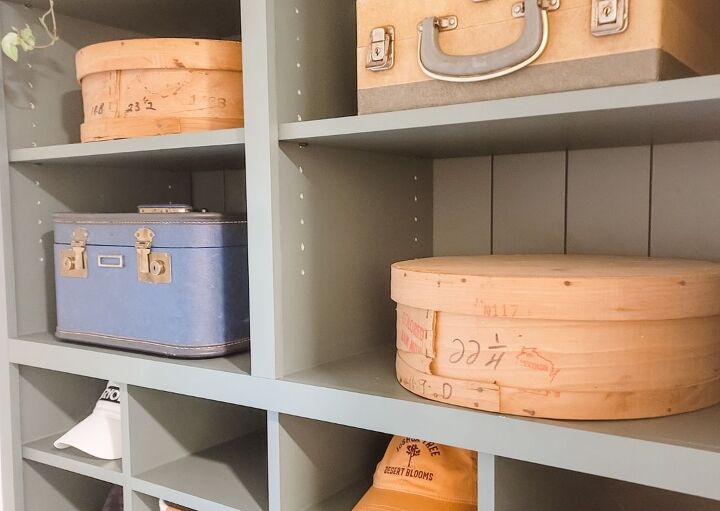
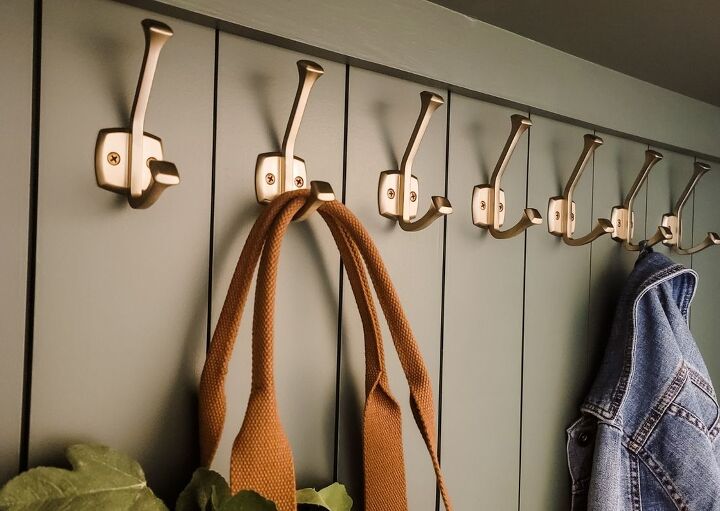
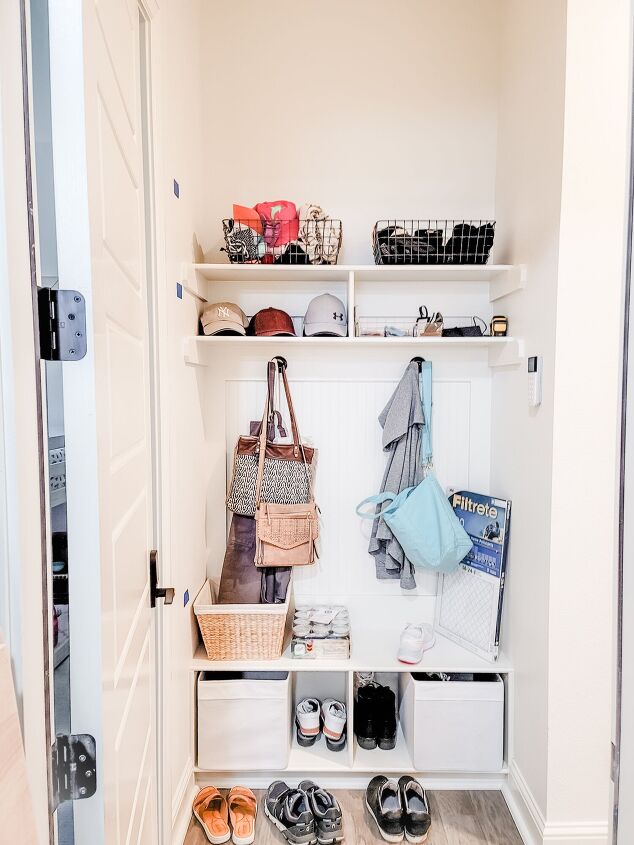
All my face frame boards were painted with two coats and then installed with a brad nail gun and 1.25″ nails. Then I patched the holes with spackle, let dry, cleaned the surface, and painted the spots. With the face frame in place and painted, there are just a few more steps to finalize our modern farmhouse DIY drop zone. To protect the shoe shelves, I ordered custom cut acrylic to line the shelves. I also measured and marked the coat hook placement and installed these eight hooks. We quickly realized that instead of making the top shoe shelves into drawers, we would use the space for our much needed shoe storage and Jeremy can places his keys and wallet in the little basket within the hat cubbies.
I used the Kreg pin hole jig to add pin holes for my adjustable shelves. It's so easy to use and adds a professional touch to built-ins.
Modern Farmhouse DIY Drop Zone – Shop this space
My original plan was to build cabinet doors for the top box. The top box will be for seasonal storage that we want unseen. However, to properly make doors, I would need a router, a router table, and bits to cut the joints. At this point, I’m not going to invest is this specific equipment and instead I’ll order custom doors to fit my box. The doors will be ordered very soon and I’ll post more photos on Instagram when they’re installed~
So, with the last finishing touches well on their way, it is so amazing to have the drop zone completed and in use. It’s so nice to have this area as a space to organize the things we use daily. I couldn’t imagine creating this built-in without the help of Shelf Help Now – and now I can’t wait to redesign our pantry space! Do you have a space that you’d like to add a built-in to? Let me know in the comments below.
BEFORE: wasted space above, not enough storage for shoes, hats, and coats.

AFTER

Tags:
Ana Whitecreate a drop zonediy built-indiy drop zonediy home projecteasy drop zonehow to create built-inshow to design drop zoneKreg jigmodern farmhouse built-insModern Farmhouse DIY Drop Zoneshelf help nowSherwin Williamsshiplap


Comments
Join the conversation
-
I, too, am intimidated by my table saw and cutting wood with it. I did make friends with it for a huge kitchen project, however. I never dreamed that there are places out there to order wood cut to specifics. What you designed and put together is awesome. Useful and beautiful. Congrats on a job well done.
-
Well done and great tips!


Frequently asked questions
Have a question about this project?