


Rainbow Shelf- With a Craft Knife

Who wants a bland store-bought shelf when you can cuten it up without touching a jigsaw?
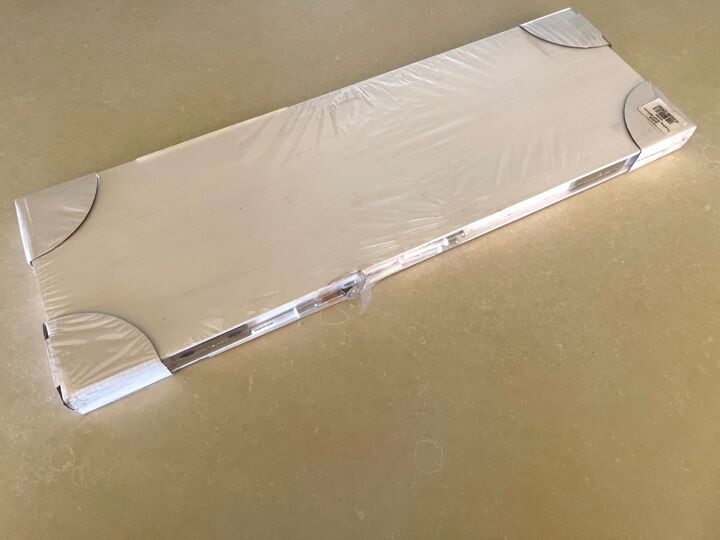
It so happened that I had two brand new floating shelves spare. They were bought for a specific spot, didn’t fit and were lugged across the country, only to gather dust in the garage for two years. If you needed such a decor-critical item like a rainbow shelf but didn’t own a ready-made shelf, I am sure that you could whip up your own in your workshop without a tutorial. But this tutorial is for the rest of us whose skills and tool collections only extend as far as craft knives and box-cutters.
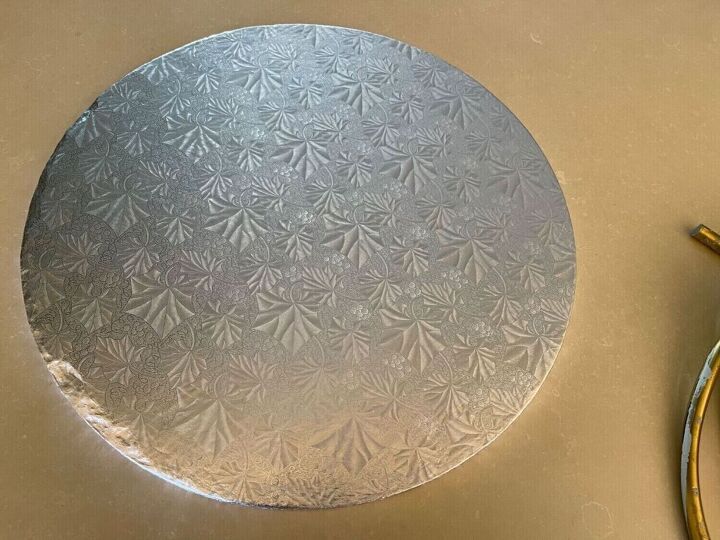
Apart from the ready-made shelf, the other easy non-saw part is a large cardboard cake board instead of the usual wood round. It can be any size except larger than the length of the shelf.

You will also need some soft PVC clear tubing, in my case a peeling gold relic of a paint job gone wrong. My peeling pipe definitely had its drawbacks, so use smooth, new tubing.
Optional hanging rod
Before accusations start flying around over me lying about not using power tools, the next part is optional. Read on and then decide whether you want use this idea.
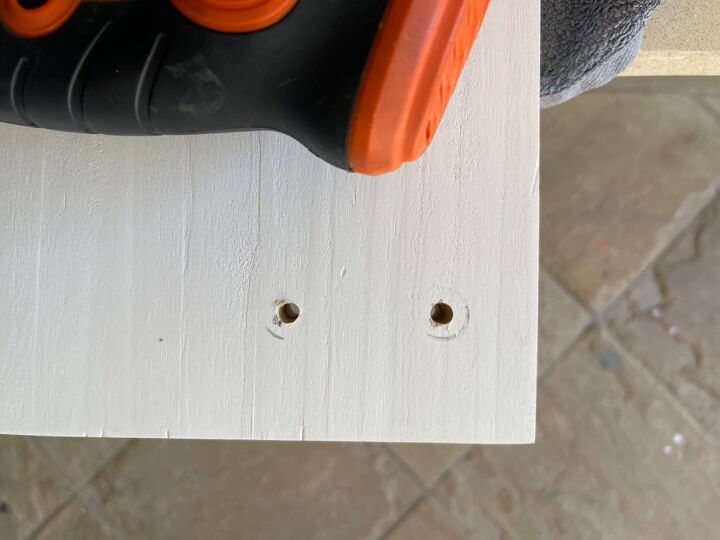
I saw a great way to add more hanging space to a shelf. It involves drilling two holes on both sides of the shelf so that you can thread some thick twine through to hang a dowel rod from.
To do this you need to attach a big drill bit to a drill. While trying to do this I managed to loosen the front of the drill to such an extent that a screw fell out! Apparently the fact that such a large drill bit exists doesn’t mean it should be attached to a drill. Go figure.
But fear not, actually, do fear, a great deal…I managed to screw it back into the dark bowels of the drill, not quite knowing whether I attached it properly or what the consequences would be had I not or what I did wrong in the first place.
By hook or by crook I managed to drill my four big holes, pilot holes and all. You can see exactly where from the picture above.
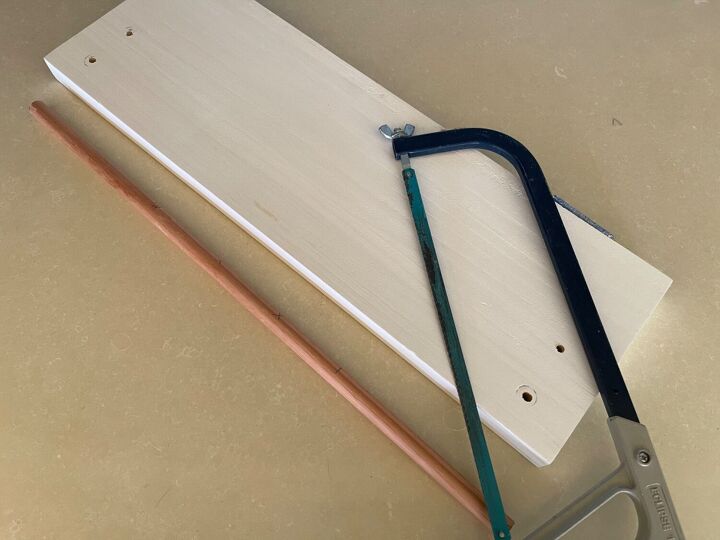
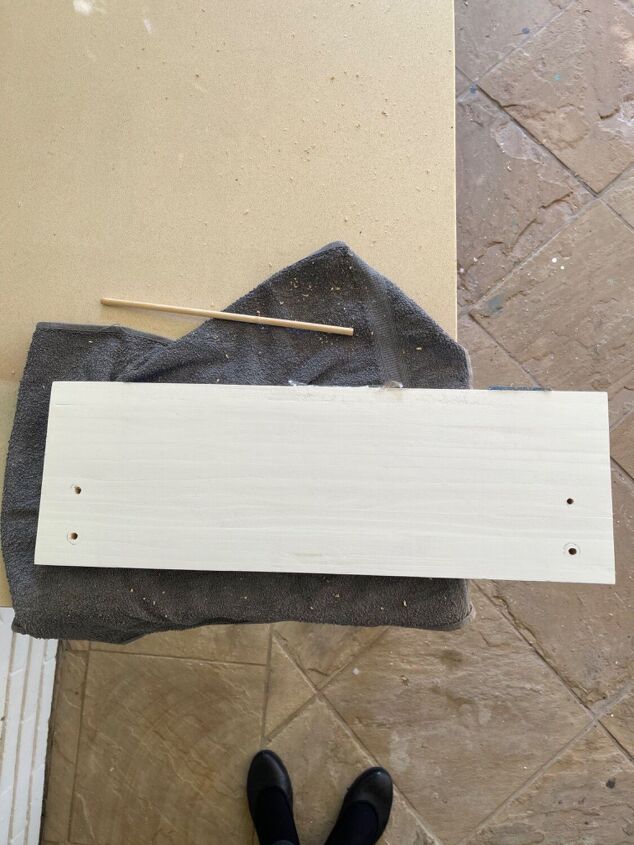
Plus I trimmed a thickish dowel down to
the length of the shelf with a hack-saw, without splintering the wood. Progress. I painted it blue.
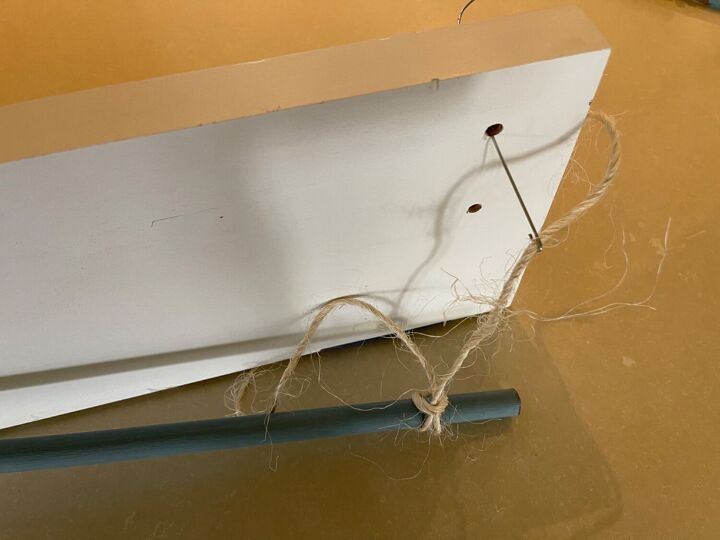
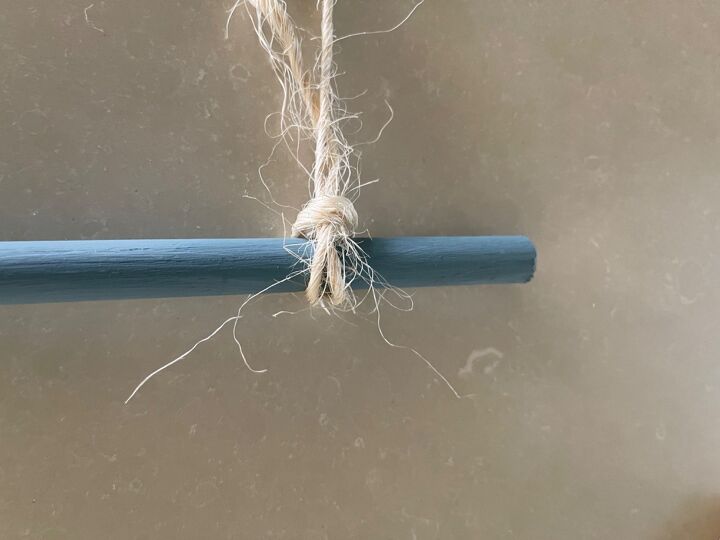
Next, I folded a piece of twine double and tied one of those basic macrame knots to the dowel. Using a hooked wire, I threaded one strand of twine through the front hole and the other through the back and tied a knot at the top.
The easiest way to get the rod level is to place the shelf over a kitchen counter with the the rod dangling over the edge and then to adjust and knot the second side. As I said, this is a cute but totally optional addition to the shelf.
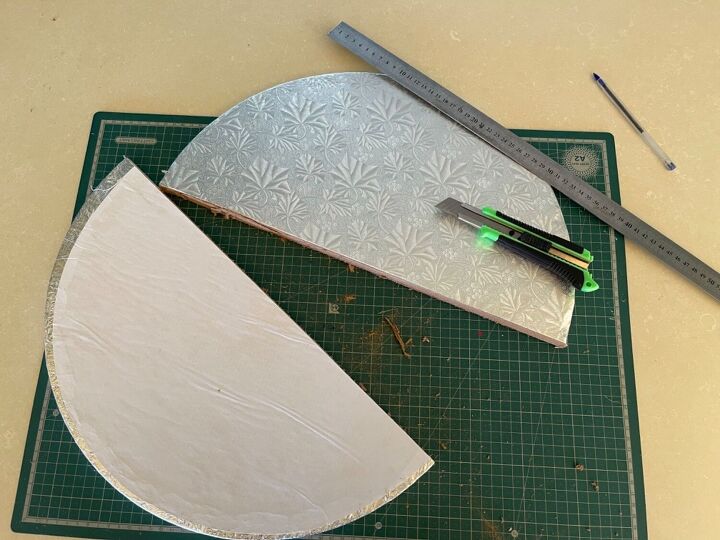
Halve the cake board, making sure that you have a square, flat trim line.
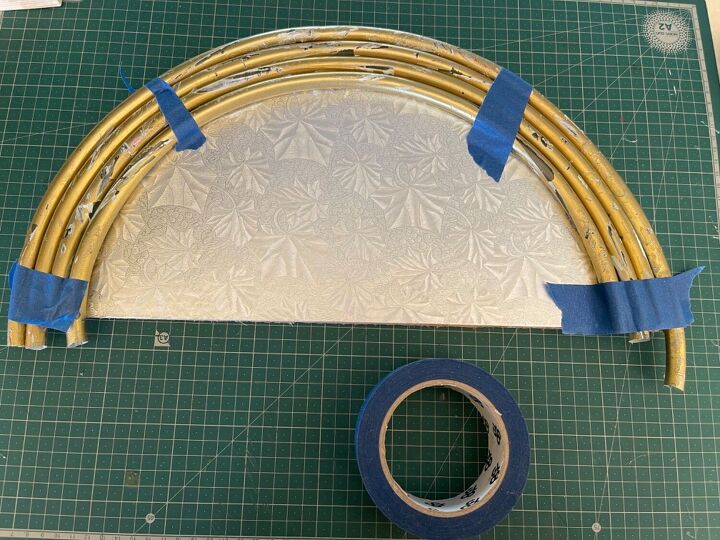
Next up is to start sticking pieces of pipe in a semi-circle onto the cake board. I prefer using contact adhesive because it works well on smooth surfaces. The only downside is that you have to wait a couple of minutes each time for it to get tacky, so the process took about an hour. Leave the pipe longer than the board so that you can trim it down later.
Stick the pipes very close to each other so that you don’t see gaps after painting. I not only used glue for the surface of the board but also where the two pipes touch each other. Using yellow contact adhesive meant that I could see the squelches of glue and wipe them away.
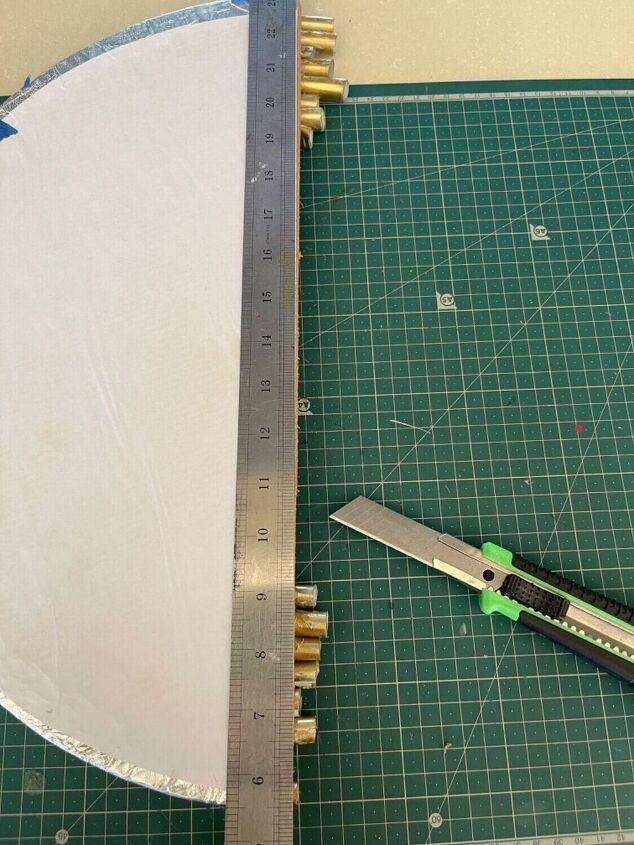
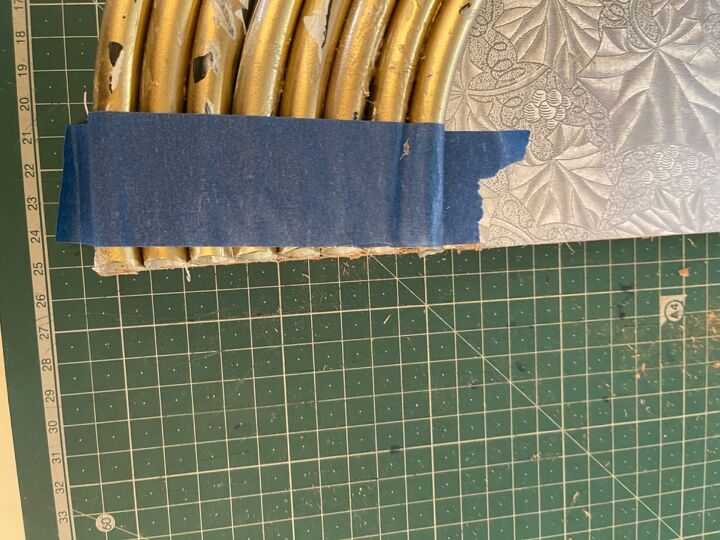
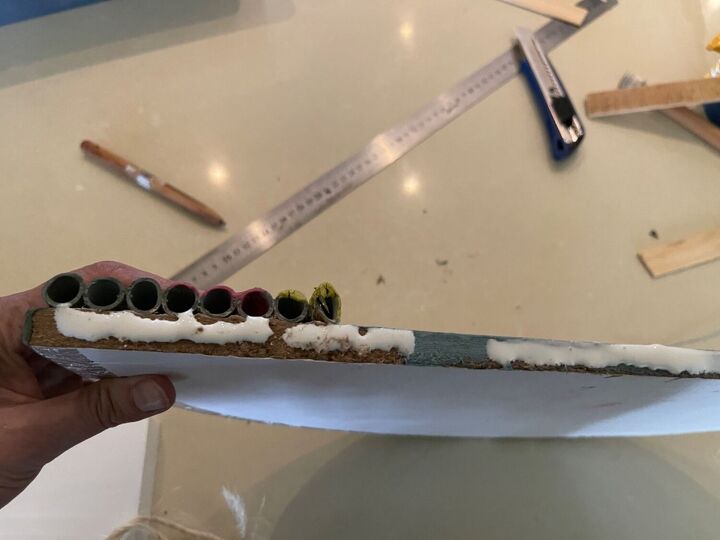
Once dried, trim the pipes down by sticking some painter’s tape across the set, then turning the pipes to face down on a cutting mat and using a steel ruler as a guide.
After removing the tape you should be left with a tidy line.
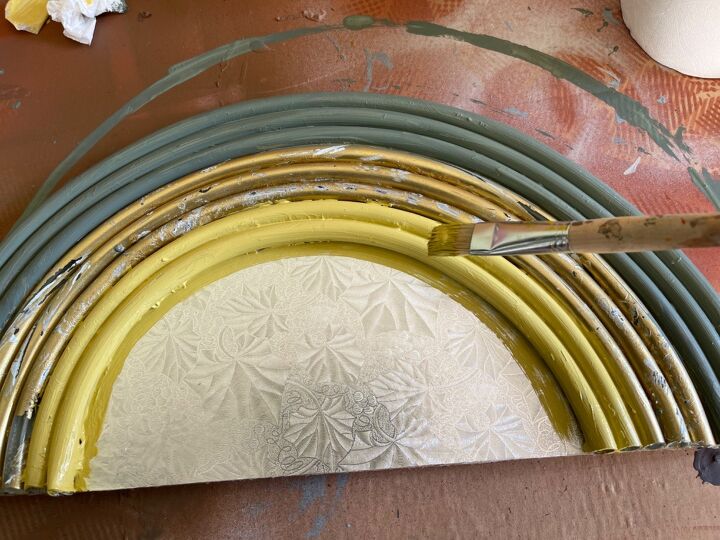
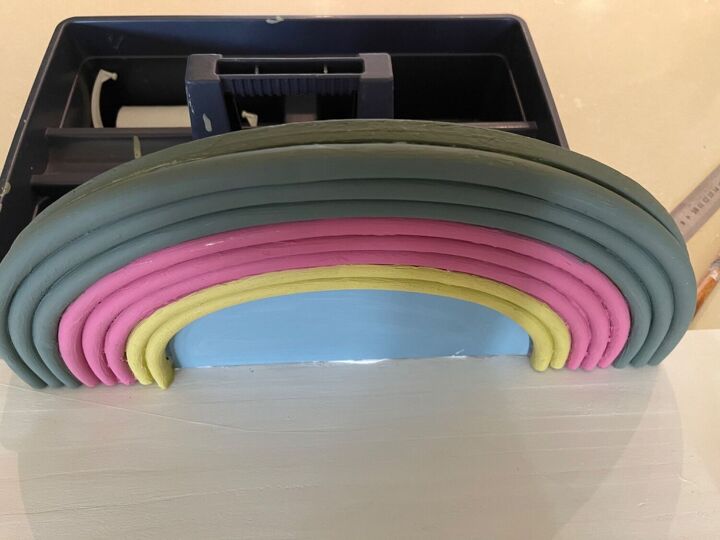
I don’t know if there is any scientific basis for leaving the pipe to settle for a couple of hours before painting but it seems that the more compressed parts move and crack if you paint them too soon. Chalk paint is forgiving and covers any unsightly gaps because you can slap it on quite thickly. Except when it looks like mine. It’s good but it’s not that good.
The bane of my crafting life is glue not sticking, so I am getting more particular as time goes by. This time I used a combination of wood- and hot glue to stabilize the join between the cake board and shelf. I first applied wood glue but left gaps for the hot glue. Stick the cake board on the back edge of the shelf where it would be supported by the wall once hung.
Wipe away any wood glue and leave to dry.
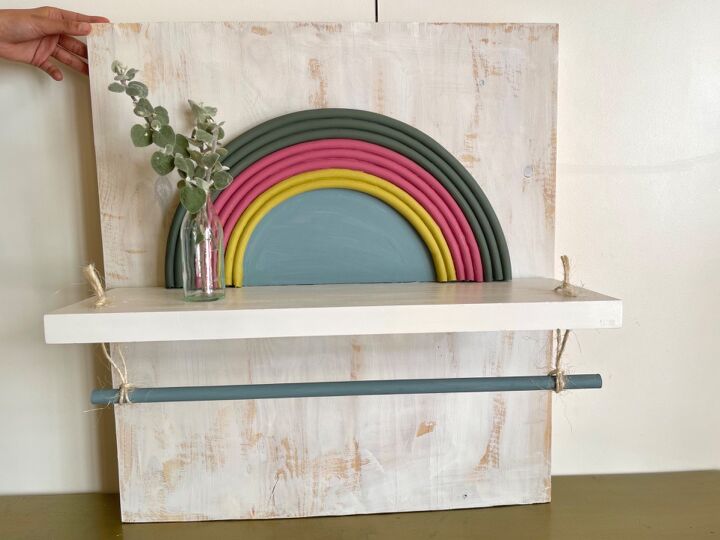
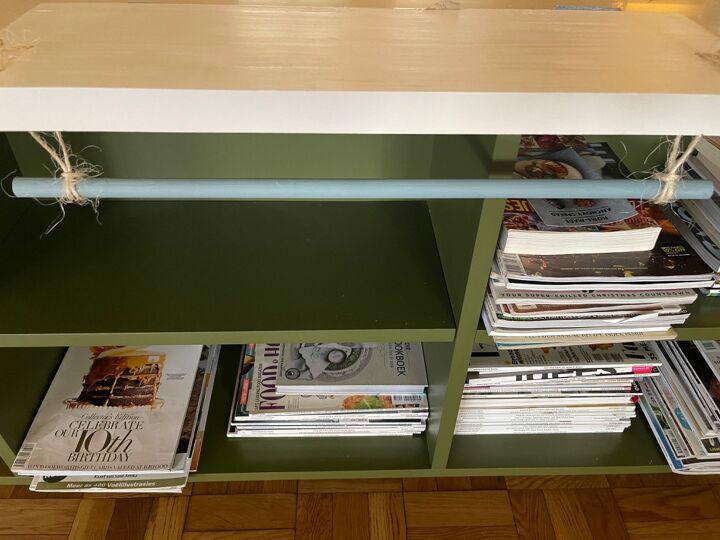
In order to balance out the uneven texture of mine, I mounted the shelf on a piece of distressed pine but normally you would just mount it against a wall.
Resources for this project:
See all materials


Comments
Join the conversation
-
Another original by Thea, your posts are always an enjoyable read !
-
Hi Thea. Hope you are well. Bet you thought I had dropped off the face of the earth. Nope, I’m still here. Decided to take a sabbatical for a couple of months which turned into 8 months now. 😳 During this time, our family has been blessed with our first grandchild and I’ve been totally dedicated to loving on this baby as much as I can. This is the first time I’ve even been on Hometalk in months. I see you are continuing to being very artistic and making unique projects. This shelf is lovely. And you would never have guessed what you used to make it if hadn’t told us. Another great job! I’ll be posting a new project pretty soon. BTW, your new profile photo is very nice.


Frequently asked questions
Have a question about this project?
What type of paint did you use?