


How to Clean an Oven Inside and Out

Learning how to clean an oven is sort of like cleaning a toilet. It’s not very exciting, but someone has to do the job.
Of course, you can use the self-cleaning function on your oven for this joyful task, but this method can be far from perfect (we’ll talk about that shortly).
Our guide gives you pain-free ways to deep clean your oven, and the tricks you need to know to keep it that way.

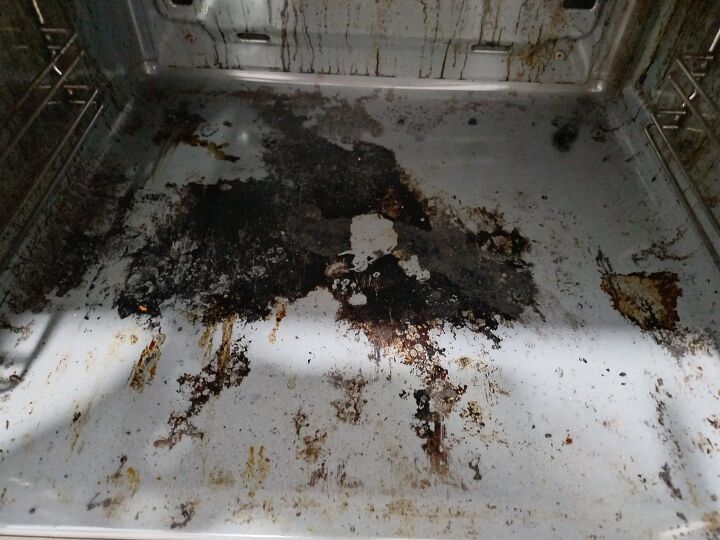
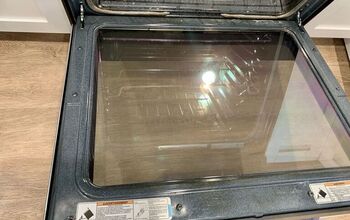
Photo via Julien K., Hometalk Team
How Often Should You Clean Your Oven?
Your oven is usually one of the most neglected parts of your kitchen when it comes to cleaning. But, your nose will know when it’s time to give it a good clean. It’s never a good sign if every time you cook, you smell something burning or you see smoke coming from it.
If your oven isn't smelly or smoking then you know it’s time to clean it when you’ve spilled something, a dish overflowed while baking, or you can’t see through the glass door anymore to check on your meal.
Even if there are no telltale signs that you need to clean your oven, it still needs to be cleaned regularly, but how often you clean your oven depends on how often you cook.
If you are an avid cook, you’ll have to clean more often than the occasional cook, but deep cleaning your oven about every three to six months or so should do the trick.
How Does a Self-Cleaning Oven Work
If your oven is pretty dirty, using the self-cleaning function on your oven probably won’t help much.
When you use this function, your oven heats up to over 500 degrees Fahrenheit to melt the build-up of grease and caked-on food. (Some newer oven models have a self-cleaning feature that can go as high as 800 to 1,000 degrees F.) The gunk is supposed to incinerate into white ash that can be easily wiped out of your oven when the cleaning is complete.
However, if there’s too much built-on grease on the bottom of your oven, it may smoke up and potentially cause a fire or at least set off your smoke alarm. There is also the possibility of fumes from the process producing deadly carbon monoxide, according to McGill University.
This intense heat can also take a toll on your oven if you use the function too often, say the experts at Molly Maid. The self-cleaning function is typically for the oven that only gets occasional use or that has minimal grease build-up.
If you do choose to use the self-cleaning function, take the racks out or the high heat will dull the finish. A dull finish doesn’t look good, and it also prevents your baking dishes from sliding in place on the rack.
Also, remember to keep a window open for the fumes to escape and keep pets and children out of the kitchen during the process.
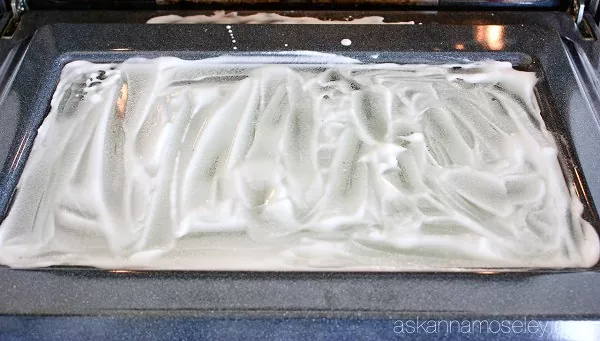
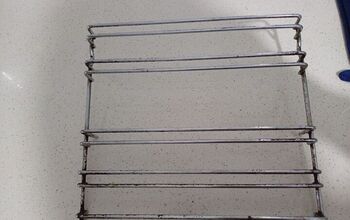
Photo via Anna M
Why Cleaning Your Oven is Important
Deep cleaning your oven beyond using the self-cleaning function is important for three reasons:
- Lingering grease and dirt build-up can create odors that might infiltrate the other dishes you’re baking. Gross!
- Spills inside the oven can create smoke and fumes that irritate the eyes and lungs of anyone inside the house.
- A dirty oven works harder to heat and maintain the right temperature, which quickly wears out an appliance.
How to Clean an Oven
It’s always best to use natural products to clean your oven. However, if you have inherited an oven in terrible condition that could benefit from the extreme power of a commercial cleaner, consult your owner’s manual first.
Here are a few of our favorite oven cleaners!
It’s important to note that commercial products are extremely powerful and the caustic ingredients may be irritating to your skin, eyes, and lungs.
Here’s how to use natural products to clean your oven instead. This process can take anywhere from two to 12 hours.
Tools and Materials Needed:
- Old towels, sheets, or newspapers
- Old rags or towels
- Plastic spatula (optional)
- Spray bottle
- Non-abrasive sponge
- Abrasive sponge
- Paper towels
- Butter knife
- Old toothbrush or other small scrubbing brush
- Rubber gloves
- Bowl
- 1 small box of baking soda
- 3 tablespoons lemon juice (optional)
- 4 drops Dawn dish detergent (optional)
- Distilled white vinegar
- 1 cup of laundry or dish detergent (any type or kind)
Hometalk may receive a small affiliate commission from purchases made via Amazon links in this article but at no cost to you.
1. Properly Ventilate
Although this isn’t as vitally important to do with DIY cleaners as it is with commercial cleaners or the use of self-cleaning cycles, you should still open all windows and turn on exhaust fans while cleaning an oven.
2. Lay a Towel on the Floor
Put an old towel, sheet, or newspaper on the floor around your oven so everything can land on there instead of your floor.
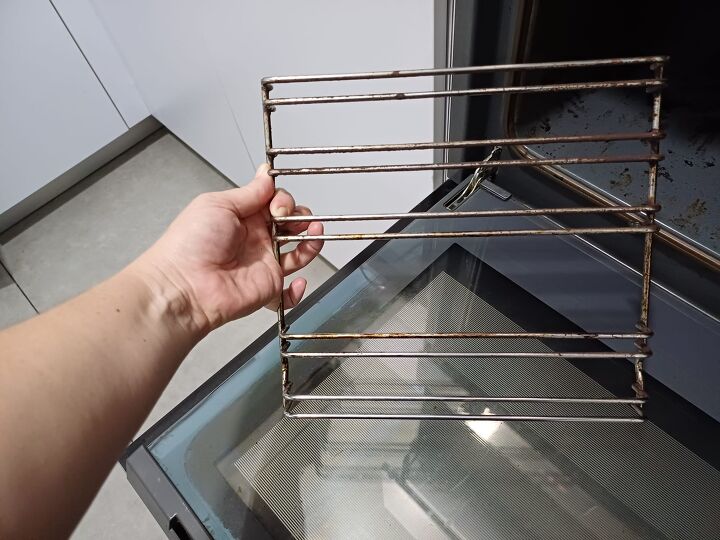
3. Remove the Oven Racks
Make sure your oven is completely cool to the touch. Take all the racks out of the oven—you will clean these separately.

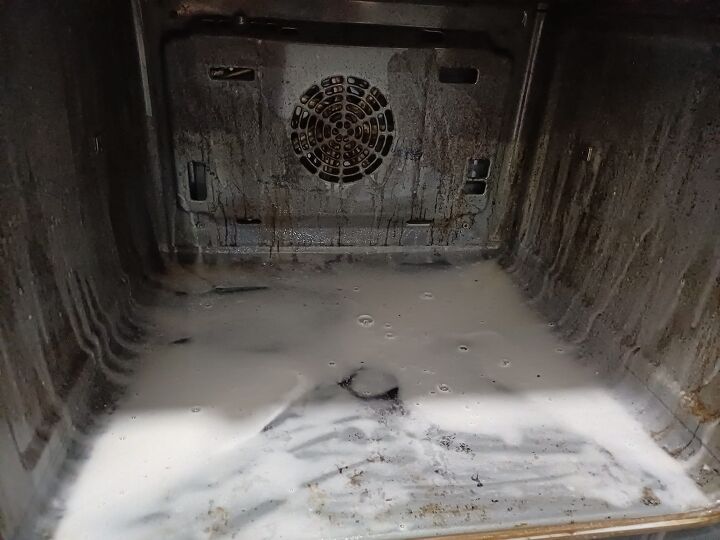
4. Make a Natural Oven Cleaner Paste
In a bowl, mix ½ cup of baking soda and about 3 tablespoons of water to make a spreadable paste (the consistency of thick oatmeal).
5. Coat the Surfaces with Paste
Using your gloved hands, rub the baking soda mixture on the oven cavity surfaces, avoiding the heating elements (the food or grease on these elements will naturally burn off when the oven is in use, according to GE Appliances).
Scrub particularly grimy spots with an abrasive sponge. Depending on how dirty the oven is, let the DIY oven cleaner sit on the surfaces for at least two hours, but 12 hours is ideal for an extremely grimy oven.
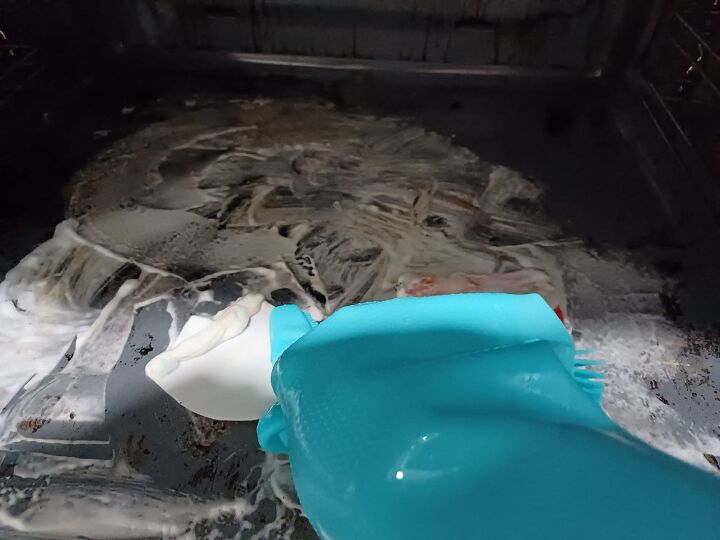
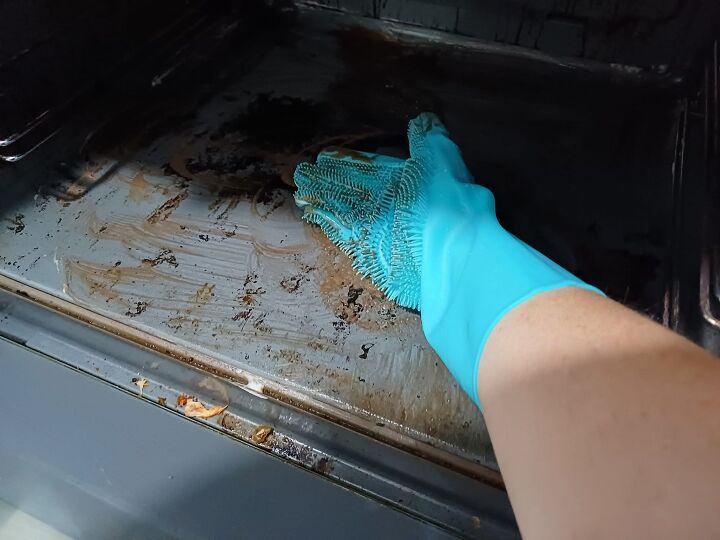
6. Wipe Surfaces
Wipe out the dried baking soda mix with a damp towel or a damp non-abrasive sponge. You may need the help of a utensil, such as a plastic spatula, to scrape off thick patches.
7. Spritz Vinegar
Put undiluted white vinegar in a spray bottle. Spray down the entire oven cavity. The vinegar will foam up where there is baking soda residue. Wait for the foaming to die down, then wipe down the cavity again with a damp towel or damp sponge to rinse off the remaining residue.
8. Clean Glass Oven Doors Inside
To clean oven glass, open your oven door so it lays flat. Generously sprinkle baking soda on the glass. Sprinkle water onto the baking soda and blend with your fingers to form a thick paste. Leave this mixture on the glass panel for about an hour.
Then scrub the mixture with a non-abrasive sponge (to avoid scratching the glass since it already has an abrasive paste on it). Keep wiping the paste off with a clean, damp towel or dampened paper towel until the residue is gone.
9. Clean the Oven Vents
The most neglected part of your oven is the vent behind the handle. To remove grease build-up, wrap a butter knife with a paper towel soaked with white vinegar. Wipe the knife back and forth inside the vent, and repeat if necessary.
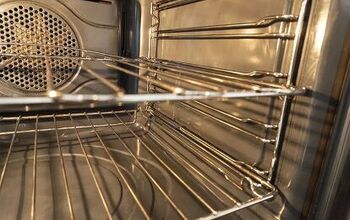
10. Clean the Oven Racks
To get shiny racks, clean them in the bathtub while the oven is soaking in the baking soda paste.
Place an old towel on the bottom of the tub to prevent the racks from scratching the surface. Fill the tub with hot water (not too hot, but comfortable enough to work in) and either a cup of laundry or dishwashing detergent (any kind is fine) and submerge the racks.
Let the racks soak for a few hours, then scrub them with an old toothbrush or other small scrubbing brush. Rinse with clean water, dry, and replace in the oven after you finish cleaning the oven’s interior.
Don't forget to give your bathtub a good clean!
11. Clean Oven Knobs
Using a damp microfiber cloth to wipe the knobs is an effective method to get them clean.
If the knobs are particularly dirty, you can clean them with a little dish soap and water.
Avoid spraying any solution directly onto the knobs, as the liquid can seep behind and short the control panel. Rather spray your soapy mixture directly onto a cloth and then wipe down the knobs.
12. Clean the Outside of the Oven Door
The outer part of your oven door might have a greasy layer. Clean it using a soft cloth and warm, soapy water. Rinse it well.
Make it shiny with a paper towel and a little glass cleaner spray. To give your stainless steel a real sparkle, use a cleaner specifically designed for stainless steel finishes.
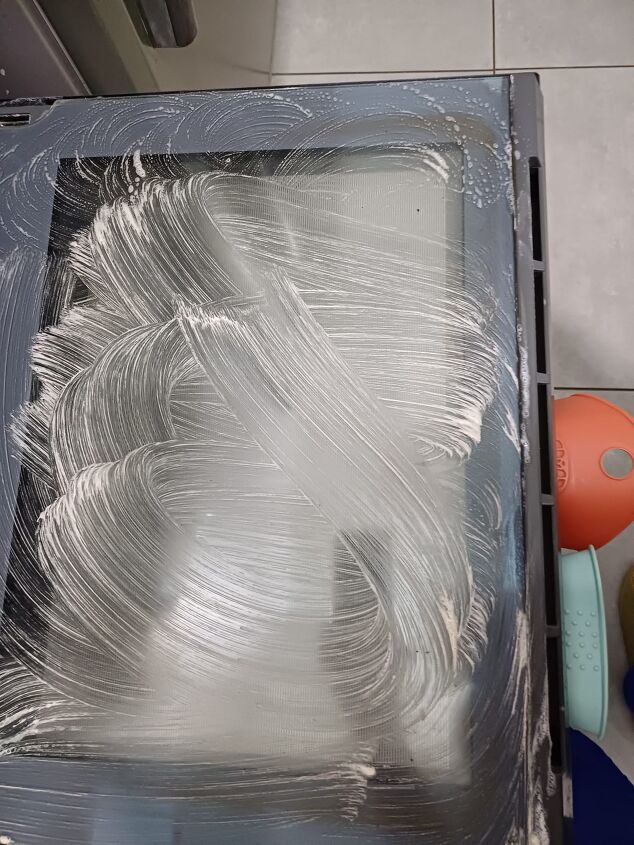
Photo via Chas' Crazy Creations
How to Clean Between the Glass Door of an Oven
If you’ve cleaned both sides of your glass door and it’s still disgusting, that’s because all the grease has built up between the glass sandwich of your oven door.
This cleaning method, although effective, takes a little investigating to find the entry point or slot to the oven door’s glass sandwich. The entry point is likely at the bottom of your door, so you will need to poke around.
You’ll also need to be aggressive when it comes to cleaning this part of your oven, as it takes a little elbow grease to get it done.
Here’s how to clean between the glass on an oven door:
Tools and Supplies Needed:
- Long tube socks (a few)
- Long piece of sturdy wire, sturdy yardstick, or dryer vent cleaning brush
- A few drops of liquid dish detergent
- Water
- Lint-free cloth
- Rubber bands
1. Find the Opening
Consult your oven’s manual to find out where the slot is located to enter the glass sandwich on your oven door. It is most likely at the bottom of the oven door.
2. Assemble the Cleaning Tool
Place a sock over the item you’re using to reach into the glass for cleaning purposes (a long piece of sturdy wire, sturdy yardstick, or dryer vent cleaning brush work well). Secure the sock over the tool with a few rubber bands. If you don’t have socks, you can always wrap a lint-free cloth around the tool and secure it with rubber bands.
3. Saturate the Sock With Cleaner
Fill your sink with warm water and a few drops of liquid dish detergent to create a soapy cleaner. Dip the cleaning tool with the sock into the sink so it’s saturated with the soapy cleaner.
4. Insert the Tool
This may take a little work, but use some force to get the wet cleaning tool into the slot between the glass while being careful not to damage the glass. Gently move the tool back and forth to saturate the glass.
5. Soak and Scrub
Let the solution soak in the glass sandwich for a few minutes to soften the built-up grease. Then scrub the inside of the glass with the cleaning tool. Repeat this step until the glass is as clean as can be.
6. Rinse
Remove the tool, put on a new sock that’s soaked with clean water, and reinsert the tool. Rinse as best as possible by swishing the tool back and forth inside the glass sandwich to remove all the soap residue.
7. Dry
Replace the wet sock with a dry sock or lint-free cloth that you can attach to the tool with a rubber band. Then insert the tool to dry the inside of the glass sandwich.
Remove the Door (Optional)
If you are ambitious, you can take the door apart to clean the glass, but you may slightly damage the tabs and other parts that hold the door together. To complicate matters, some ovens may have three layers of glass rather than two.
Consult your oven’s owner’s manual for full instructions on how to remove the door. You may need an assistant to help support the door and to help you put the door back together.
Oven Cleaning Tips
Here are a few dos and don’ts when it comes to making sure your oven is always spotless:
- Don’t rely on an oven floor liner. You may think that oven floor liners were designed to keep the oven cleaner. In reality, they alter the airflow and circulation and can trap heat or melt. Some oven manufacturers don’t recommend liners at all.
- Do keep your food covered. Use roasting bags for meat, fish, and vegetables when you can to minimize spills. Cover food with foil when baking to reduce messes.
- Do act quickly. Right after you’ve baked a messy dish, get ahead of the caked-on mess by putting a heat-resistant bowl filled with water in the oven at a high temperature (450 to 500 degrees F) for about 20 minutes. When the oven cools down, wipe its surfaces with paper towels.
Oven Cleaning Hacks for Difficult Cases
If grease buildup and trapped deposits are severe enough that the above methods don’t work, consider hiring a professional oven cleaning service.
Keep in mind that while they will use chemical cleaners to get the job done, they will do so in a way that won’t harm or scratch the cavity’s coating. If you can’t find a dedicated oven cleaning service in your area, contact a house cleaning service or an appliance repair service to see if they specialize in oven cleaning.
Have you had a baking disaster in your oven that needed a good cleaning? What tips did you use to get a dirty, grimy oven sparkling clean? Share them below—we’d love to hear about them!
Comments
Join the conversation
-
Wish I could find a way to clean between the glass. Your method does not work for me.
-
Love your article. How do you recommend cleaning the racks when you don’t have a bath tub🙁 Thanks.
- See 1 previous


Frequently asked questions
Have a question about this project?
you say 1/2 cup of baking soda and 3 tablespoons of water is that what you show in the picture of the oven covered in the paste? either my oven is bigger or you mad twice the amount. tnk you