


Make Your Own Bespoke Handles

I've recently started making my own handles for my resin trays but it got me thinking, I could go one step further and apply my process to cupboard handles and knobs.
Keep reading to learn how you can add some fun and colour to your furniture and much more!
YOUTUBE
I have a full step-by-step video tutorial of this mold making process up on my YouTube channel. Click the video link above to view 
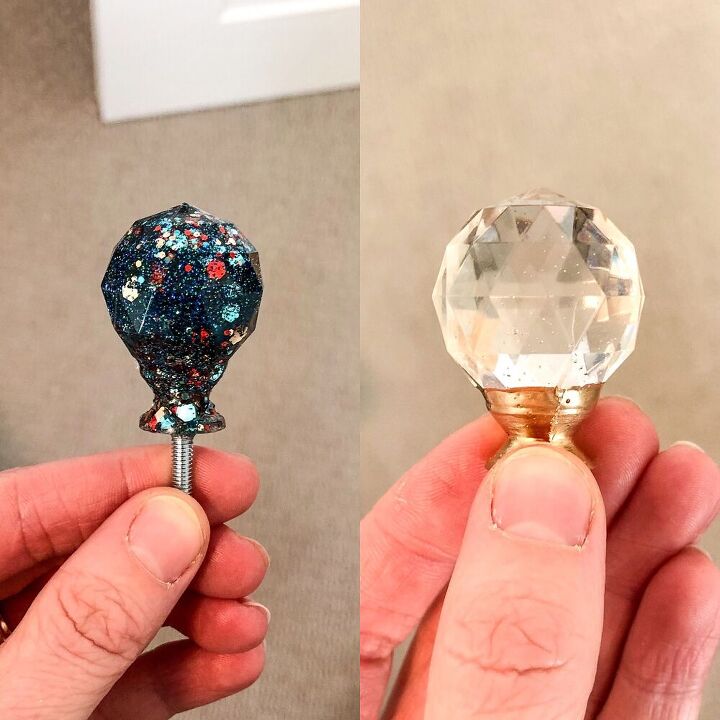
These are both handmade using resin and and some easy DIY molds.
STEP ONE
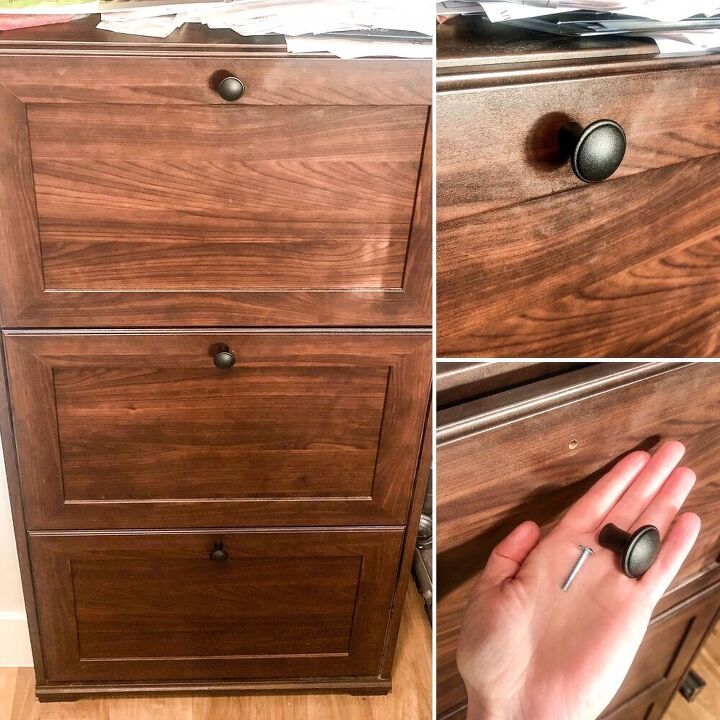
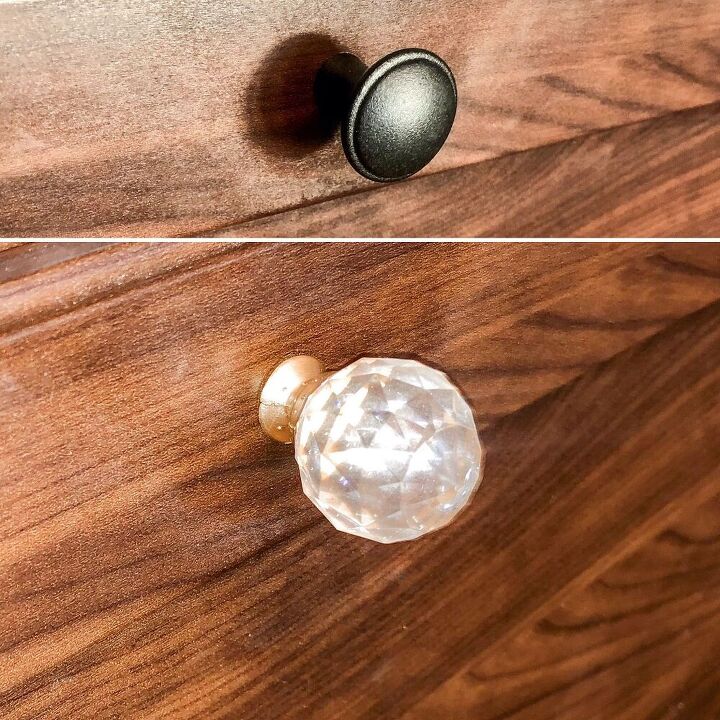
First, I unscrewed the handles from the piece of furniture that I wanted to spruce up.
There's nothing wrong with these handles at all but I thought how fun it would be to have my very own handmade handles on there instead.
STEP TWO
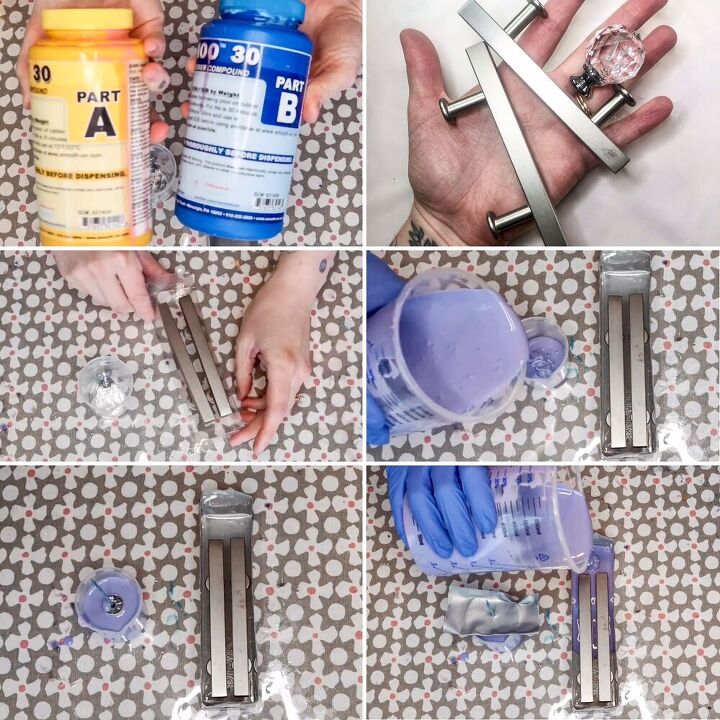
Make your molds.
There are a few different ways to learn how to make silicone molds but for this particular project I chose Smooth-On's Pourable Liquid Rubber. It's so easy to use and you get A LOT of mold making out of just one pack.
I then cast some handles I already had and really liked the shape of. I could have cast the handles from the cupboard but I wanted something a little different.
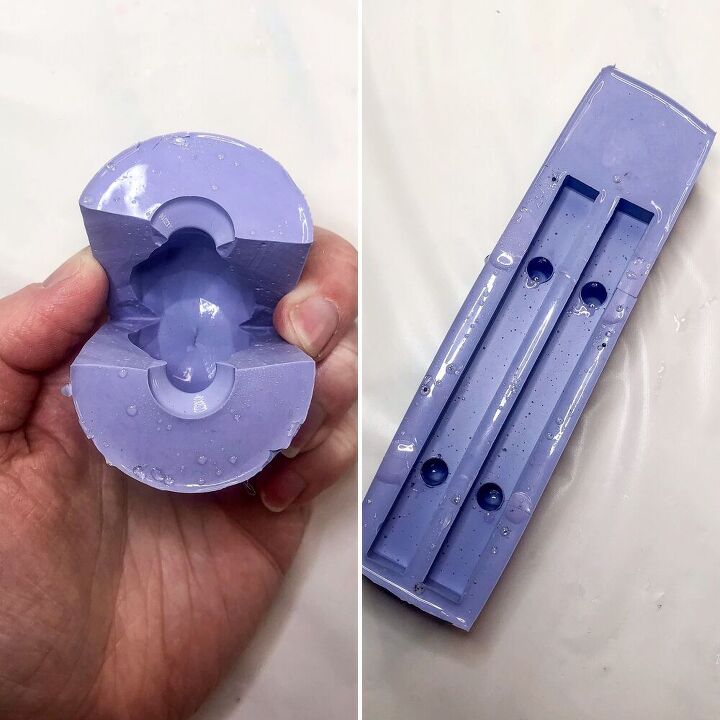
After making a leak-proof container for each of the handles and placing them inside, I poured the silicone rubber into the container up to the top of where the handles reached and let the mixture set for 6 hours. Do not fully encase your handles or you will not be able to get them out.
STEP THREE
Now you have your molds ready to go so it's time to mix your resin.
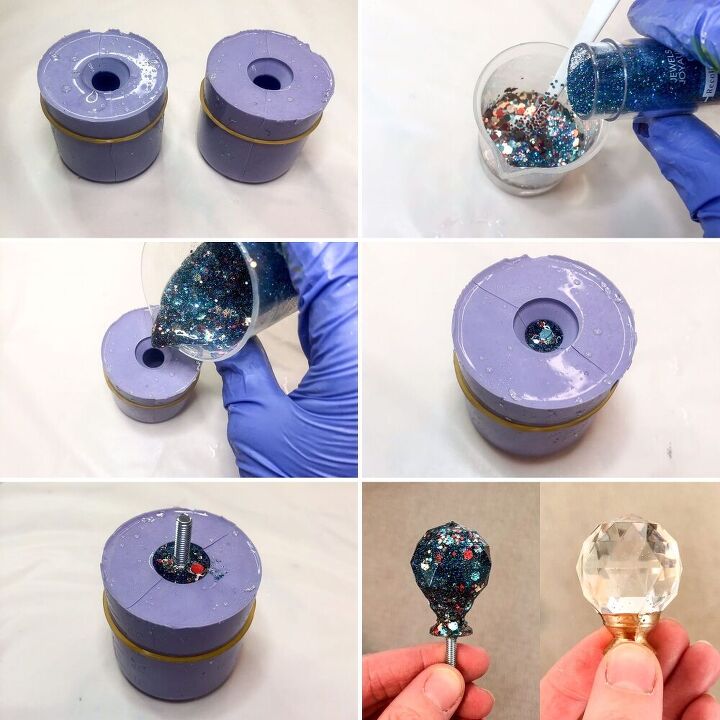
I tie elastic bands around the molds if they don't close tightly on their own, this will prevent any resin leaking out during the cure.
Mix a small amount of resin, just enough to fill each mold - tip, it's usually less than you think you need - and colour this however you like. I did a couple of different pours including this fun blue sparkly one.
The resin I used was Rockstar Resin's 5 Star Thin Coat 2:1 resin for it's low viscosity (runny) and fast cure time compared to similar quality resins. Here's a link to this product online and if you use my code HANNAH at checkout you can get 10% off (on any product) along with free shipping!
Because I know how this resin works and when it's cure points are, I let the resin part cure before adding in the screw. This just meant I didn't have to hold the screw in place or create a support structure but if you're not sure when the right setting time is, then I suggest just making a little support from some toothpicks and elastic bands. This will keep the screw in the position you want whilst the resin cures.
STEP FOUR
Once the resin cures, release it from it's mold and add any paint details that you want (I added a little bit of gold to mine).
Now you can attach it to your cupboard.
Because I incorporated the screw into the knob, I added a nut to the back to keep it in place.
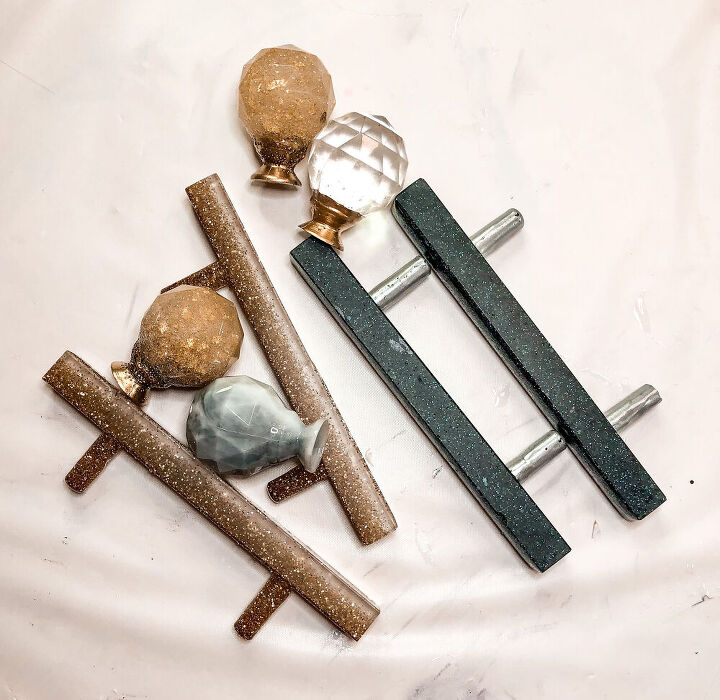
Like I said earlier, I usually make these handles for my resin trays so for this I would leave out adding the screw element and simply glue the handles directly onto my trays with a bit of resin.
Anyway, I hope this has given you some fun ideas. I think this could be a really cool and cheap way to create matching furniture even if the pieces all came from different stores or thrift shops.
Let me know what you think 
Please also check out my Etsy store where I sell all my handmade resin pieces, that would be awesome!
Until next time!

Resources for this project:


Comments
Join the conversation
-
Very Creative and Beautiful!
-
Really like the resin ones. Currently don’t have a place for them but keeping this idea


Frequently asked questions
Have a question about this project?
They are beautiful. Where do you get the good knob blank things to attach to the knobs? I’ve only been able to find the screws but not the part they screw into. Thanks
I wonder if you could dip a existing know in expoxy/resin to get a different look?