


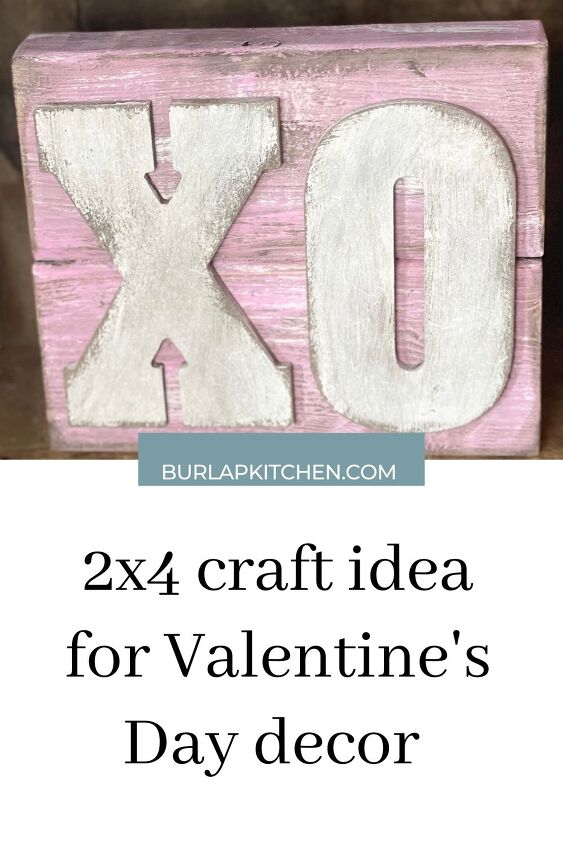
2×4 Rustic Valentine’s Day Decor – Scrap Wood Crafts

Today, I am super excited to show you all how to transform a scrap 2×4 into rustic Valentine’s Day decor. Do you have any scrap wood lying around and are unsure of what to do with it? Transform that scrap wood into a cute, rustic Valentine’s Day decoration! Recycled wood scraps can be used to create some beautiful home décor DIYs, such as this adorable 2×4 wood “XO” sign for your Valentine’s Day décor! This budget-friendly scrap wood DIY sign could even be painted using different colors depending on your home decor style.
- 2 2×4’s cut to the size you wish
- wood glue
- hot glue gun and glue sticks
- stain – I used minwax in the color dark walnut
- paint color of your choice ( I used pink on my 2×4’s & white on my letters)
- paint brushes
- old rag & gloves for staining
- XO letters
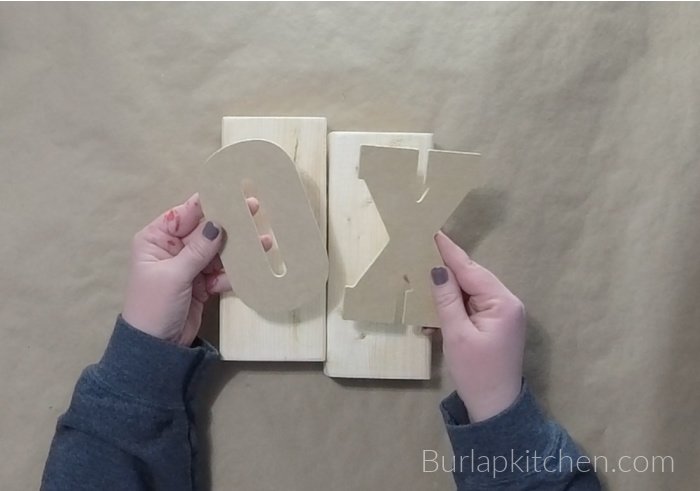
Step 1. Get two small pieces of equally sized scrap 2×4 wood as you will stack these together, and whatever letters you’d like to use for this wood sign. I used an “X” and an “O” for this DIY. Be sure the size of your 2×4 wood pieces are to scale/proportionate for the “XO” letters you are using.
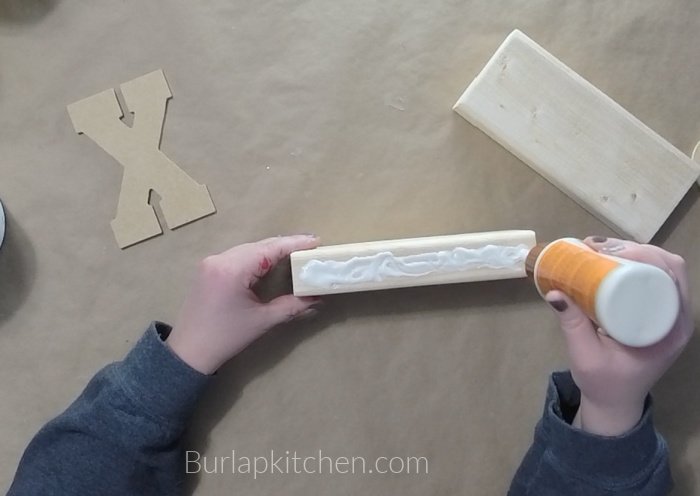
Step 2. Place some wood glue and then some hot glue horizontally along one side of the 2×4, stack the other 2×4 directly on top to glue the 2×4 scrap wood pieces together so they are both going in a horizontal direction. Hold in place until dry. Use an old cloth to wipe away any glue that may ooze out of the center. Allow to dry completely.
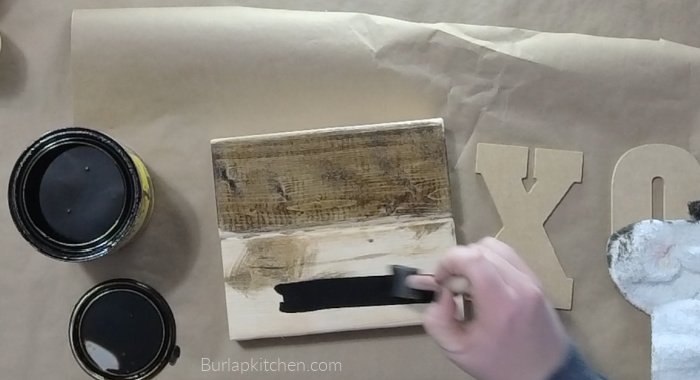
Step 3. Using Minwax stain in the color “dark walnut,” take an old cloth and rub this stain over the front, back, and sides of your project. Wipe off the stain. Allow to dry.
Step 4. Apply the same stain to your “XO” letters, and then wipe off. I only stained the front of the letters and the sides as the backs will not be visible. Allow to dry.

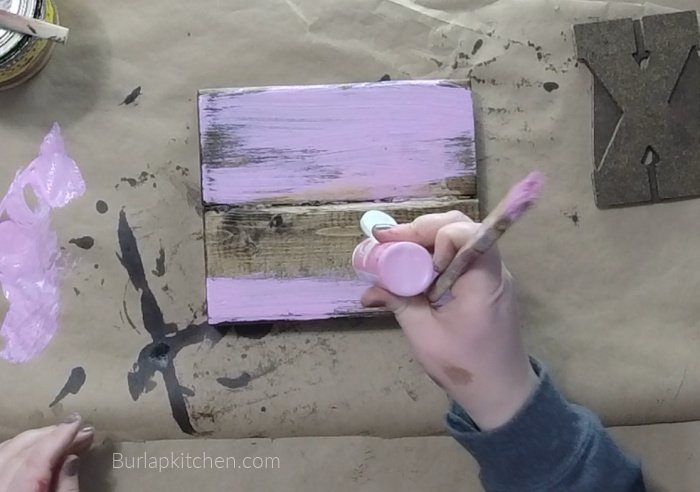
Step 5. After your wood is completely dry, take some paint of your liking, I used a pink paint from Apple Barrel, and paint the front, back, and sides of your wood/project. Allow to dry.

Step 6. Dry brush some white chalk paint onto the front and sides of your project using a chip brush, over top of the pink. Be sure to do this sparingly, as you want the project to be mostly pink with random streaks of the white chalk paint. Allow to dry.
Step 7. Next, use a sanding block and gently sand over the front, sides, and corners of your project. This will allow some of that stain to show through and make the project/wood look rustic.
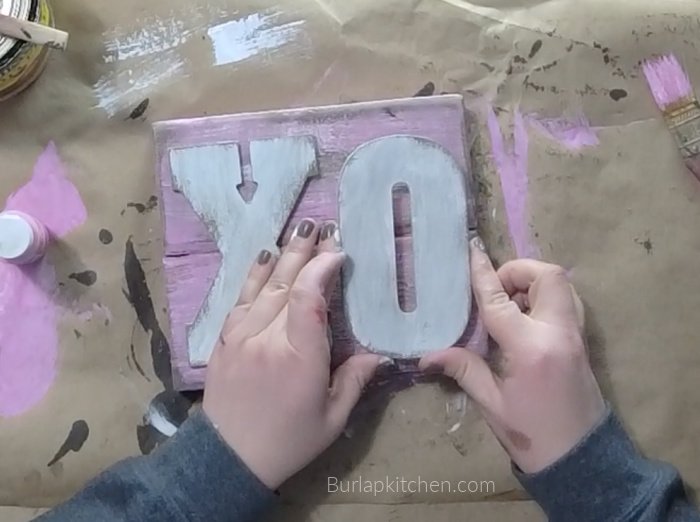
Step 8. Take your “XO” letters, and paint them using a foam brush with white chalk paint. Allow to dry. Then, apply a second coat of white chalk paint. Allow to dry.
Step 9. Use a sanding block and gently sand over your letters for a more rustic look.
Step 10. Center the “XO” onto your wood project. Once you like the placement of the letters, hot glue each letter onto your wood project. Allow to dry and enjoy!
.
.


Frequently asked questions
Have a question about this project?