


DIY Easter Carrot Decor Tutorial
You can never have enough carrot decorations for Easter! The best part is that you don’t need to buy expensive decorations because it’s all possible with the help of your imagination. This DIY Easter Carrot Decor will be made from scratch and only with a few materials.
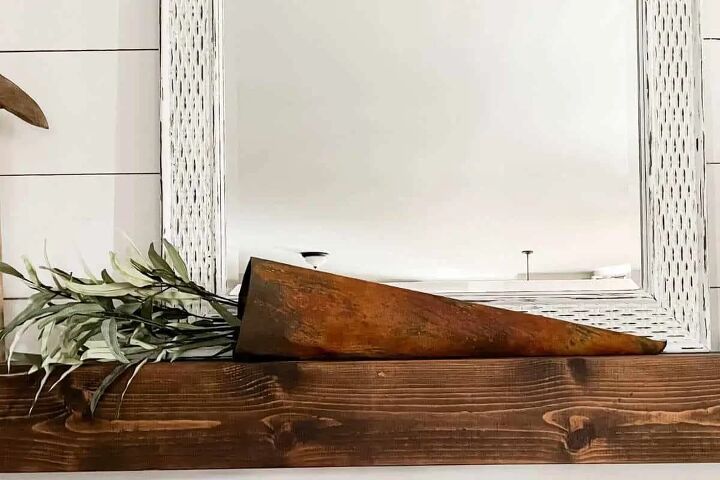
I knew I wanted to add some rustic Easter decor & since I loved the way my rust pumpkin turned out I thought this was the perfect project to use the leftover paint on.
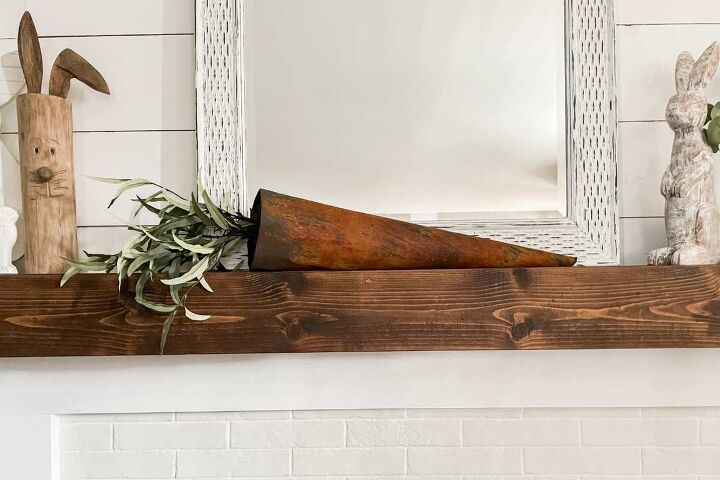
I had my mindset on a large rustic carrot to add to my fireplace mantle. The only ones I could find were quite pricey so I set out to make my own!
Here I will show you step by step how I created this DIY Easter Carrot Decor:
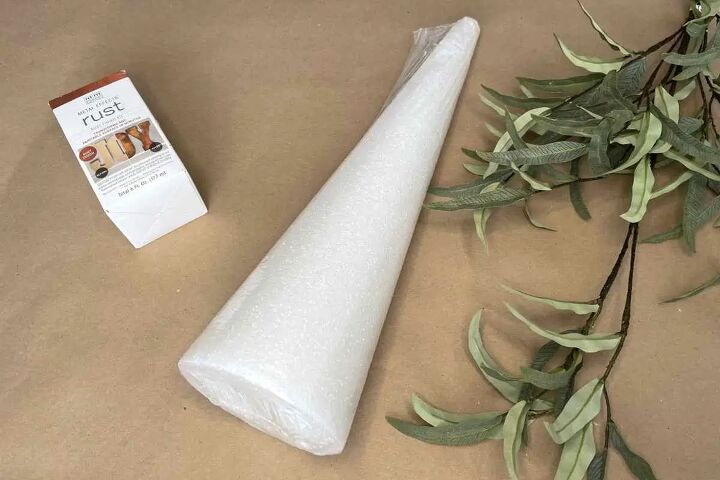
Supplies
- 1 Foam cone (I found mine at Michaels)
- Hot glue and gun
- Kraft Paper
- Modern Masters Rust Effects Kit
- Greenery (I used Ash Leaf Spray)
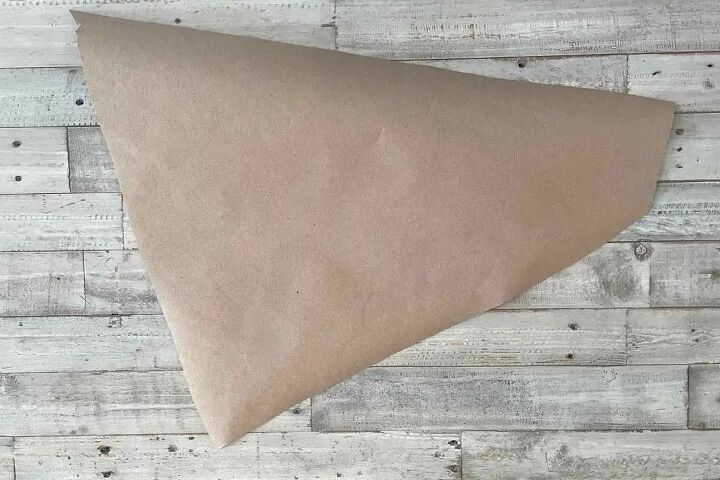
Step 1: Rough Cut Kraft Paper
The first thing I did was wrap the kraft paper around my foam cone. I wanted there to be some extra paper at the top so it ended up even larger than the cone. I just eyeballed it and made sure to cut a little extra.
Tip: Give yourself some extra paper to overlap for when it’s time to glue it to the cone as well.
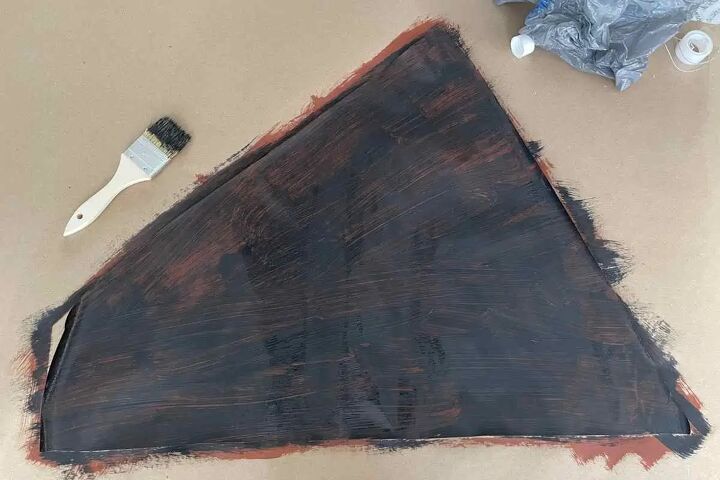
Step 2: Paint Your Carrot
Now it was time to use the Rust Effects Paint kit by Modern Masters. This is a three-step process that involves primer, iron paint, and rust activator.
- Paint two coats of primer (allow 1/2 hour in between)
- Go over with two coats of Iron Paint (allow 1/2 hour in between)
- Spray rust activator over the entire surface. Wait 5 minutes and then spray another coat.
I used a few cheap chip brushes and this was a quick process. I let it dry overnight & the next morning it was looking great!
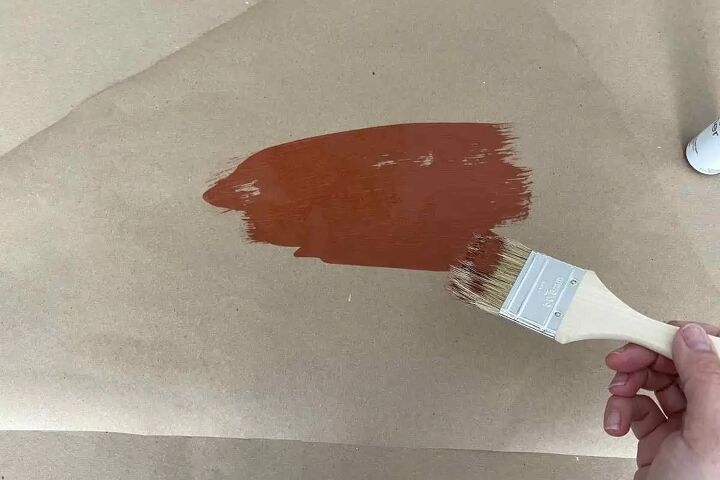
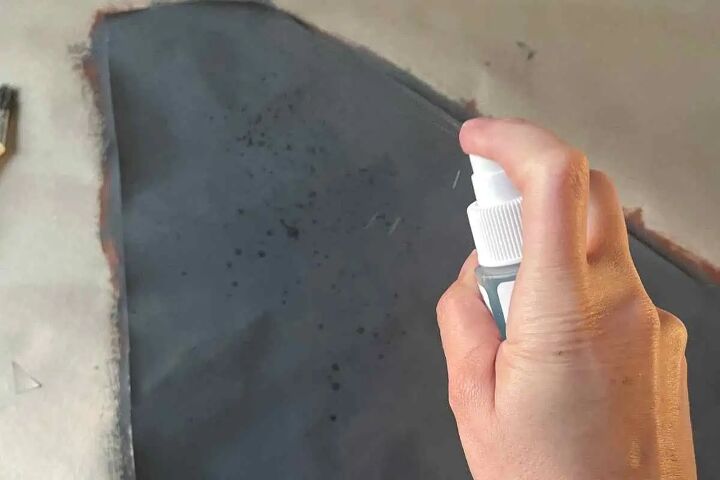
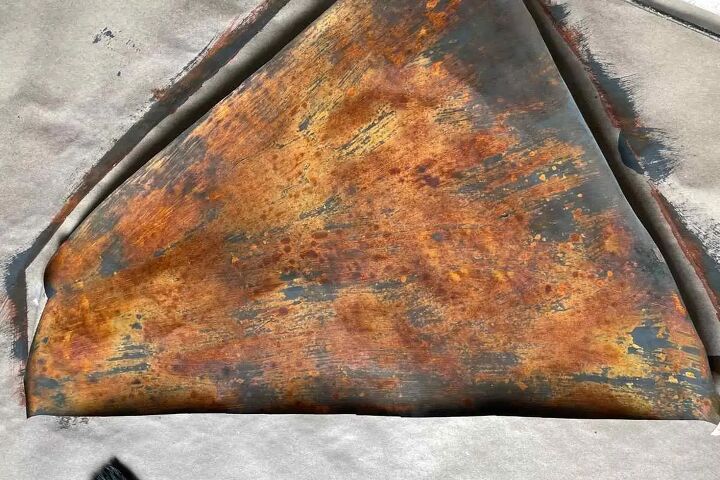
The more rust activator you add, the rustier it will be! I love the effect that this kit creates 🙂
Step 3: Hot Glue Kraft Paper To Cone
After your paint has dried, it’s time to hot glue it to the cone. Make sure to dry-fit it before you start gluing to make sure it’s the right size.
I secured it with some tape so that it would stay in place as I was gluing.
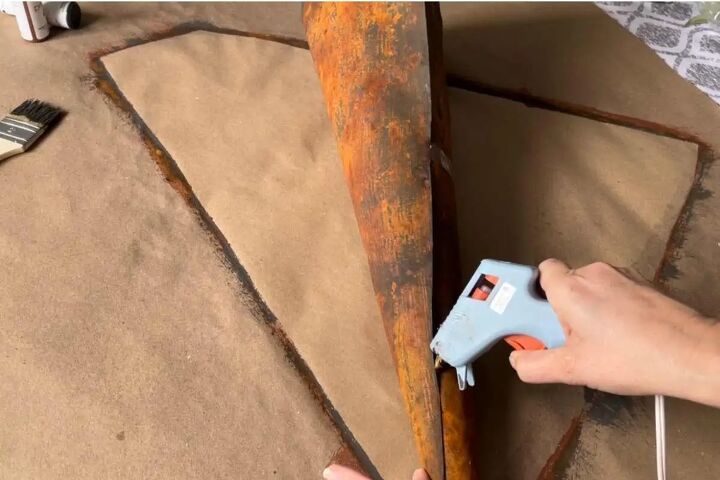
I made sure to leave a little bit at the tip past the foam cone so that it was completely covered.
Near the top, I slightly folded the paper inward to give it a more uniform look. You could add some greenery or moss inside, but I decided not to.
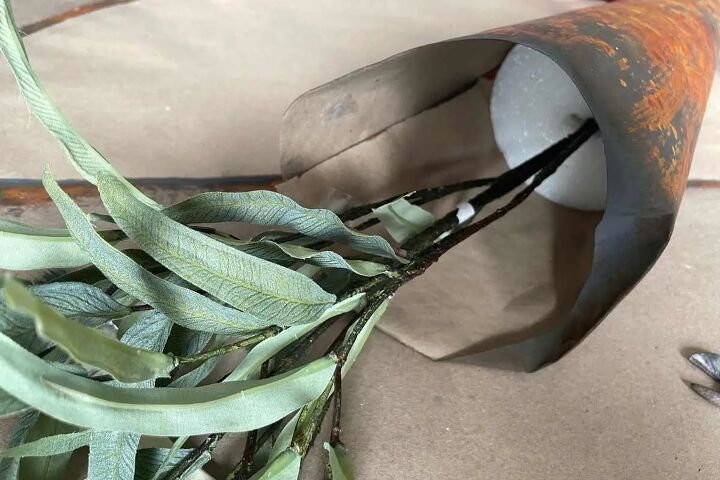
Step 4: Add Greenery
The last step is to add some greenery to your Easter carrot decor! I had some leftover greenery from another project so I just cut it up and inserted it right into the top of the cone.
This is where the foam cone comes in handy! If you use a paper one it will be much more difficult to add the greenery.
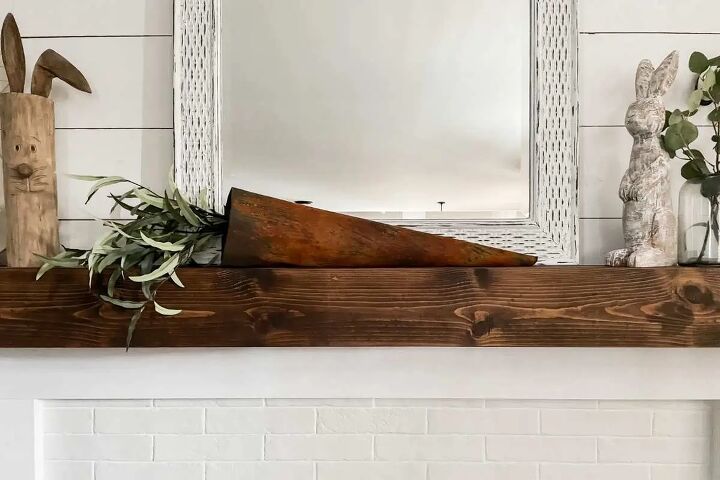
Conclusion
And that’s it! Your own DIY Easter Carrot Decor is complete. You can now use it to decorate your mantle or any other area in your home. I think I might make a few other decorative carrots in other sizes for my console table!
I hope you enjoyed this tutorial and found it helpful! There are many variations of this you could make, so I would love to see if you make one yourself! If you have any questions, feel free to leave a comment below or contact me directly.

Comments
Join the conversation
-
I don’t have a question but I couldn’t find a way to comment and I just wanted to tell you that that carrot looks totally like rust. Great job
-
Absolutely Love this!!
Thank You for Sharing!


Frequently asked questions
Have a question about this project?