


DIY LED Light Costume
8 Materials
$50
3 Hours
Easy
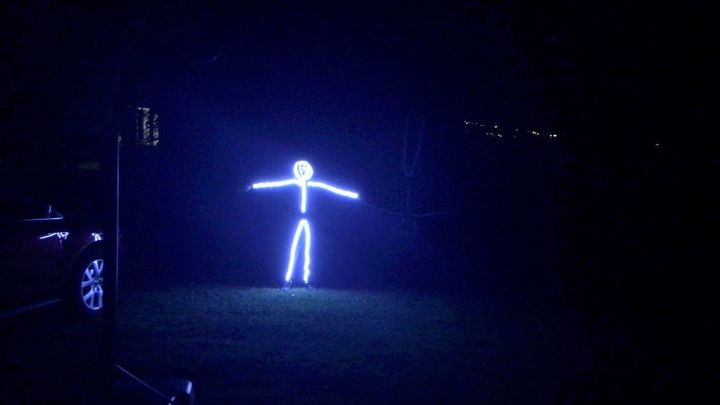
In this Hometalk Post, I show you how to make a DIY LED Light Costume. This costume was an easy DIY project and my son received many compliments. Keep reading to find out how to make this DIY LED light costume for any occasion.
{
"id": "5107581",
"alt": "",
"title": "",
"video_link": "https://www.youtube.com/embed/L99KOQI4w9U",
"youtube_video_id": "L99KOQI4w9U"
}
{
"width": 634,
"height": 357,
"showRelated": true
}
First, to find a Halloween costume which sparks my son's interest is challenging. To be honest, I sighed a bit when my wife and our son approached me about this DIY LED Light costume.
However, my mind quickly changed as soon as they showed me this costume.
Ultimately, I was curious to learn the answer to a few questions about this costume.
- How to power a DIY LED light costume?
- Where to buy battery operated LED lights for costume?
- How to solder LED light strips?
- Where and how to attach LED lights to clothes?
Measure LED Lights for Costume
First, I measured the amount of LED Lights needed for the project.
Next, I used a string to make the following measurements:
- Top of foot to top of pants below bellow button (both legs)
- Bottom of shirt (below belly button) to forehead and add 6"
- With arm spread out, measure from one wrist to the other wrist
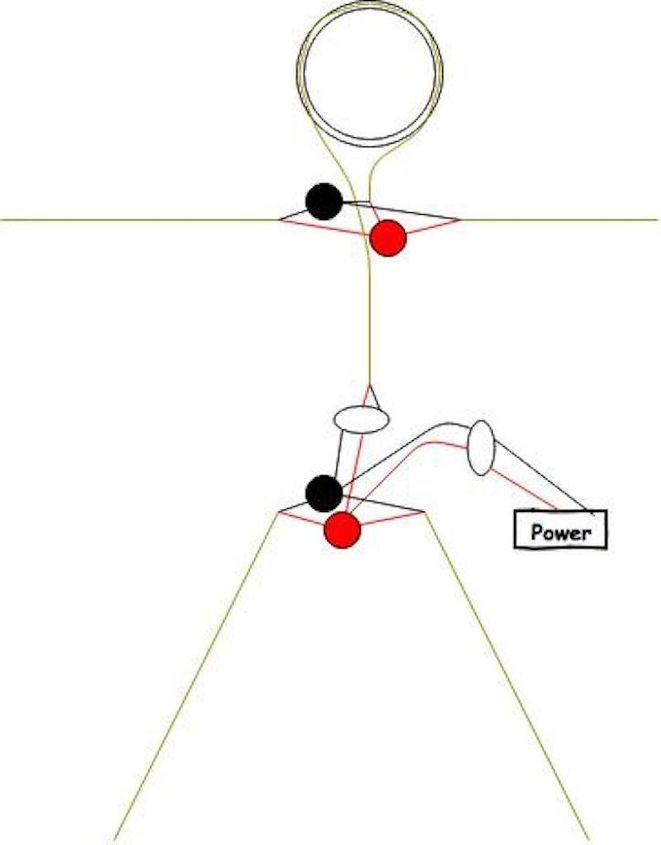
Also, below is a quick diagram you can reference for the rest of this post
Cut LED Lights for Costume
First, I cut the LED light strips according to my measurements in step 1.
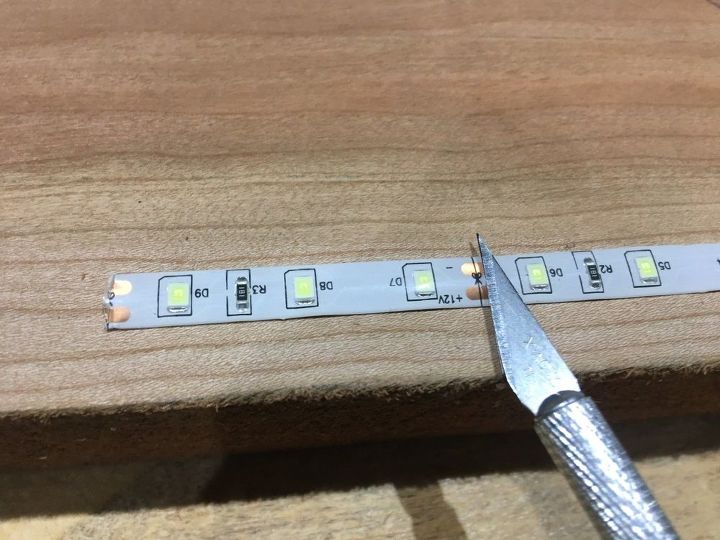
Also, be sure to cut the LED light strip in the correct location. Otherwise, the LED light strip cannot be spliced together.
The LED light strip I used clearly indicated where to make the cut.
Soldering LED Lights to Battery
First, I connected the power supply with a male connector adapter. Lets pause for a second to talk about soldering.
Soldering
Ultimately, soldering is a skill that people should learn.
Why should you learn to solder? Because it is a useful skill to use to splice LED light strips, fix electronics, and much more.
Soldering is the process of using a filler (solder) material to join pieces of metal together at a relatively low temperature (around 400 degrees Fahrenheit). It may look daunting at first glance, but it is really quite simple.
The kit I listed in the material section of this post has everything you need to get started with basic soldering at an affordable price.
Finally, keep reading to learn basic soldering tips which should be enough to get your started.
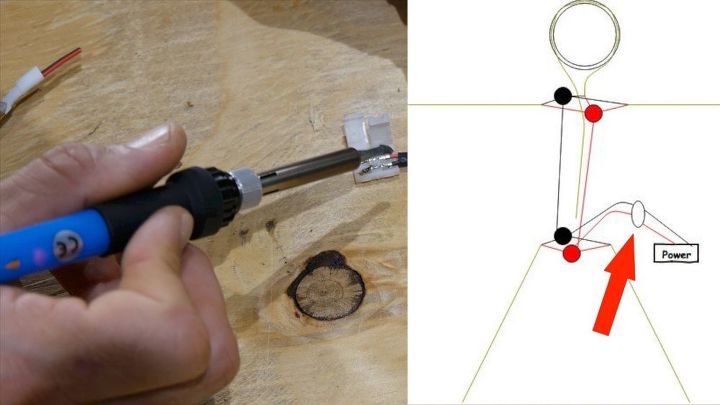
Connect Power Supply
The power supply for the DIY LED light costume is rechargeable and small enough to fit in the pants pocket.
In order for the power supply to easily disconnect from the LED lights and provide enough slack to rest in the pants pocket, I soldered a male plug.
First, I identified the positive lead (red) and the negative lead (black).
Next, I heated my soldering iron and placed it on the connections to get it hot.
Then, I placed a tiny bit of solder on both ends of the each connection point (4 in total) as this makes it easier to make the connection.
I matched the wires (red to red and black to black), verified the metal was touching, placed the soldering iron and solder on top, and melted them together.
When soldering, the wires (top left of picture above) only need to be protruding from the cable jacket about 1/16" to 1/32".
The white connection cover on the power supply was already in place.
Solder LED Light Strips Together
First, I stripped the outer silicone coating to expose the 2 connections on the LED Light Strip.
Next, I slowly removed the top of the LED light strip at an angle in small amounts in order to not damage the LED light strip.
Then, I prepared the wires and LED light strip metal connection points by putting a small amount of solder on each.
I soldered the 2 together.
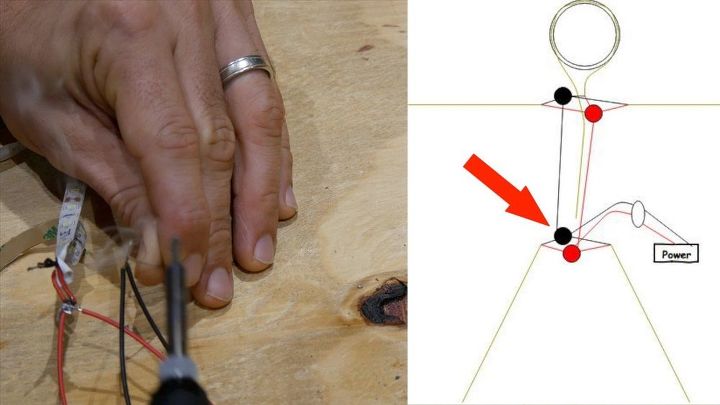
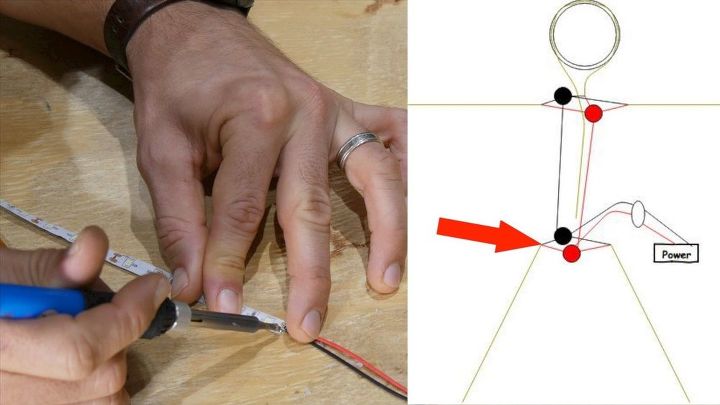
Bottom Wire Connections
In this step, I soldered the bottom connections to merge the leg LED lights, power supply, and a male plug for the top LED lights.
Also, there are a lot of connections in this step and can be confusing. To clarify, I listed them below for reference.
- Red Right Leg, Red Left Leg, Red Female Plug for Power Supply, Red Male Plug for Top.
- Black Right Leg, Black Left Leg, Black Female Plug for Power Supply, Black Male Plug for Top.
NOTE: To join the LED Light strips on each leg to the other wires, I used the wires from a male and a female plug. I simply cut the plug off and used the wires.
Also, I'm certain there is a 'cleaner' method for doing this, but I was in a rush. Halloween was roughly 2 hours away when I started this project.
I stripped about 1/4" of the wire jacket.
Next, I twisted the wires together, heated them with my soldering iron, and put solder on them to hold them together. I repeated the process for the negative (black) leads.
Then, I used heat shrink wrap to protect the exposed wires. Also, electrical tape can also be used; however, shrink wrap is more permanent.
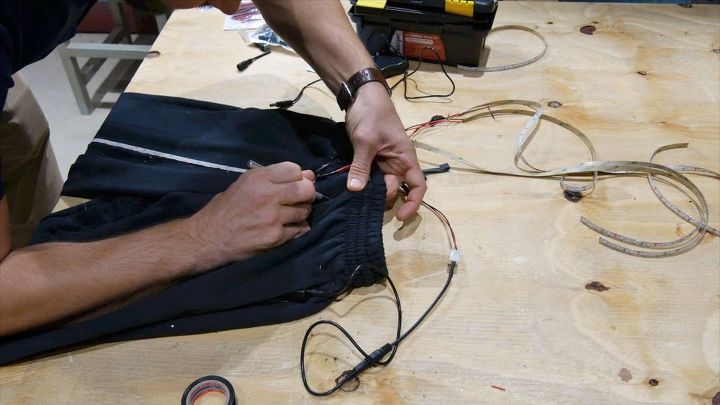
Connect Bottom LED Light Strips to Top LED Light Strips
I used 2 wires that were fairly long (roughly 8") to connect the bottom LED light strips and battery pack to the top.
First, I cut a small incision in the top of the pants near the left pocket for the battery wire.
Next, I cut a small incision on the opposite side.
Then, I ran the wire through the incision, under the shirt, and out an incision I made in the chest area.

Top LED Light Connections
First, I repeated the same process to connect the top wires as I did on the pants in step 5.
Then, I connected the top and bottom together with the plugs to ensure it worked properly before proceeding.
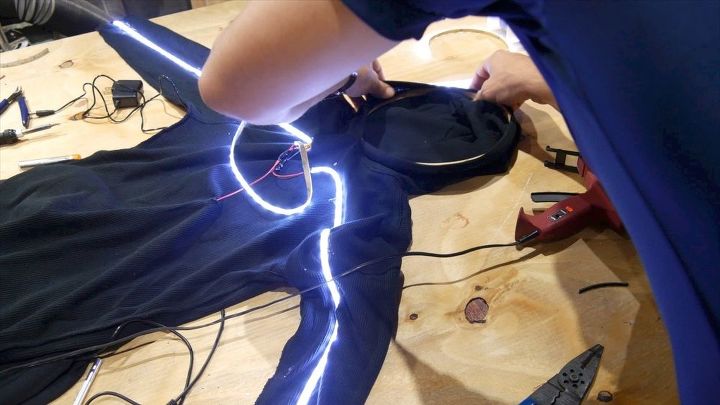
DIY LED Light Costume Hood Hoop
First, I used the wood embroidery hoop to keep the hood sturdy.
Next, I wrapped the edge of the hood around the hoop and used hot glue to secure it.
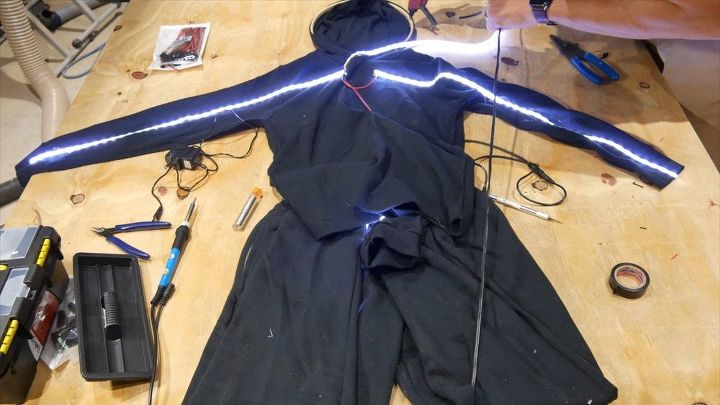
Secure LED Light Strips to Costume
I used hot glue to secure the LED light strip to the pants, shirt, and hood hoop.
In order to accomplish this, I simply placed the LED light strips where I wanted them and secured them in place with hot glue.
It is important to remember to remove the back adhesive protective paper if the LED light strip has it.
DIY LED Light Costume Opinion
This project was fun to make because it was different and helped me rediscover my soldering skills - or lack thereof.
I especially enjoyed watching my son wear something I made for him with pride.
How do I know he was proud to wear the DIY LED Light Stick Figure Costume? Because he didn't complain when my wife asked him to take pictures as he normally does. :)

Conclusion
I hope you learned how to make resin and wood wall art (or table) and this project brought you some value.
Please consider subscribing to my YouTube channel and visiting my website for more projects and other fun stuff.
If you want to make an LED Light costume like this, I will have detailed digital plans available for download that walk you through entire process step by step - click HERE.

Want more details about this and other DIY projects? Check out my blog post!


Frequently asked questions
Have a question about this project?