


DIY Farmhouse LED Light Fixture - CityGirl Meets FarmBoy
I found some darling LED lights at Joann Fabrics on clearance and I just had to have them. I do that sometimes, when it’s so cute I just can’t stand leaving it on the shelf!
I knew the area I wanted these LED lights at and so my creative juices needed to start flowing to come up with the best way to use them.
I contemplated a few ways to utilize the light fixtures in the space I needed and ultimately came up with this. I hope you can use some of these ideas to create your own Farmhouse LED Light Fixture!
Materials:
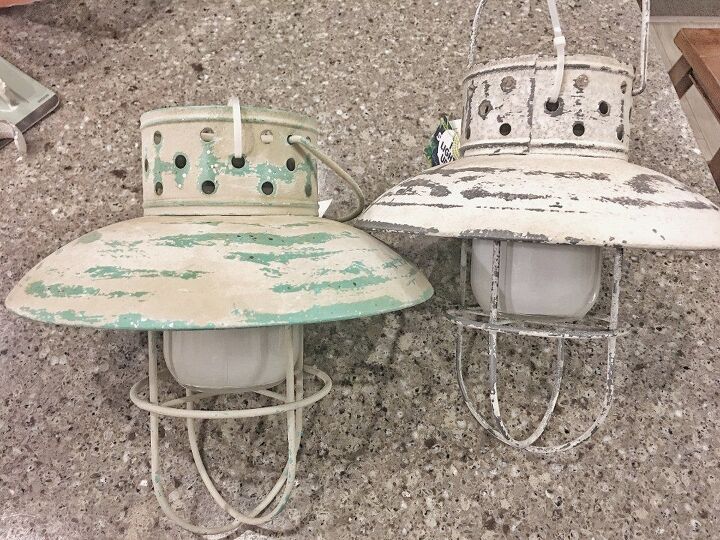
- 2 LED Lanterns – you can shop Joann Fabrics, Michaels, Ross Dress for Less, TJ Max, etc… to look for these. You can also order them online at Amazon. The ones I found were at Joann Fabrics on summer clearance for $16 each. I found some darling ones at The Home Depot, you can find their site here: Search OUTDOOR LED LANTERNS here.
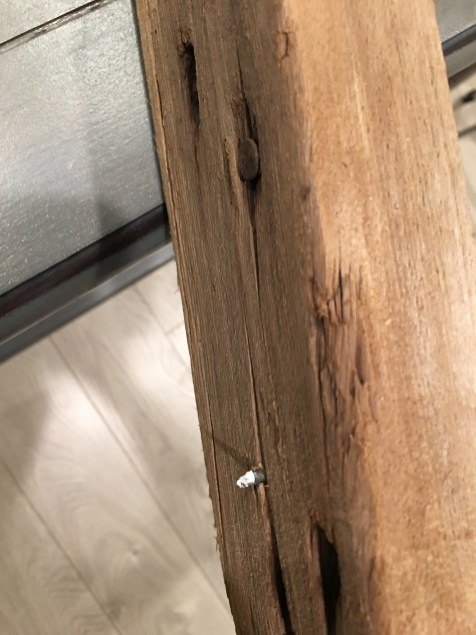
- 2 pieces of Old Barn Wood – of course you can use new wood and make it look old. To do that follow along with Mountain Modern Life here or with DIY network here.
- 2 Garden Planter Hooks – I found mine at The Home Depot years ago on clearance and held on to them. You can find their site here: Search PLANT BRACKET here.
Tools:
- Power Drill – I use my Ridgid 18 Volt handheld power drill, which you can buy here.
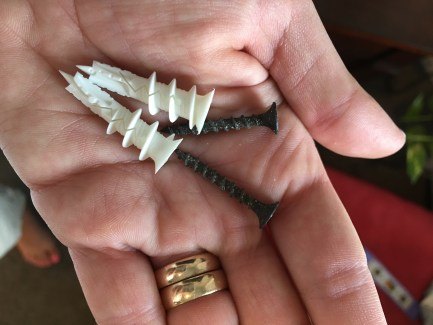
- Four 3 inch wood screws
- Four 1 inch wood screws
- Four drywall anchors if you do not use studs
- Stud Finder – I use my Zircon StudSensor HD55 Stud Finder, which you can buy here.
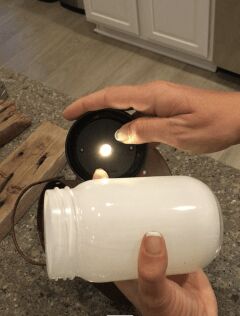
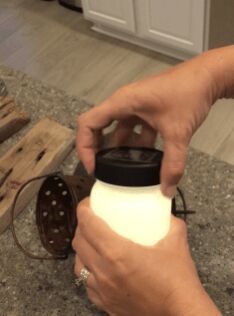
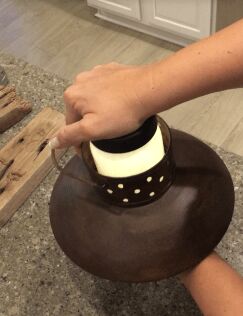
First off I had to change up the color of my lanterns. Paint and stain are one of my favorite ways to change the look of something. There is lots of rules with combining paint colors – sometimes I adhere to them and sometimes I don’t, especially if it’s for a super small project like this one.
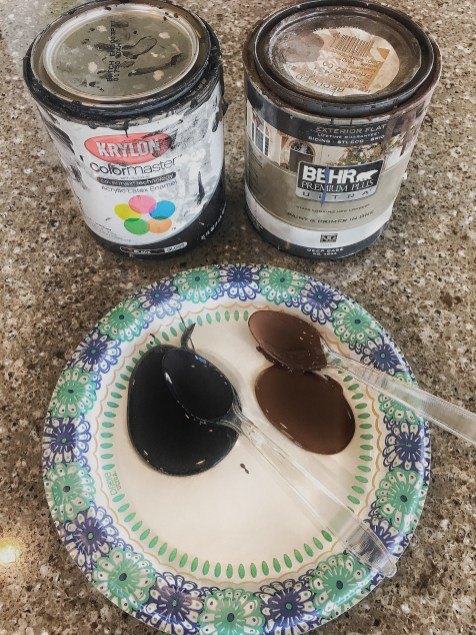
Here I mixed 2 colors to create the deep brown that I was looking for.
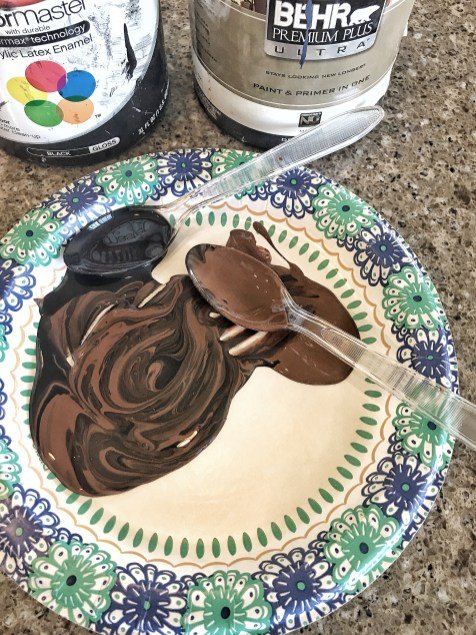
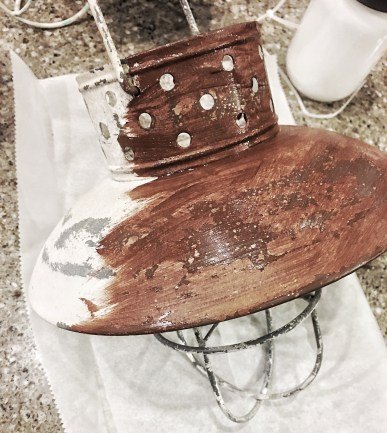
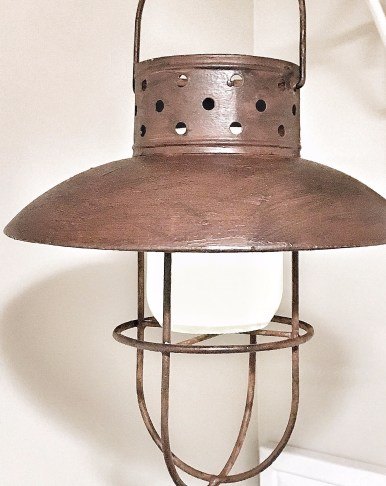
I wanted a darker look than this so I dabbed a paper towel in the solid black paint after this was dry and did a light rub all over it. It came out great. If you need to repaint your LED lights, be creative!
Next step is prepping the wood. If you choose to use new wood and make it old as in the tutorials above, you can bypass this next step. If you are using truly old wood that has been left outside and weathered, it is very important that it is cleaned and sanitized before using it in your home.
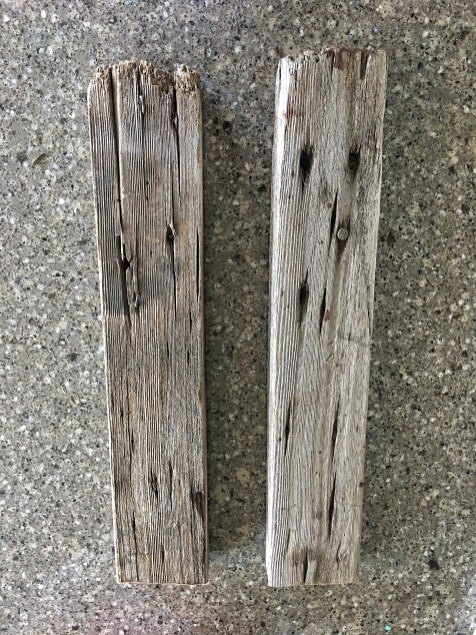
Before cleaning…

After cleaning…
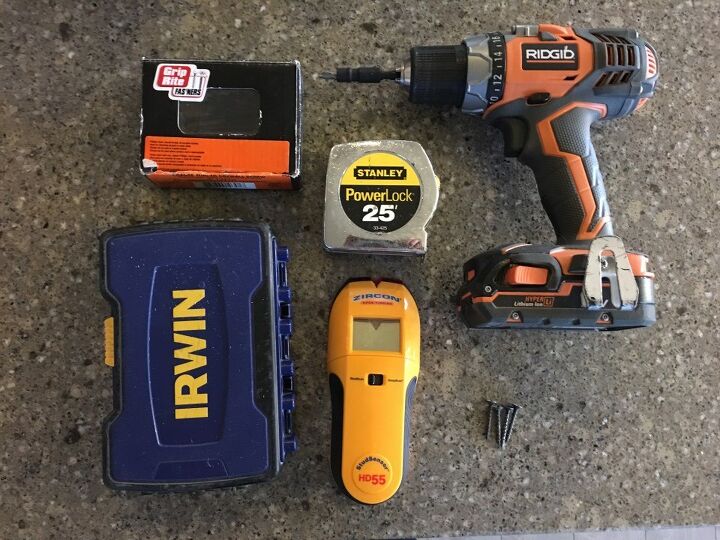
My Irwin Drill Bits and Ridgid 18 Volt Drill are my staple tools for most of my DIY’s. Additionally this Stanley measuring tape and Zircon stud finder are also in my tool box at all times. You can purchase all of these at The Home Depot here.
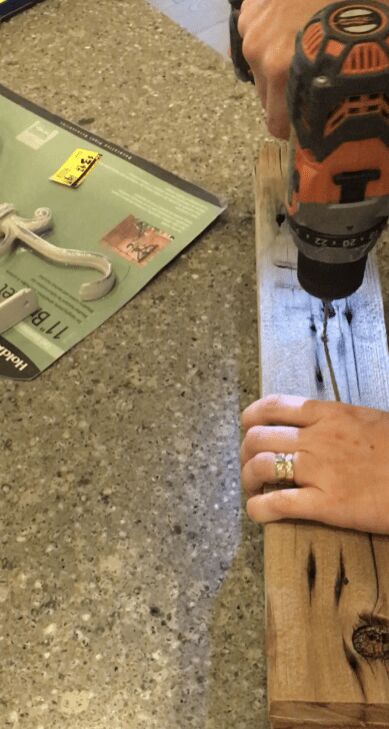
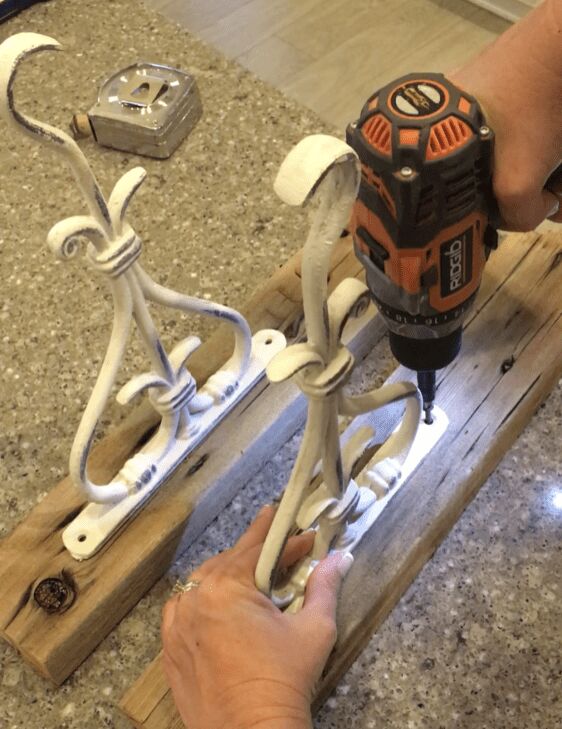
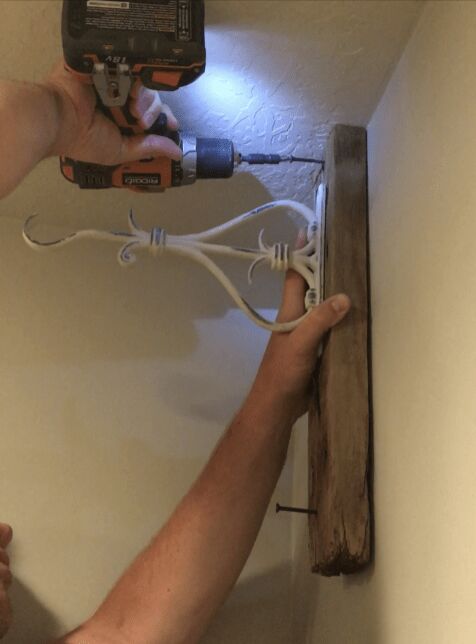
You will be mounting your garden brackets onto your wood bases. I measured into the middle by one inch and down 2 inches (my wood is a 2 x 4). Then I placed the bracket where I wanted it and marked where I needed the holes with a sharpie marker.
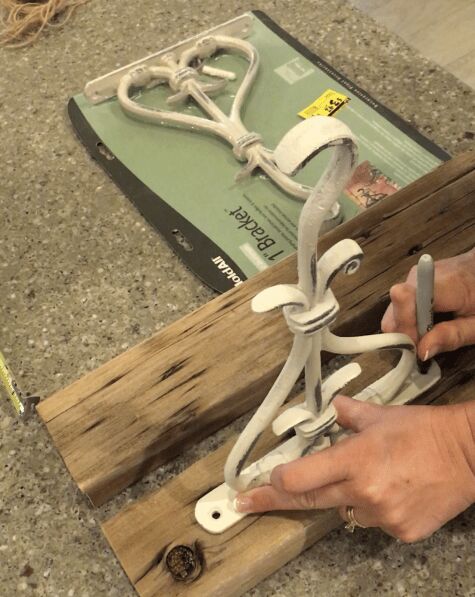
It is important to pre drill your holes so that your wood does not split. It happens a lot, especially in more fragile old pieces. After the pre drill is complete, you will mount your bracket onto the wood with your hand drill, using your 1 inch screws.
Once you have decided where you want these on your wall, you will measure for the studs. To do this you use your stud finder and slide it vertically across the wall – slowly. Once it senses a stud the arrow will light up, this is where you drill.
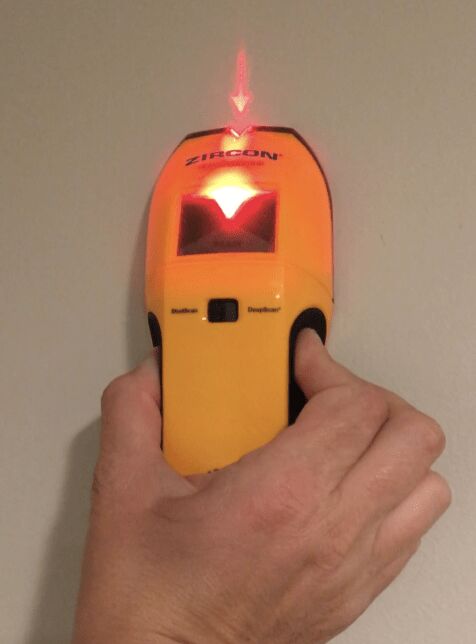
I always try to drill into a stud if possible because it is such a string support system, but if that’s not an option I use E-Z Ancor Twist-N-Lock or ITW Brand anchors. Mr. Farmboy insists they are the best and I started using them years ago to hang things. They are easiest for me to handle.
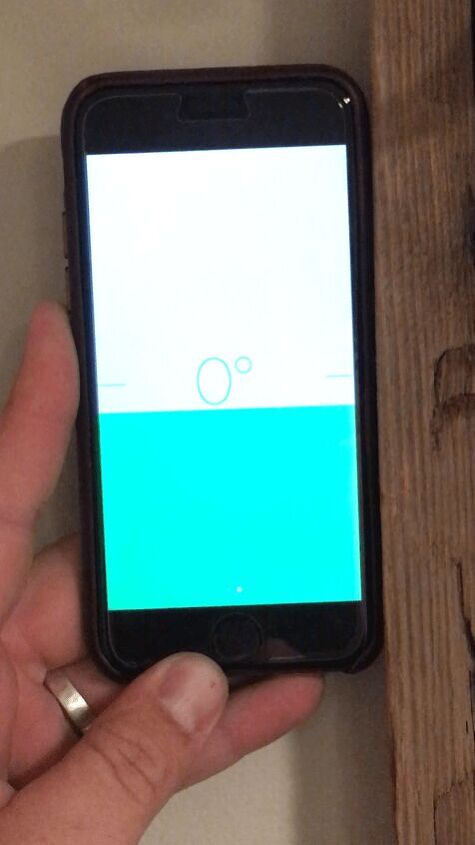
Another quick tip we use. A leveler is another staple you need in your tool box. We have a few lengths to help with different projects. This allows you to make sure whatever you are hanging or installing is even and accurate. BUT, if you don’t have one and are in a bind – there is and APP for it!! Amazing right? The Bubble Level for Iphone is a great one, as well as Toolbox Pro. Here is what it looks like, excuse my bad photos but the lighting was not very good at midnight!
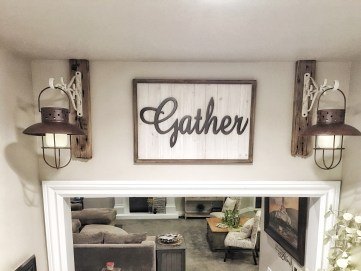
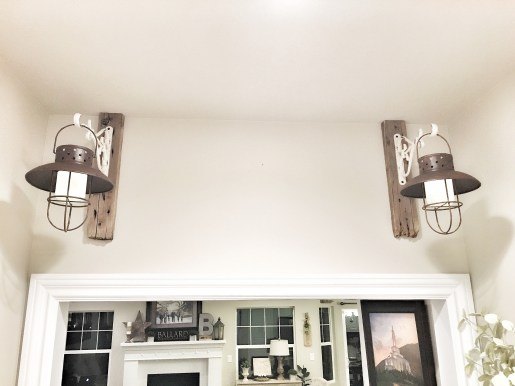
I used (well, Mr. Farmboy used) a 3 inch wood screw to mount these into the studs, one on each end. We pre drilled them as well for easier mounting.
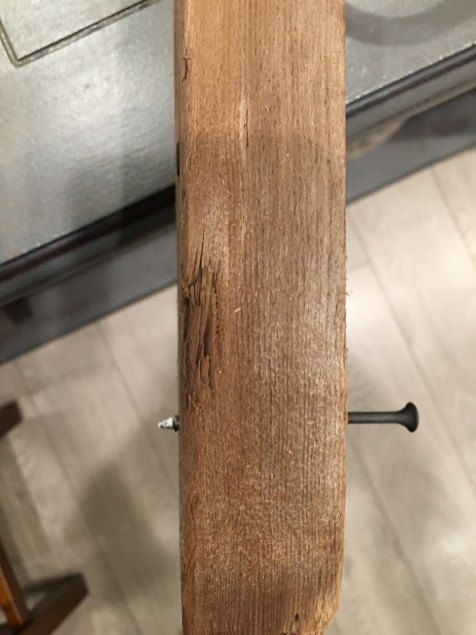
Our second light did not have a stud for us to use so we did use our anchors. A tip: If you pre drill the screws you are using so they stick out of the other end, you can gently push it into the wall where you want it. This will leave a small mark as to where you need to drill your anchors. Then once the anchors are in, you can easily mount the rest of the light fixture!
I made sure the LED light was turned on when I was ready to add my lights. They charge during the day and turn on at night!
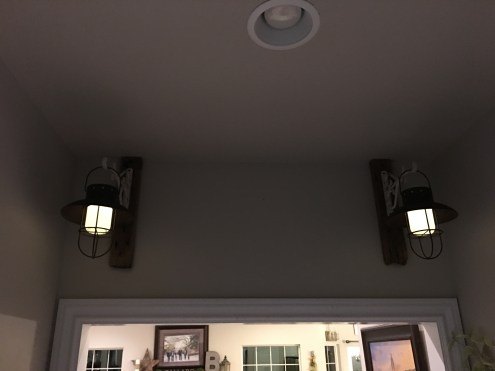
Inside lights on (the LED lights still stay on when my inside lights on are, they turn off when the sunshine comes in).
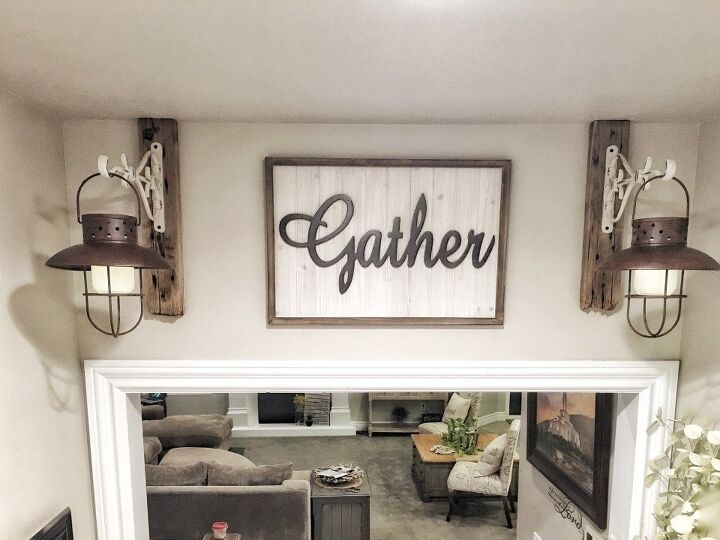
Finally, we added a darling sign we ordered from Kohl’s. Its one of my most favorite online shipping stores for farmhouse decor. They have so much more online than in the store, there is always sales and coupons, and always free shipping offers. I love them!
So that’s it! Let us know if you have any questions or how your project turns out – we would love to see it! Happy Building!
Love,
Kelly
Resources for this project:
See all materials


Comments
Join the conversation
-
Lovely and so well done and put together. Thank you for sharing :)
-
Wow, so simple yet such a big statement. It really came out beautiful.
Also, you explained the process you used so well and made it so easy to follow.
Fantastic job for you and Mr. Farmboy😁


Frequently asked questions
Have a question about this project?