


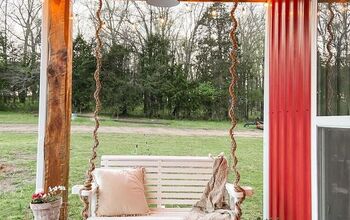
Wrap Rope Around a Swing Chain for a Custom Look
3 Materials
$30
2 Hours
Medium
Are you looking at how-to makeover a typical porch swing into something special? Wrapping the swing chain with rope is not only easy, but gives your swing a custom coastal vibe.
Apparently, I must really not like swings the way the home improvement stores make them. Wrapping the chain with rope is just ONE of the things I did to makeover my porch swing. Hey, my name is Porch Daydreamer after all :) I take this porch swinging thing pretty seriously!
PLEASE visit my website for more thorough instructions. Here are the basics...
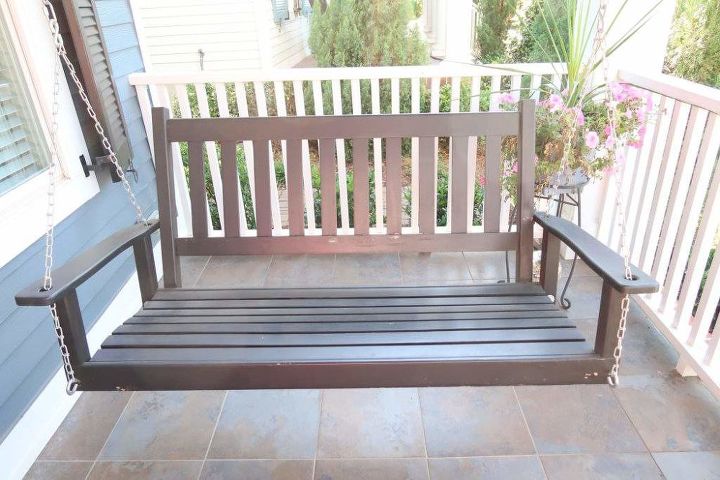
Yes, my porch swing was just your basic home improvement variety in black. Last summer this is what it looked like and after 7 years, it was time for a makeover! Much cheaper than replacing.

Here is what is looks like today - just a few updates! Please visit my website for all of the tutorials related to the porch swing makeover.
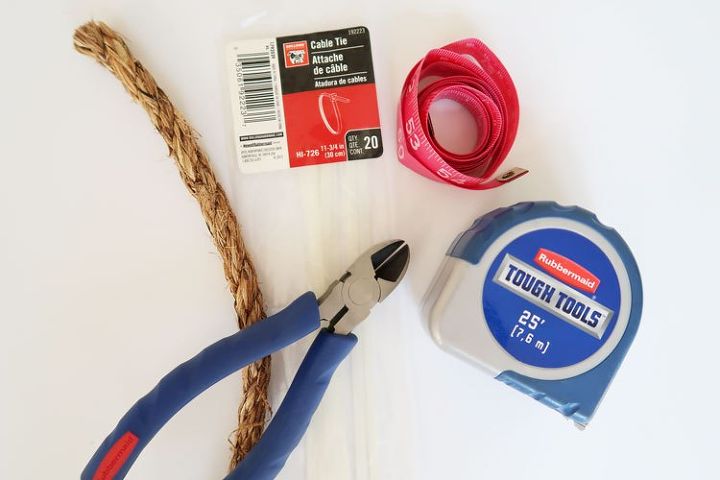
Here are the basic supplies that you need. To use the specific rope I did please CLICK HERE
Step 1:
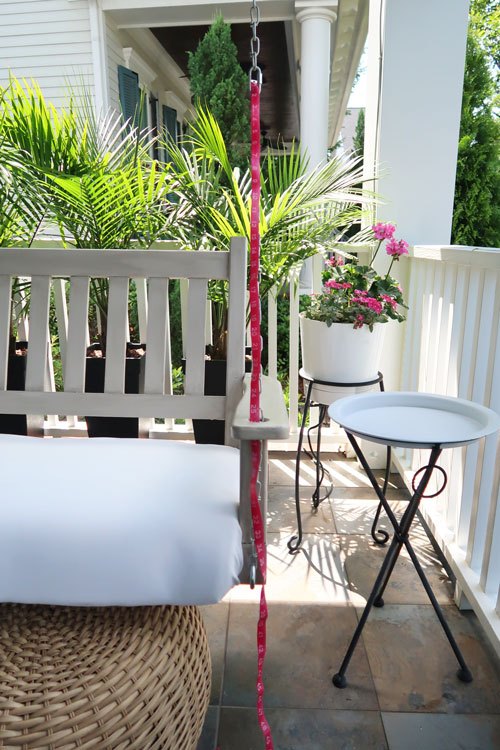
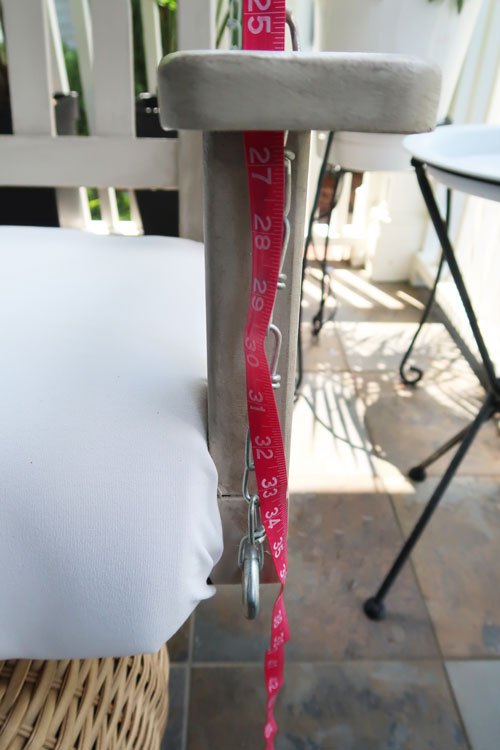
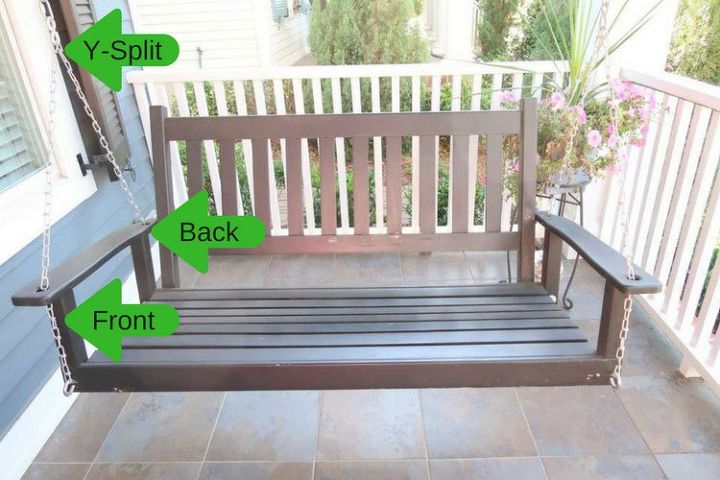
Measure the chain using the dress maker measuring tape. Measure it in sections and you'll see below why I recommend a flexible tape measure. You will have to measure through the 4 holes on the swing.
Measure the distance from the where the chain is hanging from the ceiling, then from the split. I'm calling those the Y-connectors that go through the arms to hold the swing level.
One measurement is for the front part of the Y and one for the back part.
Write the 3 section measurements down on a piece of paper and ADD 5 INCHES to each piece, so you have enough rope to tie knots and trim. I'm ASSUMING if you measure one side you can use that for both - that worked for me!
Step 2:
Cut the sections of rope using the cutting pliers. I'd recommend doing this outside because it's pretty messy. My kitchen counter and floors were a mess after this project, so I'll save you the trouble of having to vacuum and dust.
You will have an identical set (one for each side) of these pieces for a total of 6:
- Front Y
- Back Y
- Long hanging chain
As you go through these instructions, I won't be repeating the process for each area but show you the principles for the sections. So know you will go through the process 6 times!
Step 3:
Begin with the front or back Y and split the rope into 3 sections. Who knew a rope had 3 sections??? This I did, before attaching it to the swing.
Step 4:
With precision, jam the three pieces through latch that connects the hanging chain to the Y-connection. Yeah, just jam them!
No skill required. CABLE TIE THE ROPES TO THE LATCH. Sorry, I missed this picture! The cable ties will get covered later.
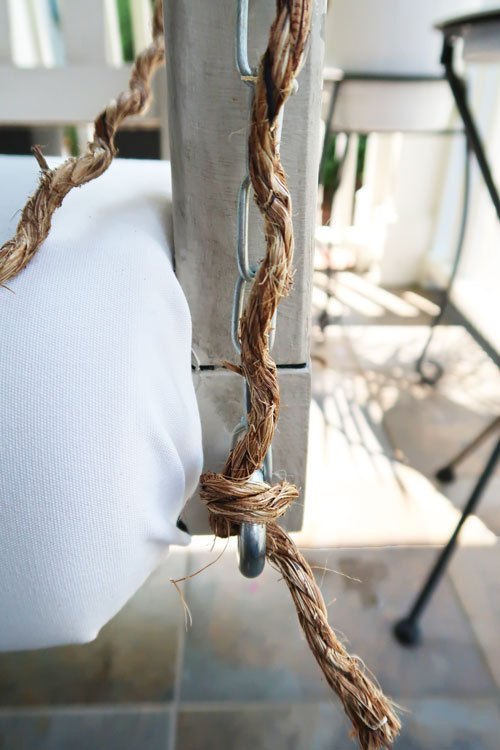
Step 5:
First, pull one of the 3 rope pieces down flat against the front of the chain. Run it through the hole in the arm and secure it to the eye-hook by tying a knot.
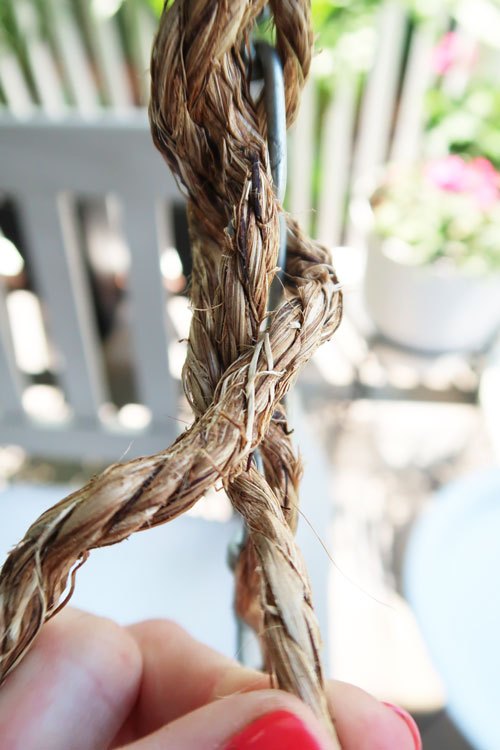
Step 6:
Time to get "kinda" braiding. Taking the 2 unsecured pieces criss-cross them over the front, then over the back of the chain. The goal is to cover as much of the chain as possible!
Go all the way through the hole by feeding the 2 pieces of rope through. Secure by tying the 2 pieces in a knot around the eye hook.
THIS SOUNDS LIKE IT TAKES FOREVER, BUT IT'S QUICK.
Tie rope to the hook eye to hold in place.
Step 7:
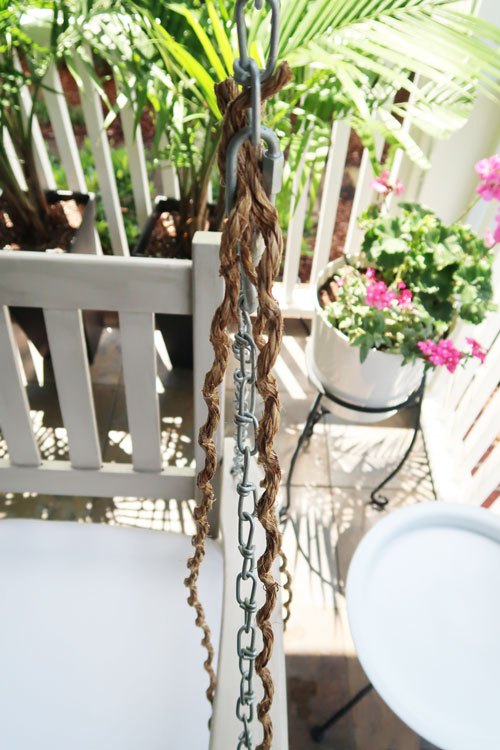
After completing all 4 Y-connection sections, move to the hanging chain. You will obviously need a ladder for this one! Up at the top, follow the SAME process and jam the 3 pieces through a chain link.
HOLD IN PLACE WITH A CABLE TIE.
Pretend this picture is a the top because I wasn't risking dropping my camera ;)
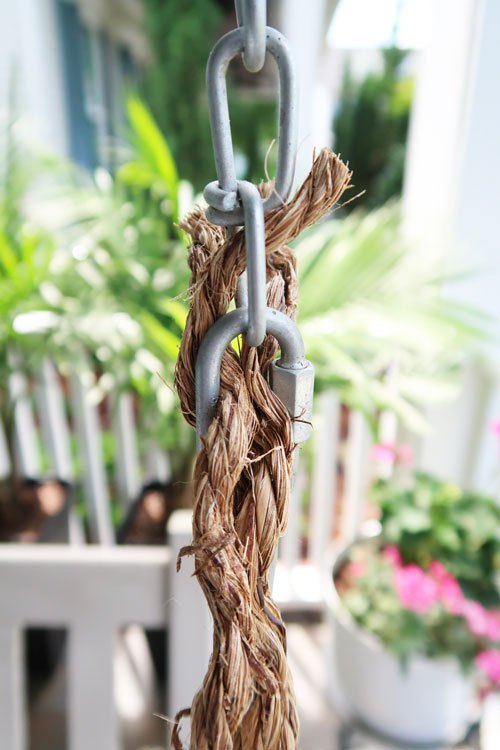
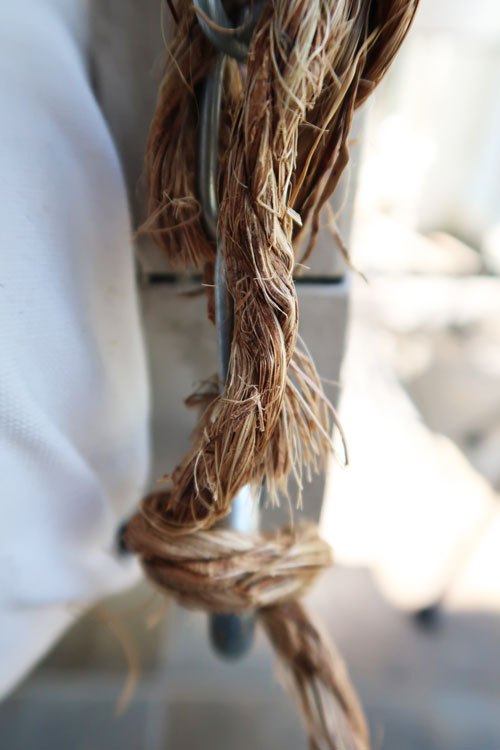
Step 8:
Take one of the 3 pieces and pull flat on the front side of the chain. Secure with a cable tie near the latch. This is JUST to hold the single rope piece taught. You can see the cable tie is holding the 2 Y-connector ropes in place "kinda" in this picture.
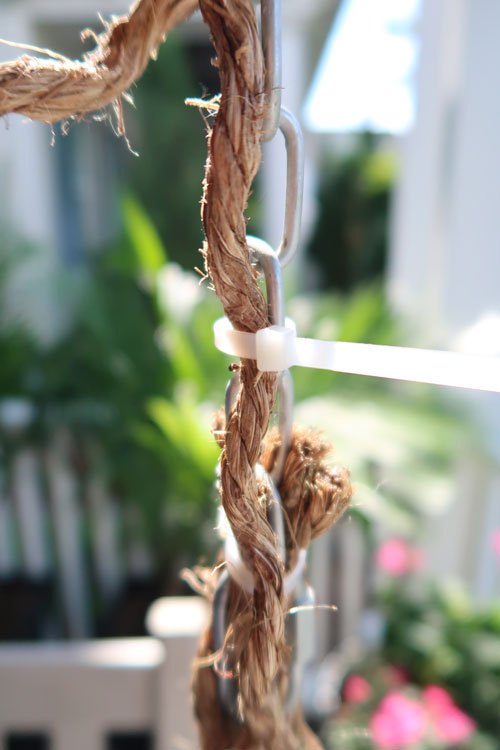
Step 9:
REPEAT STEP 3 to 6 FOR BOTH HANGING CHAINS. Clip off the "anchor" cable tie (pictured above) and wrap a final cable tie to secure the three pieces in place above the latch.

Step 10:
Finishing touches. Now it is time to cover the cable ties. Here are all of the locations you will need to cover.
Cut enough rope to create a knot around each cable wrapping the rope TWICE and then tying. See pictures below. I'm guessing it took about 6 inches.
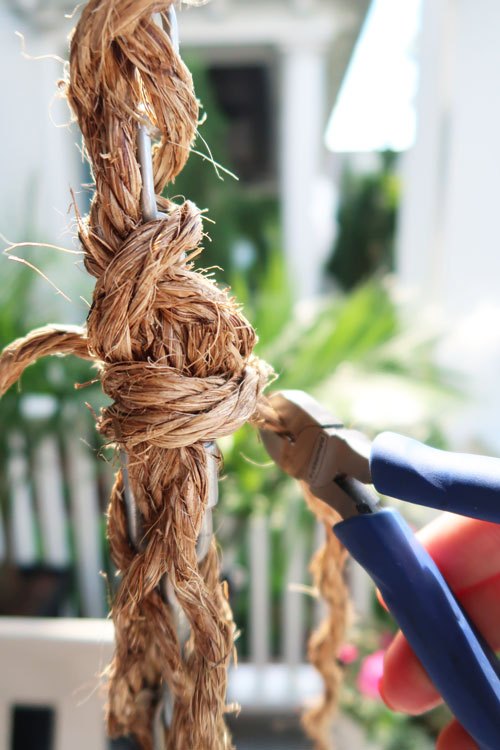
Step 11:
Snip off remaining long pieces of rope and the ends of the cable ties in all locations using the cutting pliers. You can clip very close on both items.
I PROMISE there are cable ties underneath keeping everything secure, but they just disappear after they are wrapped in rope ties.
ENJOY!
That wasn't so bad was it! I promise it took maybe 2 hours start to finish mainly because you have to go up and down a ladder.
Resources for this project:


Any price and availability information displayed on [relevant Amazon Site(s), as applicable] at the time of purchase will apply to the purchase of this product.
Hometalk may collect a small share of sales from the links on this page.More info

Want more details about this and other DIY projects? Check out my blog post!
Comments
Join the conversation
2 comments
-
I am so inspired by your post. The results looks like it cost a million dollars. That just how fabulous this looks. Thank you for sharing. I am going to try and sign up to your site, because I love your style/taste.


Frequently asked questions
Have a question about this project?