


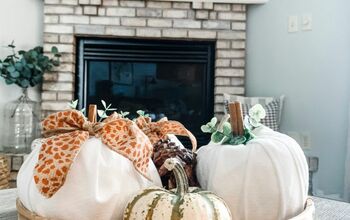
Paper Mache Pumpkin

Hello and thanks for taking the time to view my post today!
In this post I will show you how I made this paper mache pumpkin from scratch using wire.
I did try the balloon and string method too but had no joy. If anyone out there managed this, please tell me how! 😩
Of course, I also have video tutorials on how I made this exact pumpkin up on my YouTube channel so if you prefer to watch your tutorials instead of read them, then check out my channel using the link above!
I have linked the videos down below too.
On with the project!
WHAT YOU'LL NEED
- Wire
- String/tape
- Pliers
- A balloon
- Glue
- Scrap paper
- Paint
- Optional decorations
STEP 1 - MAKE THE CAGE
As I mentioned before, I have YouTube videos showing you exactly how I made this project.
The first video, linked above, shows you exactly how I created my cage and shape and how I then covered this with my paper mache.
Click above to view ▶️
However, If you prefer to follow written instructions then keep reading and I'll walk you through the steps.
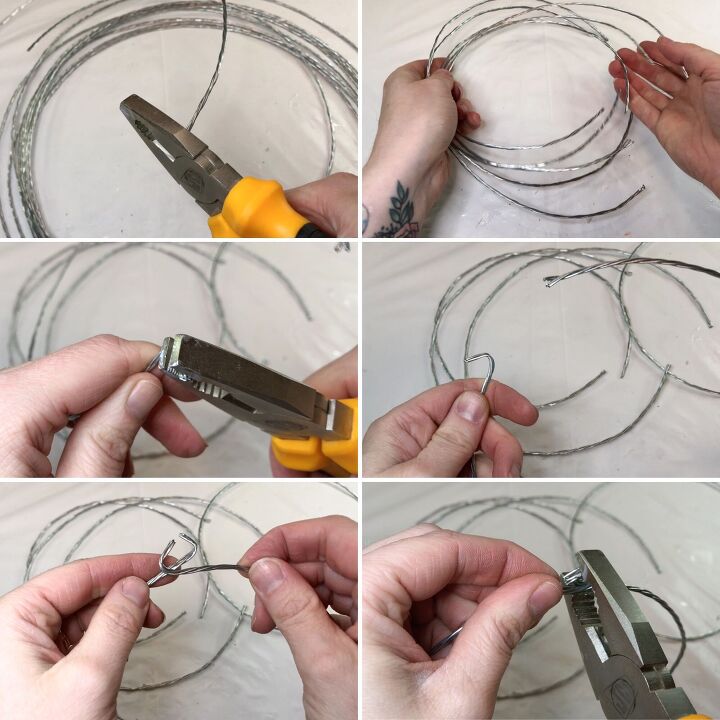
First, cut 4 pieces of wire all of roughly equal length using pliers. These pieces when made into a loop will form your pumpkin ribs so bear that in mind when considering the size of your pumpkin.
Bend the 4 pieces into hoop shapes so that they stay in place a bit better. Then using the flat part of the pliers, fold back each end to create hooks.
Hook the ends together to create 4 separate hoops that stay connected on their own. If they keep coming apart, use the pliers to crimp them in place.
You should now have 4 individual wire hoops.
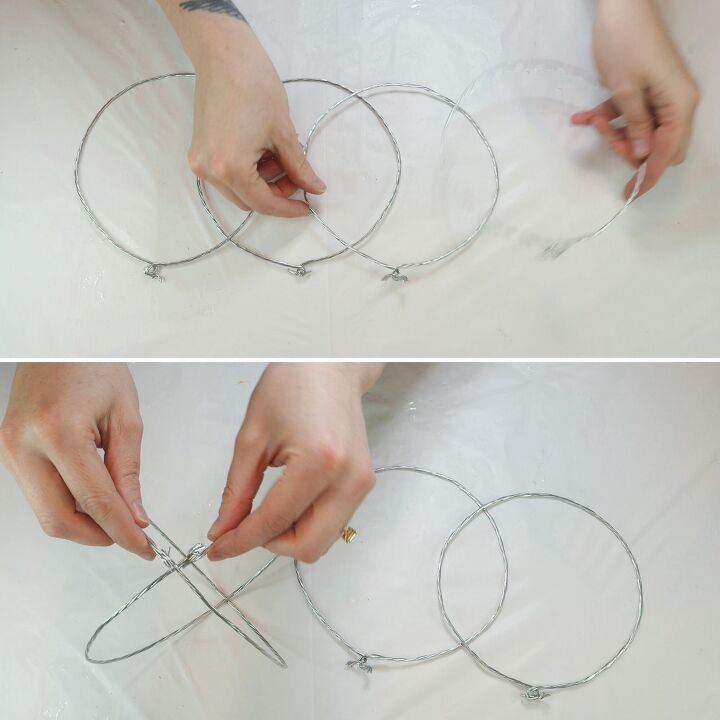
More than likely there will be a slight difference in size between all 4 hoops. Line them up in size order and pick up the largest hoop first.
Then pick up the 2nd largest hoop and slot this inside the largest hoop.
Secure the hoops in place in a cross shape at the top and bottom using string and tape. Don't worry about it looking messy, the paper mache should hide all that later.
Next, take the 3rd largest hoop and slot this inside the forming frame and secure like before. Repeat again for the last hoop until you have your empty pumpkin cage.
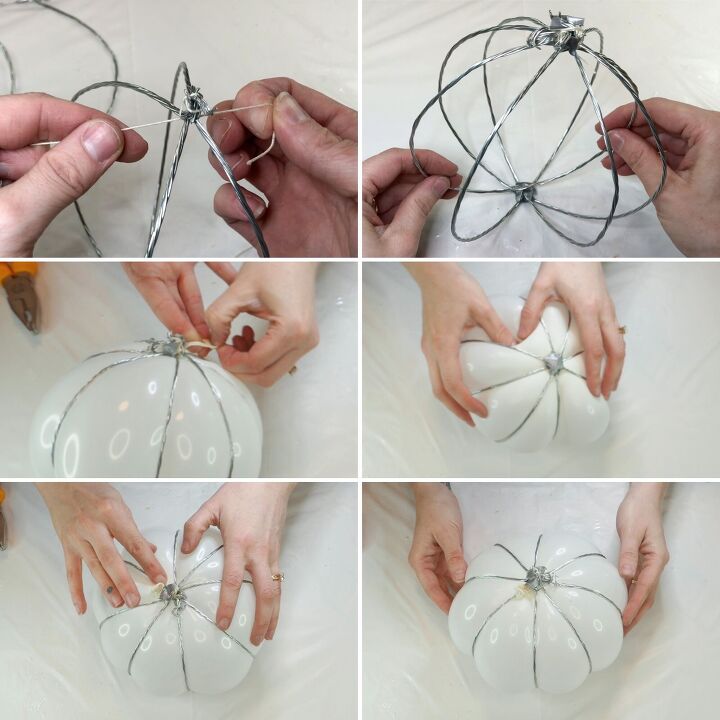
Make sure the hooks at the top are all pointing away from the centre of the cage and that there are no sharp bits facing inwards otherwise you could pop your balloon in the next step.
Maybe stretch out your balloon beforehand and then dangle it inside the pumpkin cage. Hold the neck of the balloon close to the top of the cage, near the hooks.
Inflate the balloon part way so that you can position the balloon centrally and then continue to inflate until you get some nice bulbous segments pushing against the wire ribs.
Tie off the balloon when you're happy with the volume and then carefully spread the air around evenly so that all the segments look uniformed. I popped one balloon at this stage and had to start again, so be nice and gentle.
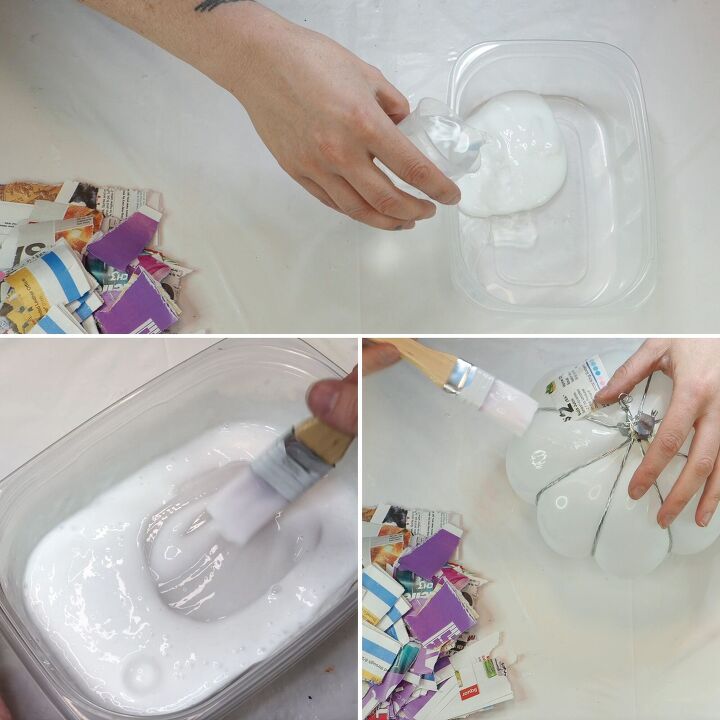
STEP 2 - PAPER MACHE
With your pumpkin shape ready, mix together some glue and water and rip up some strips/pieces of newspaper or thin magazine pages. I just used 0.032% of the daily junk mail we get 😒
I never measure my glue and water ratios but if you want a rough guide, aim for a 2:1 mix (2 parts glue, 1 part water).
Slather up your balloon and paper with the watery glue and paste the strips all over it. Cover the whole thing thoroughly and give it a 2nd coat once it's dry. Then allow to fully dry out. I left the hoop hooks bare to sort out next.
*I strongly advise doing your first coat of paper mache all in one sitting. I got bored half way through and was getting annoyed with my balloon flopping about so came back to it the next day....big mistake. The balloon had already started to deflate so I had to fill out the sunken parts with paper mache pulp. It ended up being a much bigger job than if I'd just been more patient in the first place 😳
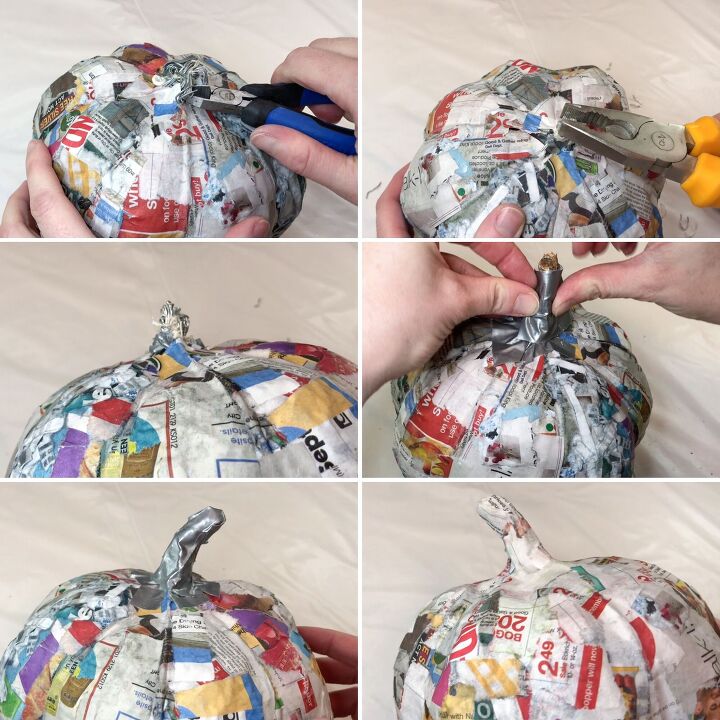
You could incorporate this next part into an earlier step (like before paper macheing the pumpkin body) but I did it at this stage for some reason...
For the handle, bend all the hoop hooks into an upwards shape and tape over all of it to create a smooth finish.
To extend the length of the handle, maybe attach a piece of twig on the end like I did.
Tape over the whole thing and then paper mache over the tape.
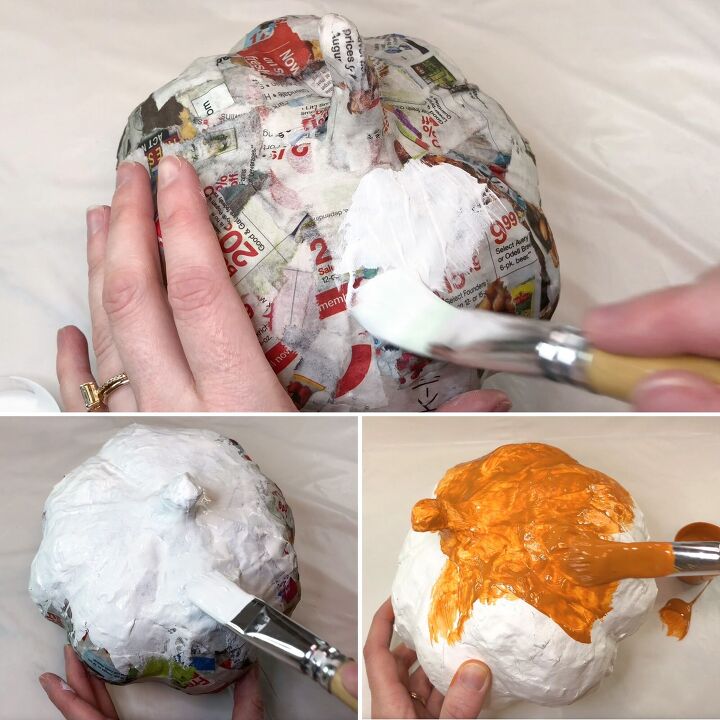
STEP 3 - PAINTING
First give your pumpkin a coat of white paint so that the print and pictures from the newspaper underneath are less likely to show through.
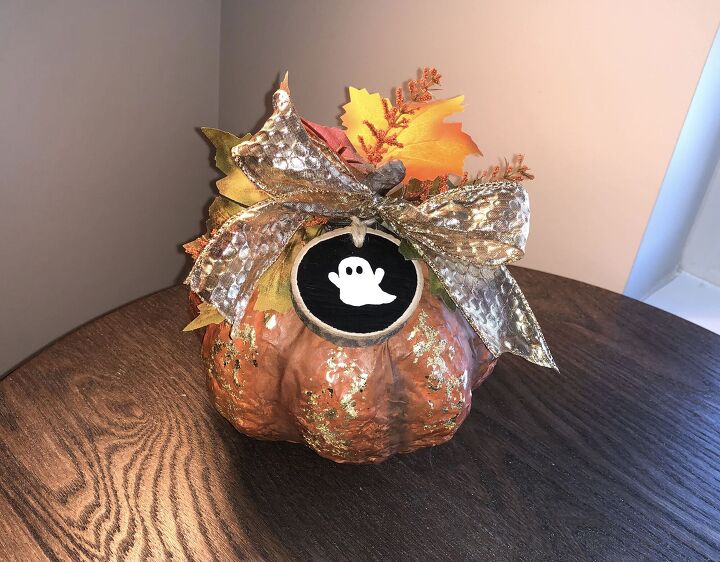
Then give your pumpkin a coating of the actual colour you want it to be. I painted mine in 'Pumpkin Orange' with a tiny bit of 'True Navy' mixed in (Apple Barrel paints).
If you want to continue painting yours exactly as I did then this is how...
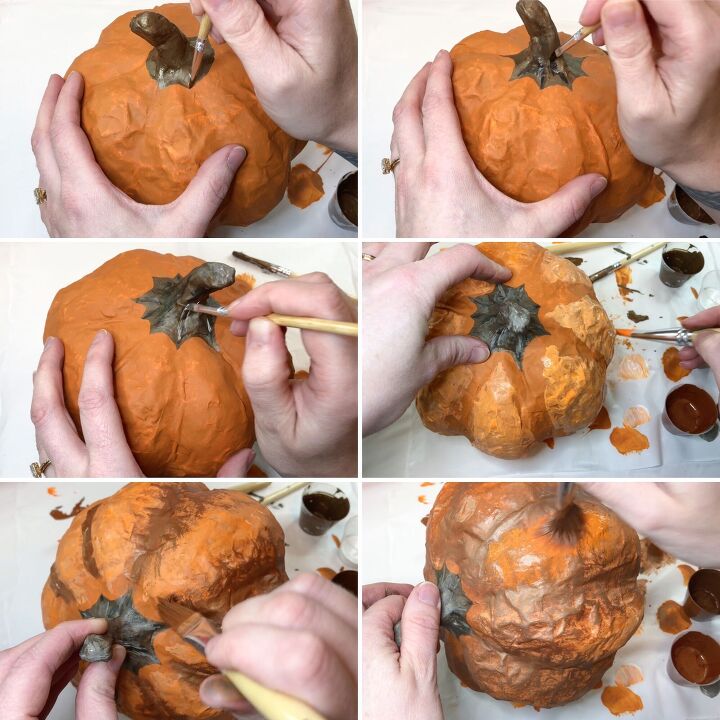
Paint on the handle with a bronze/brown colour and add texture and definition with lighter and darker versions of that colour. Just some strokes up and down to break up that block colour.
For the body, paint lighter patches of orange on the most bulbous parts and darker orange down the ribs. Blend these colours together with a drier brush and keep layering up and blending these colours until you're happy with the overall look.
Of course, you can just keep your pumpkin all one orange colour. It's totally up to you.
STEP 4 - OPTIONAL DECORATIONS
My second YouTube video, linked above, shows you how I decorated this pumpkin with all it's added extras including:
- All the painting
- Adding gold leaf
- Making the ghosty
- Adding the bow
- Adding the foliage
To watch, simply click the video link above 👍🏻
For the written instructions, carry on reading ☺️
By now you'll have a complete paper mache pumpkin ready to place amongst all your fall decor.
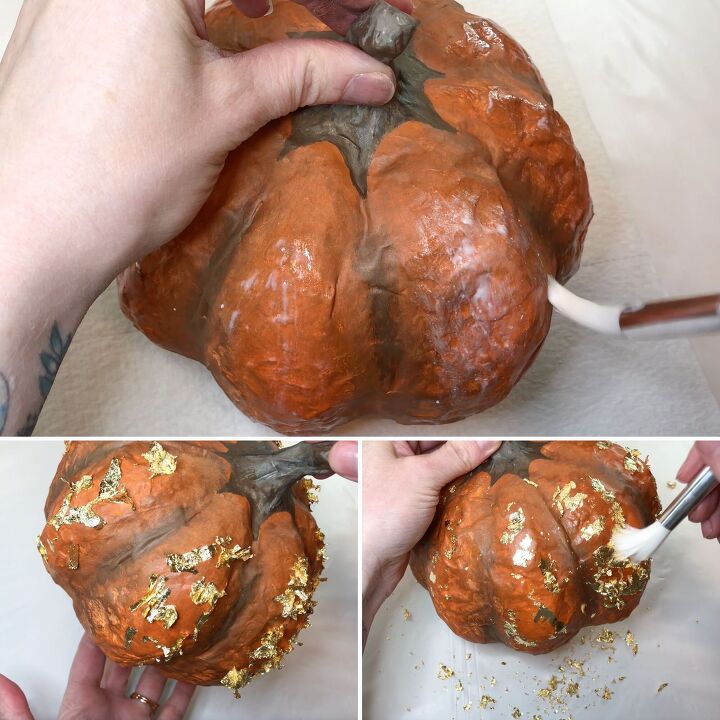
If you want to go one step further and kit it out with some gold leaf and faux foliage like mine then this is how.
Brush on some glue to the segments of your pumpkin and press on pieces of gold leaf. Allow this to dry and then dust off the excess.
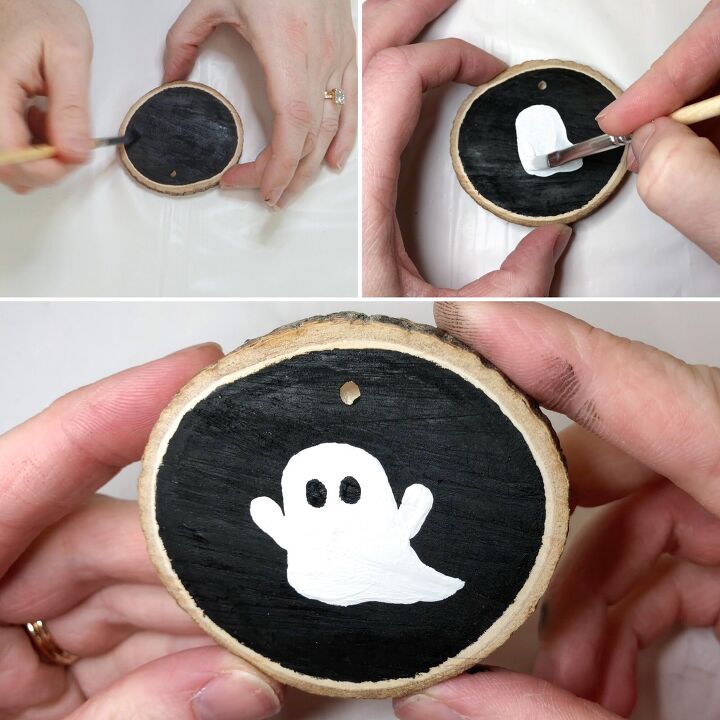
I already had some log slices left over from making my sister-in-law some wedding favors so thought a little ghosty tag would look cute.
I drilled a small hole in the top and painted the front black and added a simplistic white ghost on top of that.
If you have blackboard paint then it would be pretty cool to use this with chalk instead of acrylic paints like mine. That way you could change-up the image whenever you feel like it!
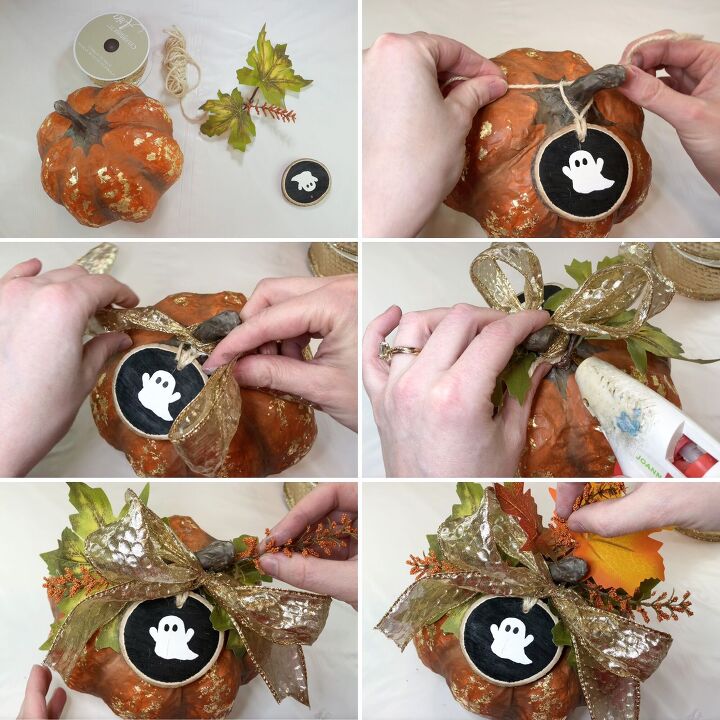
Thread the hole on the tag with twine and tie this around the handle of the pumpkin.
Next, using ribbon with thin wire running through it, tie a gold bow around the handle to sort of hide the twine as well as to look adorable.
Finally, glue faux leaves etc around the handle for literal undying cuteness.
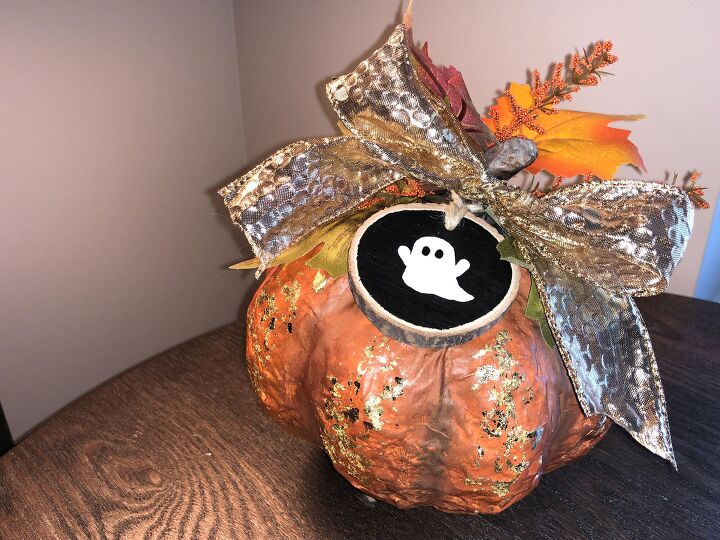
And that's it. Reusable, handmade decor.
Thanks very much for checking out my post today.
Please remember to check out my YouTube channel and consider subscribing for loads of crafty content 👍🏻
I also have an Etsy Store with lots of handmade goodies for sale. Please check that out if you get the chance ☺️
Until next time, happy crafting! x

Resources for this project:
See all materials


Comments
Join the conversation
-
I really love this idea, a much different way of making paper mache pumpkins 💕
-
Wish my dad were alive to see this. He loved paper machete at Halloween/fall. Made many epic masks for we kids for beggars night, plus other spooky things. Thanks for bringing Dad to me today


Frequently asked questions
Have a question about this project?