


Homemade Christmas Gift Tags From Cardboard and Fabric Scraps!
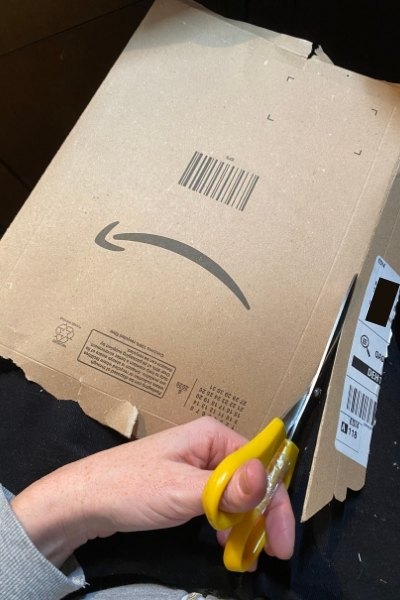
This super fun & easy tutorial is all about how to make your own homemade DIY Christmas Gift Tags out of things you would normally throw out – namely cardboard & fabric scraps!
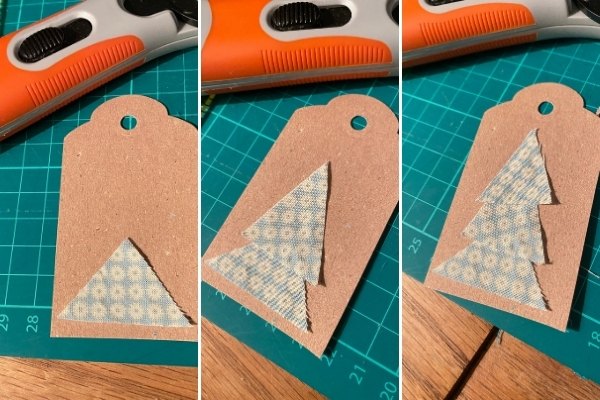
The gift tag punch I used for these Christmas Gift Tags is the same one I used to make my ‘ homemade’ Kraft Tags, it's a Vaessen Creative one and it's available lots of places.
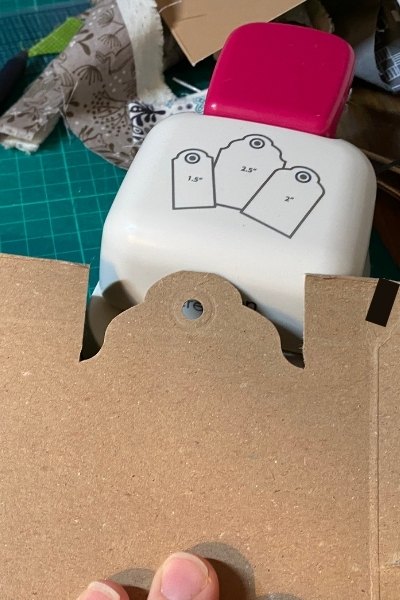
It has 3 size gift tags you can make and the only thing you need to do first is cut out yours strips of cardboard to the width that you want, either 1.5″, 2″ or 2.5″ – you get a different shape gift tag top for each size.
Just ignore that I haven’t cut out strips in the photo above! I was just seeing if it was easier if I cut the top first – it wasn’t – cut the strips first!
Cut out as many tags as you like and you can vary the length of these to suit what you like. I did some shorter ones and some longer ones too.
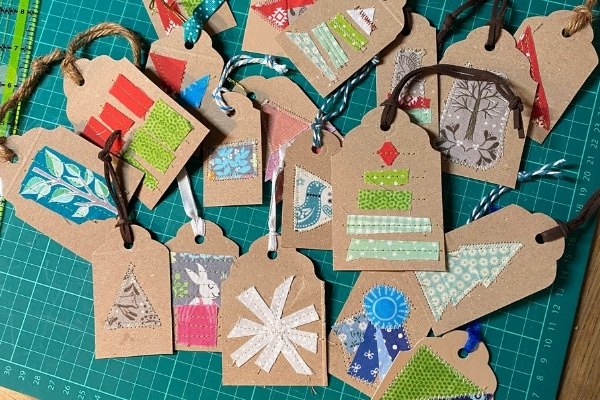
I made several different types of designs on my gift tags with my scrap fabrics. I’ll go over each variety below.
You can use the tinniest little pieces for this and it’s great for ‘fussy cutting’ little elements (fussy cutting = deliberately cutting out an image or pattern from a piece of fabric).
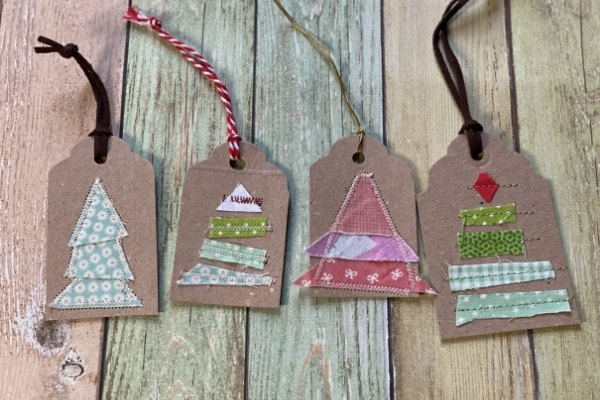
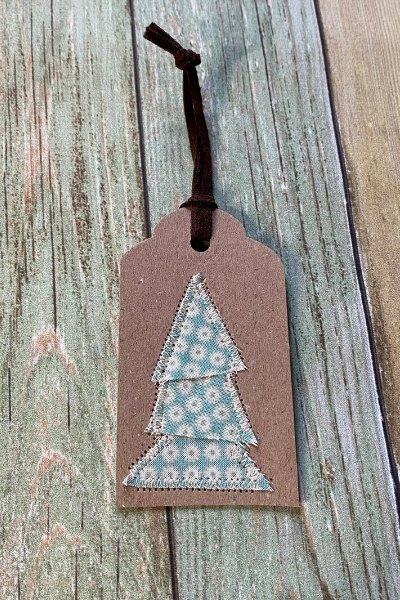
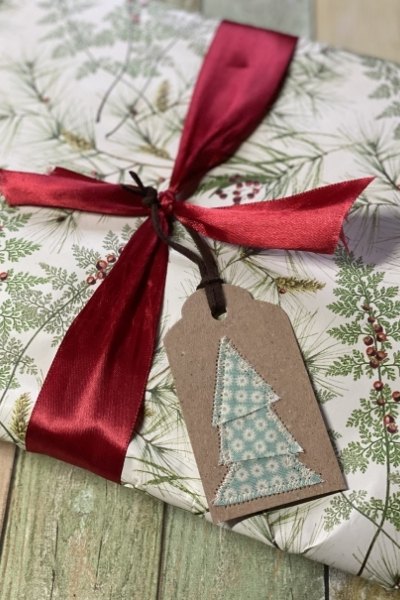
I made a few different types of Christmas Tree Gift Tags.

For the first one you literally just take 3 or 4 very thin strips of fabric (less than half an inch thick) and trim the ends so that the strips get smaller and smaller as you go up your ‘tree’.
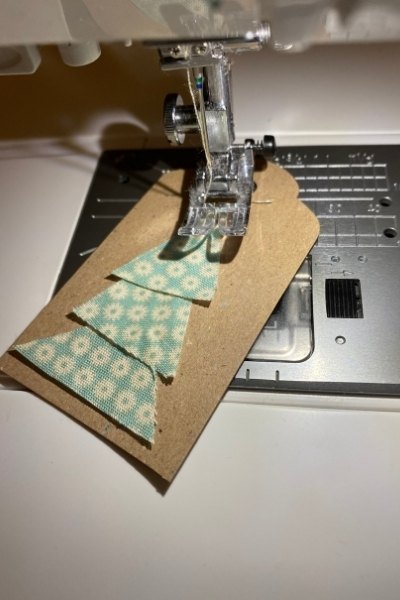
To attach them dab a bit of fabric glue (or just a kid’s glue stick) to the card where you want each strip to be.
Press your fabric in place and then take it to the sewing machine and sew a straight stitch or zig zag across – whichever you prefer. For the zig zag stitch I kept the stitch length at 1.5 and for the straight stitch it was 3.5.
For the second type of Christmas Tree tags I used those little scrap corners you get left with when you trim gussets or quilt binding strips.
`I layered 3 on top of each other until they looked somewhat tree like.
Then I sewed around the edges using a zig zag stitch. You could use another stitch type if you like.

Once I made my Christmas Trees I decided to just have a bit of fun with my other tags.
I made some with groupings of Christmas coloured scraps.
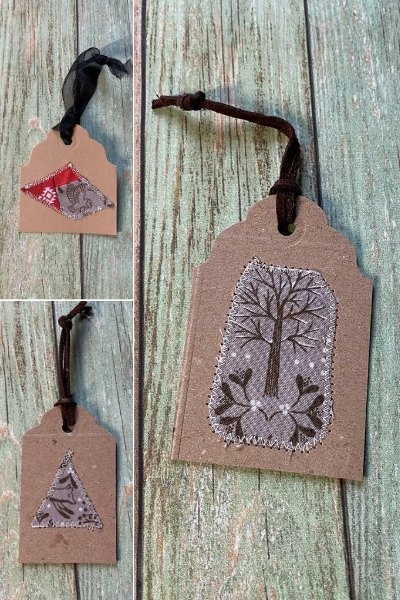
Then I made some with fussy cut elements from a sort of woodsy/christmassy fabric I had in my scrap basket.
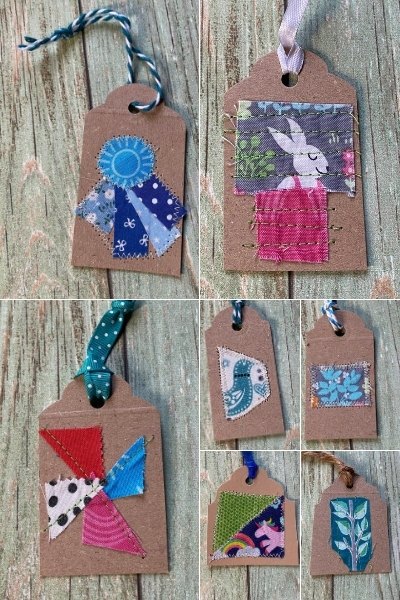
And I then I made a whole bunch of brighter tags that I thought might be nice for kids.
I didn’t backstitch when sewing any of these pieces of fabric down and I’ll explain why in the next step!
So once you have all your pretty gift tags you might be thinking, that’s great but there is stitching through the opposite side and not enough room to write on!
True.
So here is what I did.
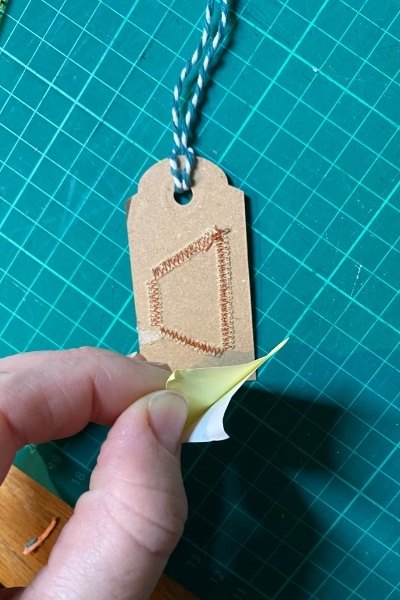
I use sticky back label paper for my day job when I’m packaging shipments.
These get trimmed and I end up with strips of this sticky back paper (everywhere!). I often have no choice but to just throw those leftovers away!
So this year I trimmed those strips to size and stuck them to the back of my DIY Christmas Gift Tags.
Because you are sticking these labels down over the stitching in the back the ends of your threads will be stuck down inside - which is why you can skip the backstitching!

You could also glue or mod podge leftover paper or pieces of junk mail envelopes if that is what you have to hand in your recycling bin.
Another option is to use the method I used in the DIY Kraft Tag Tutorial that I linked to above. For that project I sewed two pieces of cardboard together.
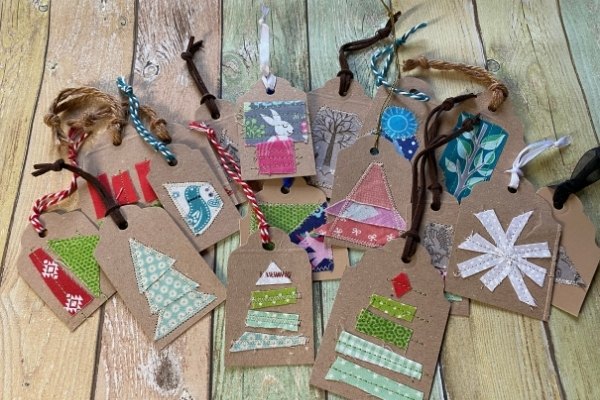
The last step is to attach your hanging loops.
You can use bits of ribbon, twine or even long thin strips of scrap fabric for this.
Simply cut a short length, tie both ends in a not, feed the folded end through the hole and loop it through!
Your done!
If you are looking for more creative ways to wrap or even make your gifts from upcycled materials, check out the Upcycled Gifts section of my blog which has loads of ideas and tutorials including several posts all about upcycled gift wrap.
Resources for this project:
See all materials


Comments
Join the conversation
-
i have plenty of those boxes, and i am going to make tags. awesome idea!!
-
So thrifty and fun! Thanks for sharing.


Frequently asked questions
Have a question about this project?
Didn’t you just blew them on I don’t have a sewing machine