


DIY Gift Wrap for Valentine's Day
25 Minutes
Easy
I get all warm and fuzzy inside when I receive gifts from people I love.And what makes me feel even more special is when the wrapping is beautiful and personalized.I feel like a star.So today I'm going to show how you can make your own DIY gift wrap for Valentine's day with some used printer paper,acrylic paints,precision knife and lots of fun!
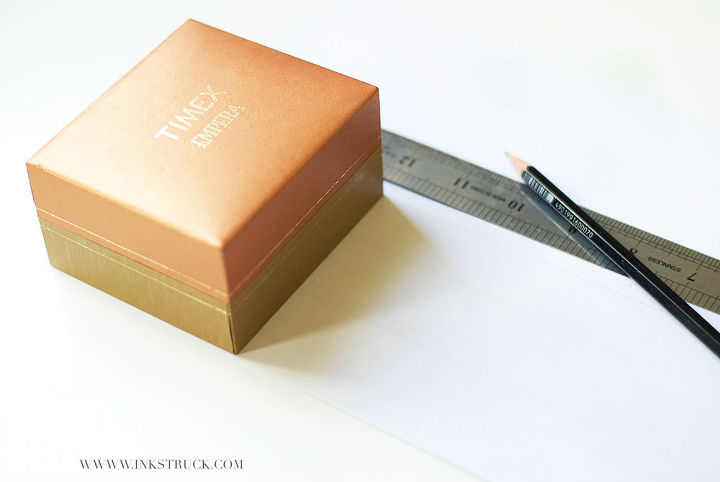
Get your supplies ready. For this DIY gift wrap, you will need 1.Printer paper(I’m using one that has been printed on one side. (Saving the planet!)2.A small gift box 3.Regular pen knife 4.Precision pen knife 5.Acrylic paints 6.Palette 7.Ruler 8.Clear tape.
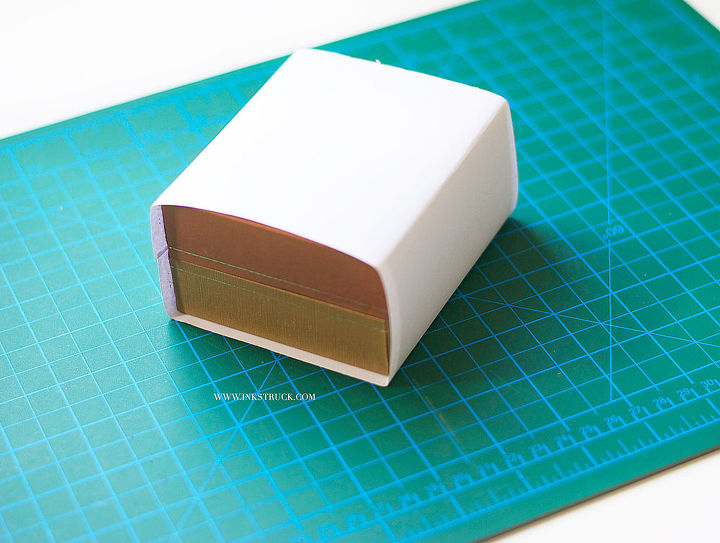
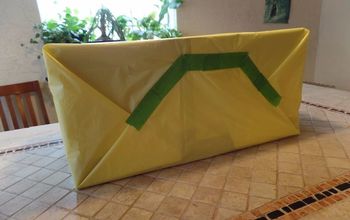
In this step, you need to take the strip of paper you previously cut and wrap it around the gift box.Secure the paper taut by sticking a piece of clear tape. You only need to cover the gift box in such a way that you get the top and bottom covered at this stage. The sides can be left exposed.
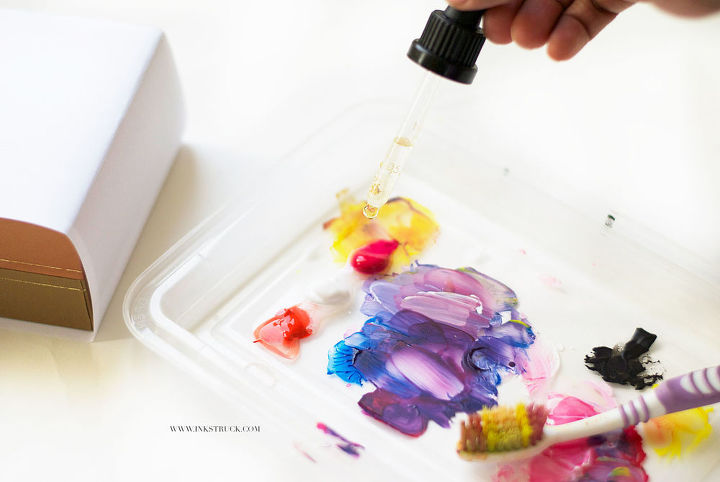
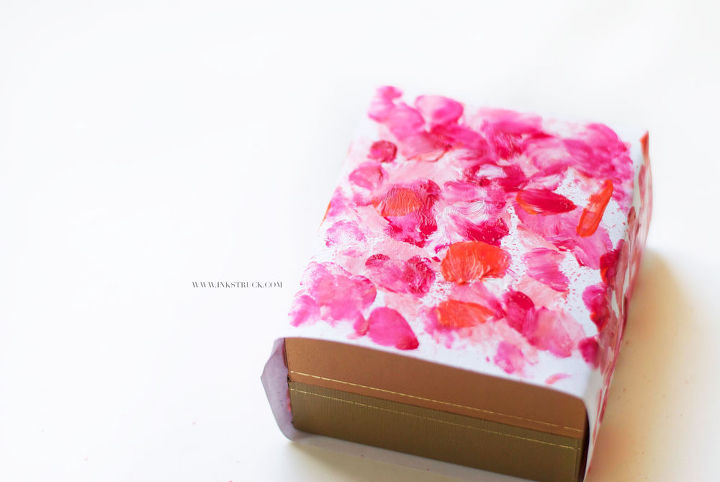
Place a few blobs of color on to your palette.I saved up a dropper that one of my son’s medicines had for the purpose of dropping some water onto the colors. I then used an old toothbrush to mix up the colors. The initial idea was to spray the paint using the brush but then it struck me that using my fingers would do a faster job plus it’s going to be messy and fun.You will now need to get your hands dirty.Use your fingers to randomly apply color on the paper.Alternate between the different colors until you are pleased with the outcome.You will end up up with a random,abstract pattern as shown below once you’re done.
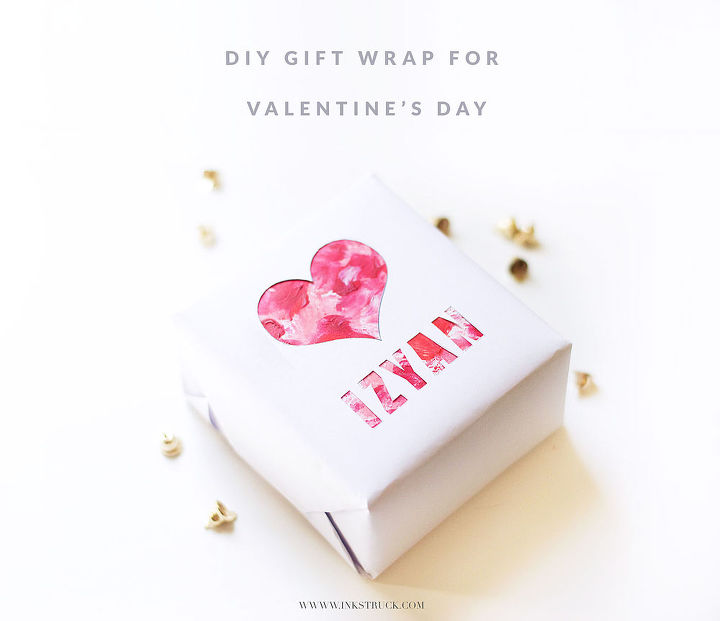
Print or draw what you wish to cut. I've used a print of a heart shape along with the name of my son.
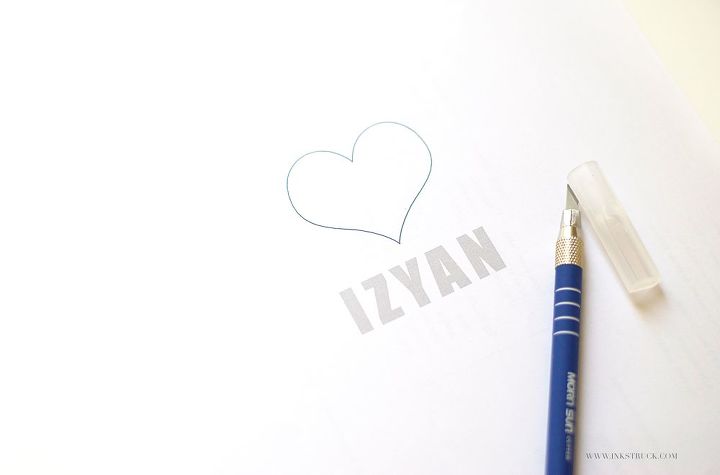
Start cutting!If you have one of those fancy machines like Cricut, then you don’t have to follow this step. The precision knife works great for small details and circular shapes. I would suggest that you turn the paper according to the direction in which you are cutting to get a smooth cut for the heart shape. For the straight shapes, you can use a small ruler or go freehand whichever you find convenient.
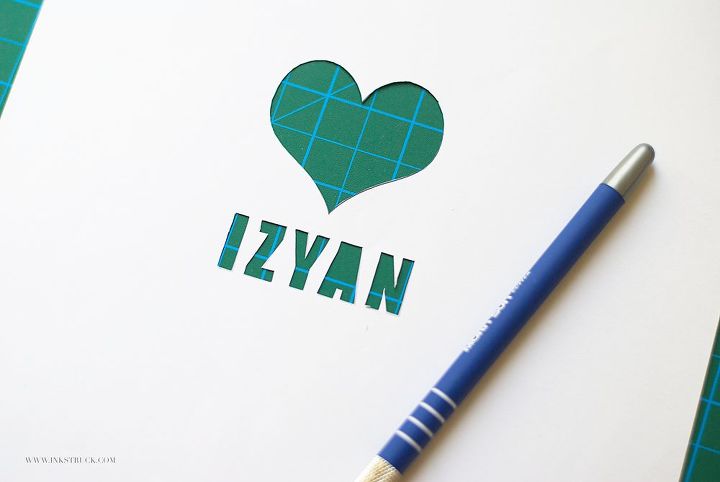
After you cut out the shapes and letters from the second printer paper, you will need to wrap it around the box. Place the cut area on top of the gift box approximately in the middle. You’ll see that the messy pattern you created shows up beautifully through the cut area. Secure the printer paper with clear tape and viola you’ve just made your DIY gift wrap.


Want more details about this and other DIY projects? Check out my blog post!


Frequently asked questions
Have a question about this project?