


Fall Floral Arrangement With Painted Pine Cones

I live on a wooded lot that graciously gives me hundreds of small pine cones every year. A few years ago I started making craft projects with these pine cones.
This year I decided to try a fall bouquet arrangement using painted pine cones as the floral stems.

For this project you can either use purchased pine cones or ones you collect from nature. If you do decide to use ones found in the woods or around your house, you will need to clean and disinfect them before using them to kill off any bugs or spider eggs living in the cones. Gross to think about I know.
To clean and disinfect natural pine cones, you will need to soak them for up to 48 hours in a vinegar and water solution. Mix two parts vinegar to one part water in a bucket.
Small pine cones have a tendency to float to the top so I weigh my pine cones down with a plate to hold them under the solution. Once wet, the pine cones will naturally close up. After the 48 hours, remove the pine cones from the solution and put them on a layer of newspaper to dry out. This may take a few days or you can heat up the pine cones in a 200 degree oven until they open back up.
I had already treated the pine cones I used for this project last year so I don’t have any images of this process. In fact, I usually have a shoe box full of treated pine cones I can use at any time during the year since I clean them in large batches during the fall season.
Fall Floral Project with Painted Pine Cones
For this project you will need:
- Pine cones
- Acrylic paints
- Craft Paint Brushes
- Floral Wire
- Container for bouquet arrangement
- Floral dry foam
- Fall leaves floral stems
- Spray Polyacrylic Top Coat in Satin Finish
I will be honest, painting pine cones with acrylic paint can be a slow and tedious process.
However, I have found that acrylic craft paints stick better to the natural wood of a pine cone than spray paint. Most of the time the pine cones just absorb the spray paint instead of the paint covering the pine cone.
So I continue with my tried and true method of applying acrylic paint to the pine cones with a brush while watching a good movie or listening to a podcast.
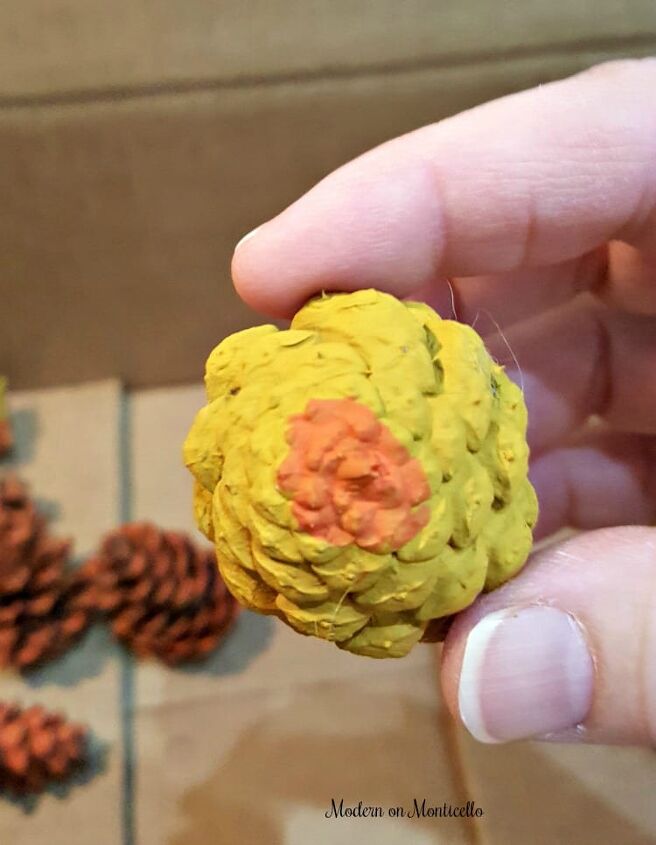
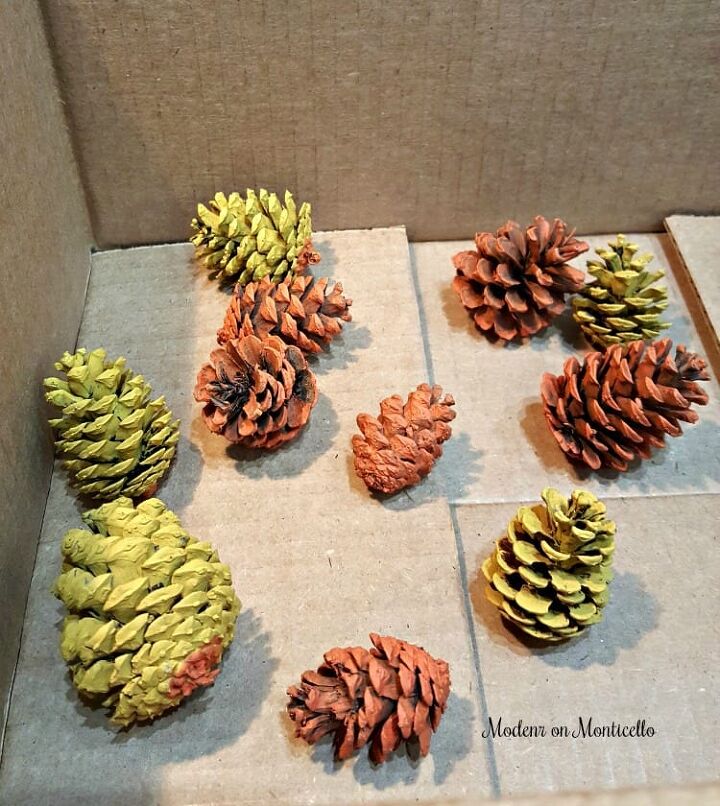
After the pine cones had dried overnight, I sprayed each individual pine cone with the satin top coat. A few of the pine cones I painted an orange dot in the center of the bottom of the pine cone to resemble a flower.
For this project the pine cones were painted in fall colors in Golden Sunset, Harvest Orange and Tuscan Red. I applied two coats of paint to each pine cone.
This project can be done with any size or shape of pine cones.
Paint a small circle of orange on the end of the pine cone to look even more like a flower.
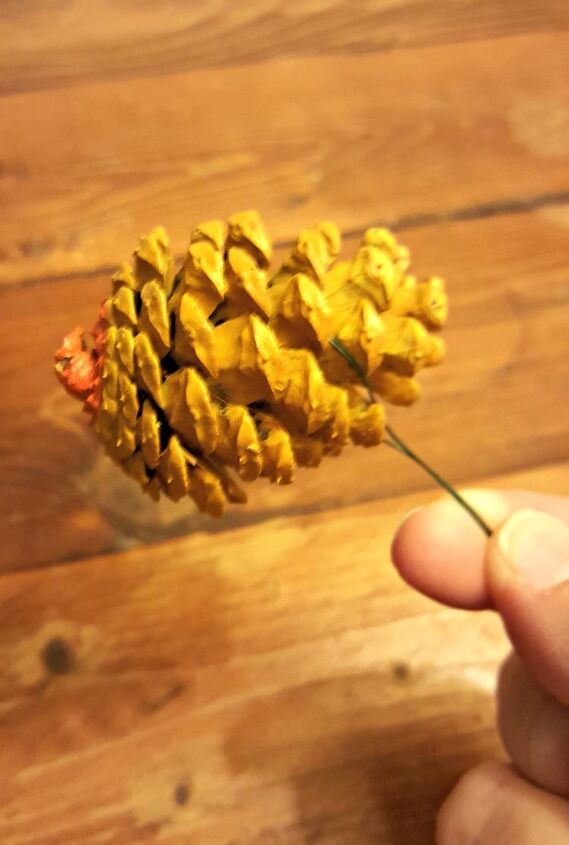
The pine cones need to be wired to insert in to the dry foam like a floral stem. Wrap the end of the floral wire around the scales of the pine cone and twist to secure, leaving enough wire to insert in to the dry foam.
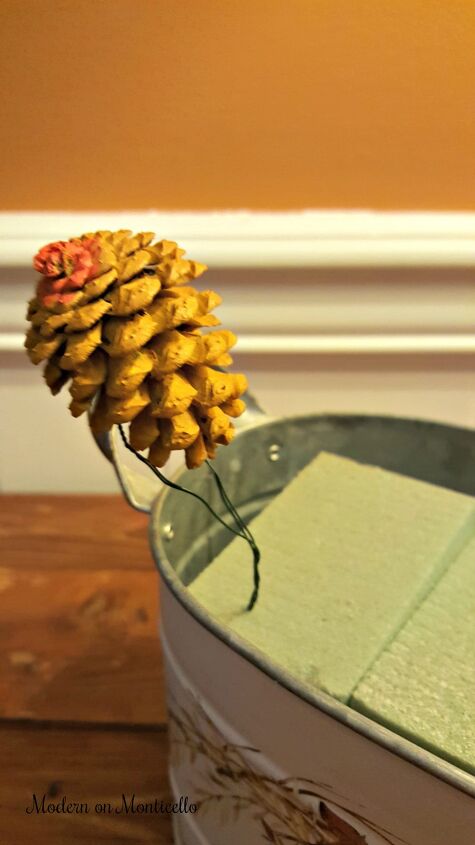
I started with the larger pine cones first and then added the smaller painted pine cones and the leaves around it as I was making the floral arrangement. There are no rules to making your own version.
Just have fun with it.

Add floral stems with fall leaves and berries to the bouquet along with more pine cones.

The final result is a beautiful and unique fall arrangement for your table or holiday setting.
Resources for this project:
See all materials


Comments
Join the conversation
-
Love this and I have pine trees that produce really really big pine cones!
-
Very pretty, and neatly done.


Frequently asked questions
Have a question about this project?