


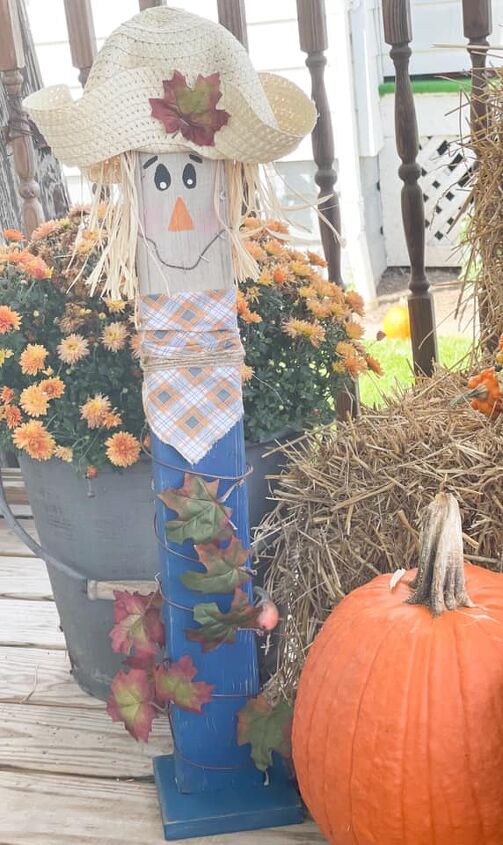
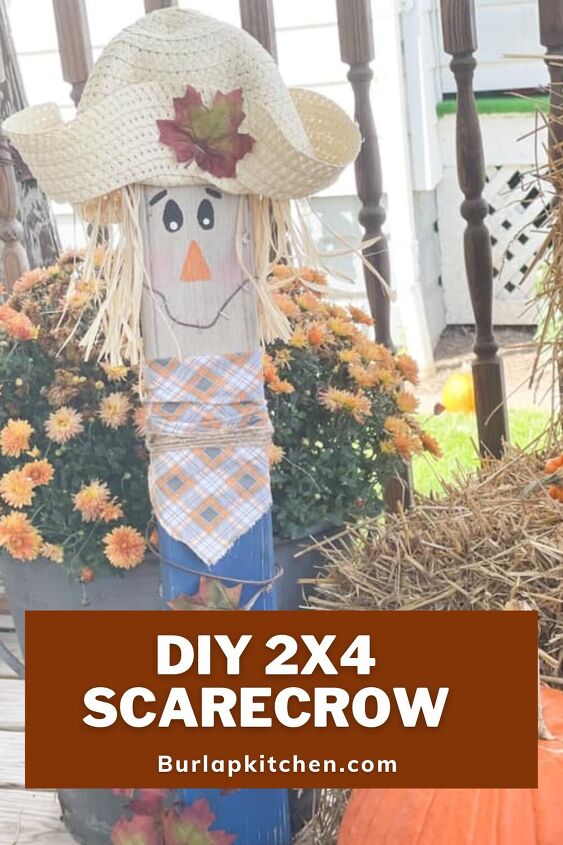
How to Create a Cute DIY Scarecrow for Your Fall Décor
Hi friends, today I am so excited to share with you how to create a cute DIY scarecrow for your fall décor. This adorable DIY scarecrow is not only a simple craft to make, it is a very budget-friendly fall DIY. This 2×4 wood scarecrow DIY is also a great way to recycle any scrap wood you may have lying around. Give this easy DIY scarecrow a try and place it on your front porch for the cutest fall décor!
Hi friends, today I am so excited to share with you how to create a cute DIY scarecrow for your fall décor. This adorable DIY scarecrow is not only a simple craft to make, it is a very budget-friendly fall DIY. This 2×4 wood scarecrow DIY is also a great way to recycle any scrap wood you may have lying around. Give this easy DIY scarecrow a try and place it on your front porch for the cutest fall décor!
Materials needed:
- 2×4 cut to the length you would like your scarecrow to be
- 1×4 square for base
- white, black, brown & blue paints
- paint brushes
- sandpaper
- antique wax or stain
- raffia
- straw hat – I bought mine at Dollar Tree around Easter time
- leaf garland – Dollar Tree
- fabric
- twine
- staple gun
- Black fine point sharpie – for mouth
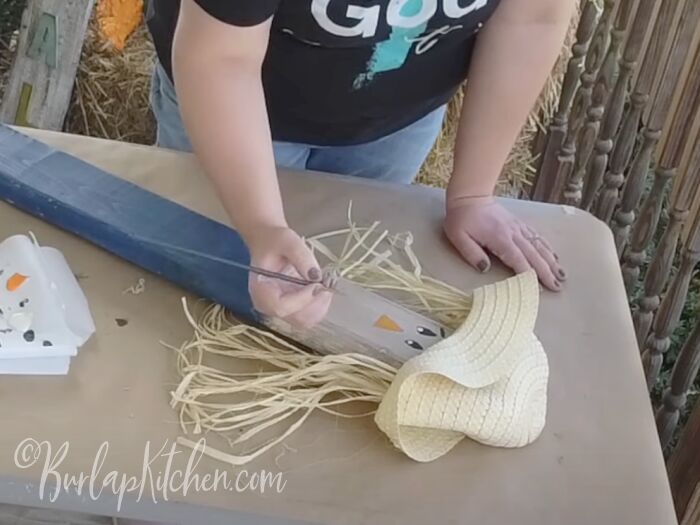
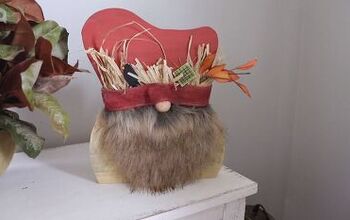
Step 1. Get a scrap 2×4 piece of wood, or feel free to make this project as long as you’d like, and take a straw hat, or you could use a piece of burlap fabric to make a hat, and place it over top of the wood just to get a point of reference for where to make the scarecrow’s face and body.
Step 2. Using blue acrylic paint, paint the bottom 2/3’s of your piece of wood. Be sure not to paint the top 1/3 of your 2×4 as that will be your scarecrow’s face. Allow the blue paint to dry.
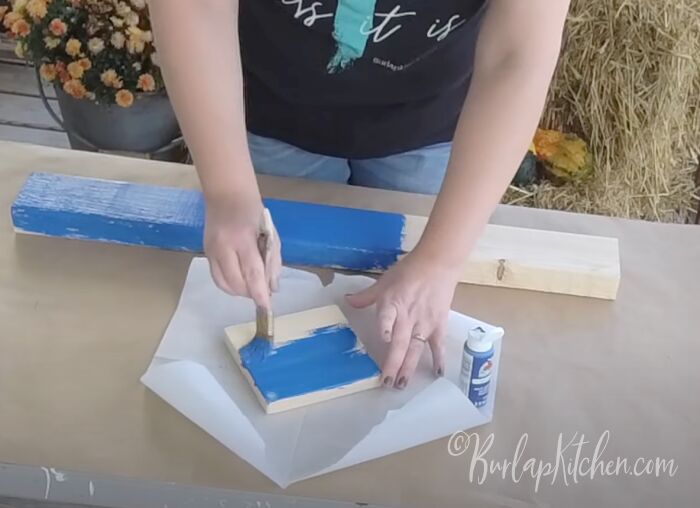
Step 3. Take a square piece of scrap wood and use it for your base of the scarecrow. I do not measure this, but just be sure the piece of wood is big enough for the scarecrow to sit on. Paint this piece of wood with the same blue acrylic paint. Allow to dry.
Step 4. Mix some white acrylic paint with a light brown acrylic paint to get the color for your scarecrow’s face. The color should look almost like sand after mixed together. Paint the scarecrow’s face (top 1/3 of your 2×4) with this paint mixture. Allow to dry.
Step 5. Use a sanding block and take it over the entire scarecrow to scuff it up a bit. Be sure to also take the sanding block over the blue wooden base for the scarecrow.
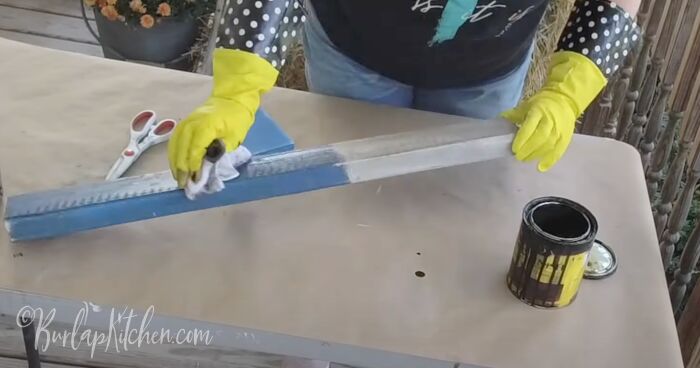
Step 6. Next, be sure to wear gloves for this part, use Minwax stain in the color “Dark Walnut” and dip a rag into the stain, rub the stain all over the scarecrow, and then wipe it off. Be sure to stain the base for your scarecrow as well. Allow to dry.
Step 7. Take some raffia, and staple it to the top of your scarecrow’s head. Staple a few times to make sure all of the raffia is secured to the top of the scarecrow’s head/top of the 2×4.
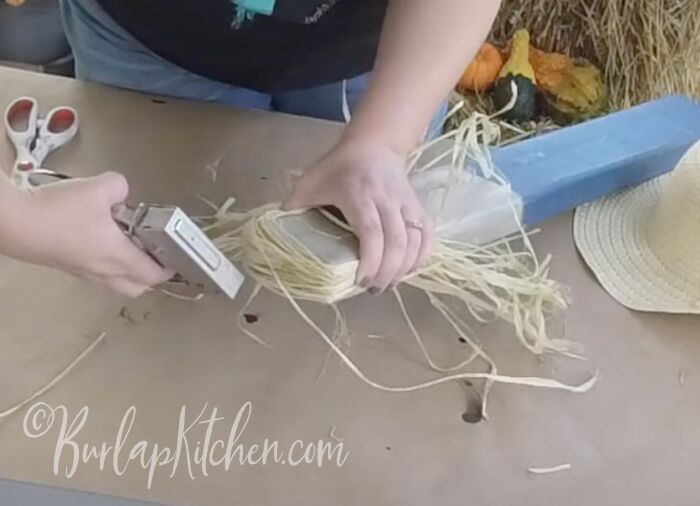
Step 8. Staple a straw hat over the top of your scarecrow’s head, so that the raffia is hanging down on both sides of the scarecrow’s face. Staple so that the hat is secure.
Step 9. Use black paint and carefully paint on some eyeballs on the scarecrow’s face. Also, paint on some eyebrows for the scarecrow. Then, using some white paint, add two white dots inside the black painted eyeballs. Next, use some orange paint and paint on a triangle for the nose. Then, just add a little bit of cosmetic blush for the scarecrow’s cheeks. Allow to dry.
Step 10. Use a rusty piece of wire to create the scarecrow’s mouth. Staple on to secure.
Step 11. Use a handkerchief, or other material of your liking, and create a triangle shape out of the material for your scarecrow’s scarf. Staple the material/scarf to the back of your scarecrow to secure it in place.
Step 12. Drill a hole in the bottom center of your base, and then take a large screw and screw your base to the bottom of your scarecrow, so your scarecrow can stand up.
Step 13. Add some fall leaf stems to the bottom of your scarecrow and wrap it up around the bottom half of your scarecrow. Secure the leaves/stem in place using staple gun.
Step 14. Trim any of your scarecrow’s hair/raffia that may look a bit too long.
Step 15. Take some twine and wrap it around the scarecrow’s scarf a few times, just to add some detail to the scarf/scarecrow.
Step 16. Using a leaf from your stem, staple one leaf to your scarecrow’s hat, just to add some more detail. Enjoy!
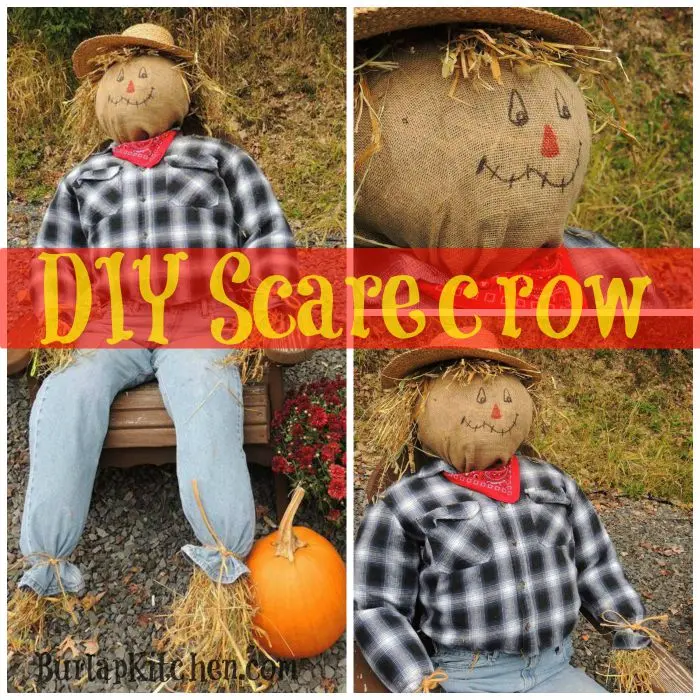
Looking for more fun scarecrow DIY crafts to add to your fall decor? Give these a try!
How to make a budget- friendly DIY scarecrow for your fall décor
How to create a DIY scarecrow using supplies from Dollar Tree
DIY Scarecrow
If you decide to make this DIY I’d love to hear from ya! You can drop a comment below or message me on any of my social media pages. Hope you have a blessed weekend and as always remember to keep it simple. Catch ya next week my friends! Facebook, Twitter, Pinterest, Instagram, youtube
Tags: 2x4crafts, DIY, dollar tree crafts, front-porch, frontporchideas, Recycledart, Scarecrow, scarecrowdiy, scrap-wood-crafts-diy, scrapwoodideas, scrarecrowcrafts, simplecraft
Resources for this project:
See all materials


Frequently asked questions
Have a question about this project?