


How to Make a Spring Bunny Wreath!
Ready to get a hop on spring decor? Our oval wood bunny wreath is just the base to get you started!
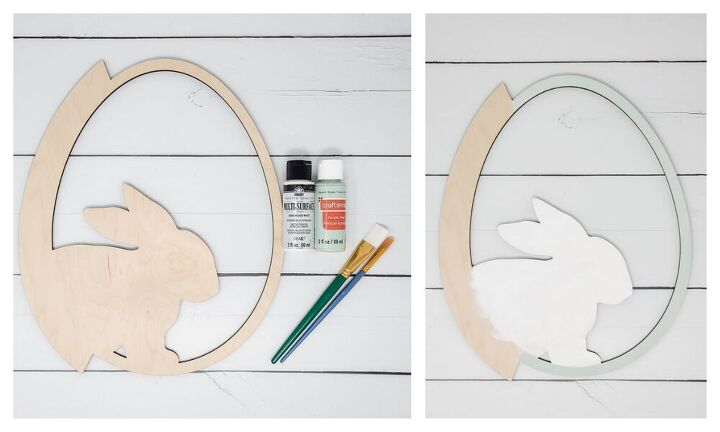
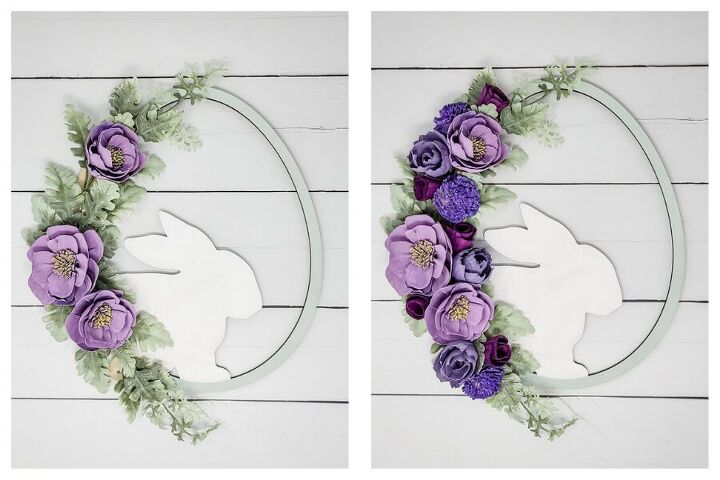
For this piece, I wanted to keep the bunny white (FolkArt Wicker White) and to add a soft green (craft smart Beach Glass) to the outer loop. I did not paint the section where the greenery and flowers would be for two reasons:
- It will eventually be covered up!
- Sometimes the hot glue won't hold as well to the paint.
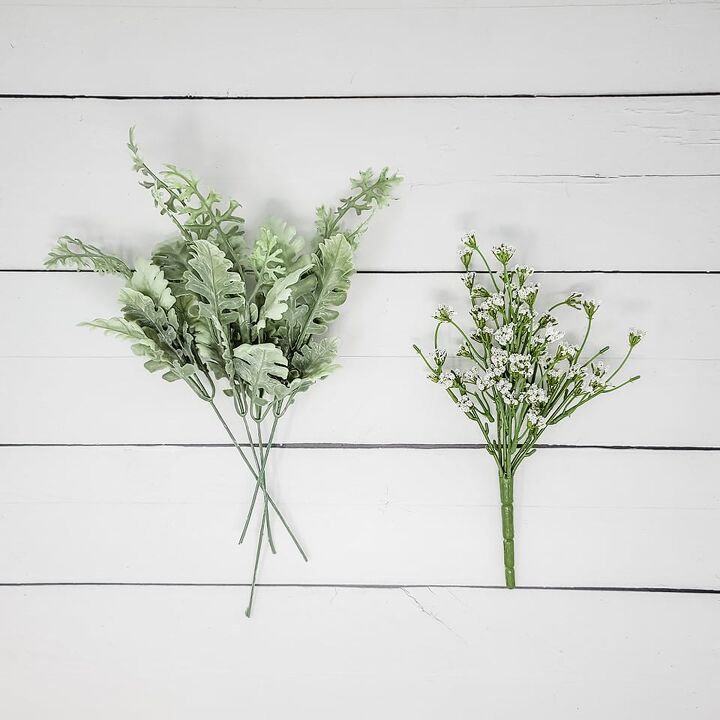
Soft, sage greens are so perfect for spring! I used a dusty miller for the greenery base (under the flowers) and the tiny white blooms as filler once all of the flowers were in place!
I first cut the dusty miller into two full stems and then pulled the larger leaves off of other stems to ensure I would get the flow I wanted.
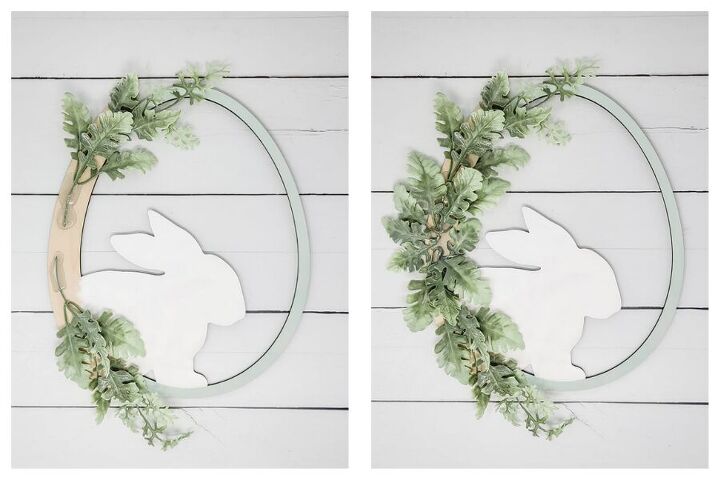
Next, I added the two full stems to each end of the unpainted, thicker section of the wreath (one at the top point and one at the bottom) with the leaves pointed out. Doing that helps to give the greenery a natural feel.
To fill in the middle section, I alternated the direction the leaves are facing and covered as much of the unpainted wood base as possible. It may look a little messy and you may be able to still see some of the wooden wreath form when you are done with this base but it is easy to fix up after you add the flowers! We just want to have a good surface area to hot glue the flowers onto.
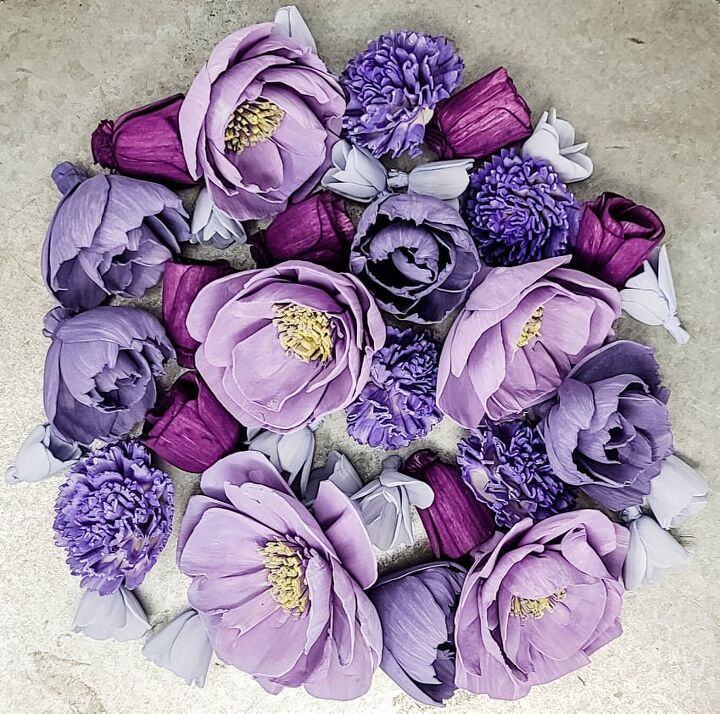
For the flowers, I used:
- Munchkins (craft smart Wisteria Blue)
- Minis (FolkArt Eggplant)
- 1.5" Carnations (these were a bit tricky because I had to dip the tips in a few different colors to get this end result! I started with craft smart Violet and when that was too bright, I redipped the tips in the paint mix I had used for the Charmers below)
- 1.5" Ruffled Peonies (craft smart Winter Plum - also a great paint color to mimic the Pantone Color of the Year Very Peri!)
- 2.5" Charmers (dip dyed in a 50/50 craft smart Lavender and craft smart Orchid mix. Once nearly dry, use a paint brush to add in Anita's Sunshine Yellow to the center)
I wanted a somewhat traditional Easter/spring color story and thought purples with the sage greens would be perfect!
To add these onto the heart, I added hot glue to the back of the flower and applied the flower directly onto the greenery base.
I started with the larger flowers first, then kept adding flowers and spacing out the different colors to ensure there was even distribution of everything. I used 3 or 5 flowers of each type/color (odd numbers of flowers are interesting to the eye!).
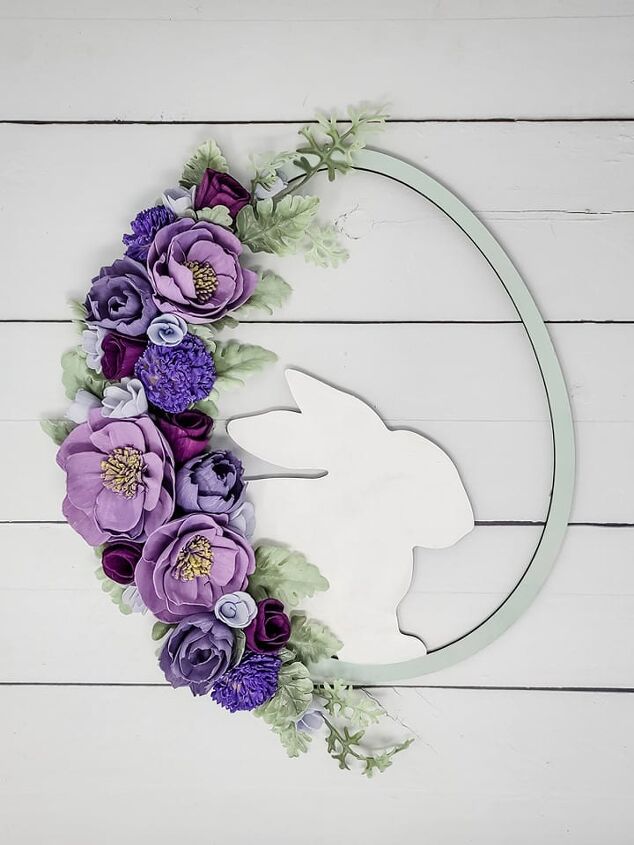
Since most of the flowers are a vibrant and/or darker shade and the outer loop is a light, beach glass color, I wanted to make sure the contrasting colors were brought together with the wisteria blue munchkins. They also filled in any remaining gaps quite nicely!
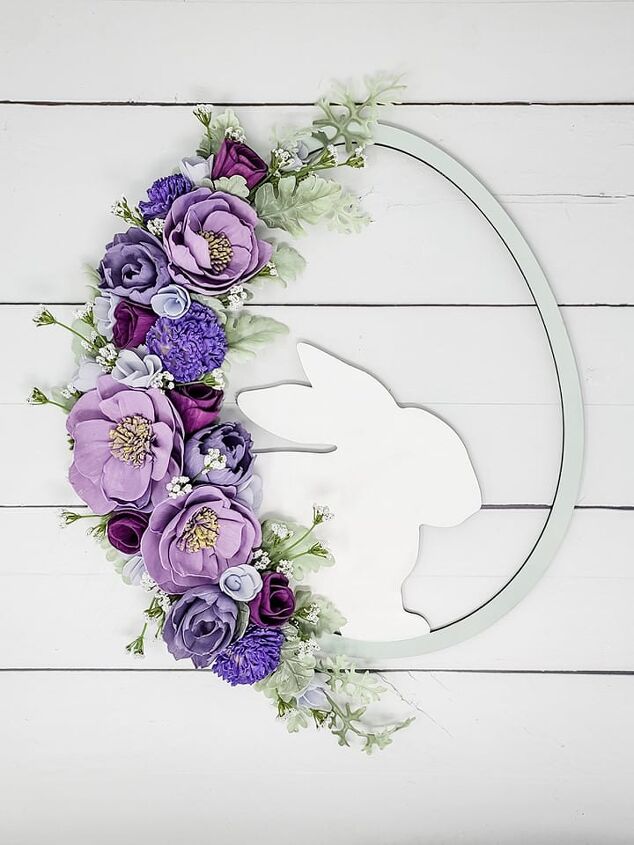
I also wanted to add in pops of white with the tiny white blooms! I cut those down into smaller pieces and glued them in throughout the flowers.
The possibilities are endless with this adorable bunny wreath! You can use a different color story, different sola wood flower styles, change up the greenery and even paint a cute little face onto the bunny itself. Whatever you create will be the perfect addition to your spring or Easter decor.
Happy crafting!

Comments
Join the conversation
-
I love this❣️
-
Beautiful! 🌺


Frequently asked questions
Have a question about this project?