


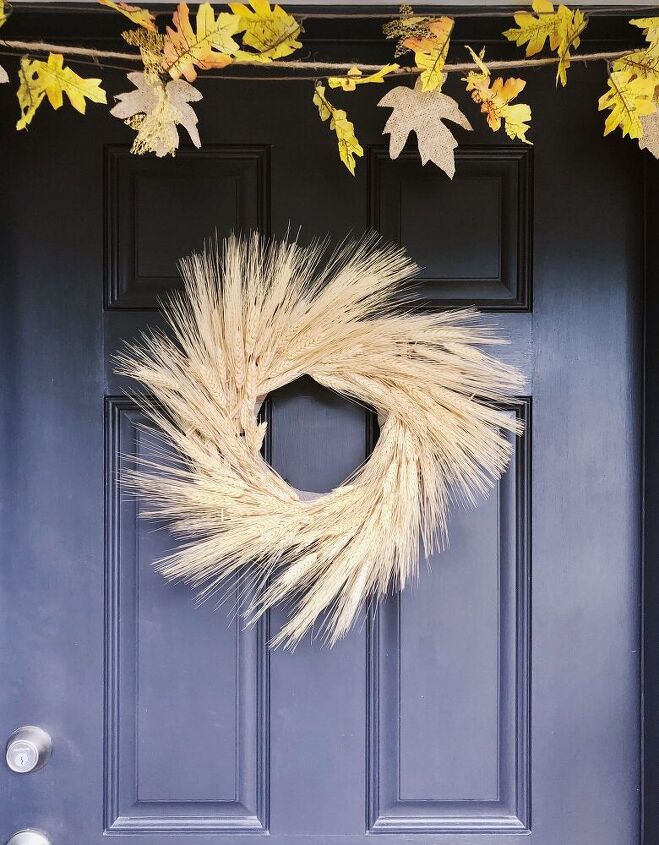
Fall Wheat Wreath

Add this fun wheat wreath to your front door for a cozy fall feel. This project only cost me $10, but if you needed all the materials it would cost around $20.
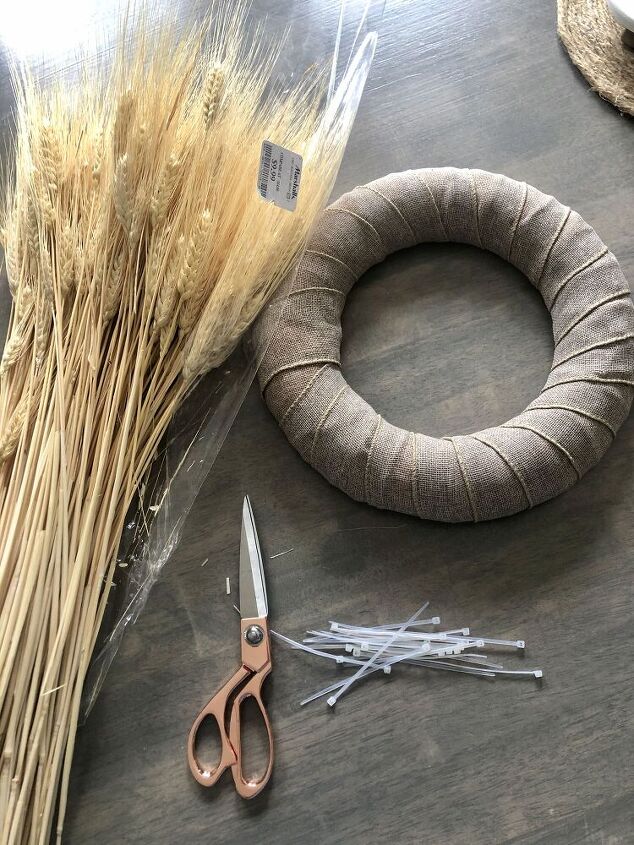
Materials Needed -
- dried wheat
- wreath
- scissors
- zip ties
- sealer spray (optional)
The only thing I purchased for this project were the dried wheat which I purchased from Marshall's for $9.99. Before I found it there I was looking on Amazon, they have the same for around the same price. I will link some below. I already had the foam wreath on hand, but you can purchase something similar from any craft store for a couple bucks.
Wheat -
https://www.amazon.com/Country-living-Bouquet-Natural-Grasses-Bundle/dp/B07Y4TM8PQ/ref=sr_1_8?dchild=1&keywords=dried+wheat&qid=1599930120&sr=8-8
https://www.amazon.com/Axbelaflor-Natural-Flowers-Arrangement-Decoration/dp/B08DLWHMK3/ref=sr_1_2_sspa?dchild=1&keywords=dried+wheat&qid=1599930141&sr=8-2-spons&psc=1&spLa=ZW5jcnlwdGVkUXVhbGlmaWVyPUEyRFBTRzVVUUlVMzQmZW5jcnlwdGVkSWQ9QTAwMDIwMTQyRDdJMFNYTE83TjdSJmVuY3J5cHRlZEFkSWQ9QTA0MTc1MTMyMzNQRzg2RUZENVVBJndpZGdldE5hbWU9c3BfYXRmJmFjdGlvbj1jbGlja1JlZGlyZWN0JmRvTm90TG9nQ2xpY2s9dHJ1ZQ==
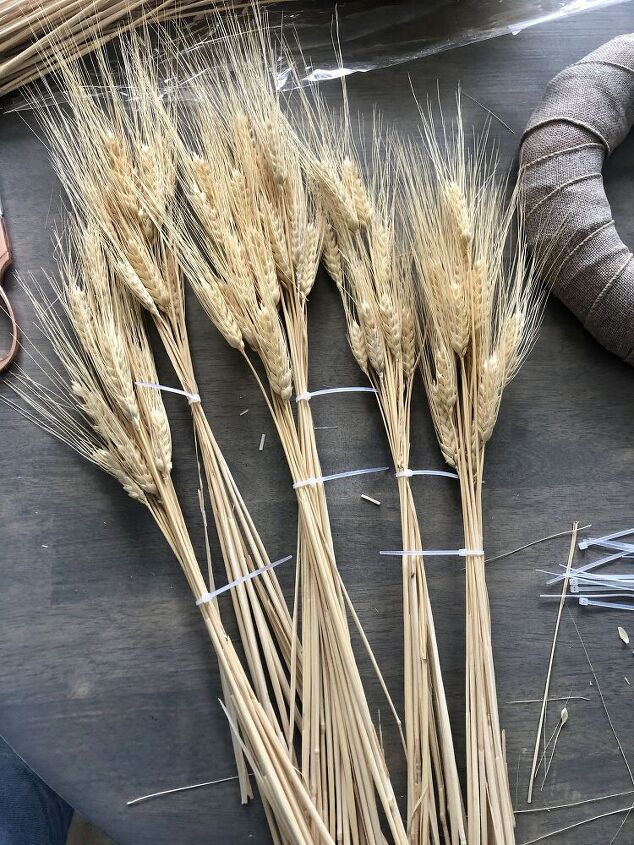
Step One - Bunch Wheat Together
I bunched about 5-7 stems together and zip tied them together. In total for the whole wreath I had around 9 bunches. My wreath is 11 inches for reference.
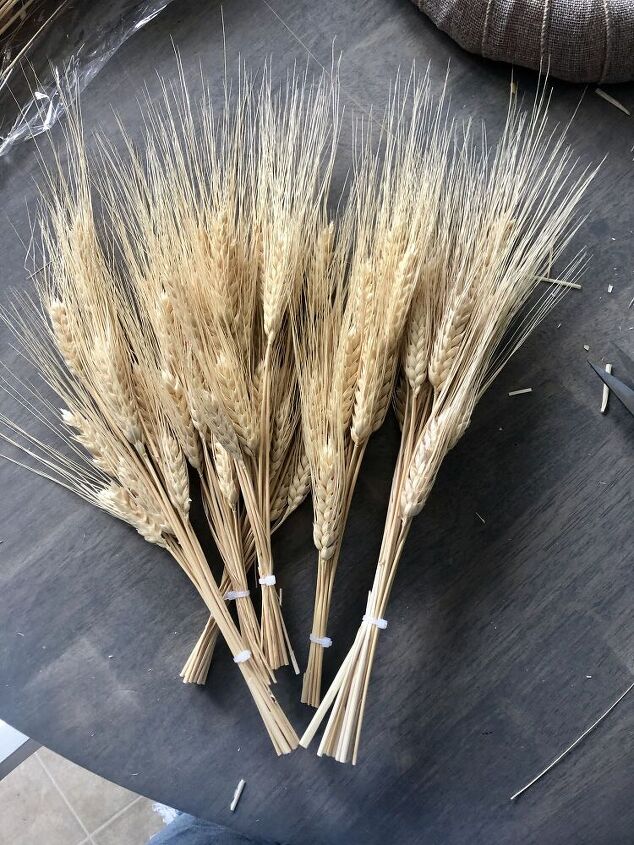
Step Two - Cut Ends
Cut the ends so they aren't so long. I left them a little longer and then cut them down after I attached them to the wreath. Better to leave too much than have too little.
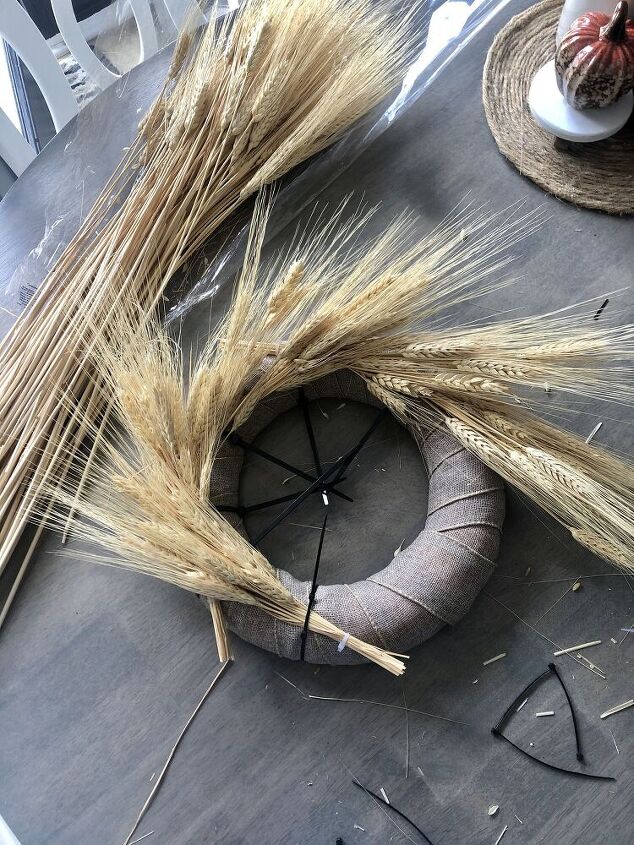
Step Three - Attach To Wreath
I used bigger zip ties to attach my bundles to the wreath. When making wreaths I always use zip ties and try to stay away from using glue. This way later down the road if I decide to change things up I can easily deconstruct and use old materials instead of always having to purchase new wreaths, flowers, etc.
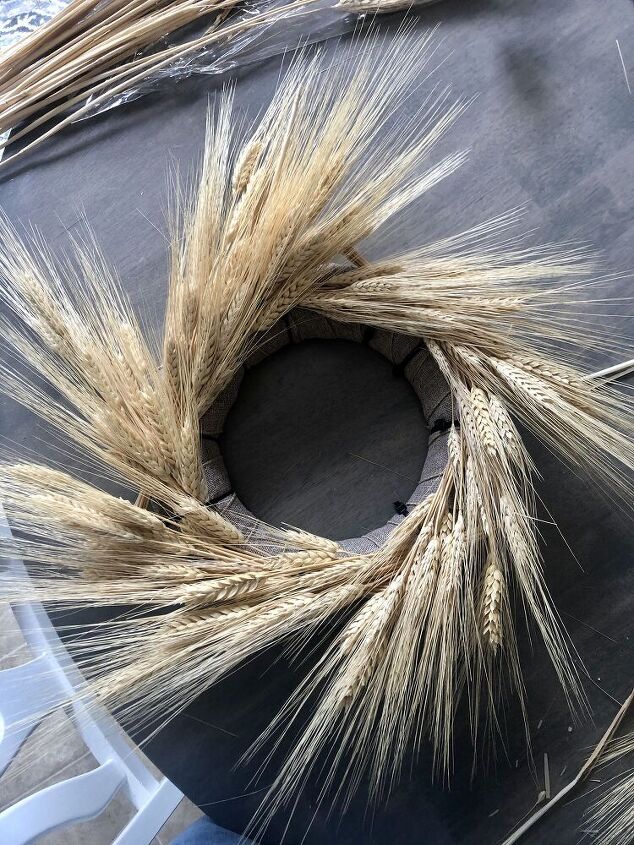
After all bundles are attached, I then snipped any long ends sticking out from the bottom of the bundles.
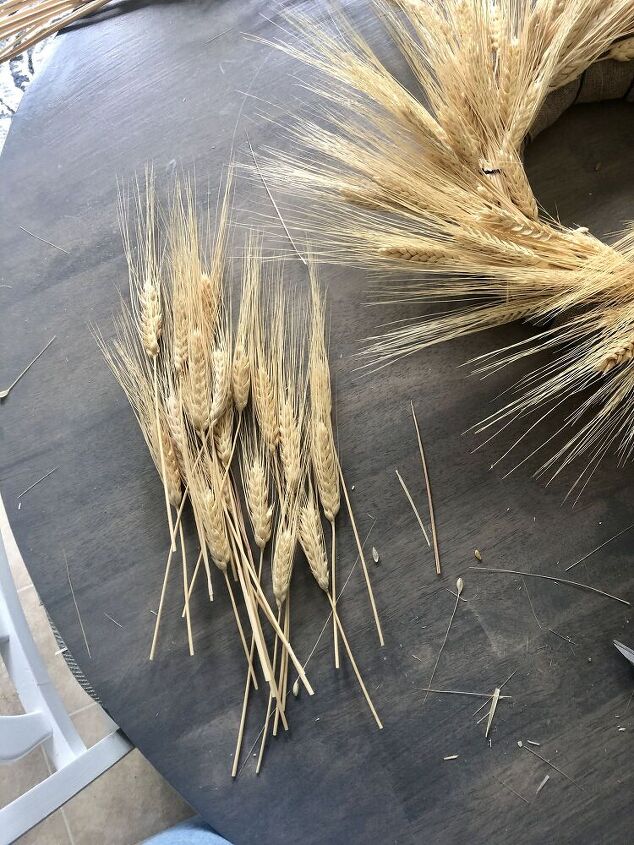
Step Four - Add Filler Pieces
I used about 90% of the wheat for the bundles and used the remaining pieces to add in where it needed to be fuller/ where you could see any zip ties.
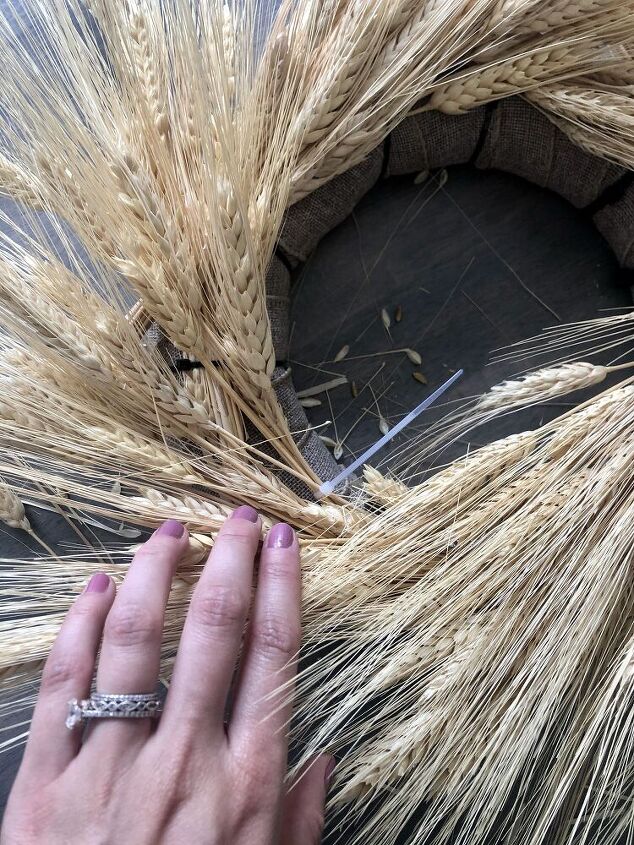
To add the filler pieces I zip tied a couple pieces to the bundle pieces and made sure those zip ties wouldn't be seen.
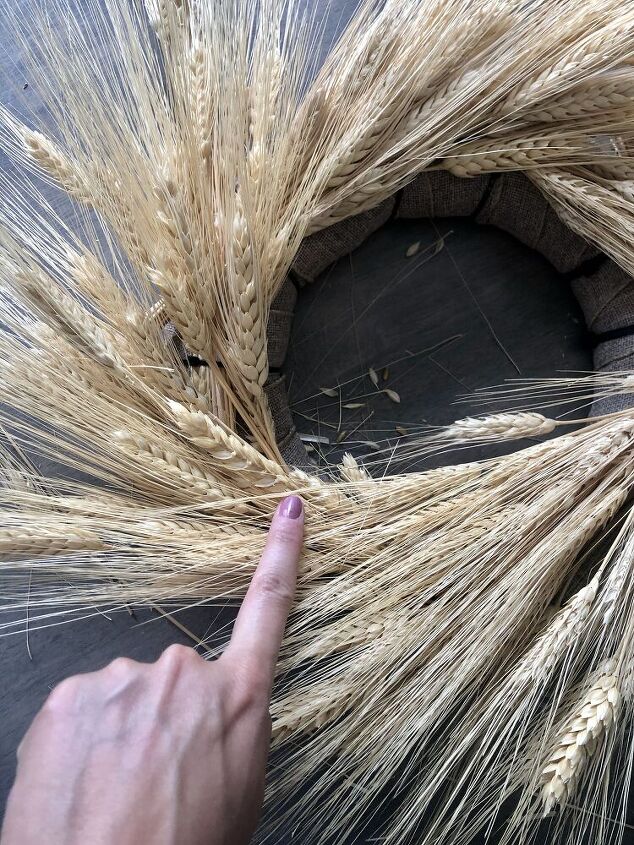
Here you can see what I mean by that. When I added these pieces on, I pushed back pieces already attached to the wreath and then attached so when I released those pieces the zip tie would be covered.

Step Five - Seal *Optional*
I had this on hand and decided to give the finished wreath a light coating because I knew this wreath would be outside on my front door. Doing this also helps prevent any shedding. It's not necessary, but it does help make it last longer.
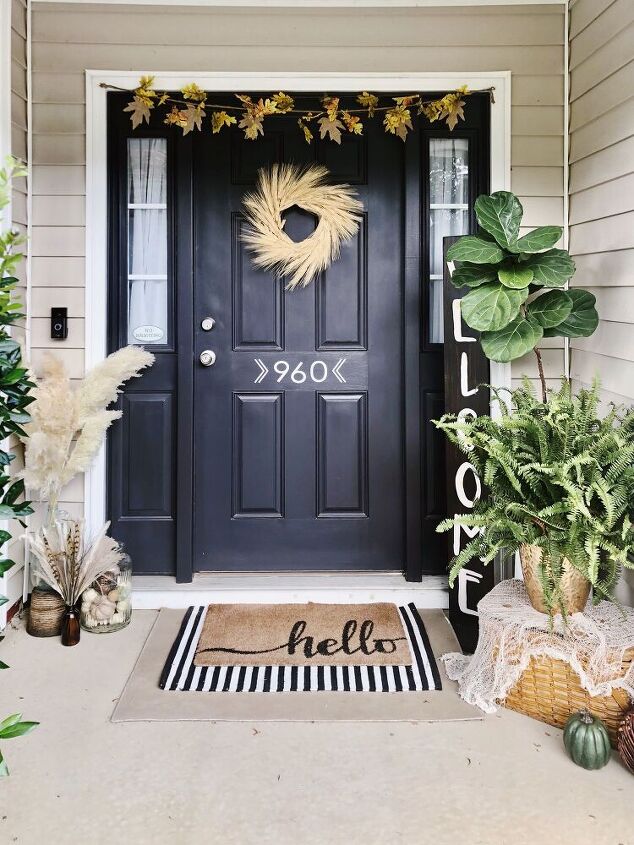
Step Six - Hang + Enjoy :)
I love the way this wreath turned out. I had seen so many similar wreaths for $25+ at local stores. For me to make, I only had the cost of the dried wheat which was $9.99, so I'm very pleased with the way this turned out!


Frequently asked questions
Have a question about this project?