


Christmas Frame 1

I LOVE home made Christmas things. I think its so much more personal and unique than mass produced shop bought stuff. Often you can also save money doing things yourself compared to the shop prices. This month I'll be focusing on things you can make to add a little extra Christmas cheer to your house this year :-)
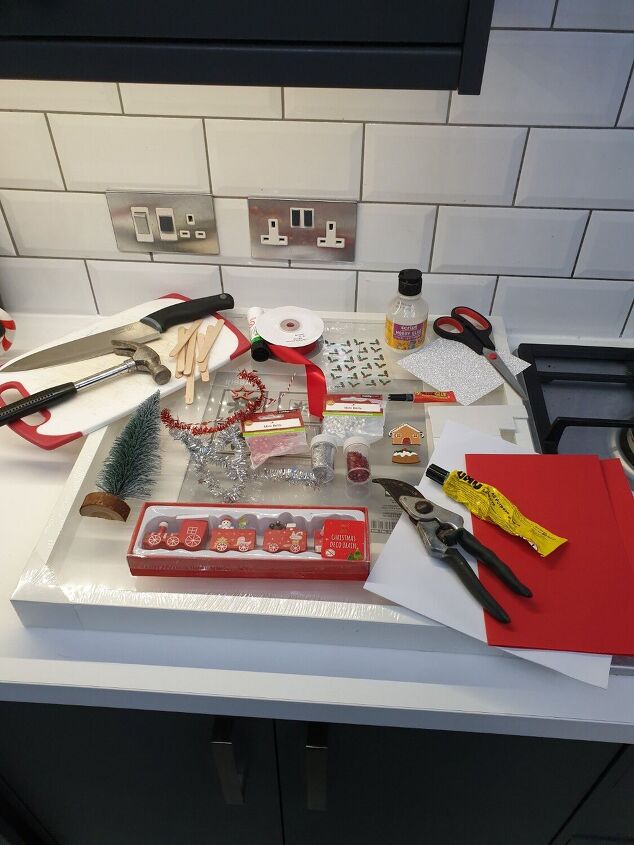
Ok so the what you'll need list is pretty long for this project. As always, my projects are as changeable as possible so feel free to swap some items out for things that suit you better. This list is to make an identical frame to mine.
Large shadow box frame with mount
Model christmas tree
Model train
Mini tinsel
Holly stickers
Secateurs
Scissors
UHU
Superglue
Pva glue
Pritt stick
Double sided sticky pads
Silver glitter card
Red ribbon
Lolly sticks
Small wooden star
Mini bells
Christmas embellishments
Red and white string
Glitter/Mini stars
Chopping board
Large knife
Hammer
Red card
White card
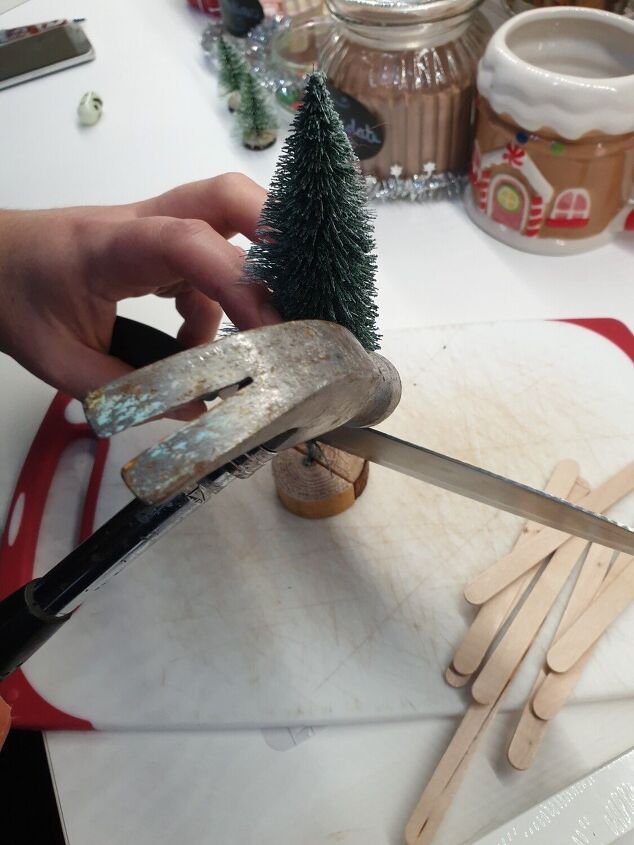
First you need to cut the model christmas tree in half. Use the chopping board, large knife and hammer to split the base of the tree in the middle as shown.
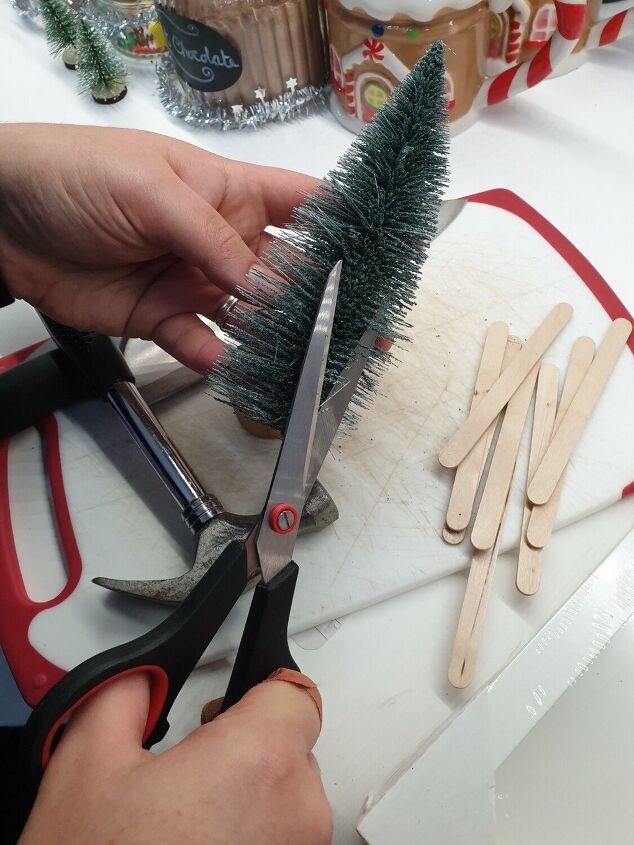
Next use the scissors to cut the branches of the tree so that the tree is in half.
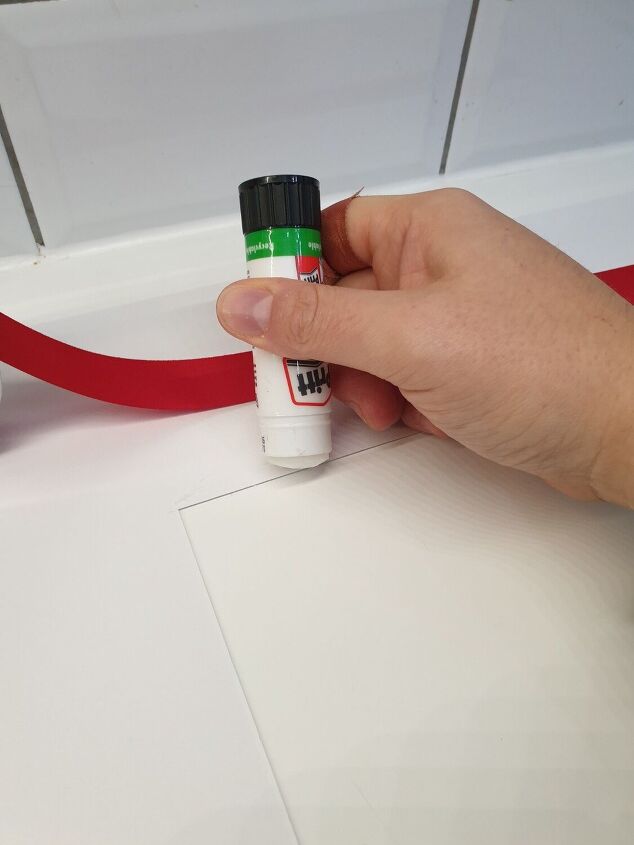
Using print stick, put a layer of glue around the outside of the inner border of the mount.
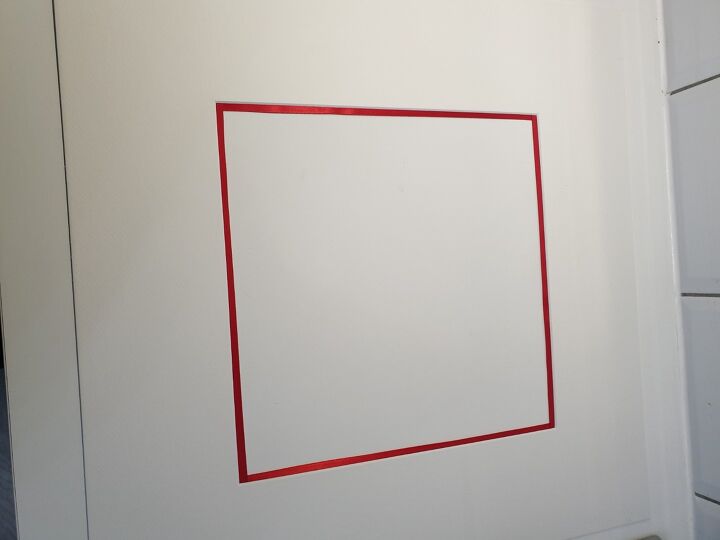
Stick the red ribbon to the glue making sure what is shown when you flip the mount is equal on all sides.
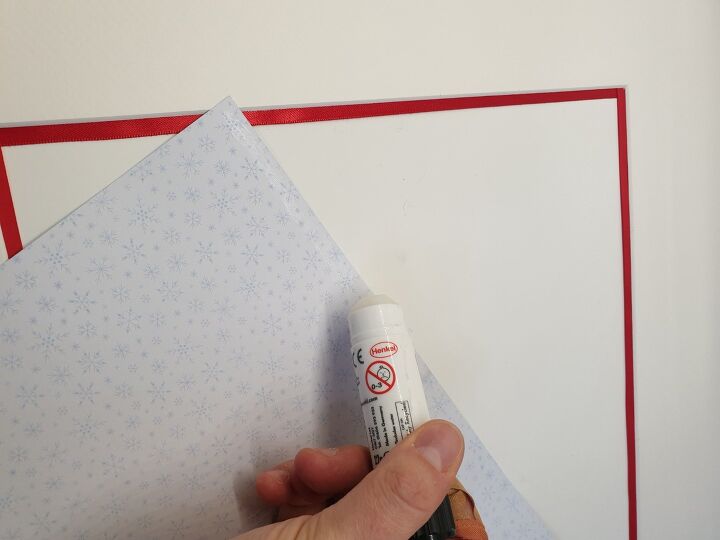
Next get your white card (I chose one with a pale christmassy design) and put a layer of pritt stick around the edges.
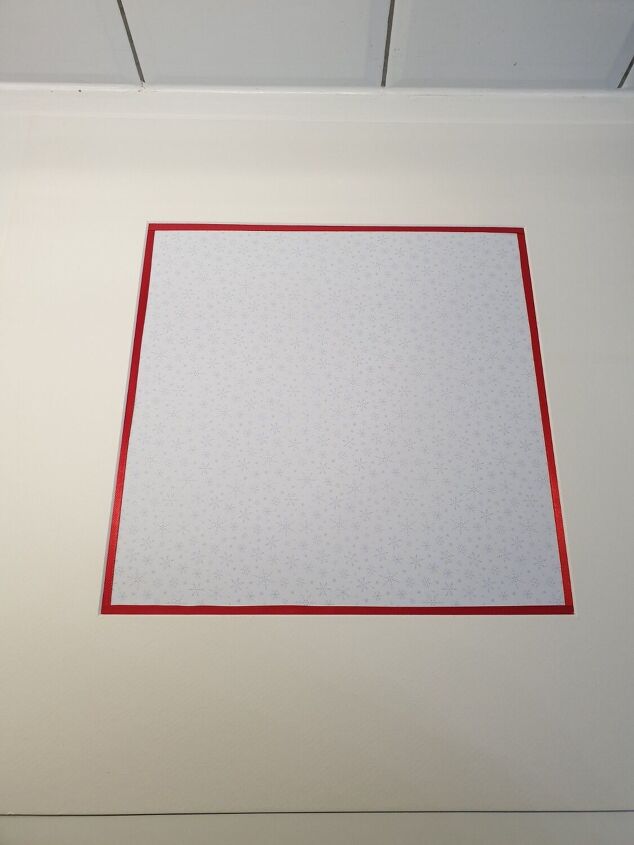
Stick the card to the back of the mount so that when you flip it, the card makes your background as shown.
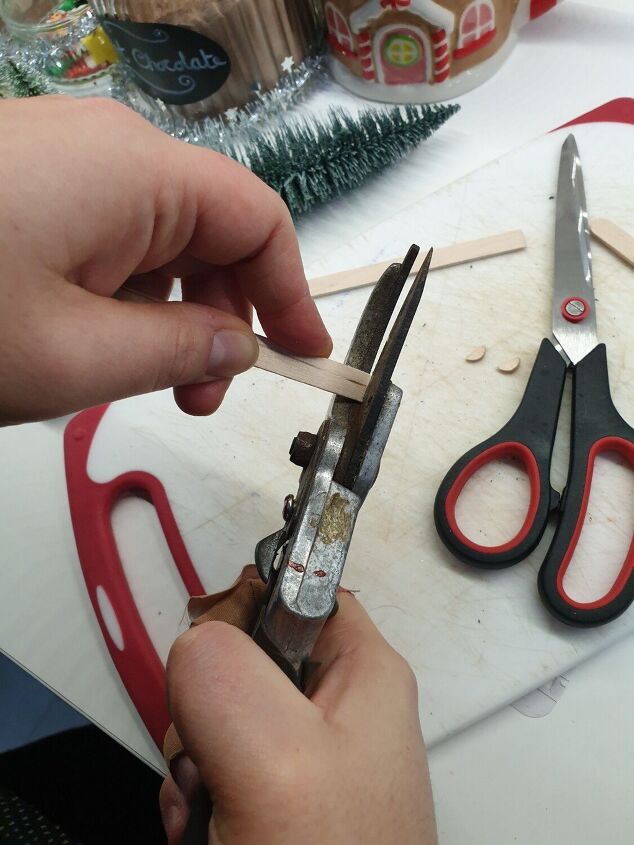
Now use the secateurs to snip the ends off the lolly sticks.
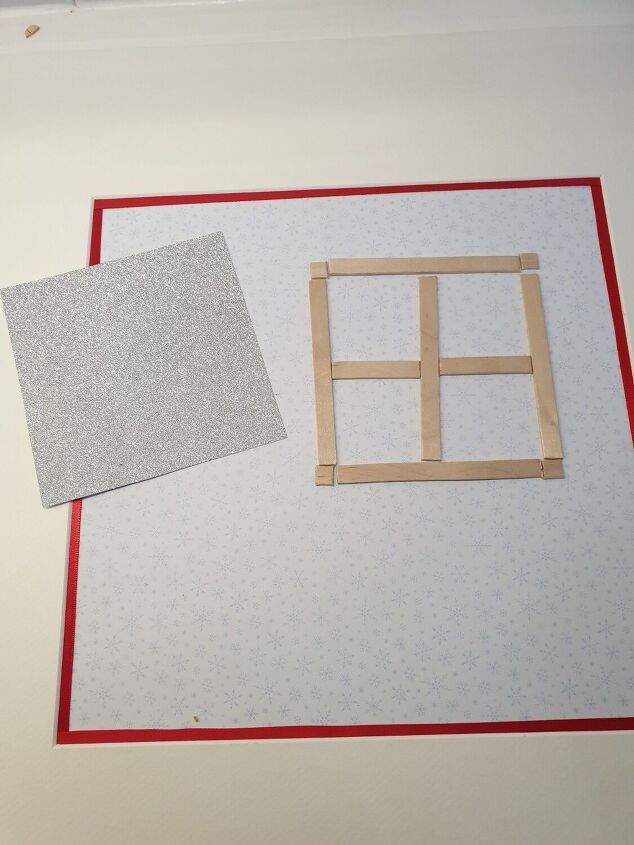
Cut lolly stick pieces to make a window frame like shown here. Position the frame loosely before gluing anything. Also at this stage cut a piece of the silver glitter card to back the window frame as shown.
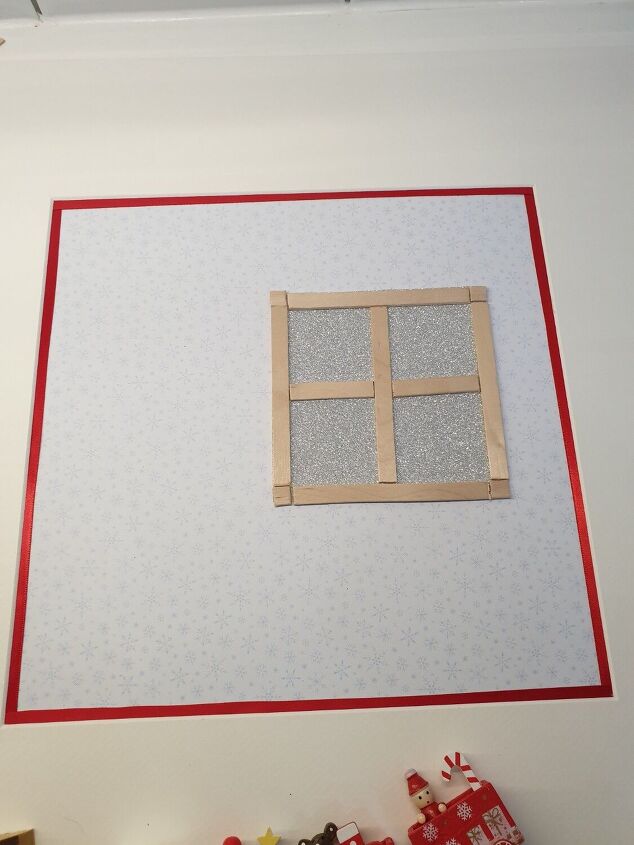
Once your window is built you can use pva glue to stick the window to the background as shown.
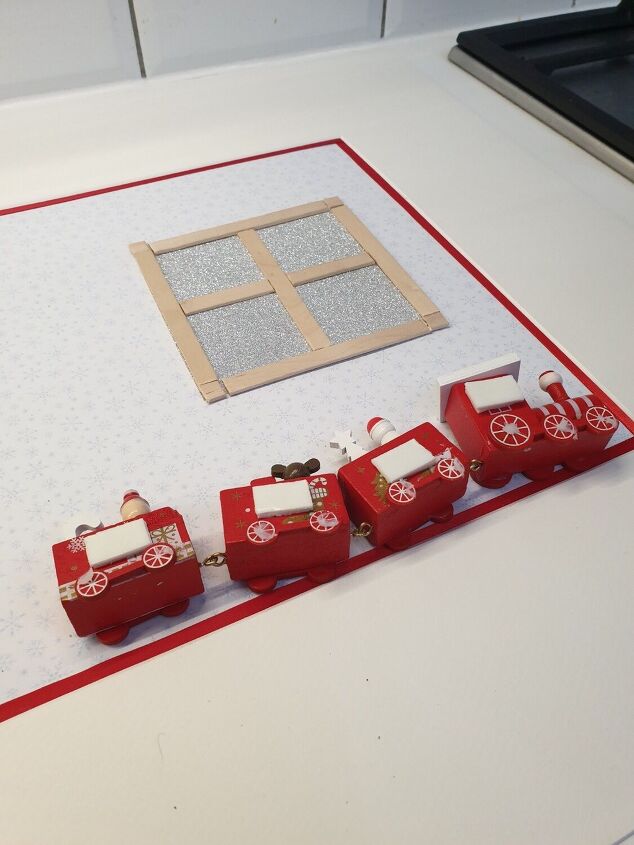
Next place a double sided sticky pad to each section of the model train.
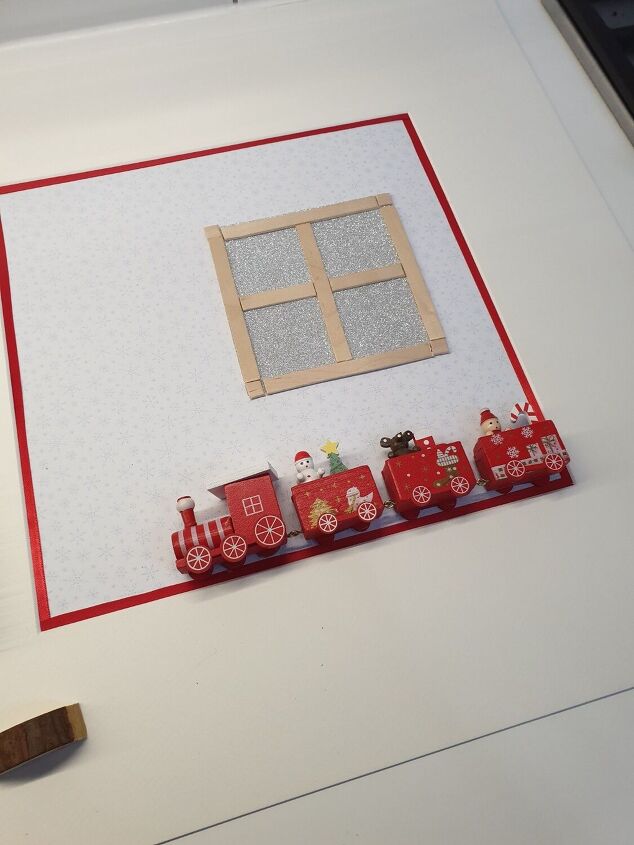
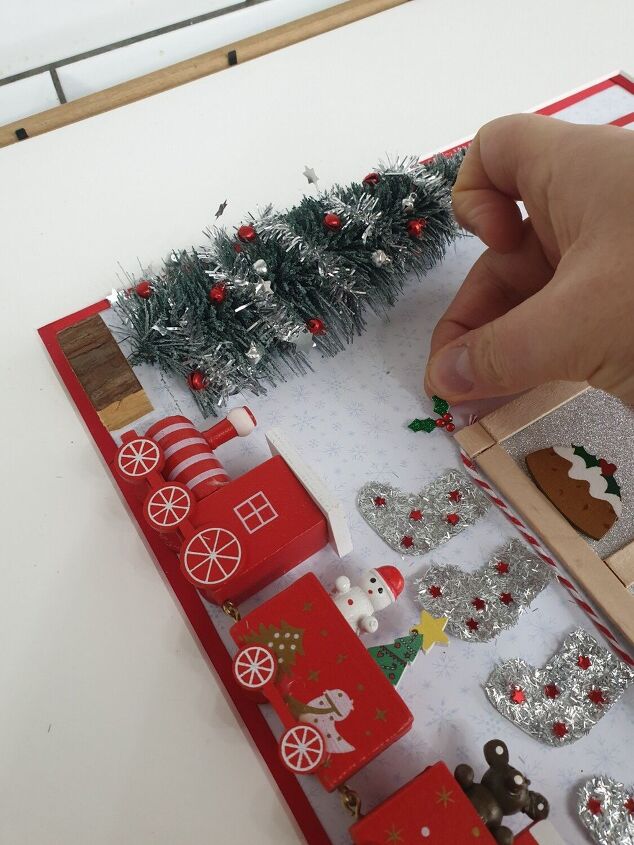
Stick the train at the bottom of the frame as shown.
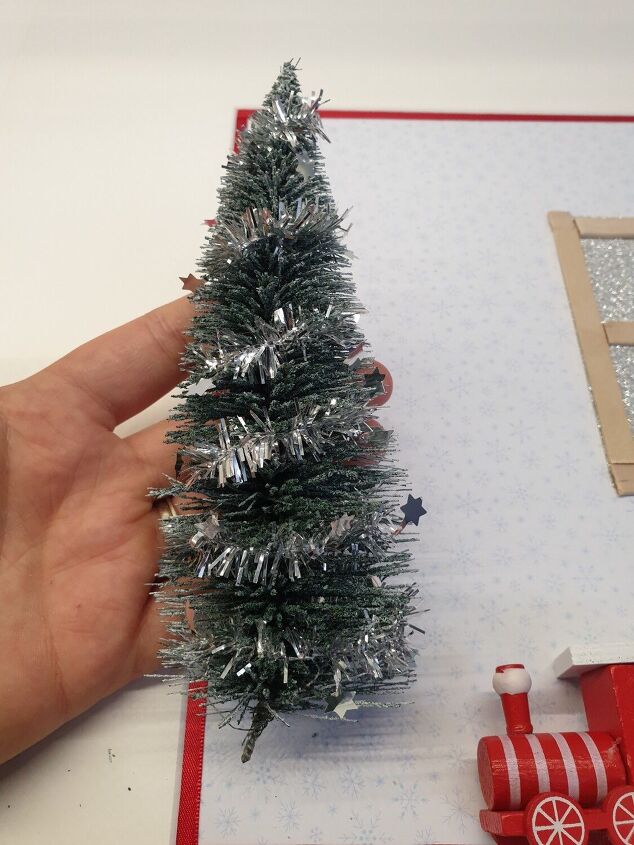
Wrap mini tinsel around your halved tree model.
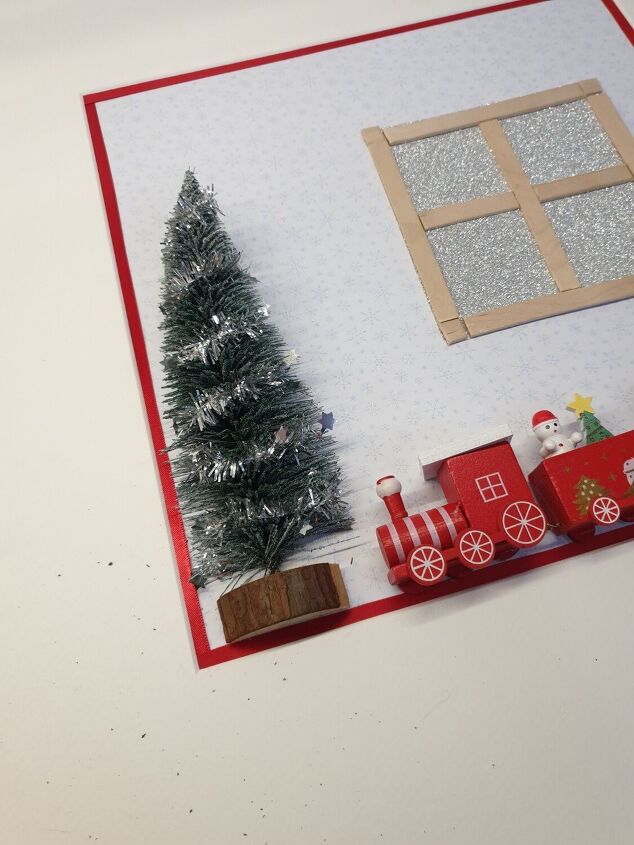
Stick the tree and base to the frame as shown. You may need to add weight to the tree and base at this stage and leave to dry overnight.
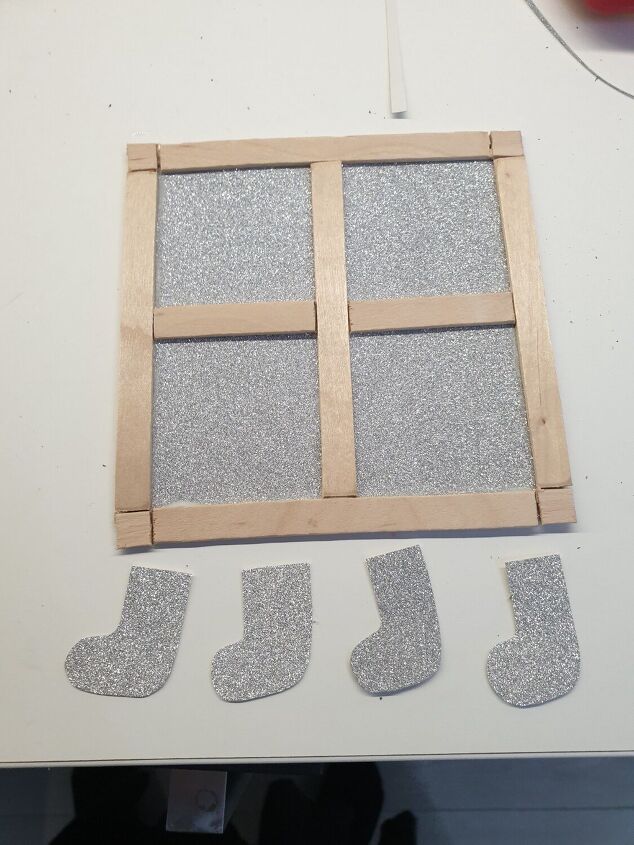
Next cut 4 stocking shapes from the silver glitter card.
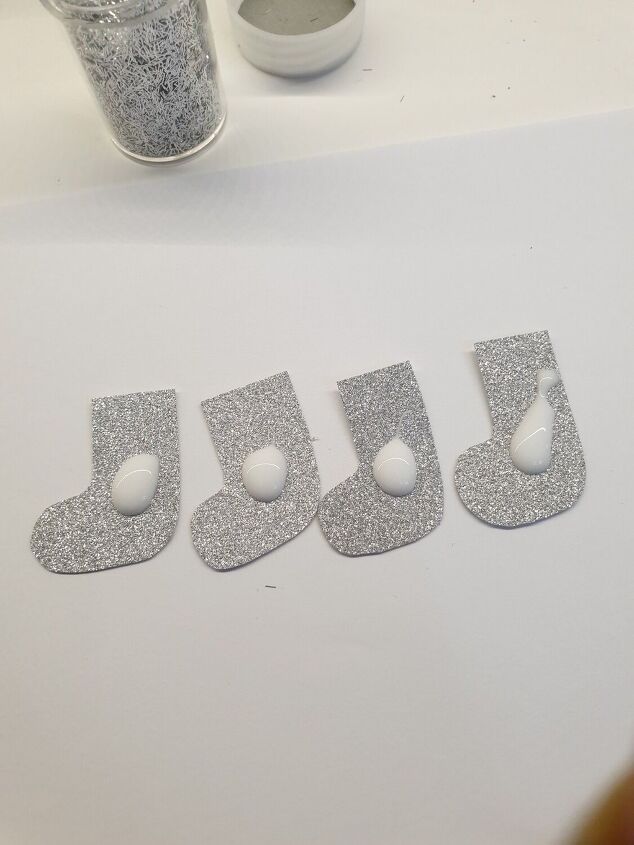
Put a blob of pva glue onto each stocking and spread it out with your finger.
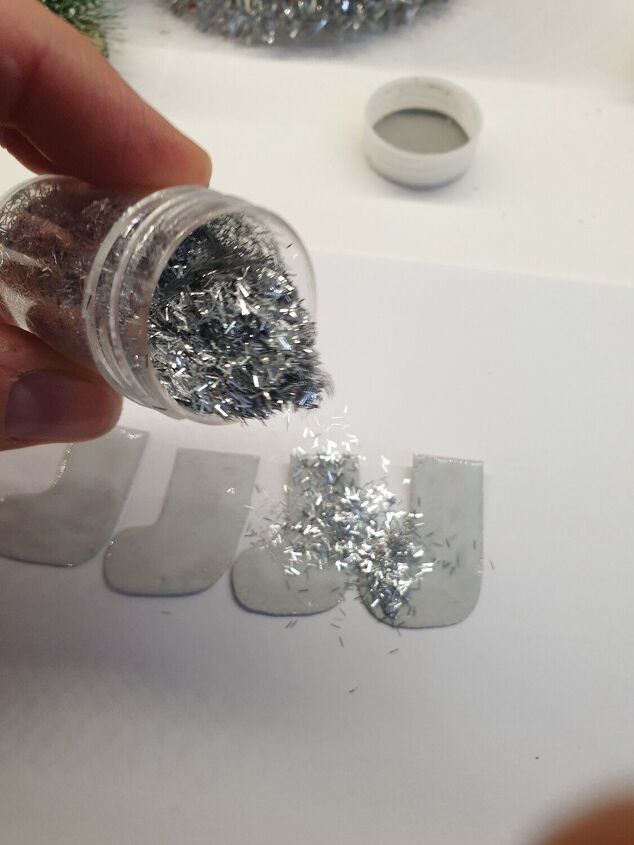
Sprinkle glitter over the stockings and leave to dry.
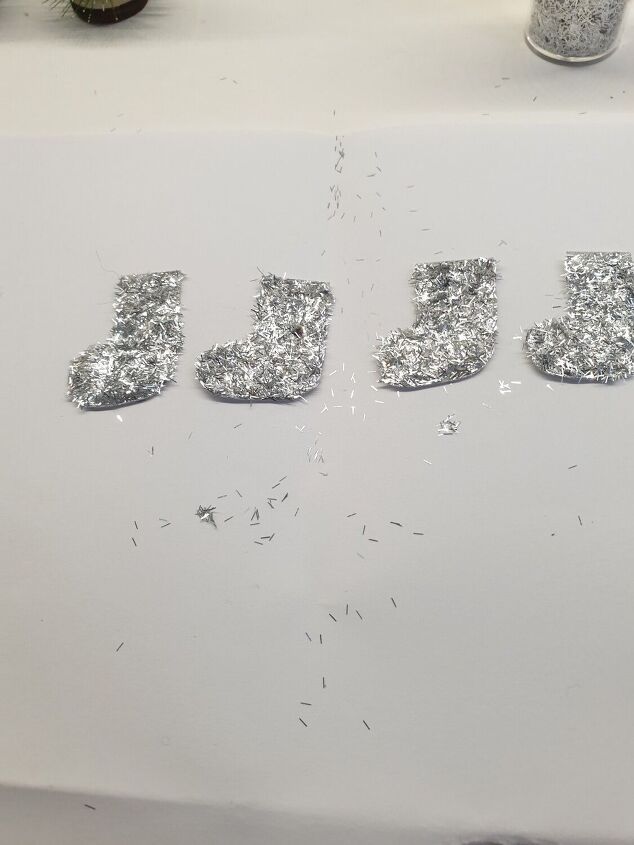
Once dry, tap the stockings on a hard surface and you should be left with something like this.
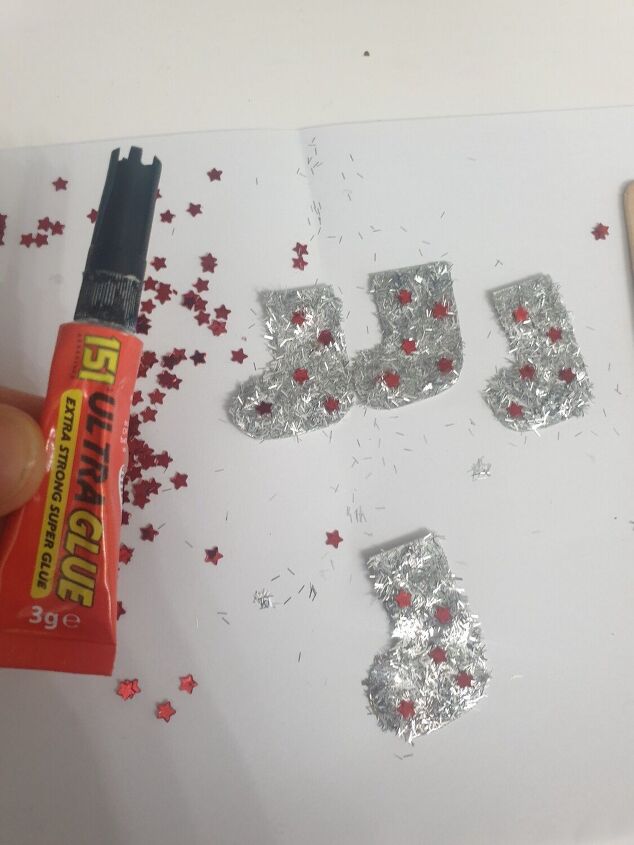
For a final touch to make the stockings look extra special, use superglue to add a few tiny red glitter stars to each one.
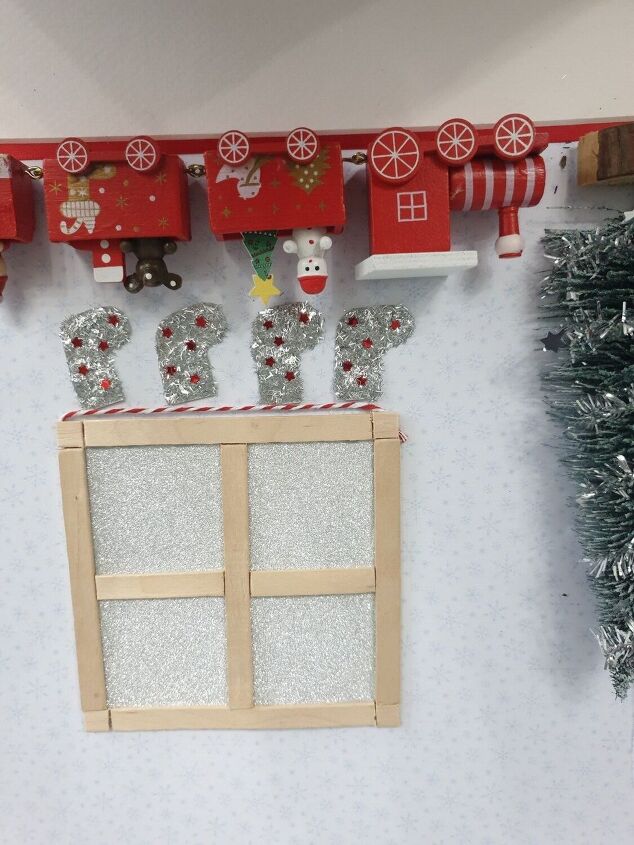
Position the stockings under the window as shown, and stick a piece of the red and white string above them.
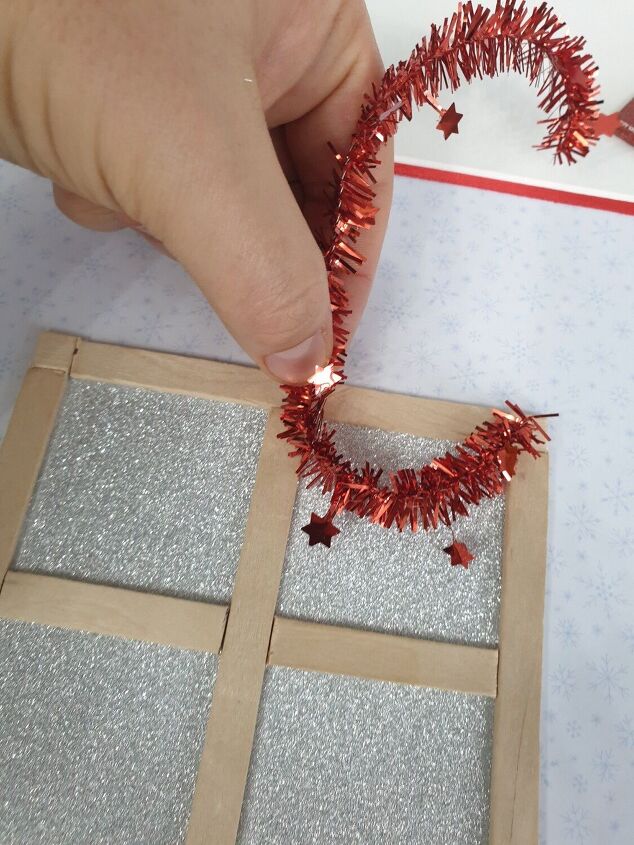
Measure lengths of mini tinsel to fit the window as shown.
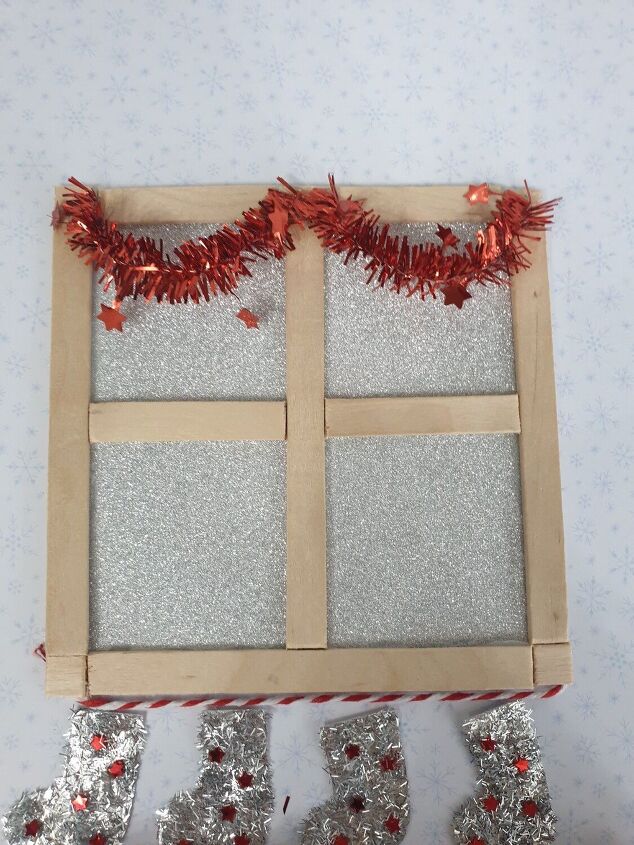
Stick the tinsel with uhu.
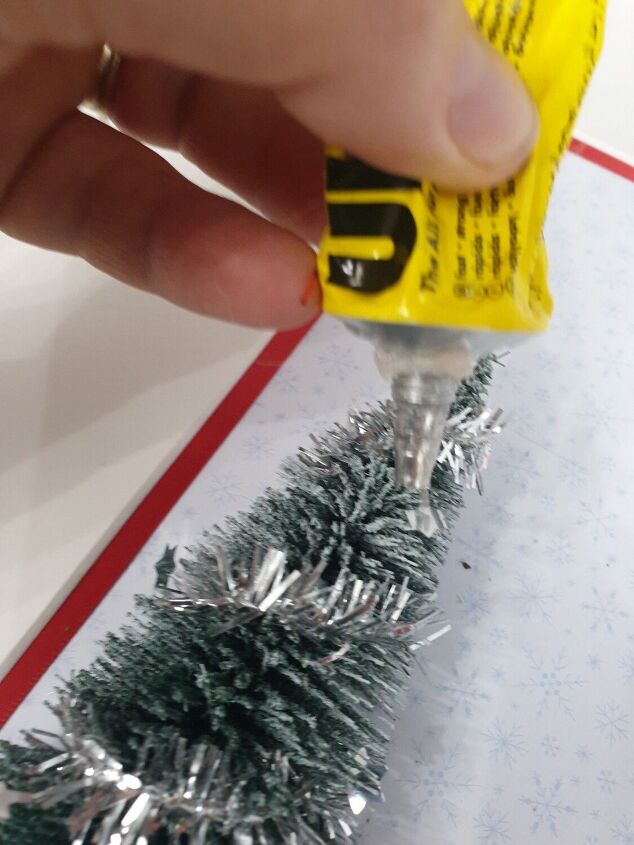
Dab uhu around the Christmas tree ready for decorations.
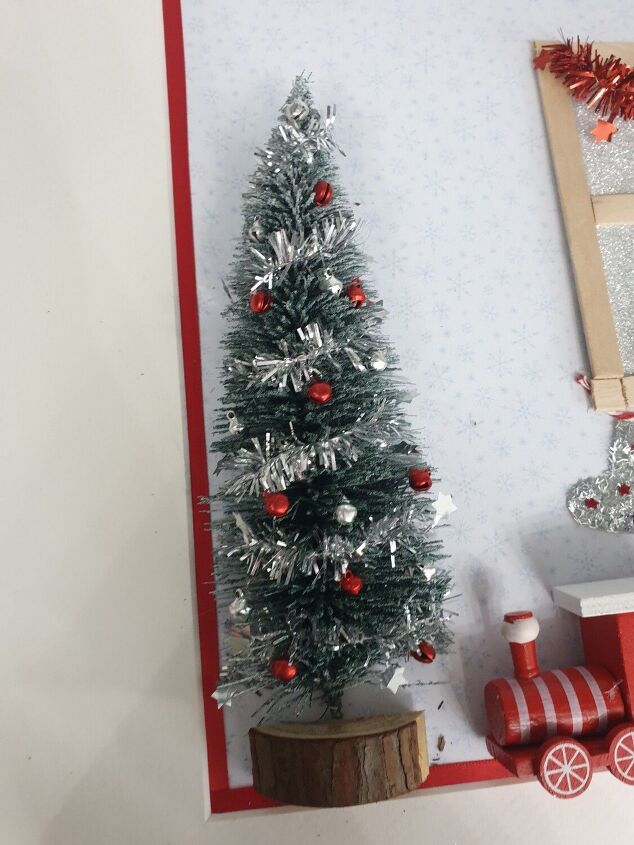
Stick mini bells to the blobs of uhu and leave to dry.
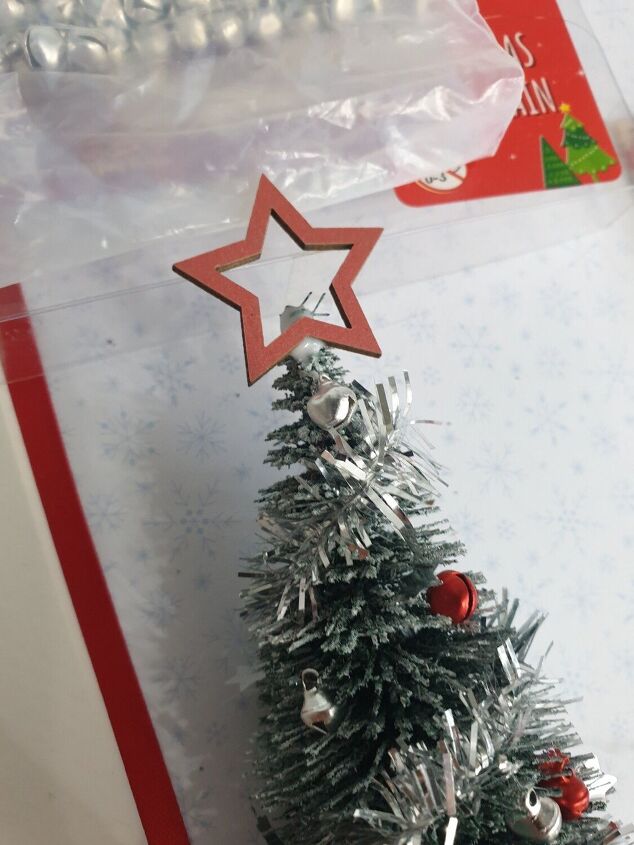
Use some more uhu to attach the small wooden star to the top of the tree.
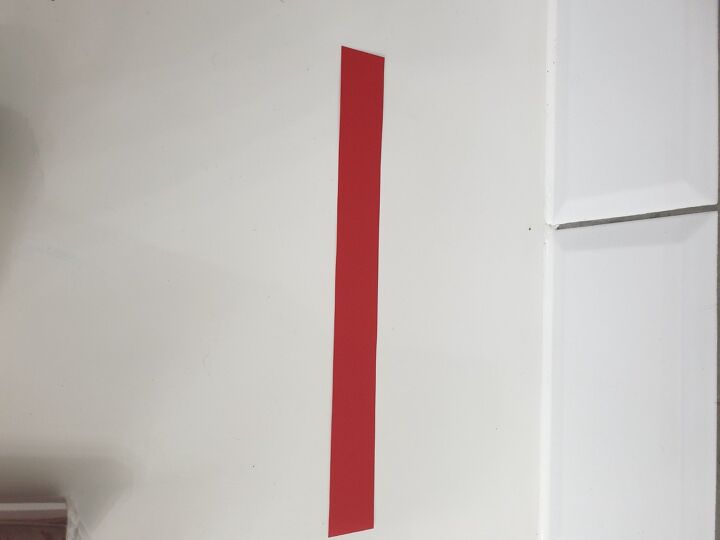
Next cut a strip of red card to fit within the frame.
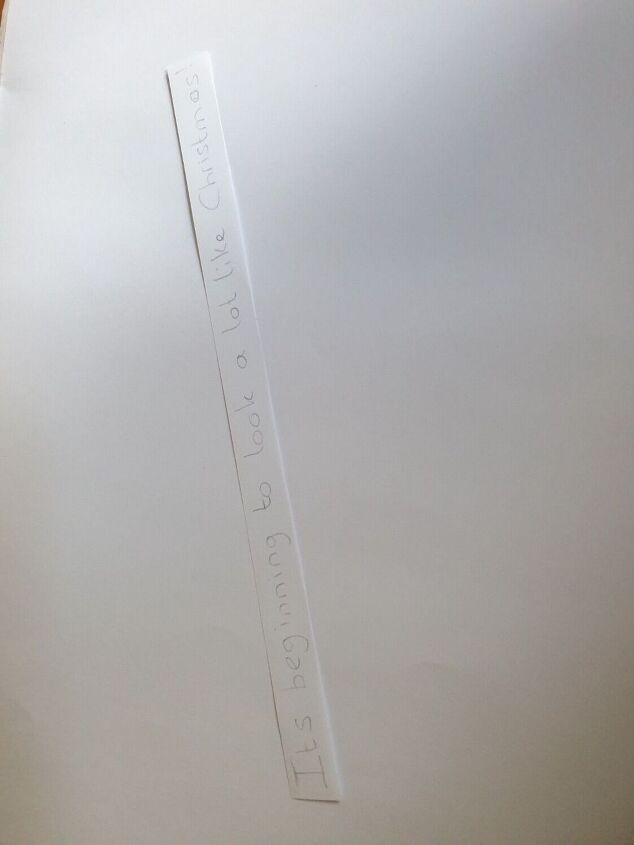
Cut a smaller white strip to front the red strip. Write a Christmas message of choice in pencil, correcting until you get spacing correct.
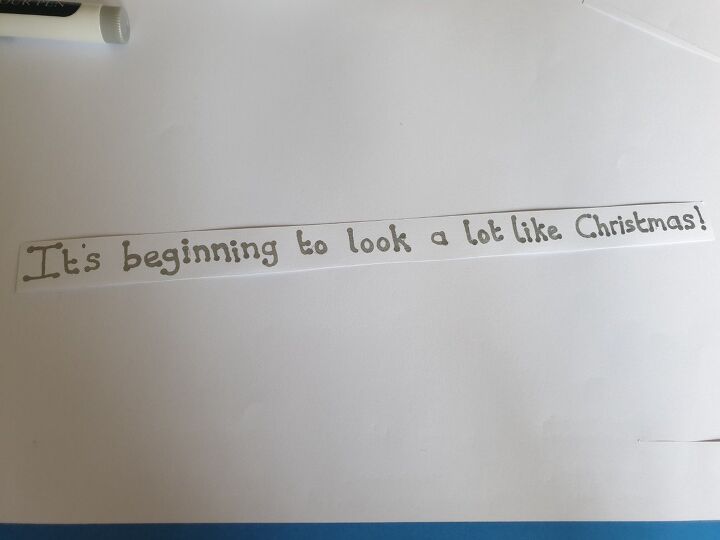
Go over the message with silver pen.
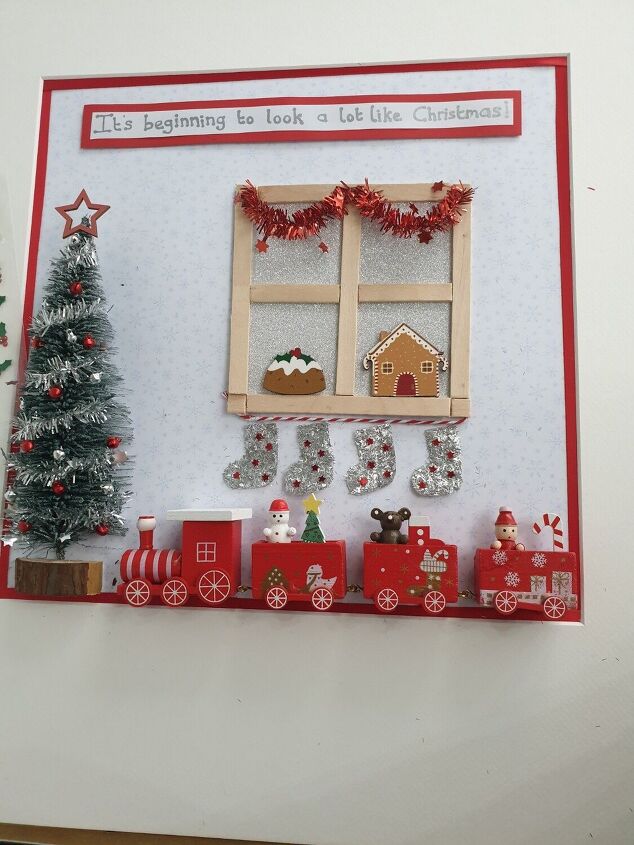
Stick the double backed christmas message to the top of the frame as shown. Add christmas embellishments to the window.
Finally add the holly stickers to the corners of the window. There you have it!
Comments
Join the conversation
-
Wow, really cute. I just scrolled thru but it looks labor (of love) intensive. I'm too lazy. I'd still b working on it Christmas 2022. But, YOU did a great job. Very homey.
-
This is so cute. I might give it a try. You should sell these at craft sale or etsey. Thanks


Frequently asked questions
Have a question about this project?