


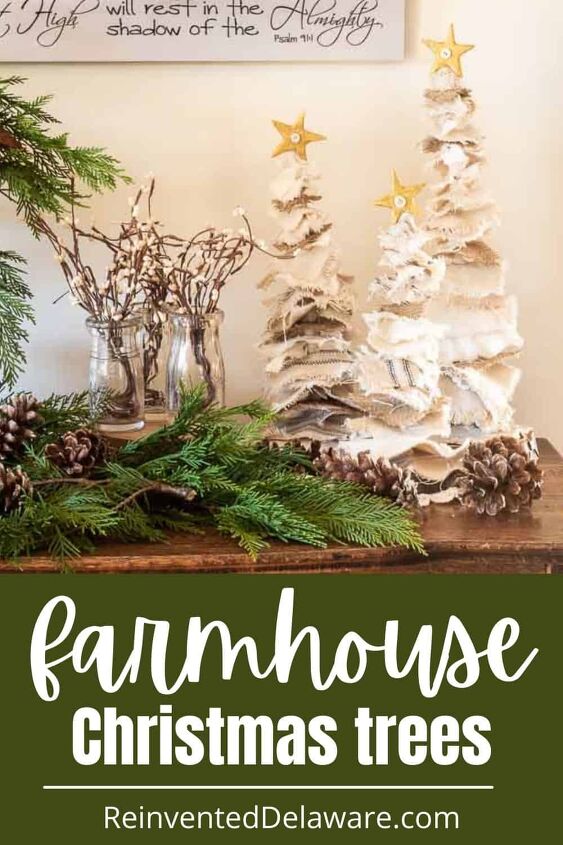
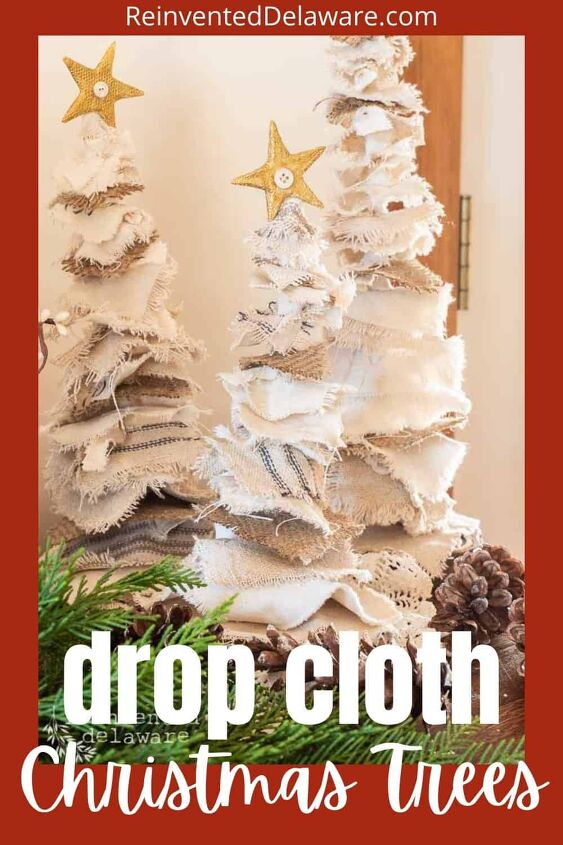
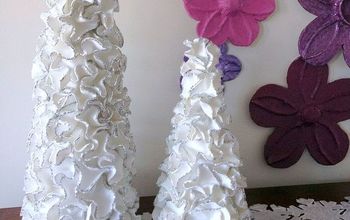
DIY Holiday Drop Cloth Christmas Trees

Are you looking for a fun DIY holiday craft for your Christmas decor this year? Or maybe you need a unique Christmas gift that doesn’t cost much? Then you are going to love this project!
As an Amazon Affiliate (and other companies including Dixie Belle Paint Company), we earn a small commission on products sold through affiliate links. Your purchases through those links help to support this blog at no additional cost to you. In purchasing the supplies we use and recommend via our links, you help to support the free tutorials we offer you and our other readers. Thank you so much! Read my full disclosure here.
drop cloth Christmas craft
Have you ever wondered where ideas come from? How in the world do our minds come up with thoughts and ideas?? If I only knew, I would start a business and sell the method!
Anyway, this idea literally sprang out of nowhere. I thought, “Hey, I could make a Christmas tree using the neutral-colored scraps I keep saving and collecting!”
And the idea for this project was born. And it’s a good one!
As the idea formed in my mind, I started to come up with the supplies I would need to make these adorable farmhouse Christmas trees.
If you don’t want to purchase all of the supplies in order to get the scraps, gather a group of crafting friends and split the cost. Then plan an evening that you can get together and make these adorable trees. You’ll have so much fun!
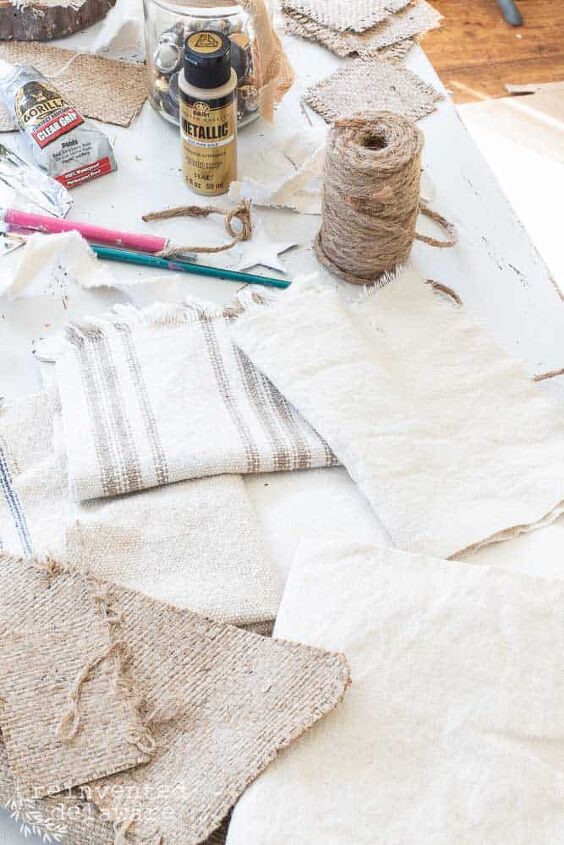
list of supplies:
- neutral colored scraps like dropcloth, grainsacks, & burlap
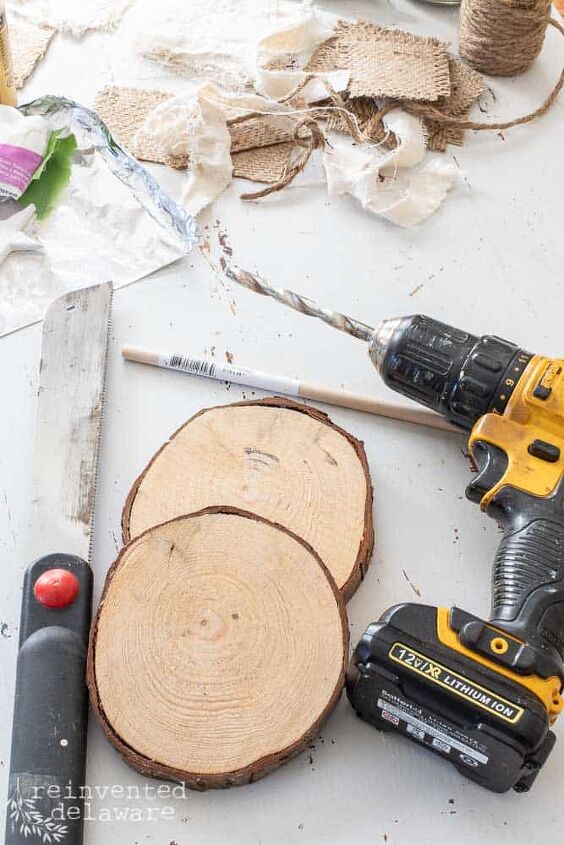
- wood slices (one per tree)
- 5/16″ dowel rod
- power drill with 5/16″ drill bit
- small pull saw
- Gorilla Glue in clear
- small clamps
- craft knife
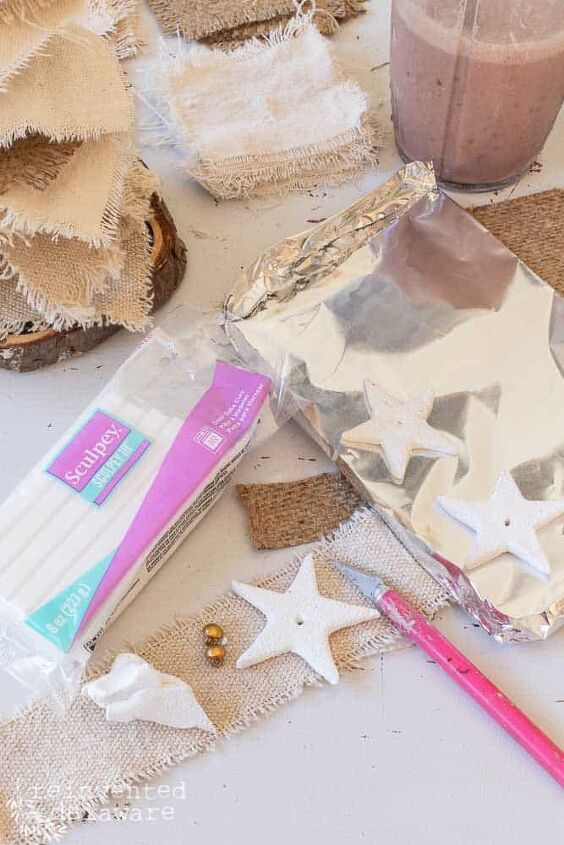
- Sculpey Clay (air dry or oven bake)
step one:
This step is fun and a little bit scary all at the same time. Gather your neutral-colored scraps and start tearing them.
“What did you say, Cindy??? Did you say to tear the fabric??”
Yepper, I sure did! Watch the video later in this post for my method and then get busy. This is the fastest way to get evenly shaped squares.
You’ll need approximately 20-22 squares varying in sizes from 4″-1 1/2″ for each tree, less for the smaller tree. The different sizes will give the tree its shape.
Be sure to save any long scrapes you will have after tearing the squares. See the pile at the top of the image below? We’ll be using those too! They are long strips about 1/2″ wide.

step two:
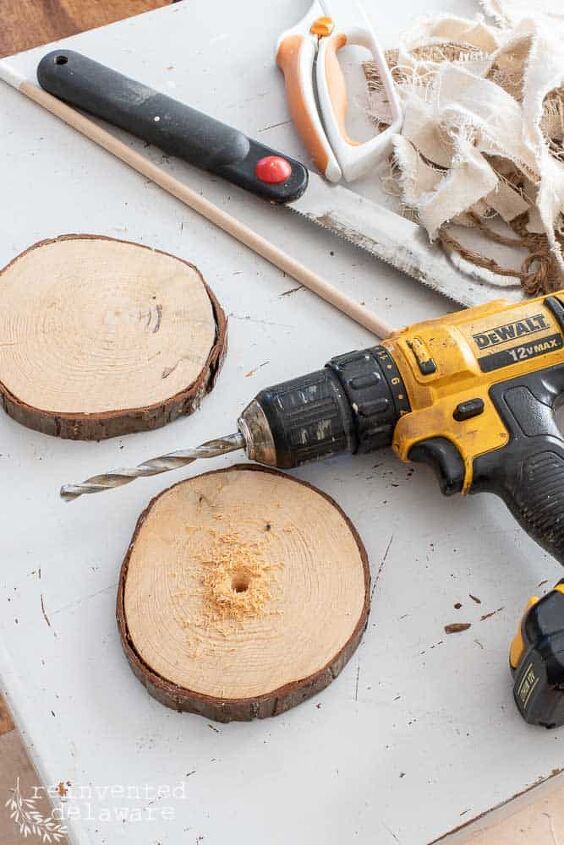
Next, drill a hole in the center of the wood slice using the power drill and a 5/16″ drill bit.
The wood slices can be purchased on Amazon and I have provided the link for you above in the supplies list. If you happen to have a handy hubby as I do and a yard full of trees, you can cut your own. They should be about 4″ in diameter and 1/2″-1″ thick.
DIY holiday tree trunk
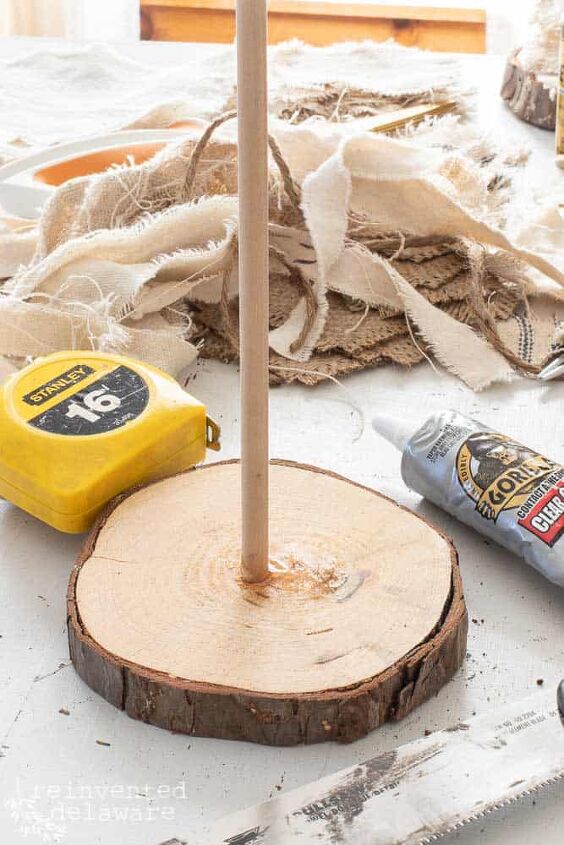
Cut the dowel rod in three lengths: 14″, 12″, and 9″. BTW, I didn’t measure exactly, I just eyeballed it after measuring the first one. I wanted three trees in varying sizes to add interest when the trees are grouped together.
Then, add some Gorilla glue to the hole in the wood slice and insert the dowel. I let mine dry overnight but only because it was time to cook dinner!
step three:
Now for the fun part of this DIY holiday project! Begin adding the squares to the dowel, starting with the largest square.
Oops! I forgot to mention, clip a little hole in the center of each square! That’s how they go onto the dowel rod! 😉 I will show you how I find the center for the squares in the YouTube video later in this post!
Between each square, tie a piece of the long fabric scrap in a knot around the dowel rod. See it at the top of the layered squares? Doing this will make it so you don’t have to have as many fabric squares plus it will give each layer some height.
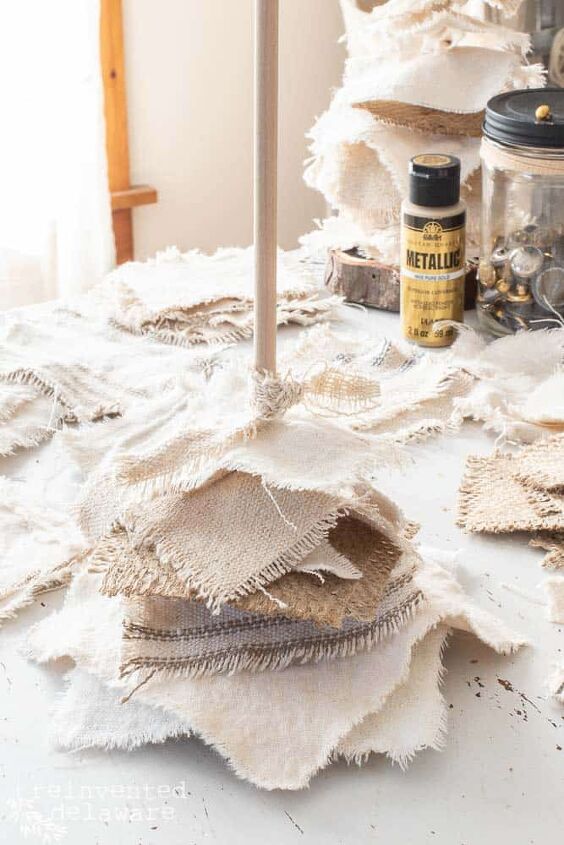
Keep moving upward on the DIY holiday tree adding a square then a tied knot, then a square, and a tied knot until you get to the top of the dowel rod.
Next, let’s cover the exposed 1/2″ of dowel rod. Use a small fabric scrap and glue it to cover the dowel.
So simple!
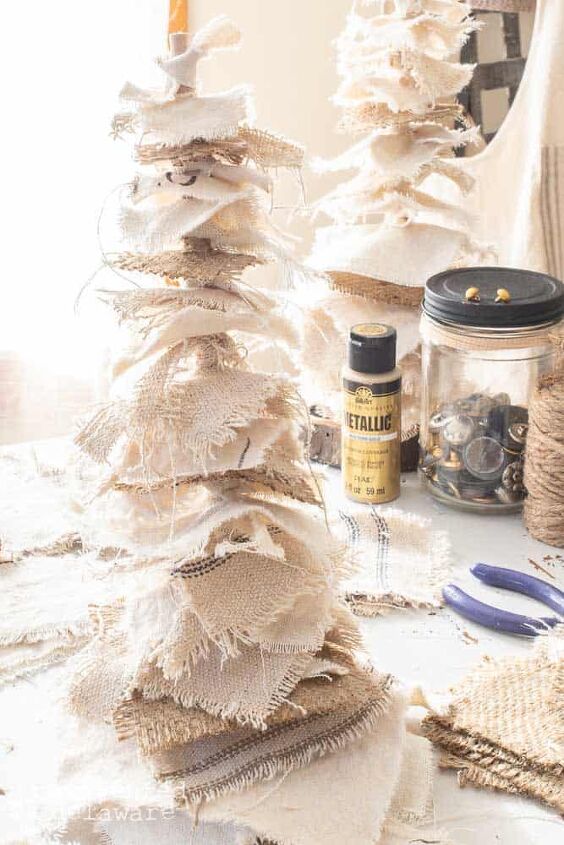
Look at the images below and you can see how the tied knots add dimension to the tree. I love how the scraps drape just a bit. And that burlap helps to add interest to the whole project!
step four:
You’ll see better in the YouTube video later in this post, but let me briefly tell you what I did for the star.
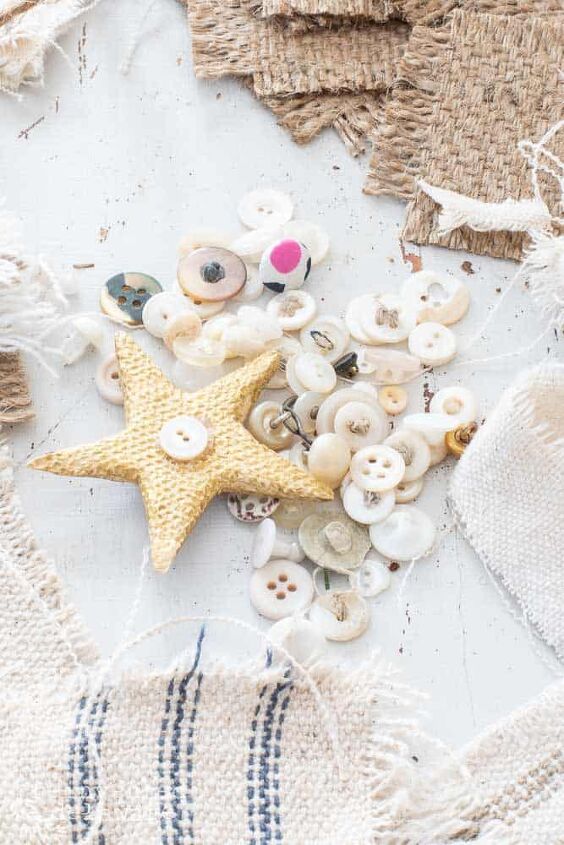
Oven bake clay. That simple! I downloaded a free star shape (approx 1 1/2″ wide) on my computer and printed it. Then I used that as a pattern to cut out a star that was about 1/4″ thick using my craft knife. To add a bit of texture to the star, I used a fabric scrap to press into the clay so that it would imprint the star just a bit.
I baked it according to the instructions and painted it gold when it was completely cooled.
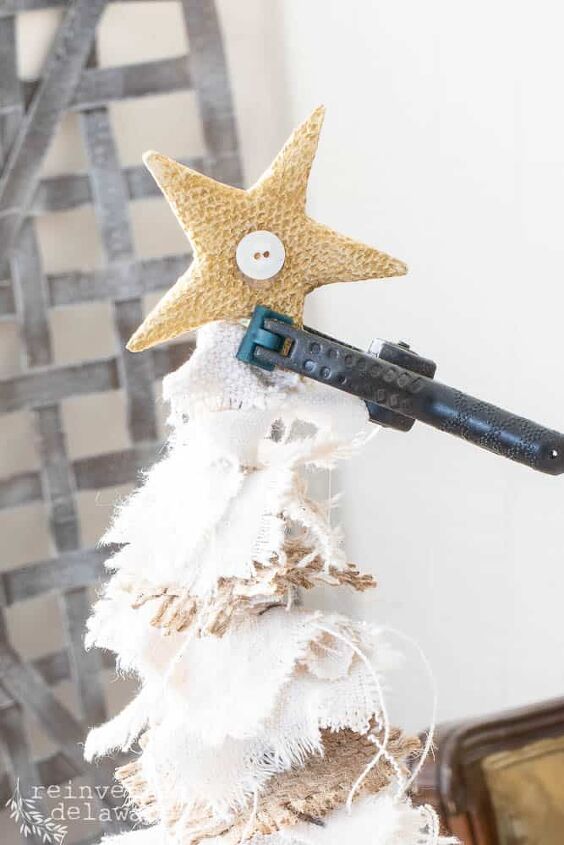
A small button in the center adds another layer of a farmhouse feel to this tree, don’t you think? The perfect DIY holiday tree topper!
It was easy to glue on with Gorilla Glue in clear. The glue had to dry overnight so I clamped it in place on the top of the tree over top of the fabric-covered dowel rod.
YouTube Video
Here is a fun video for you. Sometimes it’s easier to watch someone make the project .😊
https://youtu.be/SiJpu_aFwis
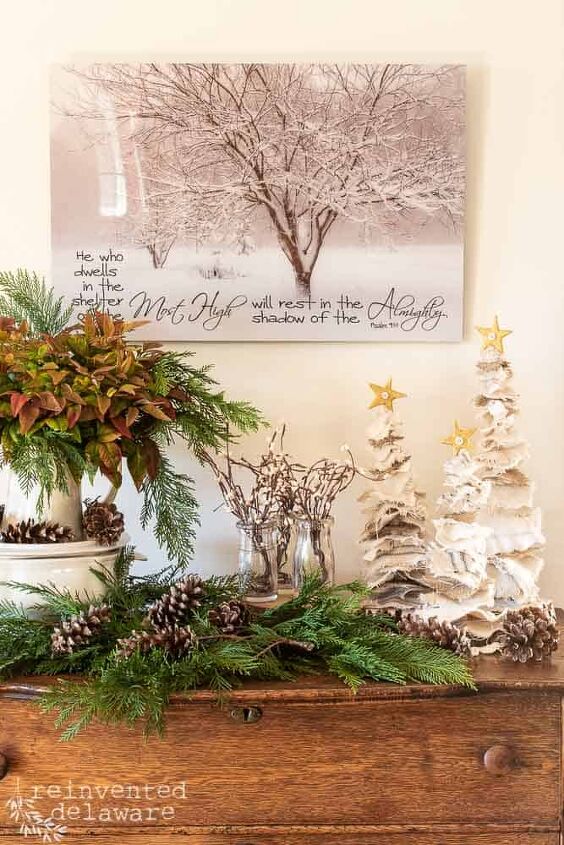
step five:
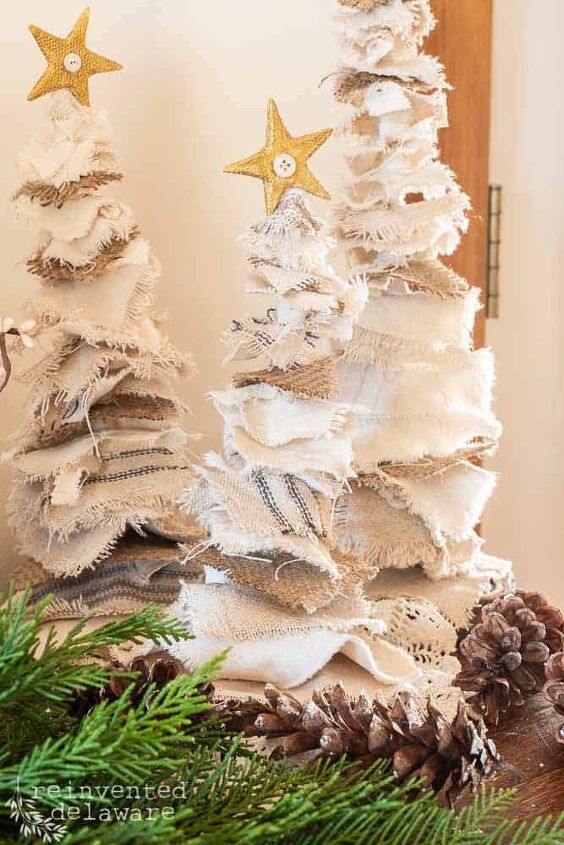
Enjoy your drop cloth Christmas trees! I have mine set up in our kitchen area directly across from our kitchen island. They bring just enough Christmas to this little spot.
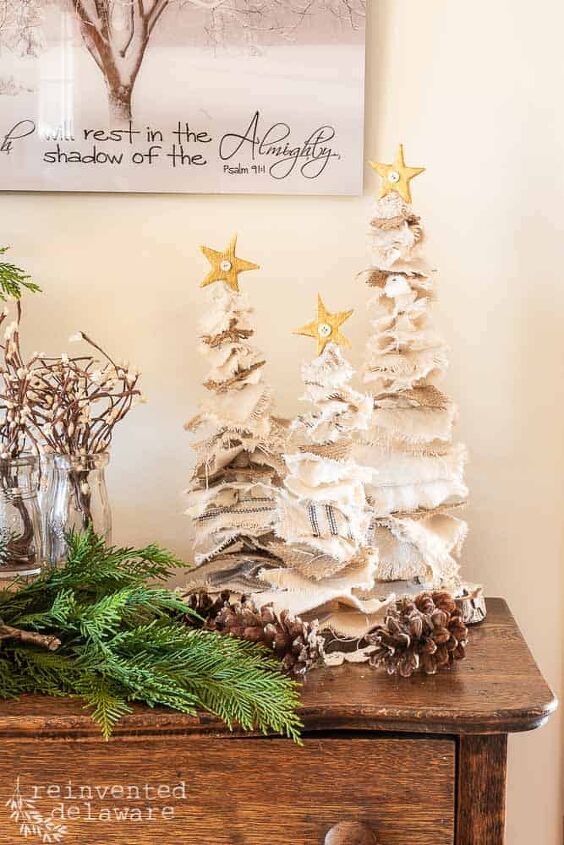
cutest Christmas decorations
Aren’t they the cutest Christmas decorations?? I could have a forest full of them throughout the house!
Let’s think of some places these DIY holiday trees could go:
- a guest bathroom (or any bathroom that needs a little holiday cheer)
- a nightstand in a bedroom
- use them as part of a tablescape for you Christmas gatherings
- kitchen island or countertops
- laundry rooom (we need a little Christmas decor while we work too!)
holiday DIY
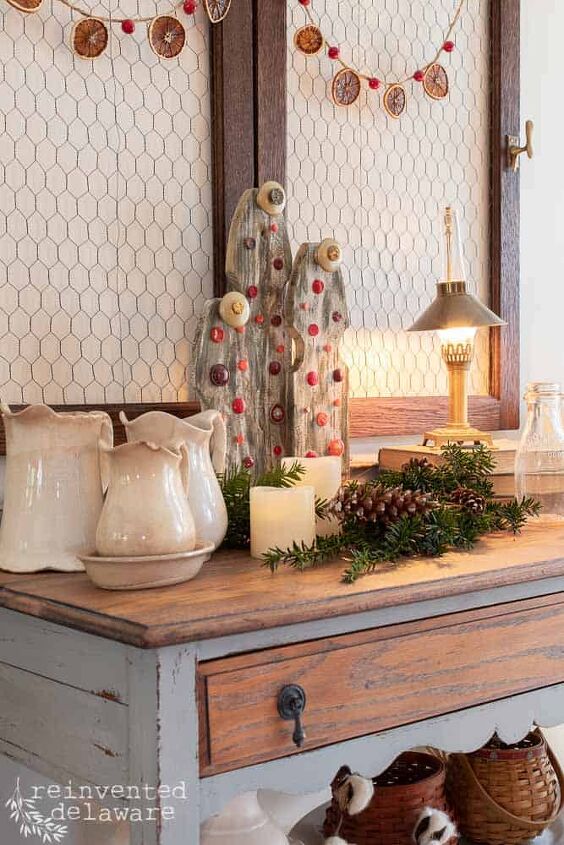
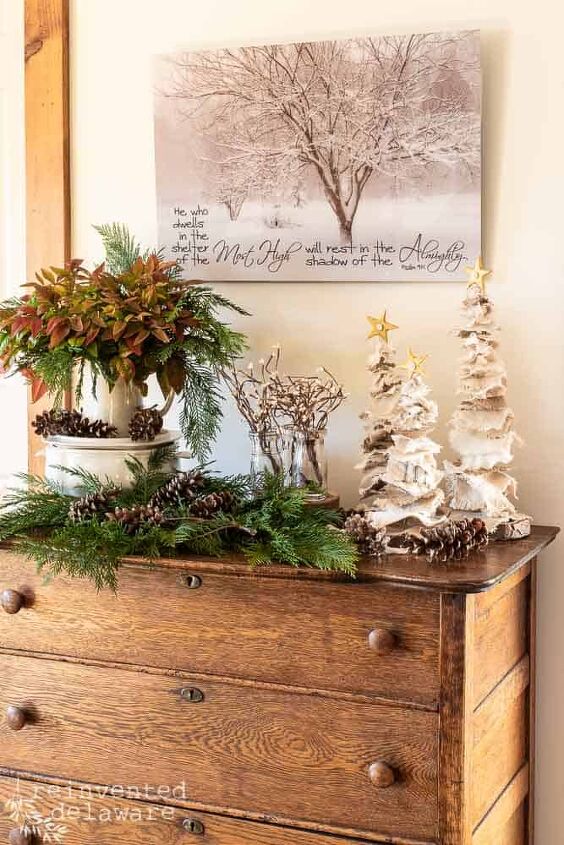
Speaking of holiday DIY projects, I thought I would mention an easy way to bring a festive look to your home during the Christmas season. Just bring in fresh-cut greenery from your yard and landscaping!
You can see here I have a branch of Nandina in an ironstone dish along with the fresh Leyland Cypress branches. The Nandina is a gorgeous red, isn’t it?
I stuck the branches in a glass of water and placed the glass inside the ironstone dish. The Nandina will last for weeks. When the leaves start to fall off, I just go outside and cut some more. They will be even redder as the season goes on.
I will do the same with the Leyland Cypress branches. As they dry out and start to lose their needles, I’ll go outside, get a breath of fresh air, and cut a few more branches. Pinecones add another layer to the look!
office Christmas Decoration
Back to these sweet DIY holiday trees. Since they are relatively small, they would be perfect at your office desk. Whether you work at home or in an outside office, they are the perfect size for a desk.
If your desk is too small for all three, just use one!
need more DIY Christmas decor ideas?
Here are some great ideas to inspire you to create decor for your home!

easy DIY farmhouse holiday decor
Wasnt’ this an easy project for Christmas? I thought I would share a couple of more ideas with you for these sweet drop cloth Christmas trees:
DIY holiday decor to sell
Do you run your own vendor booth and need a fresh Christmas decor piece to sell? These are fast and inexpensive which allows you a nice profit margin! Take a weekend and make lots of trees in various sizes. Your customers will love them!!
DIY Christmas decor as gifts
Or maybe you have a lot of friends and family but not a lot of buck-a-roonies? This project is your solution! Make a tree for each person within that family and print their name using a brown fabric marker on one of the squares to personalize it!
Too many family members for each to have their own tree? Make a 14″ tree and print each person’s name on one of the squares. What a treasure that would be! Give the person the fabric pen so they can add names to the tree as their family grows!
**If you are concerned about the appearance of your handwriting try this trick: print the names in all caps. It will look amazing!
whimsical farmhouse Christmas decorating
I hope you enjoyed this tutorial for the cutest Christmas trees made from drop cloth! Let me know if you get a group of your friends together to share in the supplies and make these trees! I would love to hear about your gathering and the fun you had making them!

Pin the image below to your home decor and furniture boards! Just click the pin button at the top left corner!
Thanks for joining our journey!
We want you to join our journey over on Instagram and Facebook! You can also find more inspiration on our Pinterest page! We’re always pinning fresh ideas!
Until next time…

Comments
Join the conversation
-
You have such great ideas. The Christmas decorations look so beautiful. Is it weird that I think they are "calming"? Is that a thing?
I just love it and all of your creations. 💚 🌲 ⭐️
-
I love the fabric square trees and plan on making some. I adore your home! Do you consider your style country, rustic or a mix of many LOL? I love it either way !!!


Frequently asked questions
Have a question about this project?
where can I get a pic like the one using Psalm 91:1?