


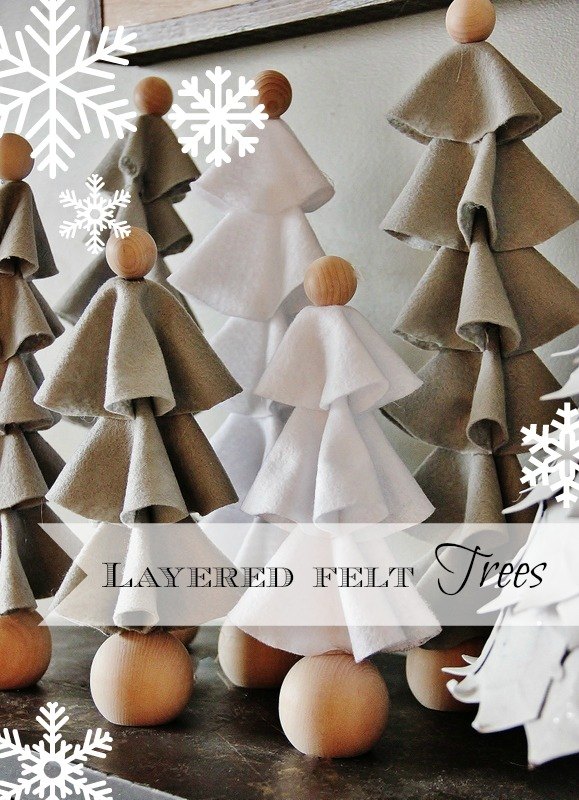
DIY Layered Felt Trees

Make these easy felt trees. Stack layers of felt to create a tree form and hot glue to a wooden ball. This is such an easy simple project to make felt trees for Christmas.
I know you are so busy.
I know you’re shopping and baking and wrapping and decorating and going to parties and Christmas concerts and parades and tree lighting ceremonies.
After all, it’s the busiest time of the year.
But just in case you had a few extra minutes. Just in case you wanted to make those little felt trees sitting over there on the Merry Mantel, I have a tutorial.
If you need step-by-step, I’ve got pictures and detailed instructions.
Merry Christmas. 🙂
Method 1: Felt Trees Without Dowel
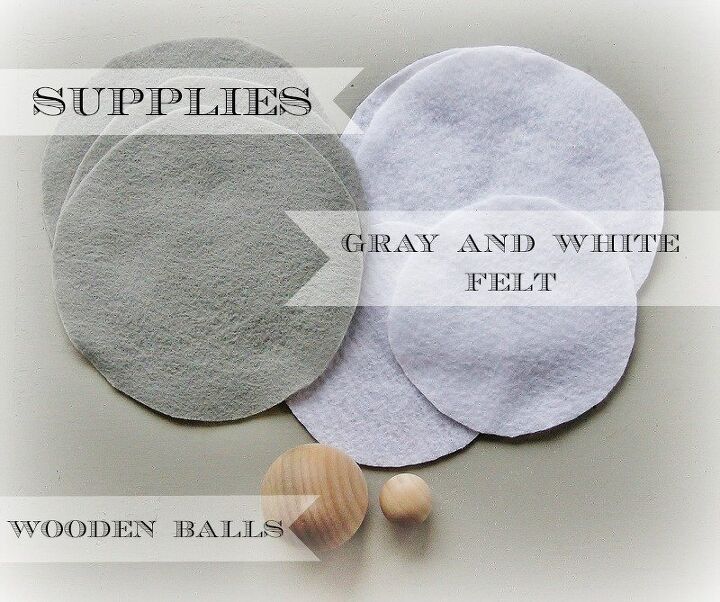
Supplies:
Gray and white felt
Wood balls
Hot glue
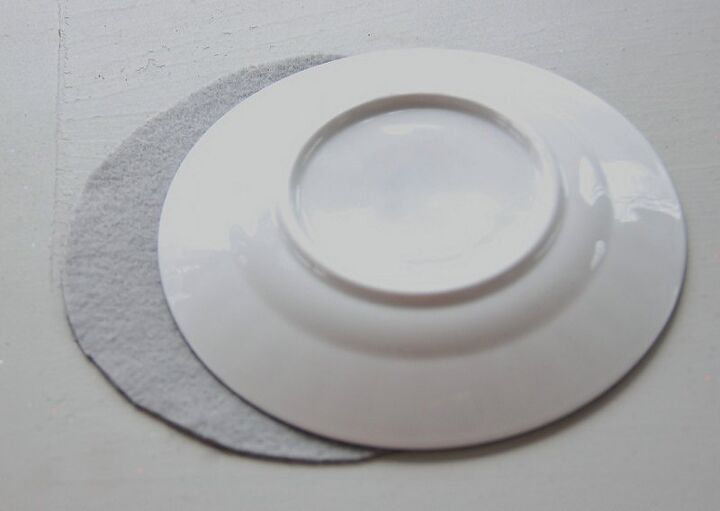
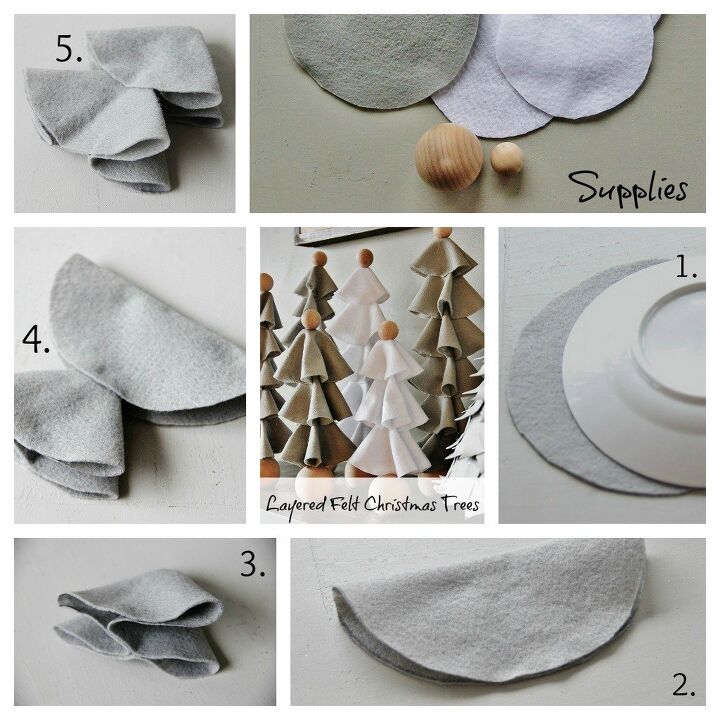
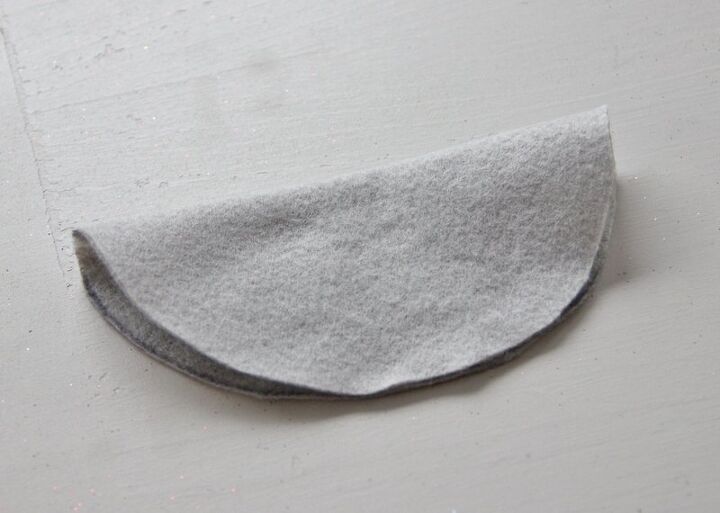
Step 1: Cut circles from felt squares
Purchase felt squares from the craft store. Then trace around a plate, coffee cup, glass, etc. to make a circle.
Cut a circle out of felt.
I made two sizes.
I traced a small plate and then I traced the edge of a coffee cup.
You will need three large circles and one small circle.
edited to add: I was able to get two large circles from one square of felt and four small circles from one square of felt.
Step 2: Fold large circle in half
Add a drop of hot glue to hold circle closed.
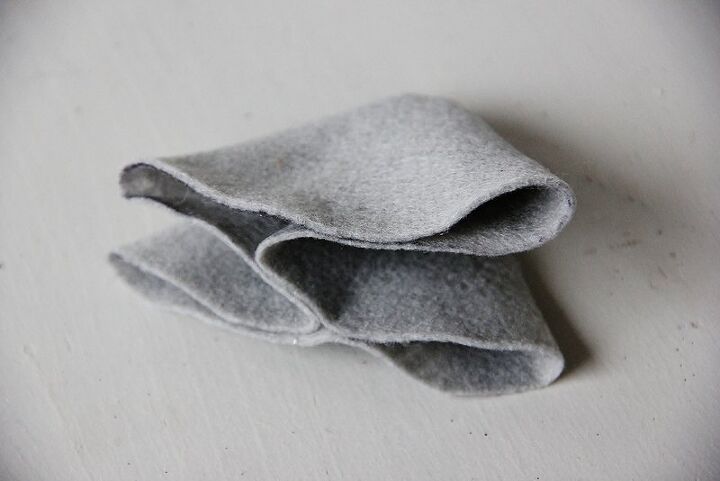
Step 3: Fold circle other direction
Turn the felt the other direction and fold into two triangles.
Hot glue each triangle at the end to hold closed.
This is the first layer of your tree.
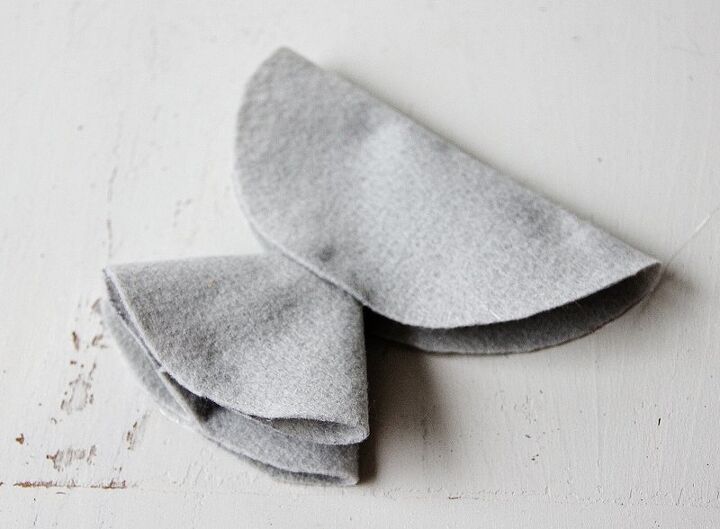
Step 4: Repeat step 2 with the next layer of felt
Fold another circle in half and hot glue to the first layer of the tree.
Step 5: Fold circle in other direction
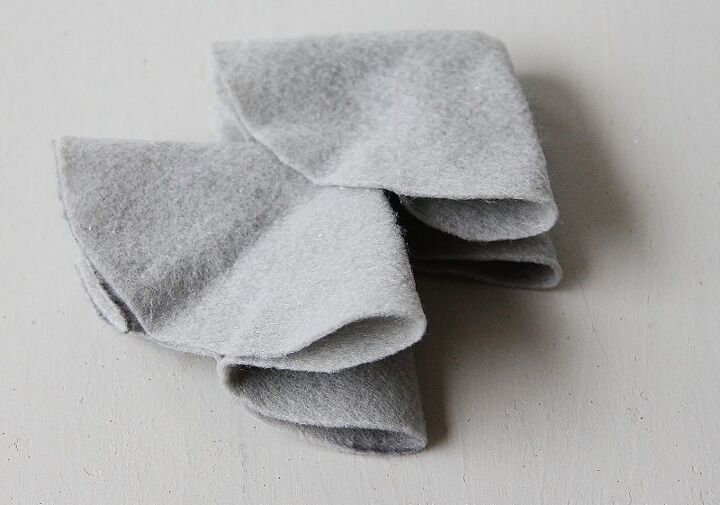
Repeat step 3 to form two more triangles and the next layer of the tree.
Repeat for two more layers until the tree has four layers.
edited to add: I made some of the trees with three or five layers to create different heights.
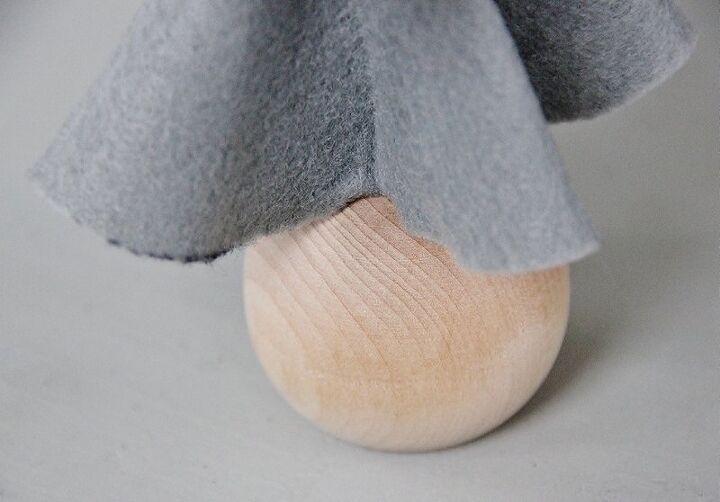
Step 6: Add wooden ball to bottom of tree
I found wooden balls at the craft store with a flat bottom so the tree can stand.
Add a bead of hot glue to the top part of the ball and press the felt tree onto the ball.
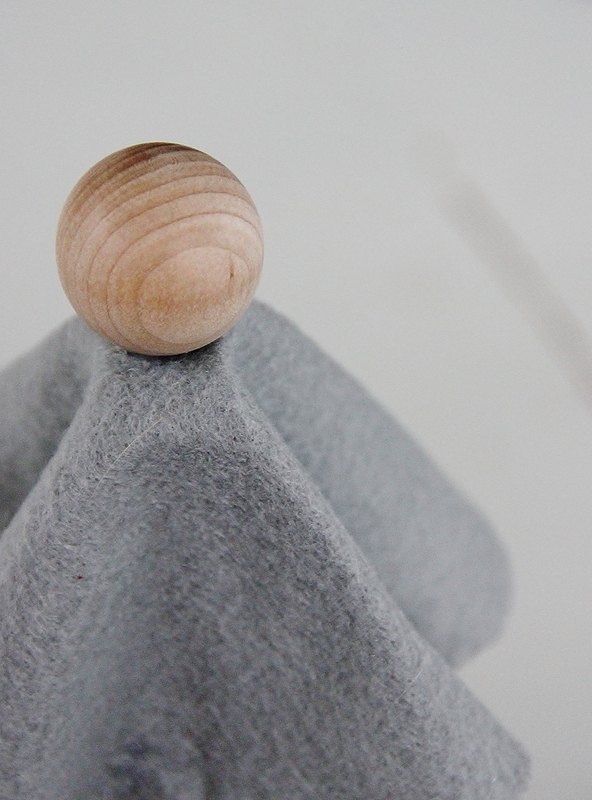
Step 7: Add wooden ball to the top of the completed tree
Add a drop of hot glue to the top of the tree.
Lightly press the small ball into the top.
Method 2: Felt Trees With Dowel
You can also make this tree with a dowel rod in the center to stabilize the tree.
1. Use a wood block as a base instead. Drill a small hole into the center of the block and use wood glue to hold it in place.
2. Cut felt circles as shown.
3. Punch a small hole in the center of each circle.
4. Thread the first circle onto the dowel rod. Fold as shown.
5. Repeat with each of the felt circles until you have created the tree.
I made all four trees for under $10.00.
And in amazing news? It took me less than an hour to make all these trees and deck my halls.
Fa la la la la….la la la la. 🙂
If you liked this post, here are two additional posts you may be interested in:


Comments
Join the conversation
-
I suppose the dowel stick went up in the middle of the felt circles for support.
-
I assume the felt is stuff enough not to need a dowel. I'm going to try this using my enormous stash of of P.V.A. sheets, they're cheaper than felt, I'm stingy!
Merry Christmas.


Frequently asked questions
Have a question about this project?
Did you leave out the process of adding the DOWEL to this? I would like to try but right now the directions are incomplete. You must update this post.
She glues the circles to hold them folded over, so how would you stick a dowel through the middle to act as the trunk of the tree? I can see ways to make this work but much more complete directions would help a lot and I believe should be included or supplied in response to the questions here.
Hi Keriann, I love this project and want to do it with my grandkids. I am wondering about the dowels though, did you make holes for them, and, if so, how did you do that? The trees are so cute! Thanks, Pat