


Do It Yourself • Modern Christmas Cone Trees
5 Materials
$20
2 Hours
Medium
Here is our easy step by step tutorial for our modern Christmas cone trees! Here are the basic steps, but find more tips and tricks on our blog.
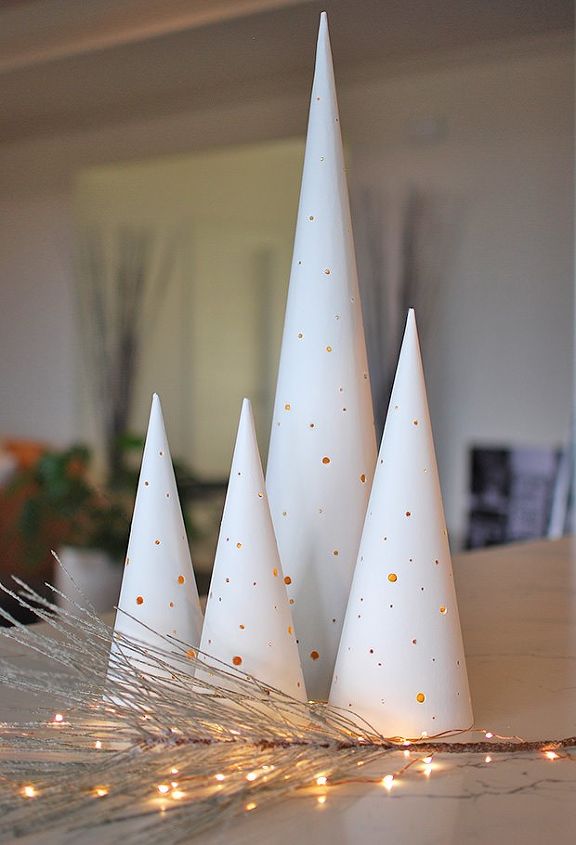
One of the first things we decided with this project was that in order to make a huge glam statement, more is more. We chose to make these the focal point of our main living area built ins, and that meant creating a forest of different sized cone trees! We also felt “go big, or go home” so we included several 2 foot tall cone trees.
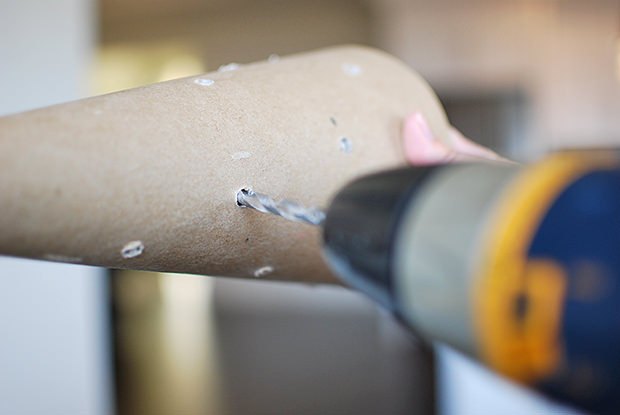
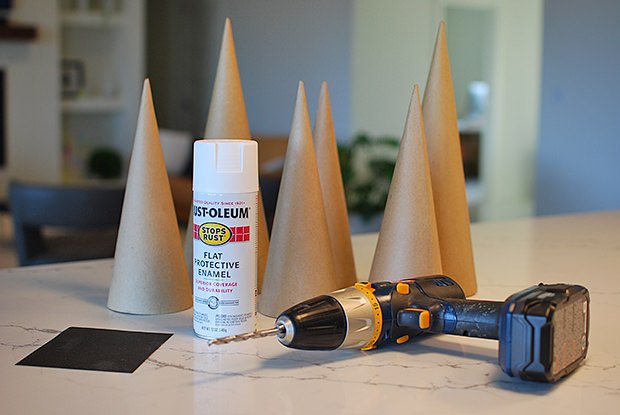
We started out choosing 3 different sized bits and drilled holes in the cones randomly, putting more towards the bottom, and fewer at the top. Try to make the holes quick and smooth and straight in, you get less ragged holes that way. You are drilling into what is essentially paper, so be prepared, it’s not going to look perfect right away. If you are hesitant and try to drill slowly, it will tear up the hole. Also, sharp bits work best!
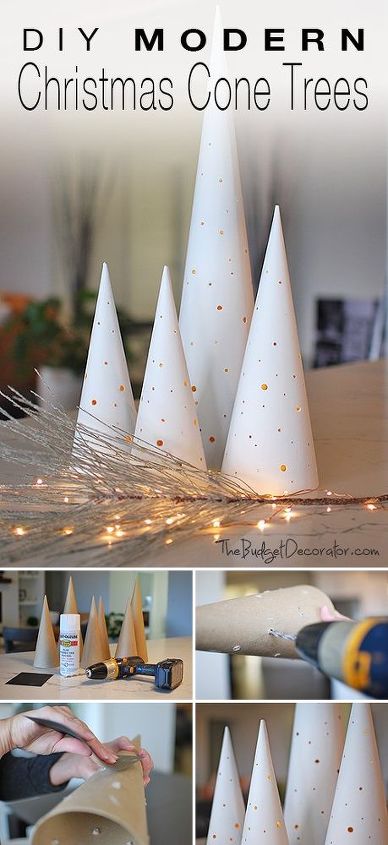
Using fine sandpaper, sand down the entire outside of the cones, paying special attention to the holes. We used a dremel grinding tool to “clean out” the larger holes, and then a small bit or bamboo skewer to poke through the tiny holes to the inside.Spray paint the cones in light coats.So now all you have to do is light them!on how to make these Christmas cone trees at https://www.thebudgetdecorator.com/do-it-yourself-•-modern-christmas-cone-trees/

Want more details about this and other DIY projects? Check out my blog post!


Frequently asked questions
Have a question about this project?