


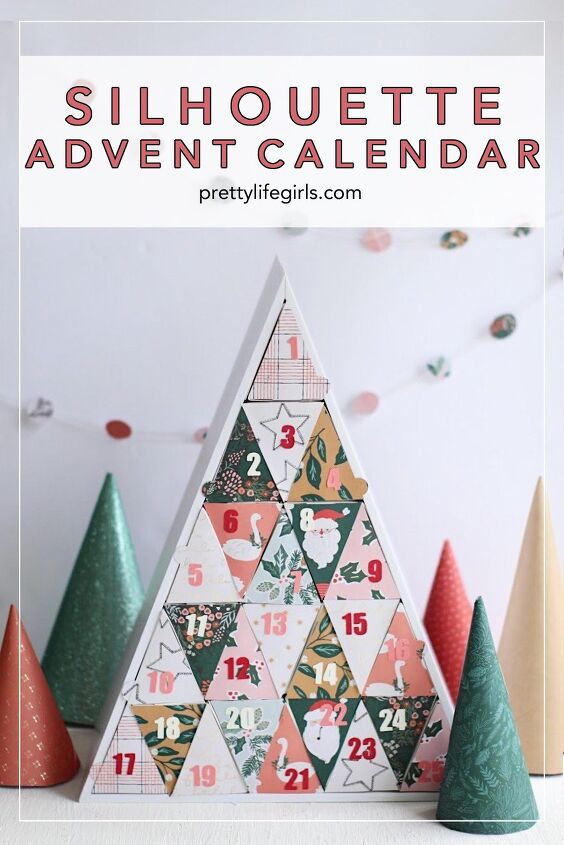
Make a Silhouette Advent Calendar!

In all of our years of crafting on this blog neither of us have ever made an advent calendar. I don't know if that's because I never found one I loved or if it was the pre-planning it takes to get it done before December 1st, but it never happened…until now! Being a Silhouette mega-fan, I should have known Silhouette was where I would find the coolest advent calendar, and that is what I'm going to show you today! Let me tell you all about it!
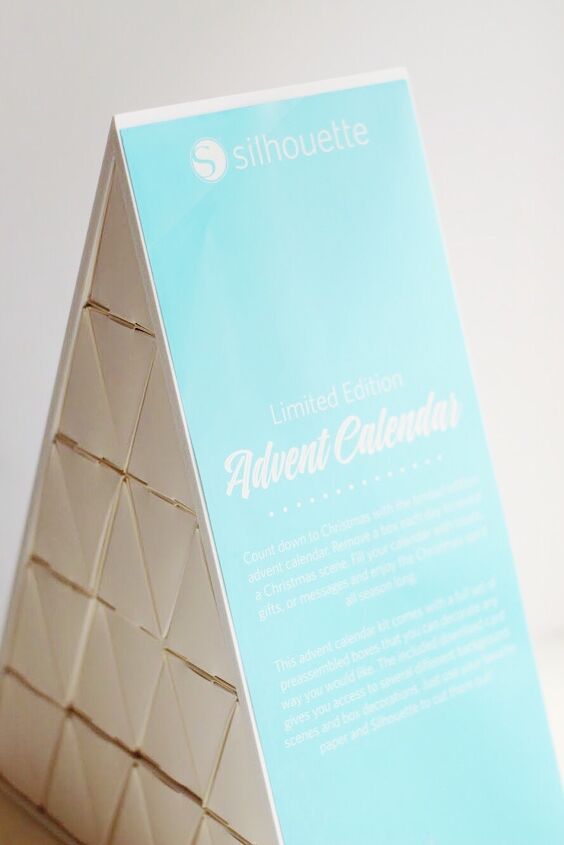
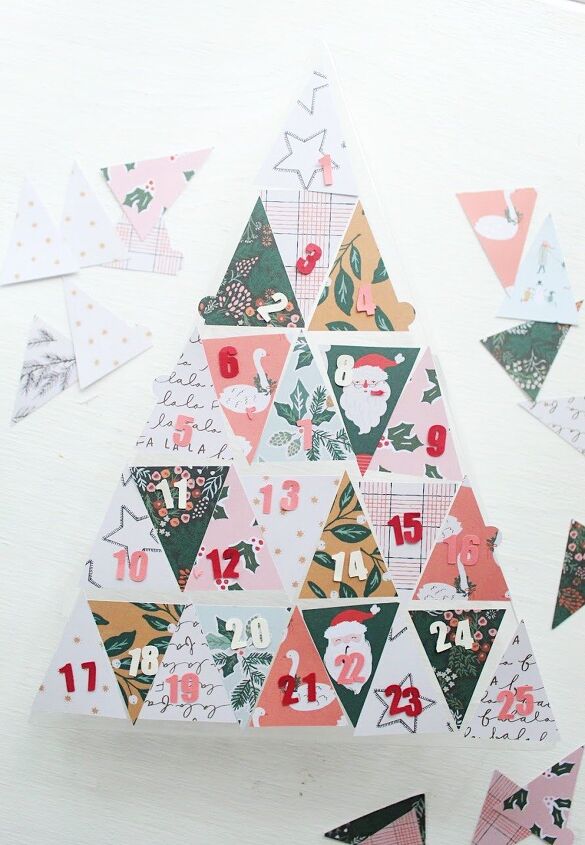
Here are the details: This year Silhouette has come out with a limited edition advent calendar! It comes completely blank and your purchase of the calendar comes with all of the cut files to customize your calendar! You can cut and decorate each of the boxes, number them and fill them with treats to be opened every day through the month of December! Then, if that wasn't fun enough, also, included in those cut files is a special Christmas scene that is revealed behind the boxes! PLUS, the best part is you can get it for $24.99 using code PLG at check out before October 31 (without the code the it's $39.99)!
Want to see how it comes together? Let's do it!
Supplies Needed
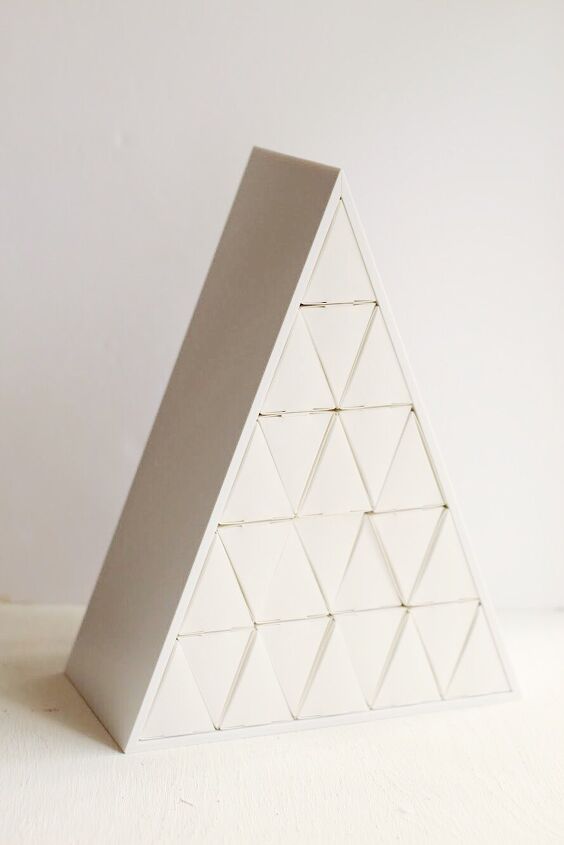
Silhouette Limited Edition Advent Calendar
Silhouette Cameo 3 (or your favorite Silhouette cutting machine)
Patterned Paper
Glue (I used my hot glue gun)

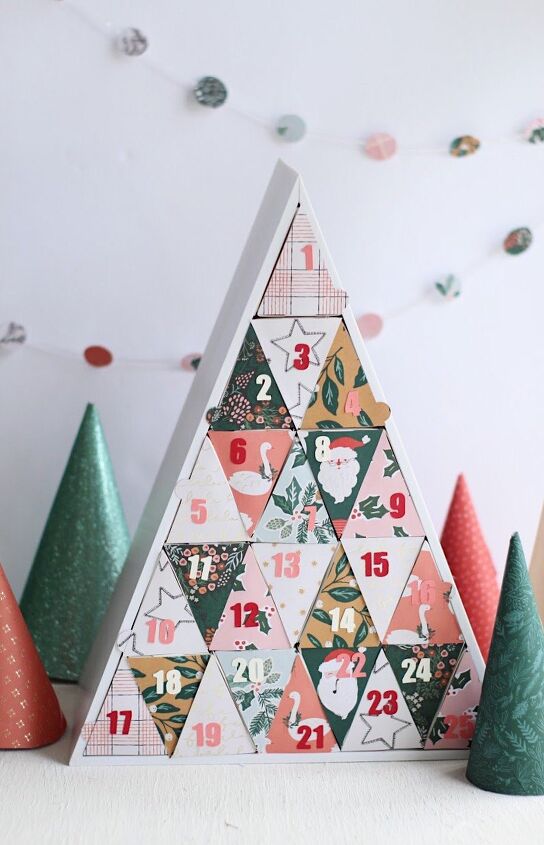
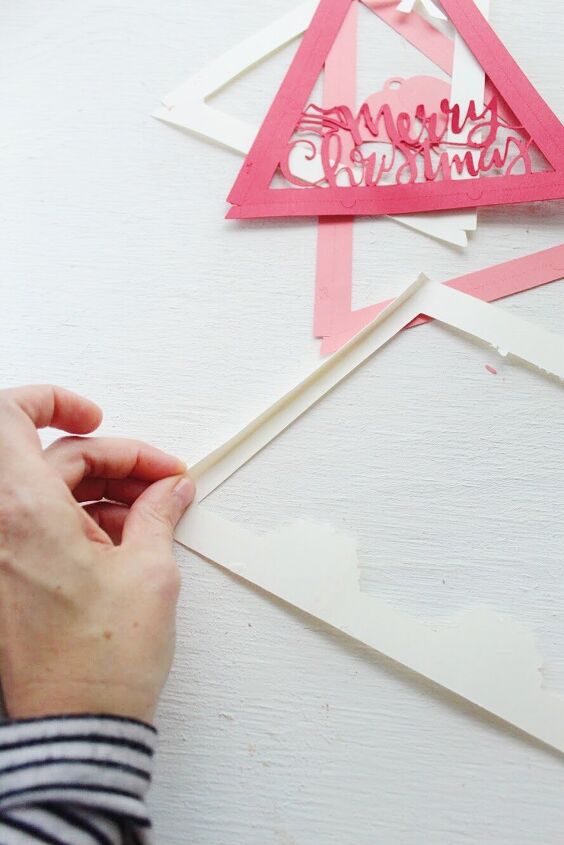
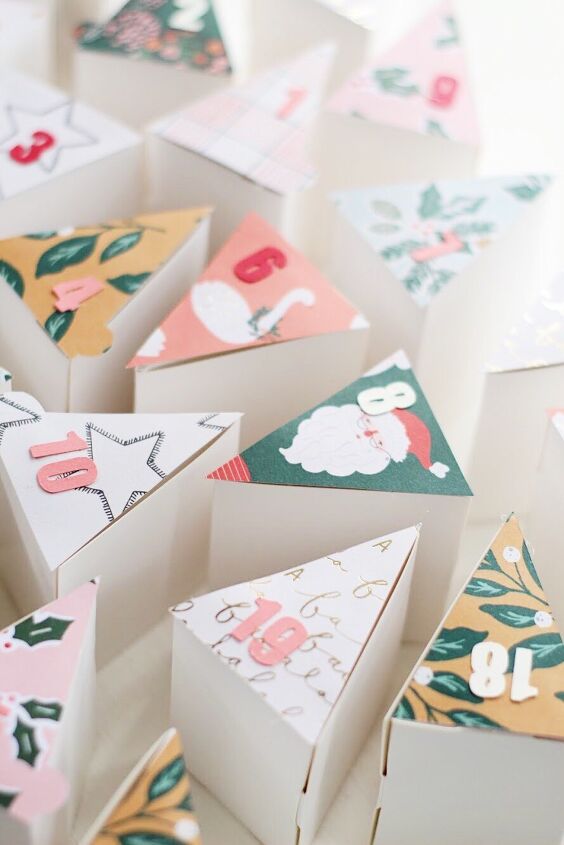
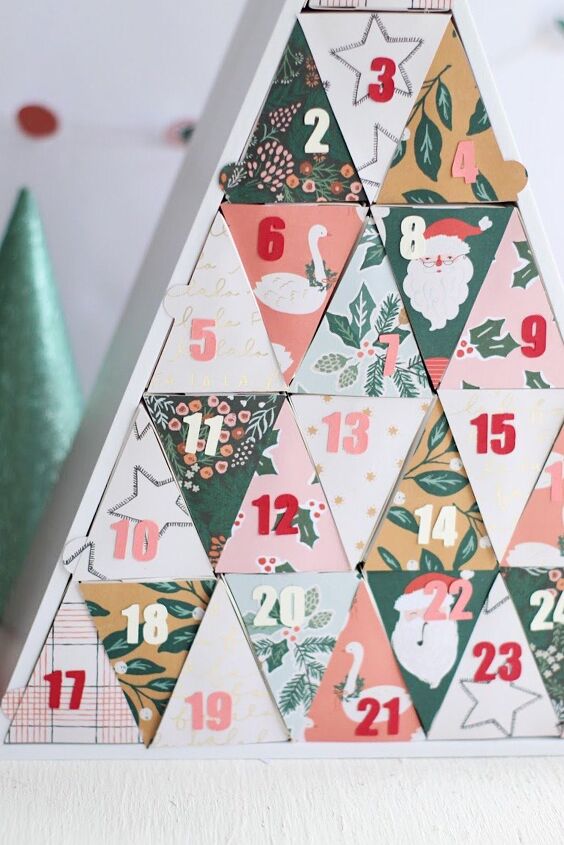
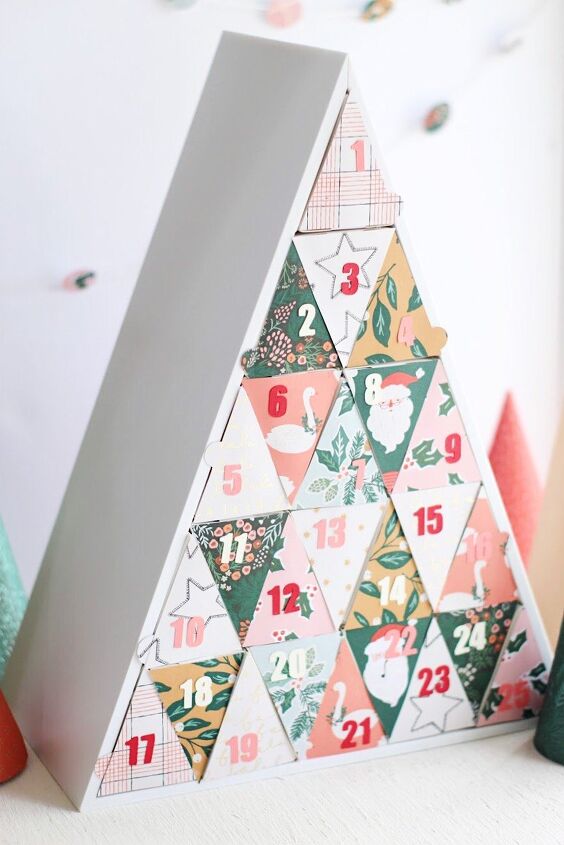
1. When you receive your calendar you'll also receive a download card with all of the cut files scaled to size and ready to go! Begin by cutting out 25 triangles for your boxes. I found some really fun holiday papers that I loved and cut out a couple of triangles out of each pattern.
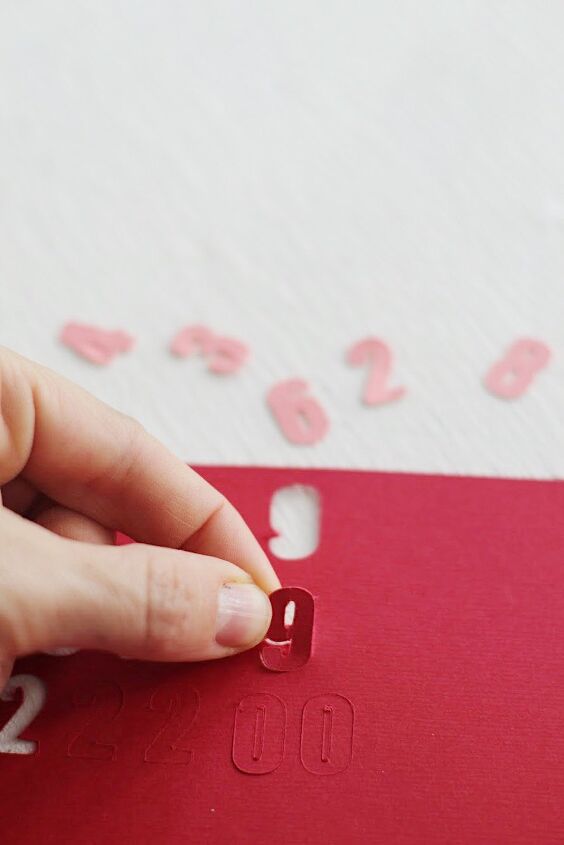
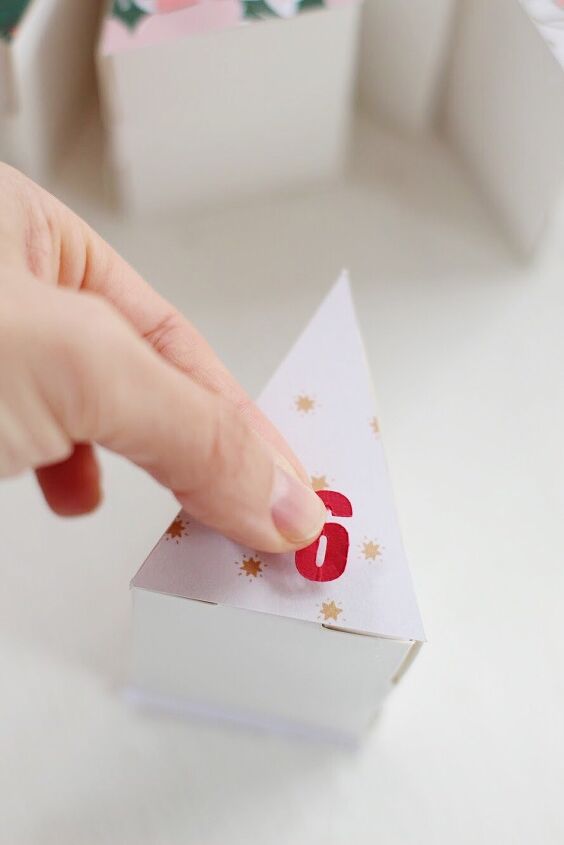
2. Next, cut out your numbers! The design I used and a couple other sets of font numbers are included in the font sets included in the files that come with the calendar. There are also fun frames for the numbers if you want your numbers to really pop! I cut my numbers out in three colors to match my patterned papers.
3. Once you have cut all of your pieces, it's time to lay them out to determine how you are going to attach them to your boxes. This was so fun and felt a lot like quilting when you are piecing out your design.
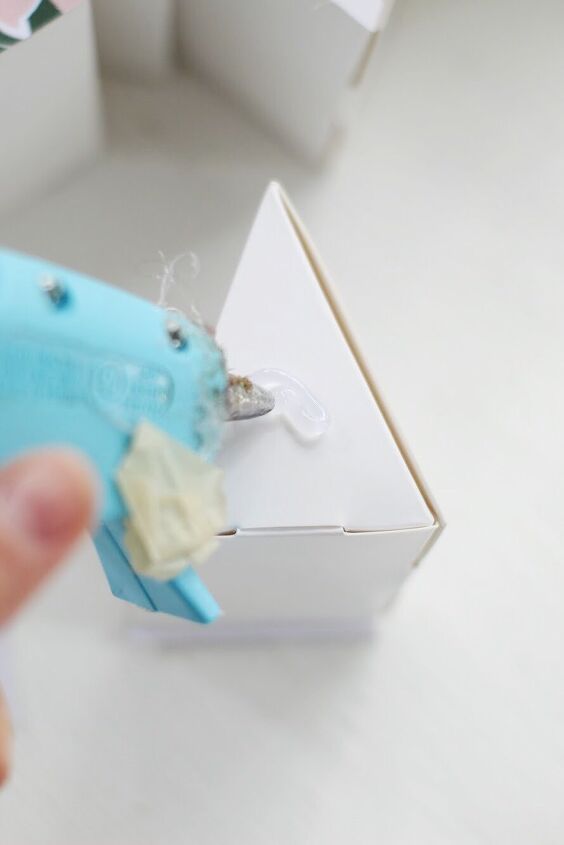
4. Next, attach your triangles and your numbers to the boxes using the adhesive of your choice. I used a hot glue gun.
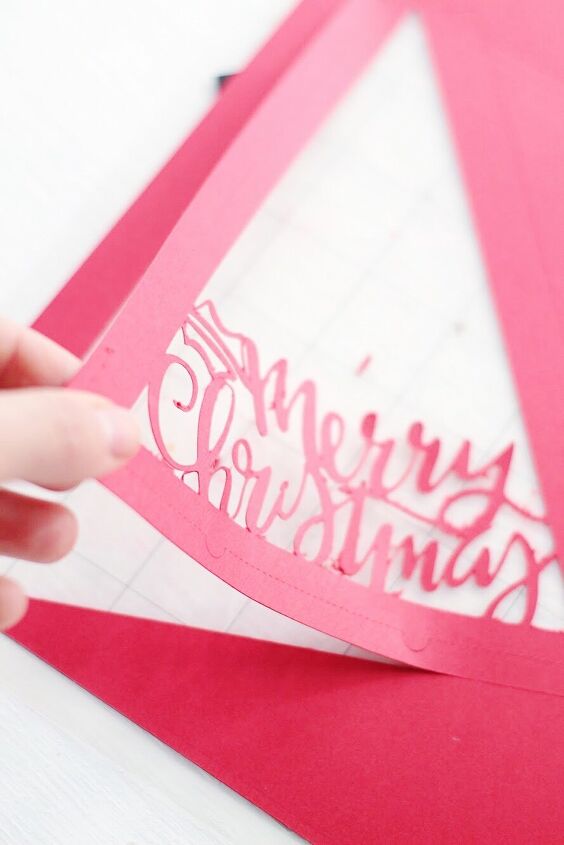
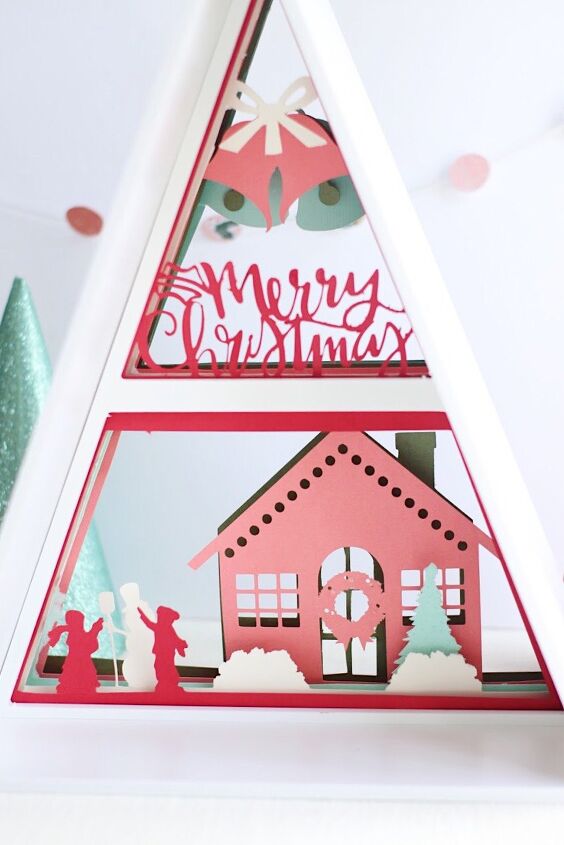
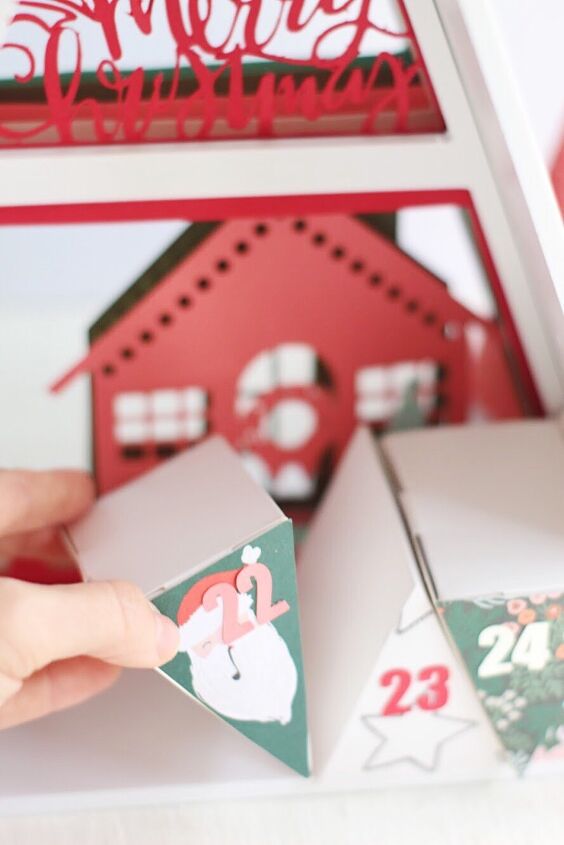
5. Once your boxes are all put together, it's time to cut out your scene! The Silhouette advent calendar comes with a couple of different adorable scenes to choose from, from a Nativity scene to a Santa scene! I chose this sweet scene with kiddos building a snowman next to an adorable, cozy house. To start this part, choose the scene you would like to use. Each scene has multiple layers to cut, so you'll want to start with the one that has a 1 on the design. Arrange the pieces with a 1 on them in Silhouette Studio then cut them out in the color of paper that you'd like. Continue doing this until you have cut all of the layers.
6. Fold each piece of the design on the dotted lines. This will help to secure the scene in the box.
7. Place each layer of the scene in the box according to the number on the design. As you place them in the box, you'll notice that there are notches for connecting each piece to the calendar frame to keep it secure. They really thought of everything with this thing and you'll be amazed at how fun and easy it is to put together!
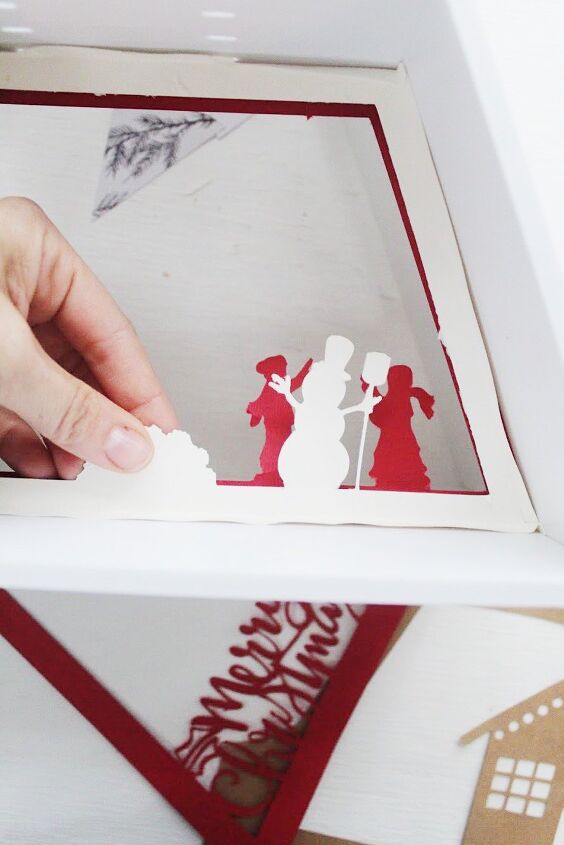
8. Once each layer of your scene has been put in the box you can fill the box up with your triangle boxes, according to the numbers you have assigned them!
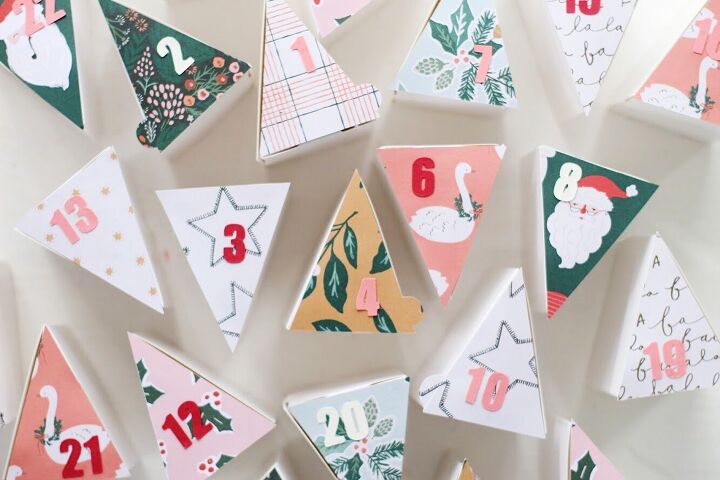
That's it! You've made the most darling and clever advent calendar ever! Fill each box with treats, quotes, scriptures, and candy and get ready to have the sweetest December.
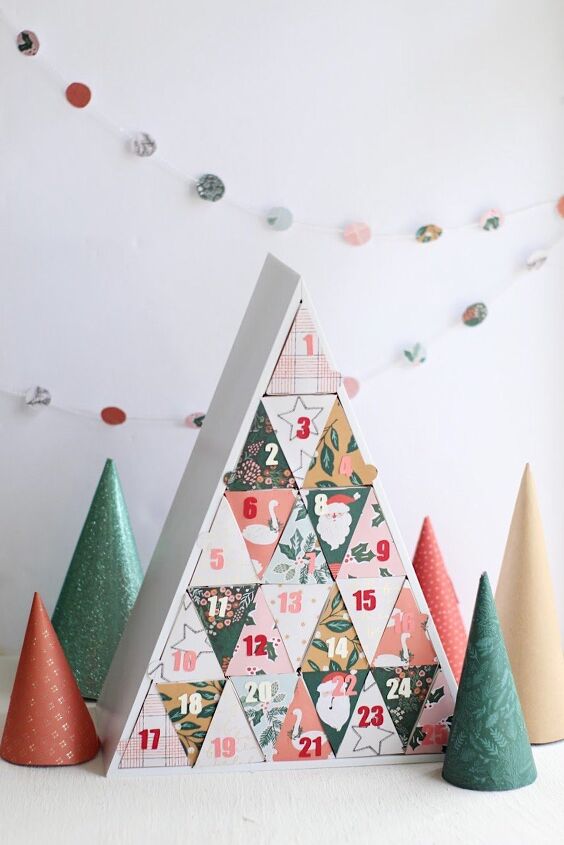
I love it so much. Making it was such a pleasure and I can't wait to use it year after year. You can't let this one pass you by! It's so unique and customizable! You can choose any paper you'd like, or use the fun designs in the cut files that come with the calendar to embellish each box to fit your style.
Isn't the scene behind the boxes the coolest touch? Imagine the excitement of kiddos (or even grownups) to see what is behind there after each box has been opened! It's so dang clever and each scene in the cut files is so fun it's impossible to choose.


Happy making!
ox. Liz


Frequently asked questions
Have a question about this project?