


Wait Until You See This Simple DIY Burlap Christmas Tree

You’re going to love how easy and inexpensive it is to create this pretty DIY Burlap Christmas Tree to decorate your home for the holidays!
For more simple and budget-friendly DIY project ideas, be sure to follow us on HomeTalk and visit our blog!
I love decorating for Christmas, don’t you?
Some of my Christmas decorations are as old as I am!
Pulling them out each year becomes an instant walk down memory lane.
It’s almost like greeting an old friend.
In fact, AnnMarie and I both fill our Christmas trees with sentimental ornaments.
But over the past 25 years that I’ve decorated my own home for Christmas, my tastes have changed.
I mean, it’s bound to happen, right?!
Lately, I find myself drawn to natural, organic-looking holiday decor.
It looks so good with the antiques I’ve begun collecting.
Something else that works beautifully is burlap.
Honestly? Burlap might be one of the best chameleons for decorating!
It looks great in farmhouse-styled homes.
But it’s also fantastic in boho, traditional, French country, cottage, southern, transitional, country, and vintage decorating!
I loved my table centerpiece last year, but I wanted something a little different this year.
Without breaking the bank.
So I decided burlap would be the perfect way to go.
I love how you can find burlap in a so many different colors!
When I found some pretty cream burlap with a little shimmer of gold thread woven in I knew it needed to come home with me.
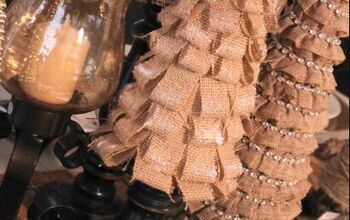
It was so fun making these fringed DIY burlap Christmas trees!
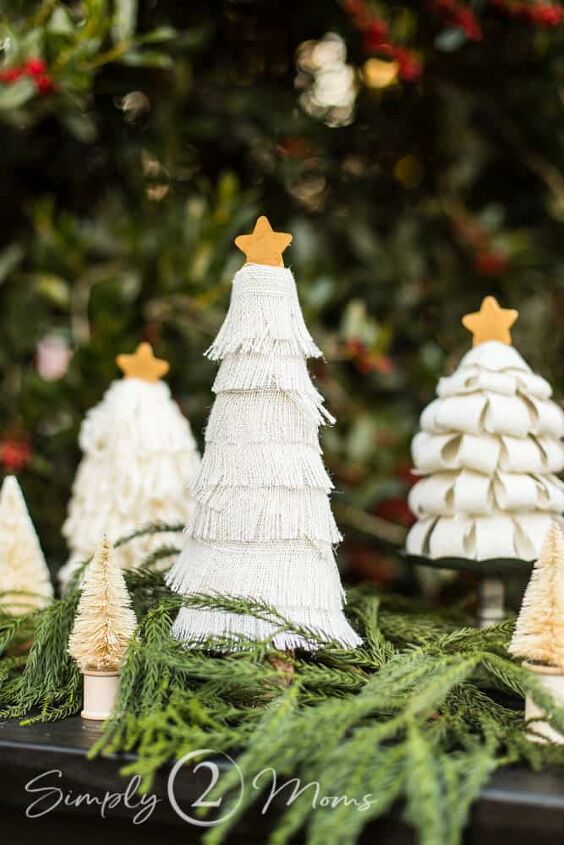
They pair so nicely with other styles of burlap trees or even with these adorable yarn trees!
You can pair them with greenery, or check out how I used them in my Christmas centerpiece this year.
How to Make Fringed Burlap Christmas Trees
One thing that’s unique about burlap is how easy it is to fray.
You’re either gonna love that, or it’s gonna drive you nuts!
I’m solidly in the love it camp.
So I decided to embrace the fray for these cute trees and intentionally frayed strips of burlap to give them a fringed look.
They’re so easy to make!
This post includes some affiliate links which means we may earn a small commission at no extra cost to you. You can read our full disclosure policy here.
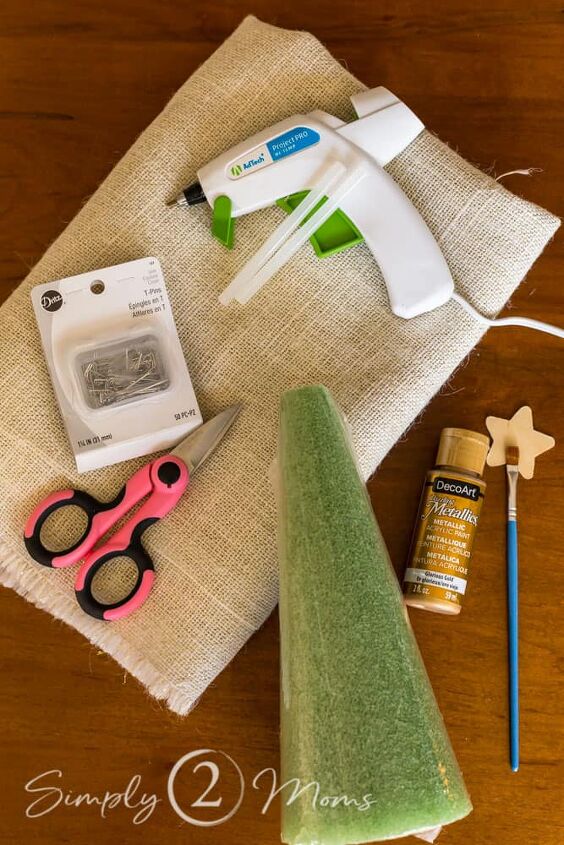
Supplies to Make These Trees
- 1/4 yard Burlap (I used this cream burlap with gold shimmer)
- 1-1/4-inch T Pins
- Styrofoam tree form
- Hot glue gun and glue sticks
- Small wood star
- Gold metallic paint
- Small paint brush
- Fabric and Craft Scissors
- Optional: block of wood, slice of a tree branch, large wooden dowel, etc. to form a tree trunk
When you shop for burlap, you’ll notice that not only does it come in a variety of colors, it also has different weaves.
The style of burlap you choose can give your trees different looks!
You can even choose a variety of burlap styles and they’ll all work together for a less “matchy” look.
Paint, Cut, and Fray
1. Paint your wood stars with the gold metallic paint.
Start by painting the edges, then place the star on a piece of paper and paint the top. Set it aside and let the top dry while you complete the next few steps.

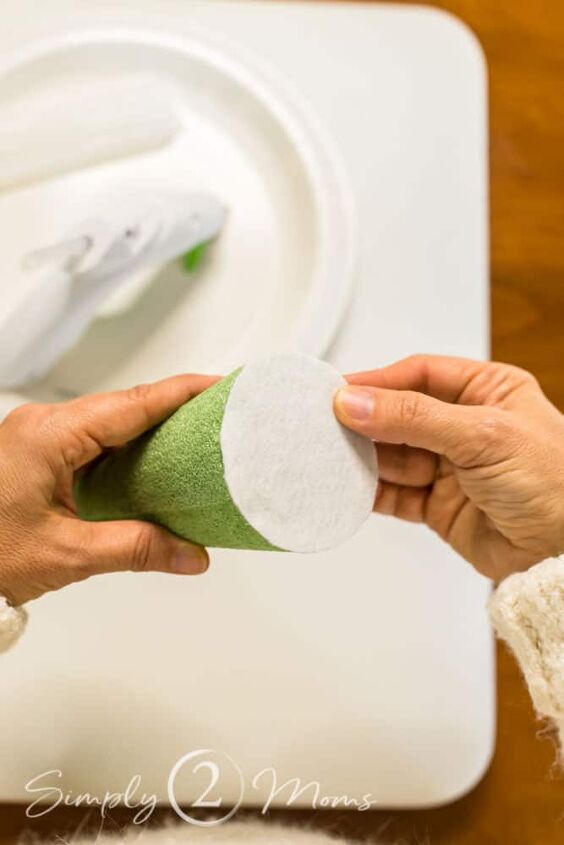
2. Cover Base of the Cone
This step is optional, but it helps to cover the foam at the base of the tree and also provides a soft surface to protect your furniture. Trace the base of your foam cone on a piece of white felt and cut it out.
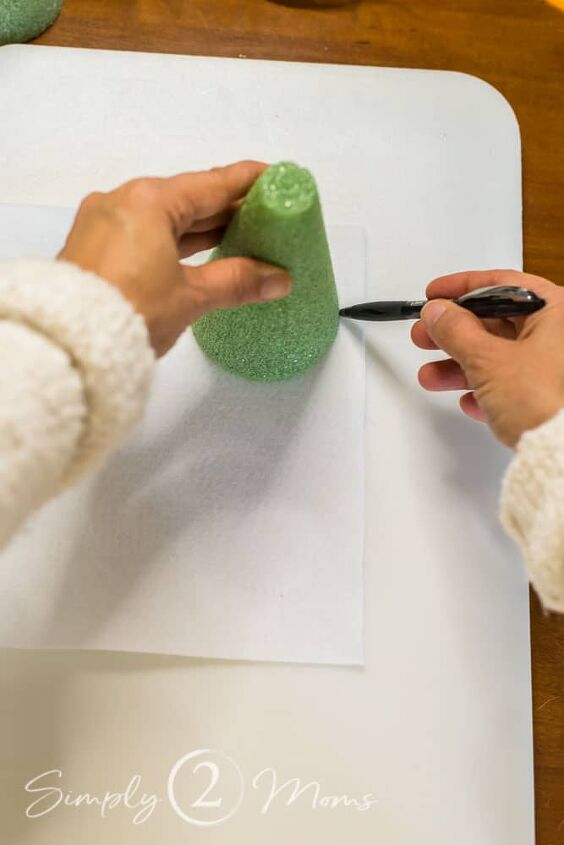
Apply hot glue to the base of the cone and attach the piece of felt.
3. Cut the burlap
When you buy burlap by the yard you’ll have two selvage edges that have been stitched by the manufacturer to prevent fraying.
I like to make my first strips using those selvage edges and use those at the bottom of the tree.
I generally cut off both edges of the selvage into long, 2-inch strips.
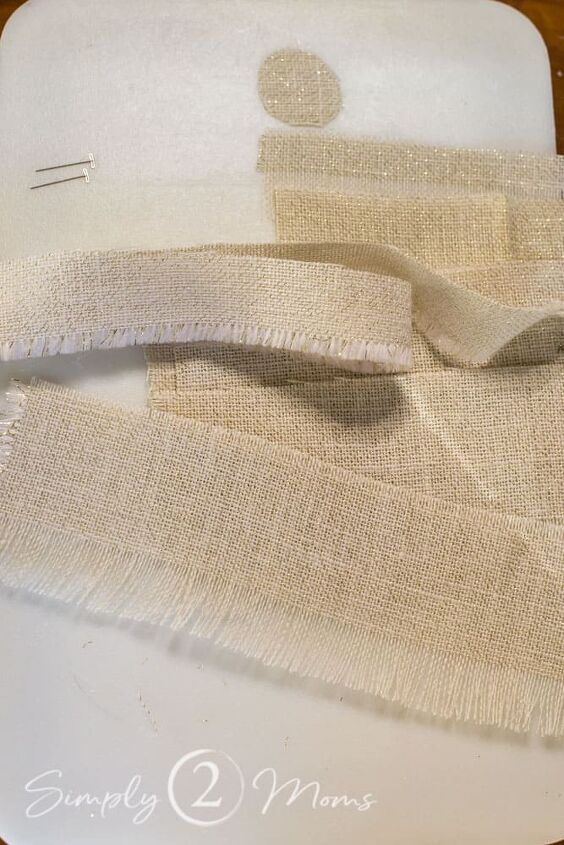
Next, cut 3-inch wide strips. The number of strips you’ll need depends on the height of the cone you’re covering.
I used 4 of these 3-inch wide strips to cover a 14-inch tree.
Take the first strip and wrap it around the base of the tree with a generous 1-inch overlap. Trim that strip (be sure to include the overlap!!)
Now, take another strip and wrap it around the tree about 2 inches higher and cut it (again, include about a 1-inch overlap).
Repeat this process until you have enough strips to completely cover the tree.
Why cut all these strips now?
Because it’s way easier to create the fringe on shorter pieces of burlap.
You’ll also need one circle of burlap that’s about the same size as the top of the foam cone.
4. Fray the bottom edge of the burlap strips to create a fringe.
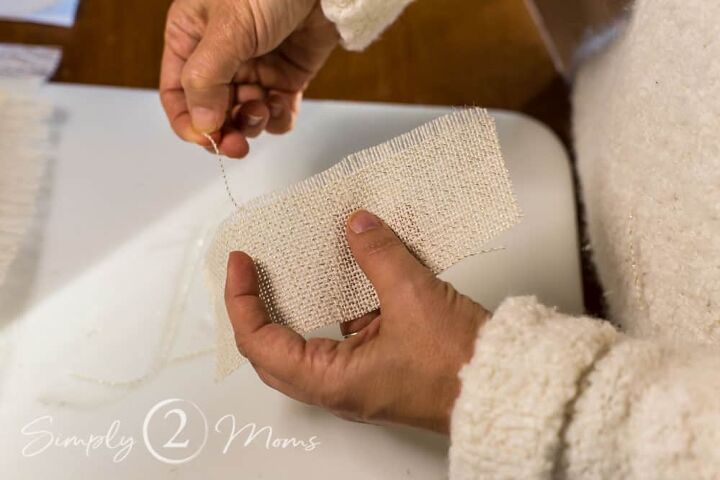
It’s fun to fray the edges of the burlap!
It’s also kinda messy.
You’re gonna be covered in fuzzy lint.
Simply pull out the long strings from the edge you’re fraying.
You want to end up with about 1 – 1.5 inches of fringe on one edge of each strip of burlap.
Assemble Your Tree
Now that you’ve got everything prepped and ready to go, assembling the tree is super easy!
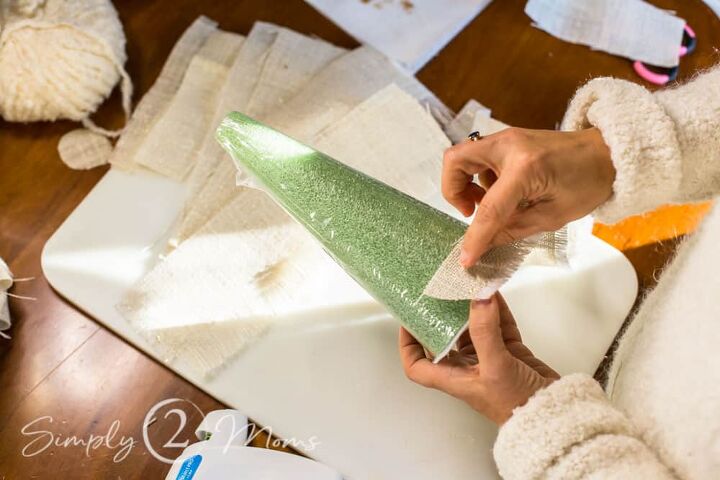
Start with a strip that you cut from the selvage.
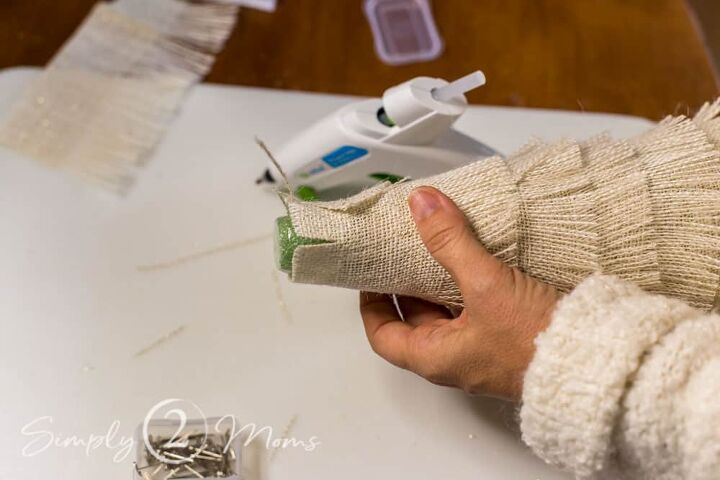
Wrap it around the bottom of the Christmas tree cone with the edge flush with the base.
This strip covers the foam so it’s not visible through the frayed edge of the fringe.
Use hot glue to attach this piece.
Be careful with your fingers because that glue can squoosh through the holes in the burlap and it’s not called “hot glue” for no reason!
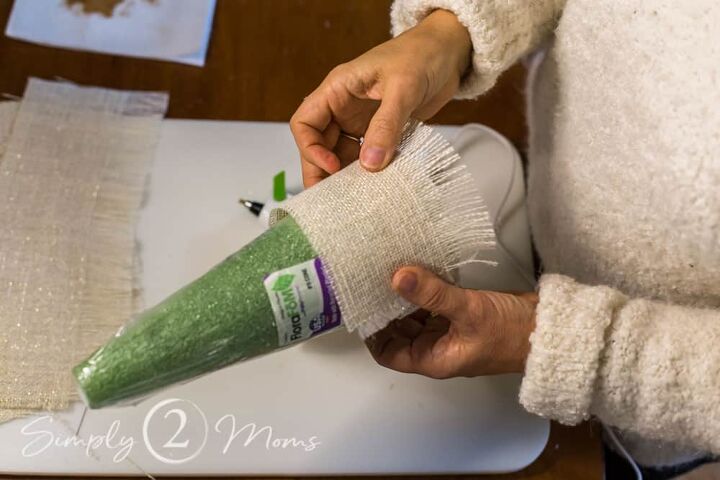
Attach strips of fringed burlap
Now, take your longest strip of frayed burlap and wrap it around the bottom of the floral foam cone.
You can either have the fringe end at the base, or you can let it hang over the edges for a fun look!
This works great if you decide to add a trunk to the bottom of your tree.

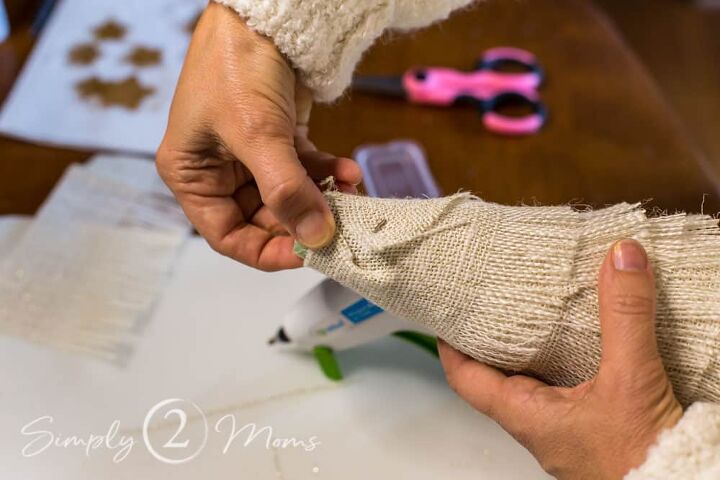
Take the next strip of burlap and wrap it around the tree a little bit higher.
You want the bottom of the fringe on this piece to reach the spot where the fringe begins on the bottom piece.
Skip the hot glue for the rest of these pieces and just use a T-pin to hold each strip in place.
You definitely need to use a T-pin because the heads of regular pins will slip right through the holes in the burlap!
Continue wrapping the strips of burlap around the tree until you get to the top.
At the top, you may need to cut a little slit and overlap the edges of the burlap when you pin them to make them lie neatly and close to the cone.
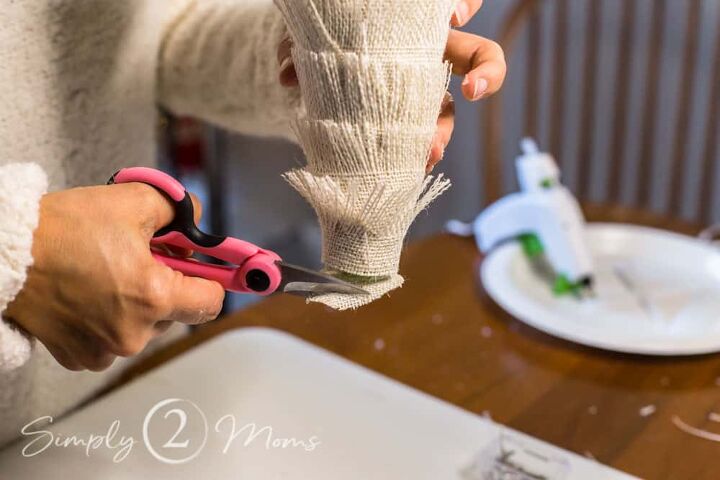
For the very top strip, cut down the burlap so that the unfrayed part is about 1/2 an inch thick (see the image below).
This lets the fringe go almost all the way to the top of your DIY burlap tree.
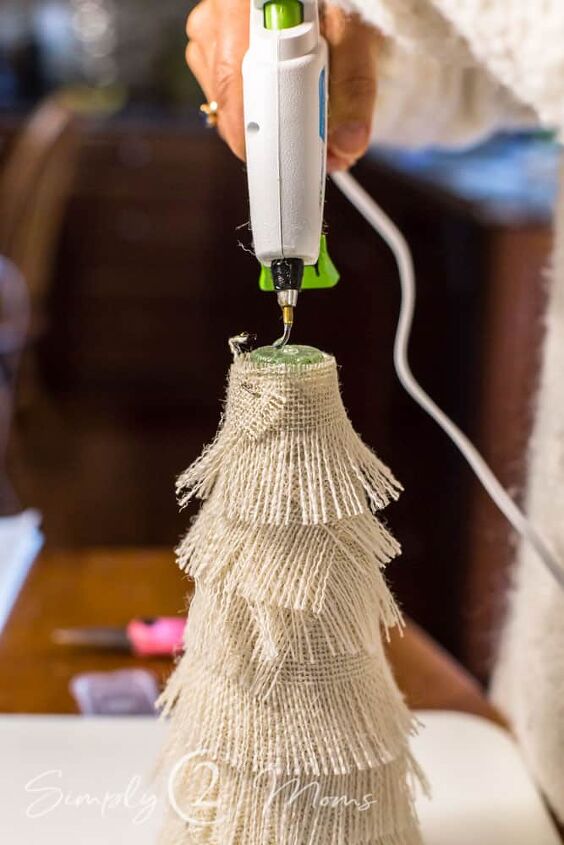
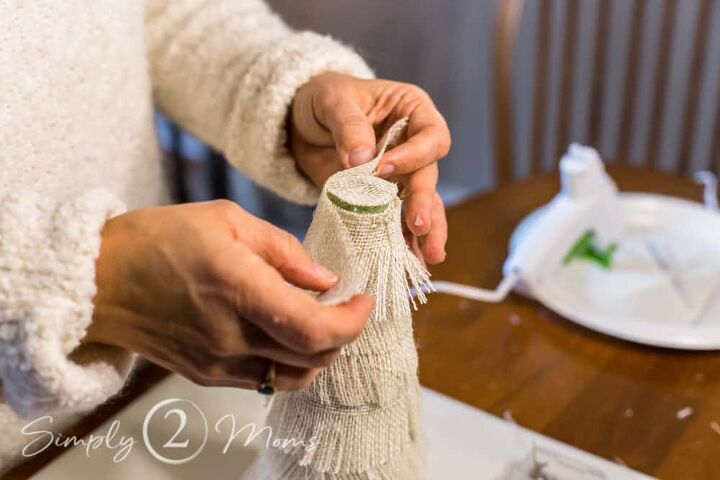
Cover the top of the foam cone
Add some hot glue to the top of the foam cone.
Then take that circle of burlap and pop it on top.
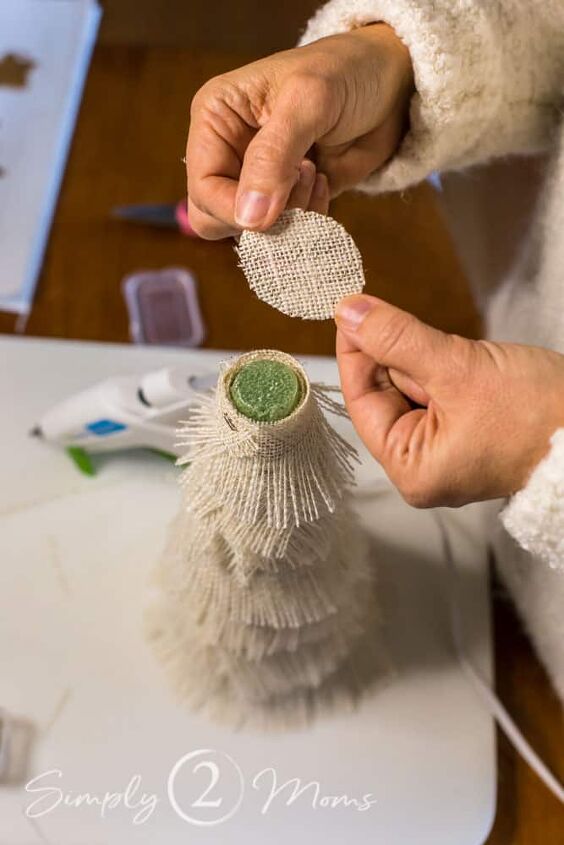
Flip the tree upside down and trim the circle so that it’s close to the edge of the top row of fringed burlap.
Now take one last piece of fringed burlap and use hot glue to attach it to the top.
This will cover up any foam that may be peeking through, and also covers up the last T-pin.
Add a star
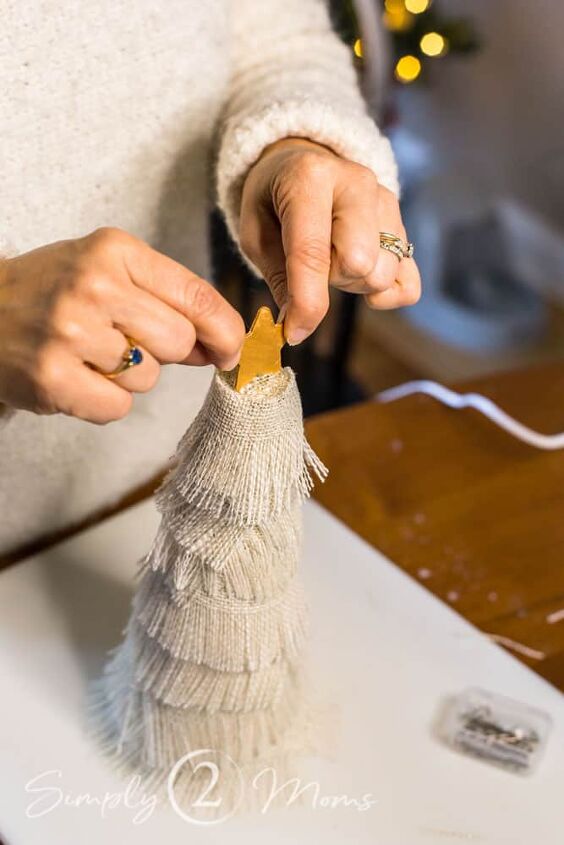
Put a big blob of hot glue on the top of the tree and then hold the gold painted star on top until the glue hardens.
And voila!
You’ve finished your fringed burlap Christmas tree!
Now go make some more trees to create a DIY Christmas tree forest.
Resources for this project:
See all materials


Comments
Join the conversation
-
Love this ❤
-
Absolutely


Frequently asked questions
Have a question about this project?
Why did you leave the cone wrapping on is this important?