


DIY Love You S’more Serving Tray (Easy Cricut Project)
Learn to make a delightful s’more serving tray using an inexpensive wood tray, adhesive vinyl, and a Cricut cutting machine. Fill the tray with delectable individual s’more kits for family and friends and make memories around the fire.
Project Overview
I started with an inexpensive unfinished wood tray from Target. Using a mix of white acrylic paint and water, I white-washed the wood and then applied vinyl decals that I designed and cut using my Cricut Maker.
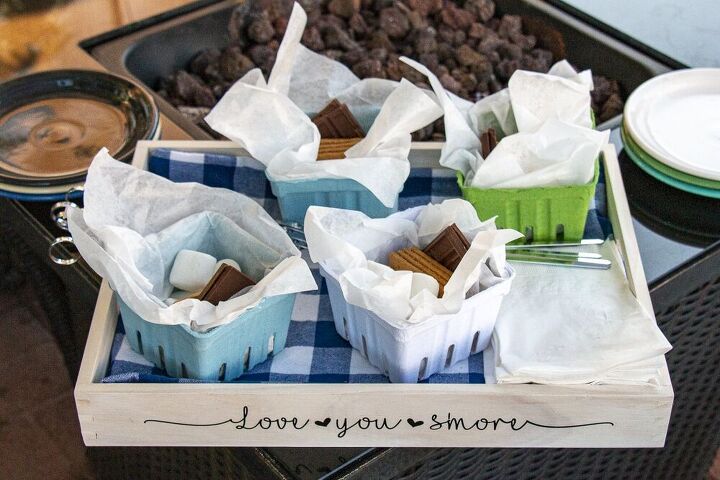
The tray holds 6 individual s’more kits made from paper berry baskets filled with graham crackers, chocolate and marshmallows. There’s room on the tray for the roasting sticks and plenty of napkins since s'mores are quite messy! This makes an adorable serving set.
How to Make a S’more Serving Tray
Here’s What I Used
Materials
- 12″ x 16″ unfinished wood tray
- White acrylic craft paint
- Water
- Black permanent vinyl
- Transfer tape for vinyl
- Clear acrylic protective coating
- Paper berry baskets
- Deli wax paper squares
- S’mores kit
Tools
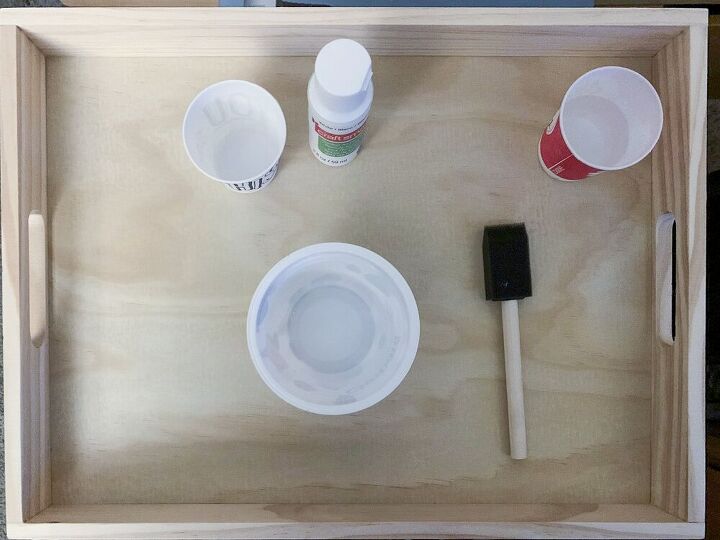
- Small container for mixing paint and water
- Foam sponge paint brush
- Cricut Design Space software
- Cricut Maker
- 12″ x 24″ standard grip mat
- Fine point blade for the Maker
- Weeding and scraping tools
- Roasting sticks
- Respirator
Project Steps
Note: these instructions assume you are familiar with using Cricut Design Space software and a Cricut Maker, or other electronic cutting machine.
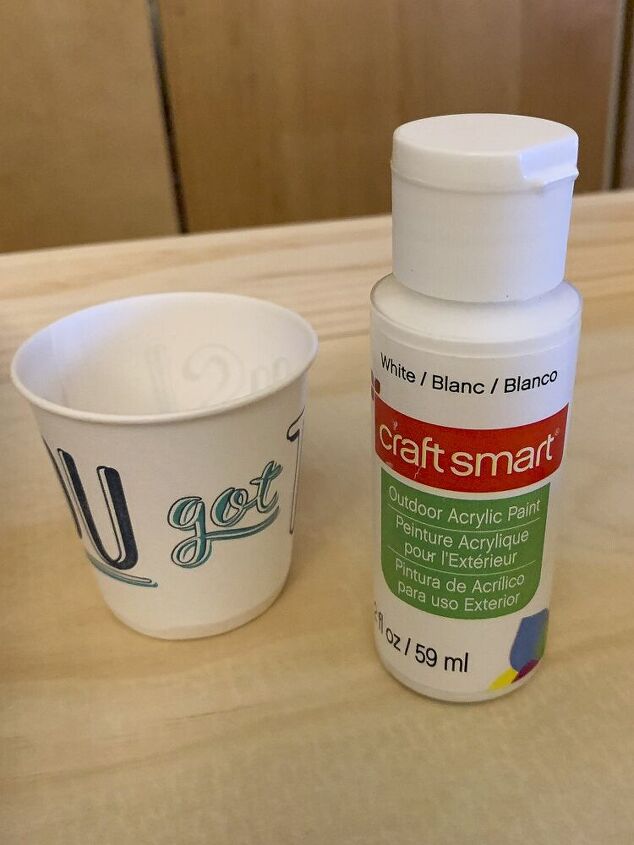
Prepare White-Wash Paint Mix - Create a white wash for the unfinished wood tray by mixing equal parts white acrylic craft paint and water in a small container.
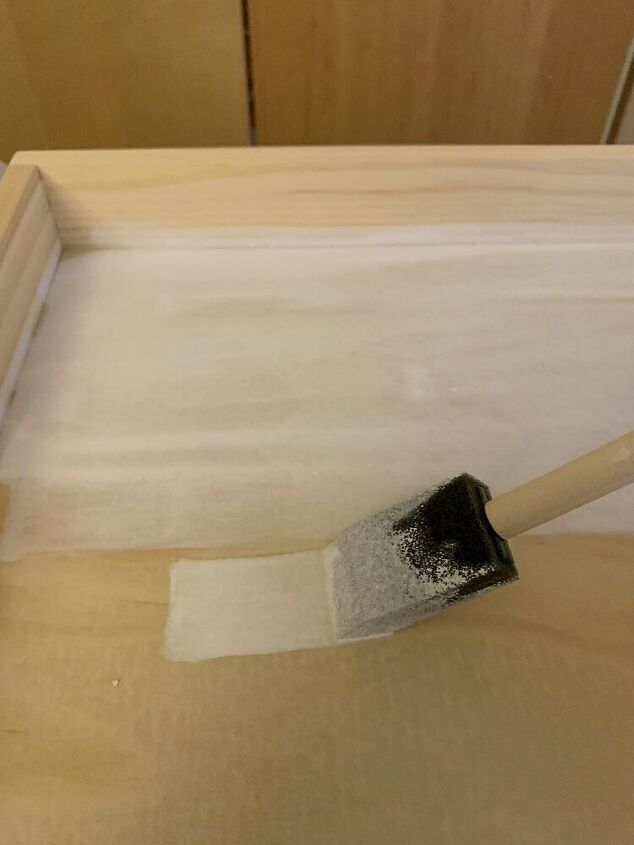
Apply Paint - Using a sponge foam brush was an easy way to apply the paint/water mixture to the wood tray to give the tray a white-washed appearance. Make sure to let the wood dry before applying the vinyl, especially since the paint is watered down.
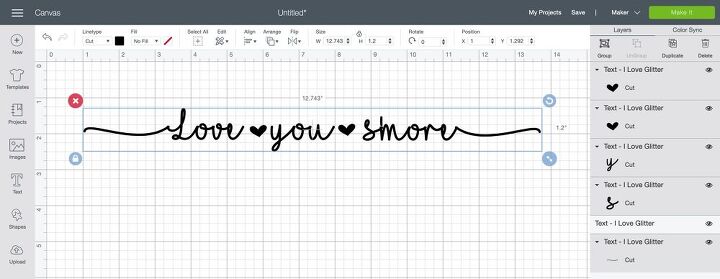
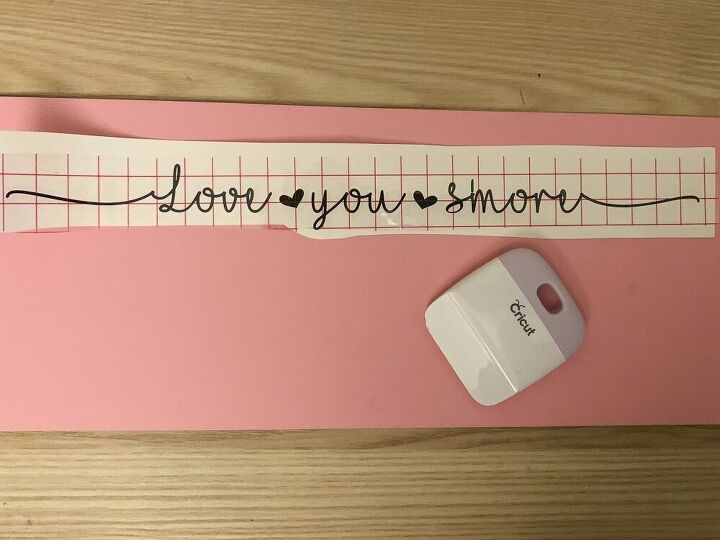
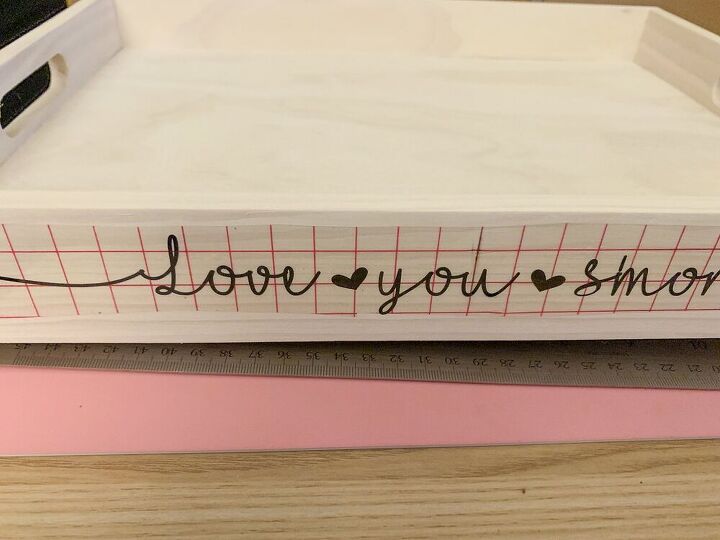
Design Vinyl Decal in Cricut Design Space - Using the Cricut Design Space software on your computer, type the phrase “Love You S’more” in your project canvas. I used “I Love Glitter”, which is available for download on dafont.com. If you’re not familiar with uploading a new font, Jennifer Maker has a thorough tutorial on her website on how to upload fonts to Cricut Design Space.
Add a flourish at the start and end of the phrase and hearts between the words. With the “I Love Glitter” font, the beginning flourish is the [ key, the ending flourish is the ] key and the solid heart is the * key.
Use the character spacing option in Cricut Design Space to reduce the space between the letters so that the cursive letters are connected. Once the spacing is final, weld the letters together, resize the text box to 12.743″x1.2″ and duplicate the text box since the project needs a decal for each of the two long sides of the s'more serving tray.
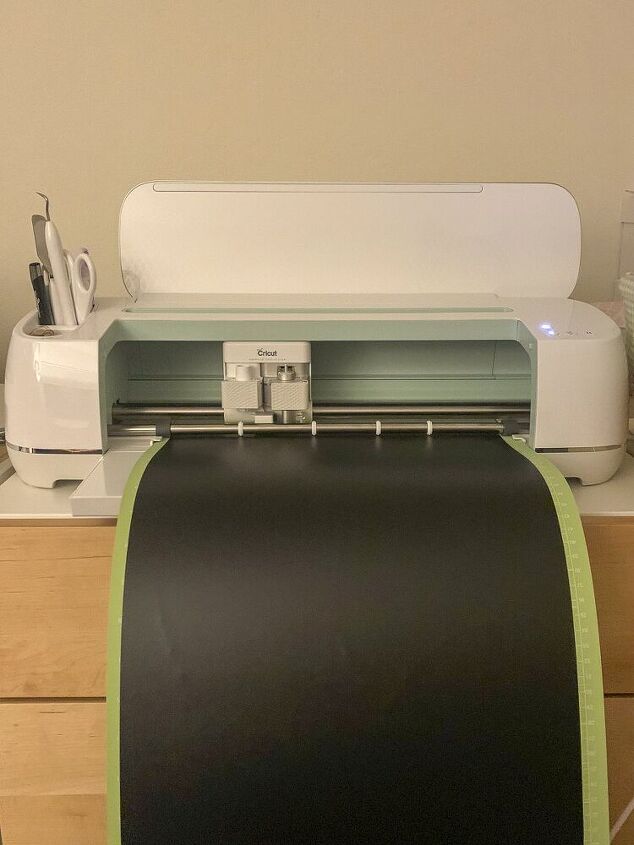
Cut Vinyl Design - Because the design was over 12″ long, this project requires the long Cricut cutting mat. Stick a piece of Cricut Premium Vinyl (permanent) to the cutting mat, load the mat onto the Cricut Maker, and then send the design to the machine for cutting. The cut settings were: Cricut Premium Vinyl material, default pressure, and a fine-point blade.
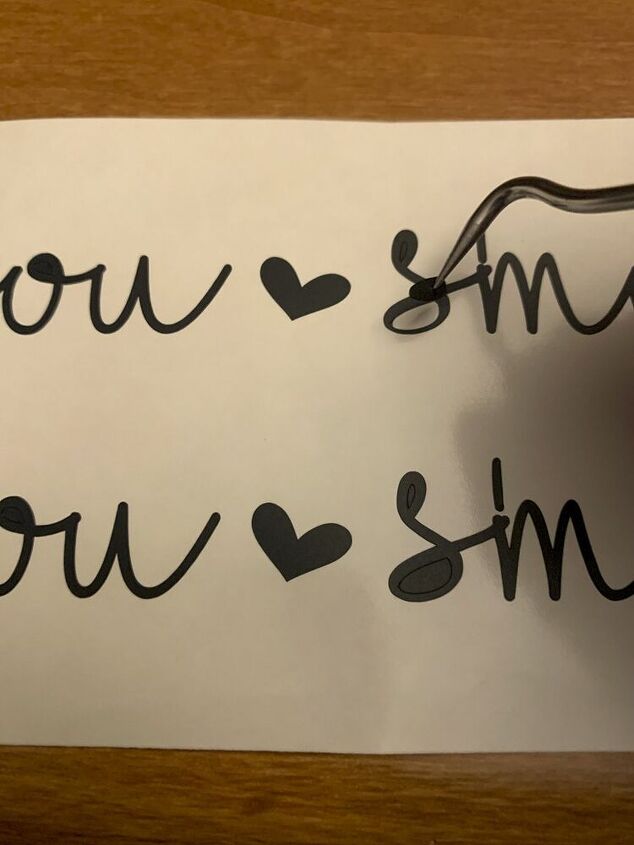
Weed Design - After the Maker is done cutting the vinyl, unload the cutting mat. Then remove the cut vinyl from the mat (cut a rectangle around the finished design and save the excess vinyl for another project). Next, proceed to weed the excess vinyl that is not part of the design.
Cricut weeding tools (the tweezer and the pick) are helpful in removing the smaller pieces of vinyl.
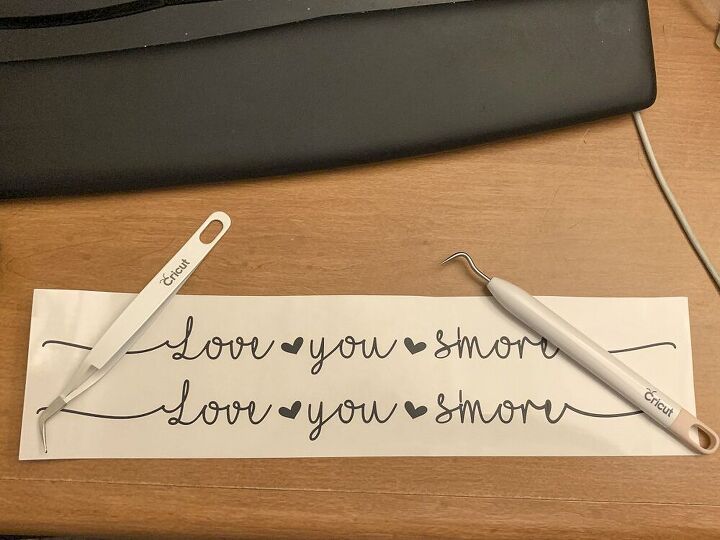
Cut and Apply Transfer Tape - To transfer the cut vinyl phrase to the tray, use transfer tape. Yrymht Transfer Tape for Vinyl is one of my preferred transfer tapes because the tape is clear and it contains grid lines to help with alignment.
Cut two piece of the transfer tape equal to the size of each vinyl design. After removing the backing from the transfer tape, apply it to the top of the vinyl design. Then use the scraper tool to make sure the transfer tape stuck to the vinyl design.
Next, remove the backing from the original piece of vinyl so that only the vinyl letters remained stuck to the transfer tape.
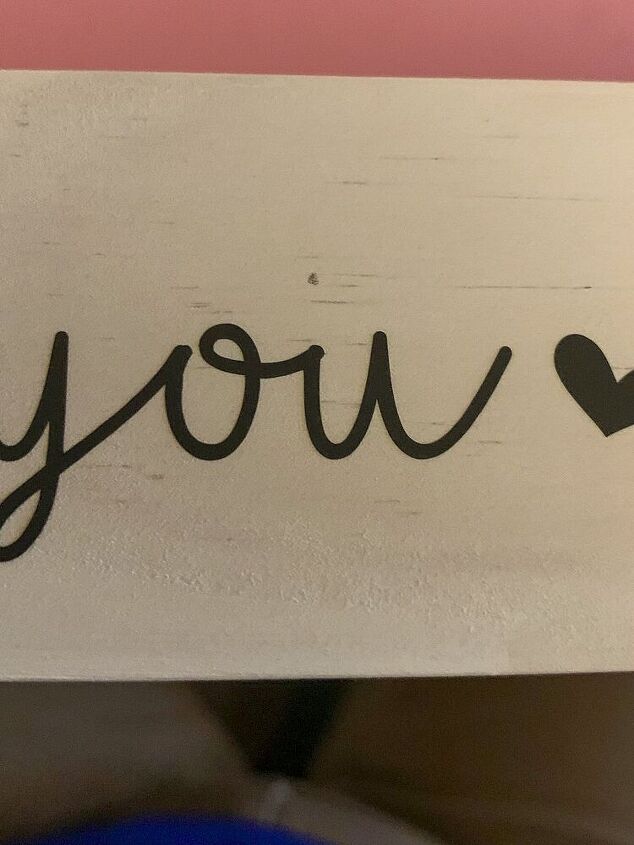
Mark Placement on Tray Sides - The design will be centered on the long sides of the S’more Serving Tray. Determine the center point of your design (which was right over the left part of the “you” for my design). Also, identify the center of the tray side and use a pencil to make a faint dot to mark the center location on both sides of the tray.
Decide where the left and right flourishes should be located in order to center the design vertically and ensure it is level. Using the pencil, mark the two end points with a dot. Do this on both sides of the tray.
Apply Design to Tray - Using the placement dots made in the prior step, carefully line up the vinyl design and affixe it to the side of the tray. Use a scraper tool to rub the transfer tape in order to help ensure all of the vinyl sticks to the wood.
After doing so, carefully remove the transfer tape, leaving only the design on the wood. Erase all the pencil reference marks too.
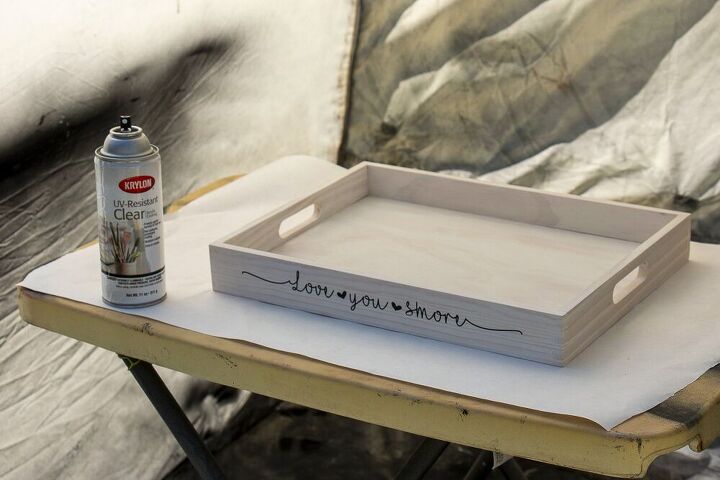
Apply Protective Top Coat - To help protect the wood, apply two coats of Krylon Clear Acrylic Coating. This helped make the tray moisture-resistant (but not waterproof).
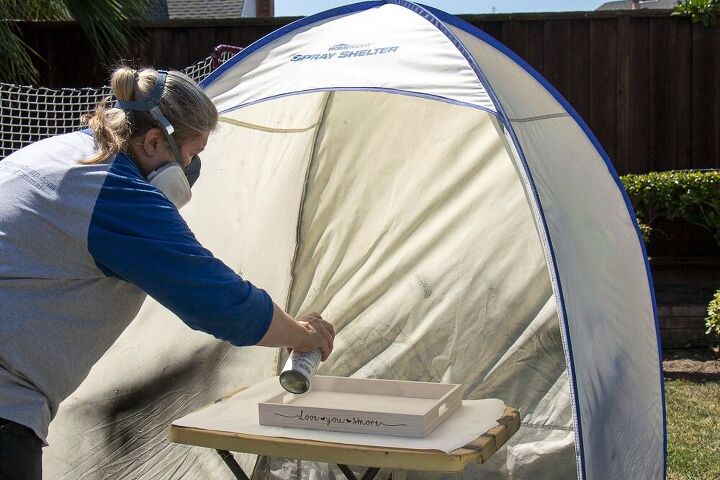
Lung are important, so wear a respirator and spray outside in a well-ventilated area. Make sure to follow the safety instructions on your specific can.
Per the directions on the can of Krylon Clear Acrylic Coating, shake the can for 2 minutes. Spray in sweeping motions 10″-12″ from the surface of the tray. Apply multiple thin coats back-to-back without allowing the coating to dry between coats. The Krylon coating should be dry enough to handle in 2 hours.
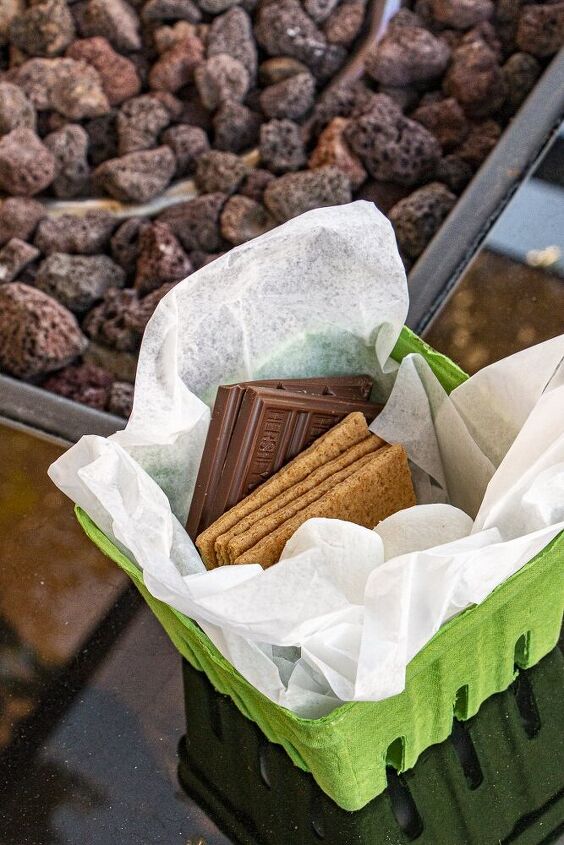
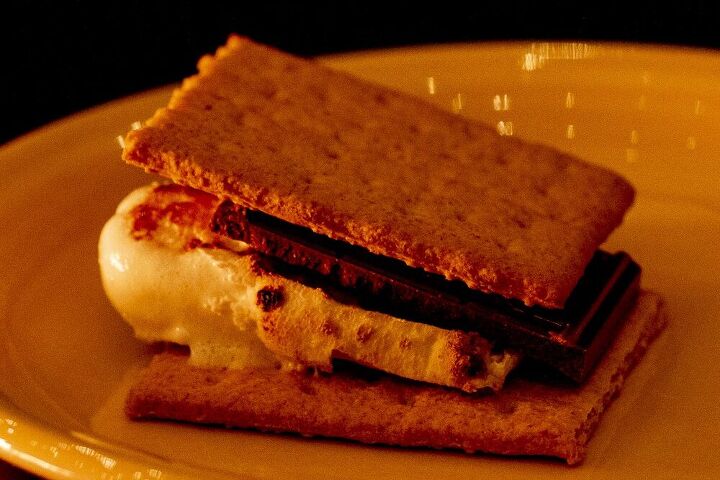
Create Individual S’more Kits - Assembled individual s’more kits using berry baskets lined with deli paper. Add to each kit, graham crackers, chocolate bar squares and marshmallows.
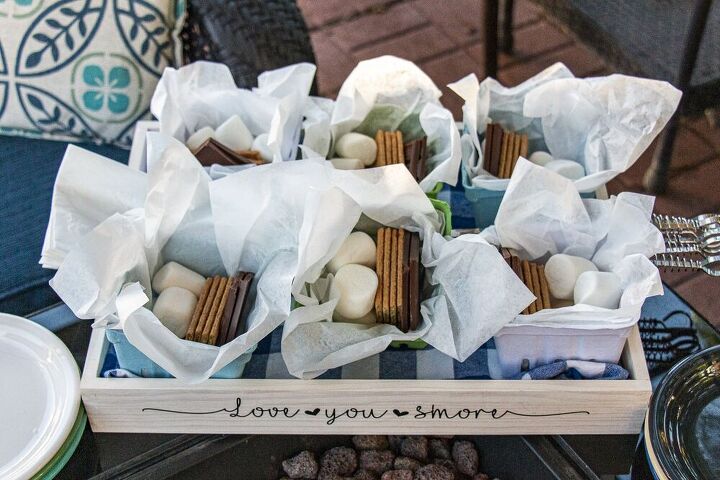
Arrange the kits on the Love You S’more serving tray, add roasting sticks for the marshmallows, and don't forget a a generous pile of napkins.
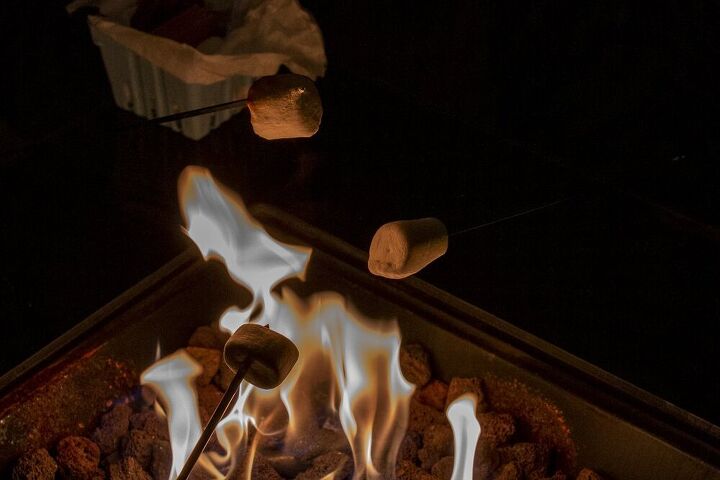
Make Memories and Enjoy!
Enjoy your s'mores and your time with family and friends! Don't forget to debate the ideal amount of toasting while roasting marshmallows over an open flame while.
Other Ingredients
Do you make s’mores with ingredients other than graham crackers, chocolate, and marshmallows? Do you make them with peanut butter cups, bananas, white chocolate, or caramel? What other ingredients do you suggest?


Frequently asked questions
Have a question about this project?