


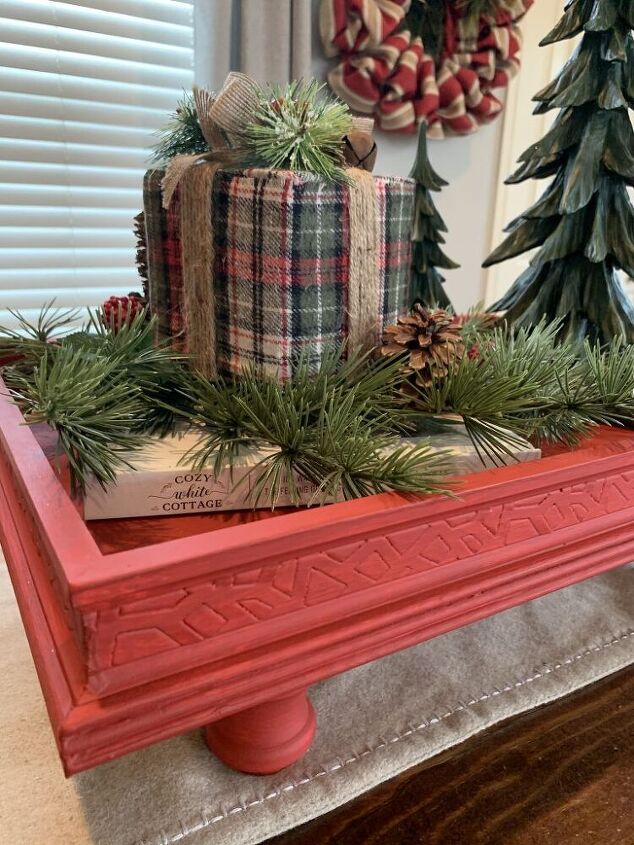
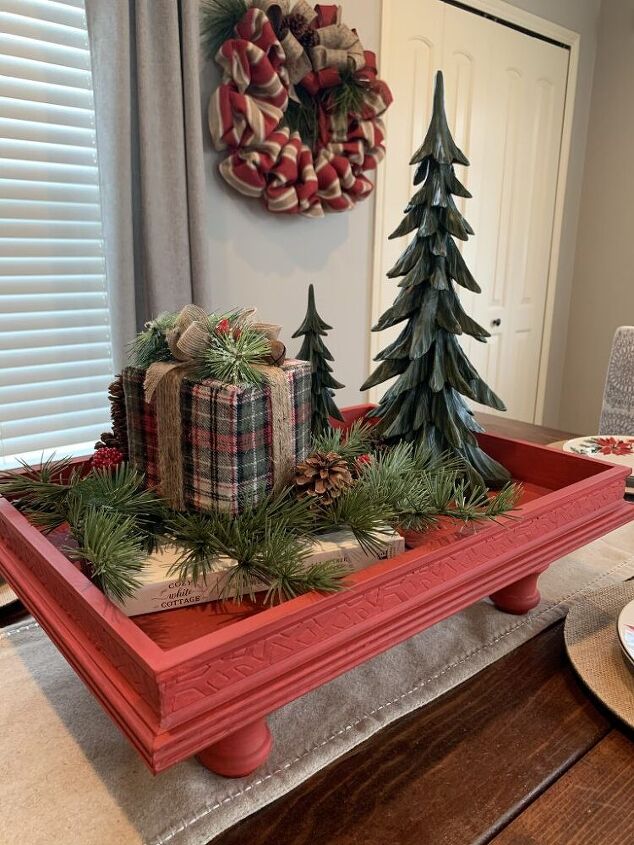
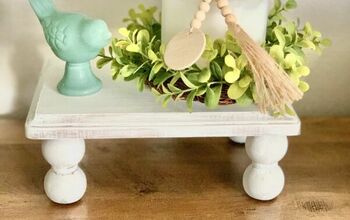
How To Make A Footed Tray
My kitchen table is a big farm table. Handmade by a friend, it is one of my most favorite pieces in my home.
Therefore the table’s centerpiece needs to be big. A statement piece for sure!
When I was asked to participate in the DIY Blogging Challenge, creating a footed tray, I thought about my big farm table. How awesome would it be to make a custom tray to fit the area just right?
So I accepted the challenge!
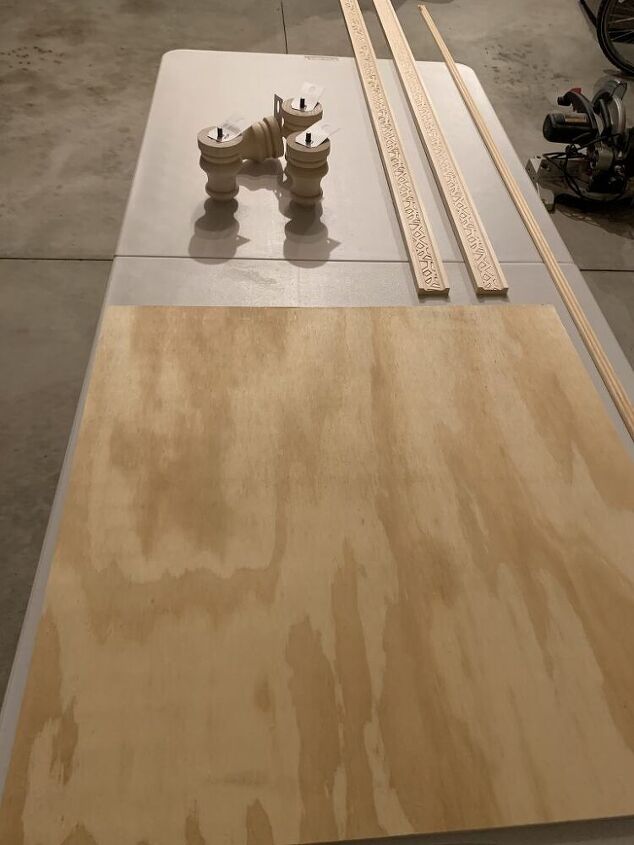
Below is a list of materials you will need:
- Molding for the unfinished edge
- Feet
- Brush/primer/paint/
- Saw
- Nail gun or wood glue
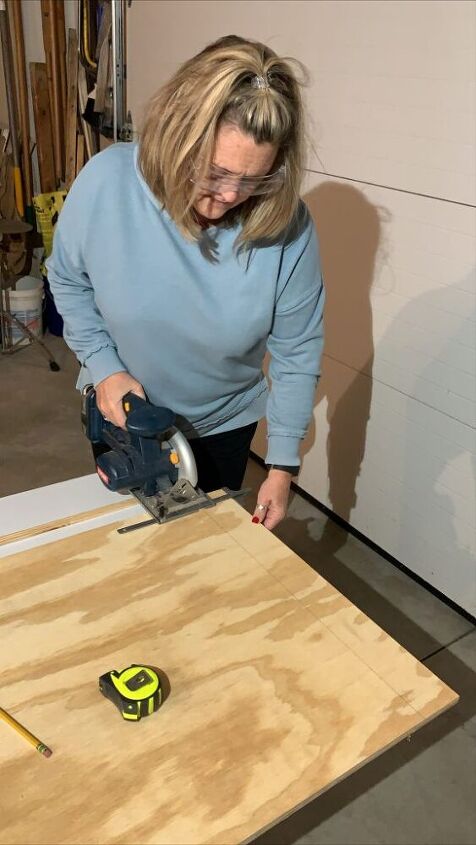
Step 1
I measured my table and decided the size of the tray. You want the tray to be proportionate to where you will be using it. If it helps you visualize, take some newspaper and cut it to the size you think will work, and then put it on the table.
Trust me! If you are unsure of the size, the newspaper trick will help.
Once the size was determined, I then took the small piece of plywood and cut it, creating the base of the tray to be 15 x 21.
Step 2
I decided that I didn’t want the side rails to be plain. I bought some detailed trim to give me the look I had imagined.
If you aren’t interested in the detail you can use a plain piece of molding or 1 x 2 wood.
Raise your hand if you are a pro at the miter saw.
Just so you know, I am NOT raising my hand!
I had Mr. Mitten help me cut the corners. Once the corners were cut, I used the nail gun to secure to the bottom of the tray. If you don’t have a nail gun, wood glue would also work.
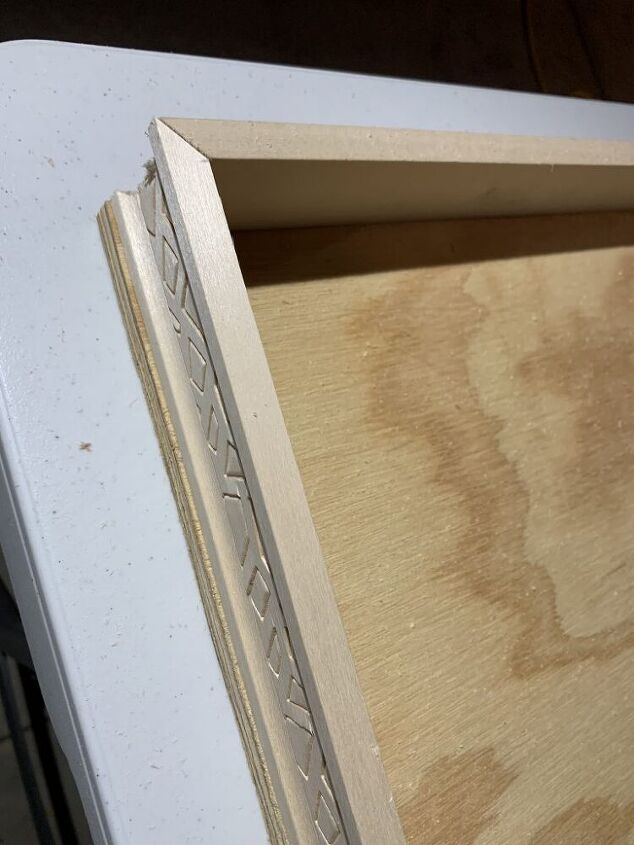
Step 3
The edges of the plywood were unfinished so I bought a super inexpensive piece of molding to cover them.
Once they were cut, I nailed the molding to the side of the tray.
Step 4
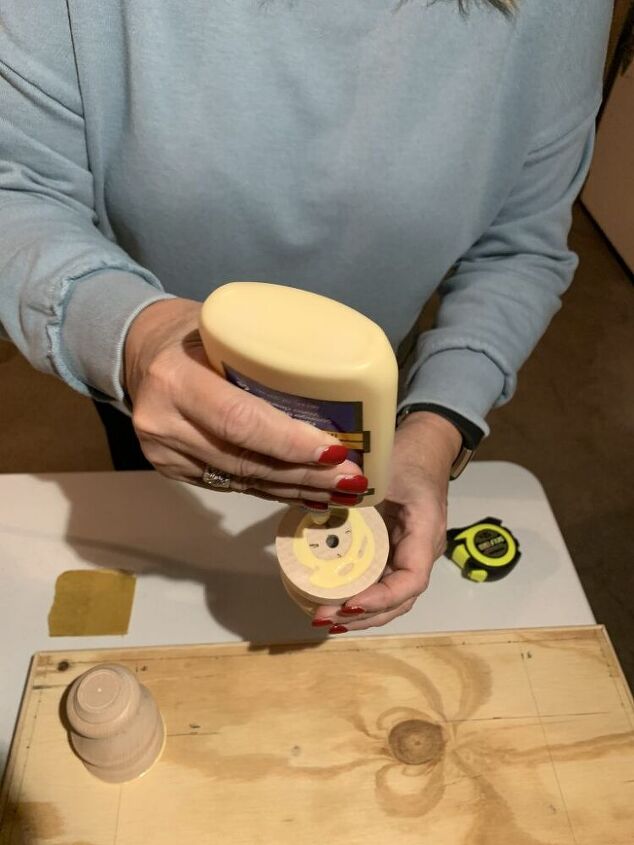
The feet I bought for my tray had long screws in the bottom. However, I removed the screws and used wood glue to adhere to the bottom.
Easy peasy!
The construction process took less than an hour.
Step 5
I primed with white, painted with red, and sanded it to get the look I was going for.
Step 6
Stage the tray.
The most time consuming part of this project was priming and painting.
Lastly, if you are intimidated by wood working, I am here to tell you if I can do it, YOU can do it!
If you like this project, please check out My Christmas Table.
Lastly, click the links below and check out all of my fellow blogging friends AMAZING trays!
How To Use Scandinavian Decor as Holiday Table Inspiration
American School of Charm
How To Make A Footed Tray The Super Easy Way
Mrs. Coleman
Shop At Blu
How To Make A Wood Pedestal Tray – Farmhouse Christmas
Chalking Up Success
JDUB By Design
Modern on Monticello
Cottage on Bunker Hill
Sydney and Co.
How To Use Scrap Wood To Create A Pedestal Tray
Sonya Burgess
How To Create a Sentimental Footed Tray
Quick and Easy Way To Make A Footed Tray
From Farmhouse to Florida
How To Build A Rustic Footed Tray
MTB Home Living
Easy To Make DIY Farmhouse Table Riser
The Ponds Farm
I hope you have enjoyed our DIY trays. I hope it encourages you to create your own!
Peace and Blessings,
Kim


Frequently asked questions
Have a question about this project?