


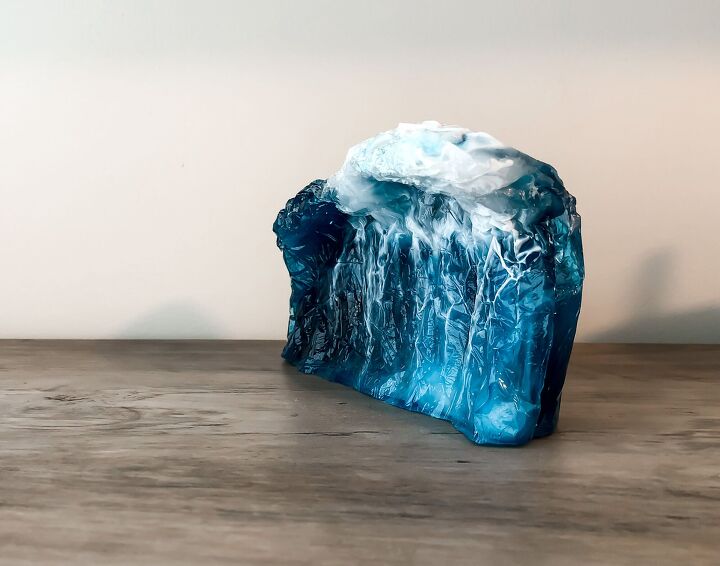
3D Resin Wave

I'm back with a resiny project today and of course it's an easy one!
There's a number of ways to create 3D resin pieces and the most common is to form the resin part-way through the cure. It's not tricky but it's an additional step and requires a little more planning.
With this project, however, it's one pour and you're done! No checking back and setting timers for shaping the resin later, so it's the easiest of them all ☺️
As usual I have a YouTube video of this project up on my Channel which I highly recommend watching (link further down in this post) 👍🏻
WHAT YOU'LL NEED
- Resin - For 10% off Rockstar Resins products use my code HANNAH with this link
- Tin foil
- Spray glue
- Cling film (saran wrap)
- Caulking silicone/hot glue (optional)
- Something to stand the mold in (e.g container of sand)
- Mixing cups and sticks
- Pigment or acrylic paints/food colouring
- Craft knife or sand paper
*Always use protective wear and follow the appropriate safety guidelines when handling resin*
STEP ONE - WATCH MY YOUTUBE VIDEO
As I mentioned earlier, this tutorial is up on my channel and can be viewed by clicking the video link above.
Do consider subscribing to my channel whilst you're there and feel free to drop me any questions or comments for any of my videos and I'll happily get back to you ☺️
I upload at least once a week and my videos cover a large range of crafts as well as resin 👍🏻

STEP TWO - MAKING THE MOLD
Yes, we will be making our own mold for this so you get to design the kind of wave you want.
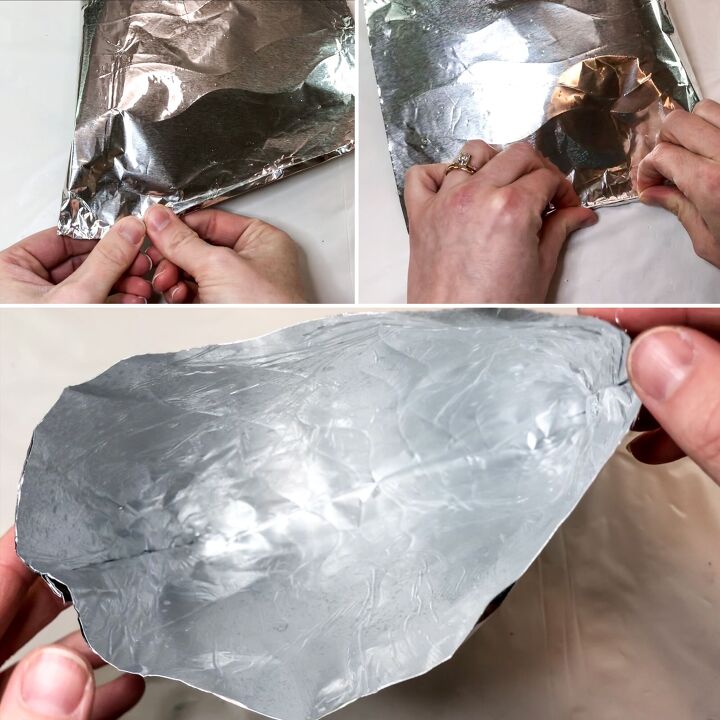
Using a spray glue (as I find this easiest to apply here) glue together at least 8 sheets of foil. I make my sheets approx 1.5 ft long and again, this may change depending on how you want your wave to look.
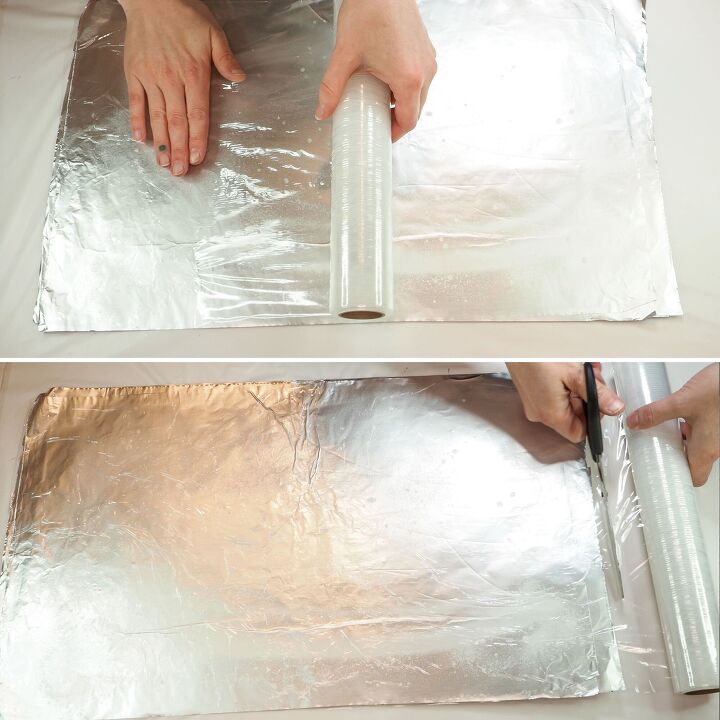
On top of the last sheet of foil, glue down a sheet of cling film the same size as the foil sheets.
Allow all 9 layers to dry out.
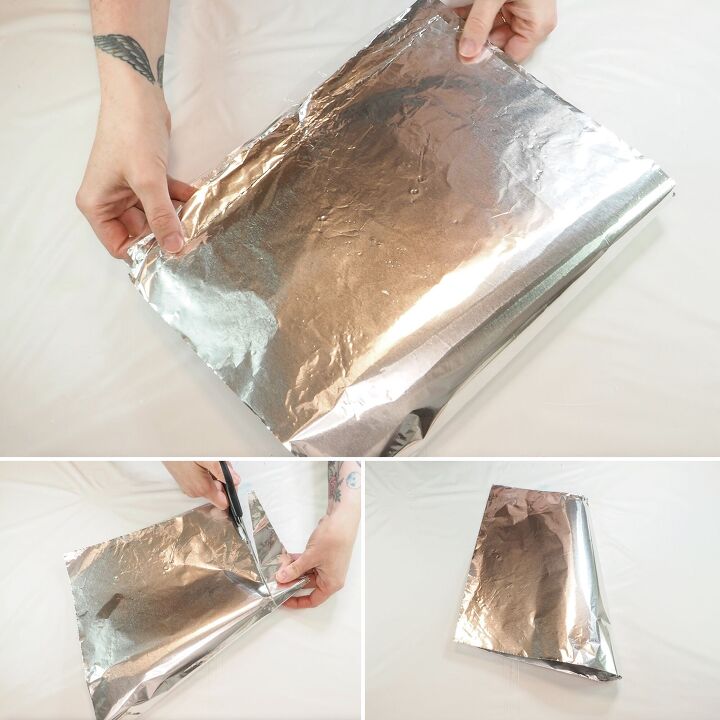
Once dry, it's time to shape the layered sheets into a wave.
Making sure the cling film side faces inwards, fold the layered sheet in half and cut the bottom off at an angle so that the fold is now sloping. This slope can be at any angle you like, this will create the height of each end of the wave.
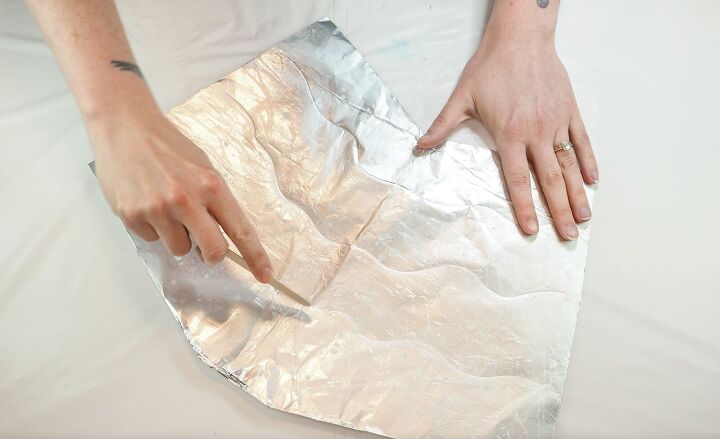
Open the sheet back up and carefully score wavy lines on the inside (this will be on the cling film side).
This step isn't too important as we will create a lot of texture throughout the next few steps anyway.
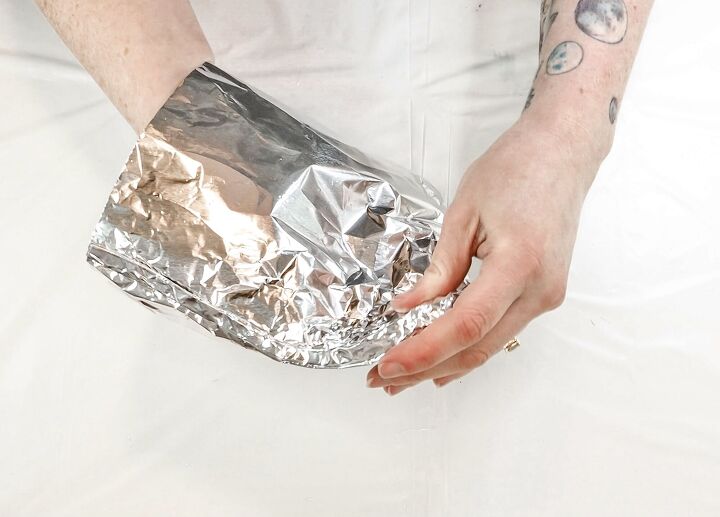
Close the wave back up so that the cling film is on the inside again, and crimp the edges together by folding them over a couple of times. This is so that the resin doesn't leak out later.
Open the wave pocket up and flatten the inside edges so that the seams are rounded.
Now whilst wearing the wave like a hand-puppet, start to mold the overall shape. I put my fingers right up into the corners during this step to make sure that the resin would still flow into them and not be cut off by any creases in the foil.
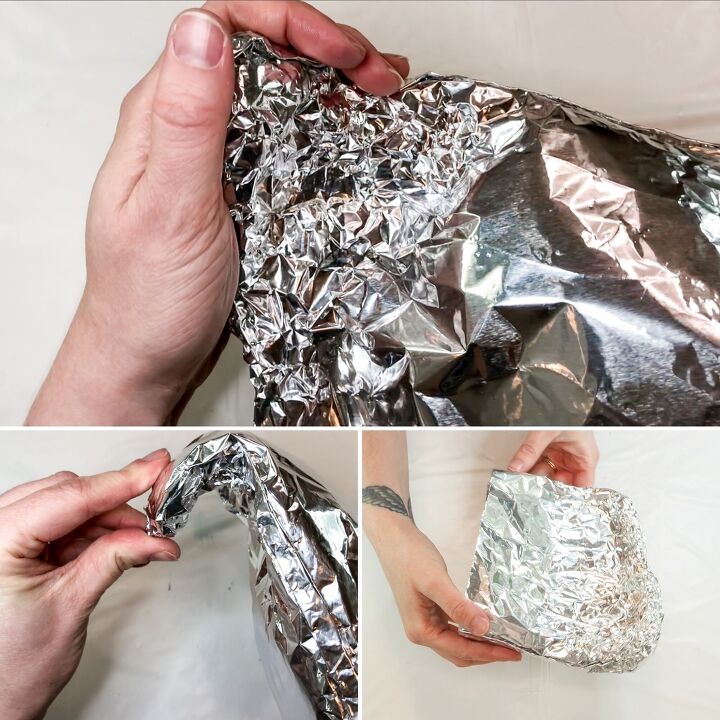
Smooth out any really sharp crinkly bits to try and make as smooth a wave mold as possilbe.
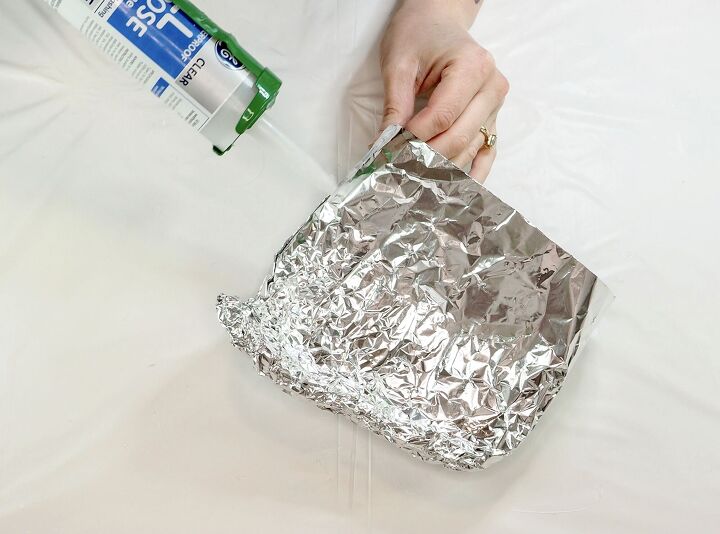
As an optional step, you could pipe caulking silicone (or hot glue) over the edge creases for extra leak-proof reassurance. I didn't need it in the end because my crimped edges held up.
Leave the mold to dry out if necessary. If you didn't add silicone or glue, you can go straight to the next step of pouring the resin!
*I mix together a total of 600mls of resin. This didn't fully fill my mold because I didn't want my wave to be too tall. If I wanted it to be taller I would have mixed more resin and filled it up more.
An easy way of working out how much resin you will need is to simply fill your mold up with water to how tall you want your wave to be and then measure how much water pours out of your mold. Make sure your mold is fully dry before pouring the resin in afterwards though*
STEP THREE - POURING THE RESIN
I split my 600mls of resin up into the follow amounts by colour:
10mls of white
50mls of transparent white
80mls of clear
50mls of light blue
200mls of medium blue
200mls of dark blue
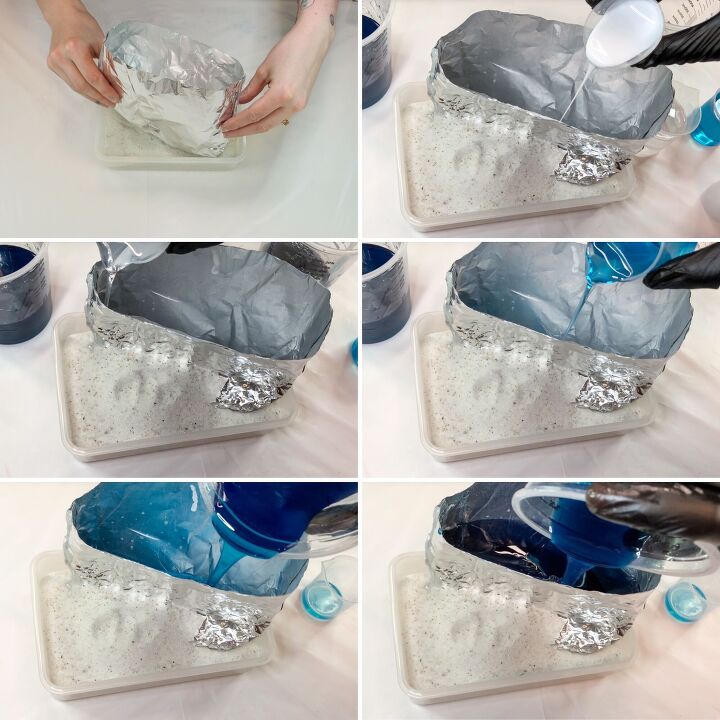
Prop the mold up on it's head in some sand so that it stays in place whilst you pour.
First I pour in my white and make sure this drizzles this down the sides, followed by the transparent white and then clear. (I pour every colour down the side of the mold so that it doesn't sploosh in the bottom and muddy the gradual layers of colours).
After each addition of a new colour, I push a wooden mixing stick down through the resin to the bottom of the mold and then lift it back out again so that the colours gently mix together to avoid solid layers. I repeat this pushing action a few times in different places throughout the resin for an even 'mix'.
I continue pouring in the colours, first light blue, then medium blue and then finally dark blue.
I add in drizzles of transparent white and light blue at the end (whatever was left over in the containers) and again push a mixing stick in and out of the resin to gently mix the layers together. I was hoping by adding these lighter colours later on that this would create some extra definition in my wave.
Once all my colours are in, and I'm happy with how things are looking (not much can go wrong to be fair) I leave the resin to cure.
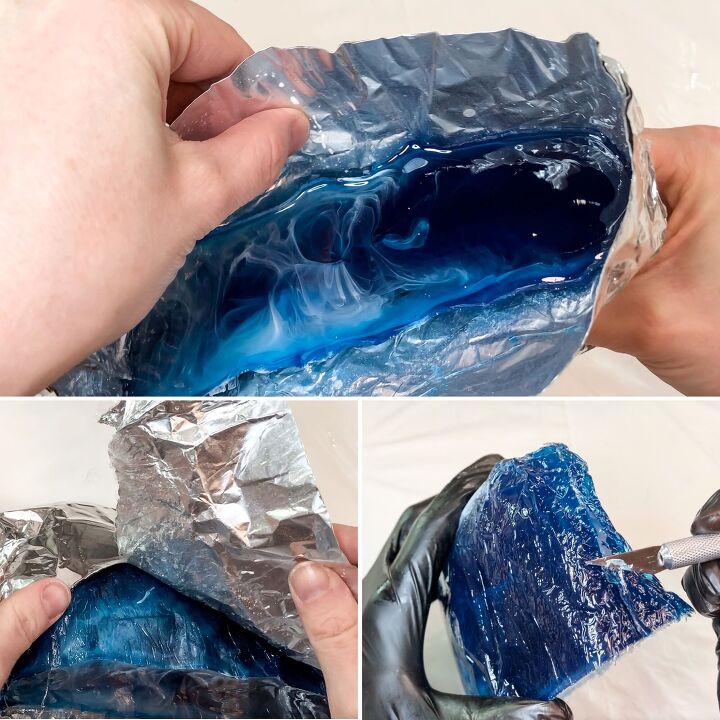
STEP FOUR - DEMOLDING
Once the resin has cured, demold your resin wave.
Hopefully your mold will come off in one piece so that you can use it again but unfortunately mine did not. The film layer came away from the resin fine but the resin snuck into the little creases I made and tore my mold.
Once the mold is removed, trim any loose flaps of resin or any little sharp bits using a craft knife or use sanding paper to smooth them off.
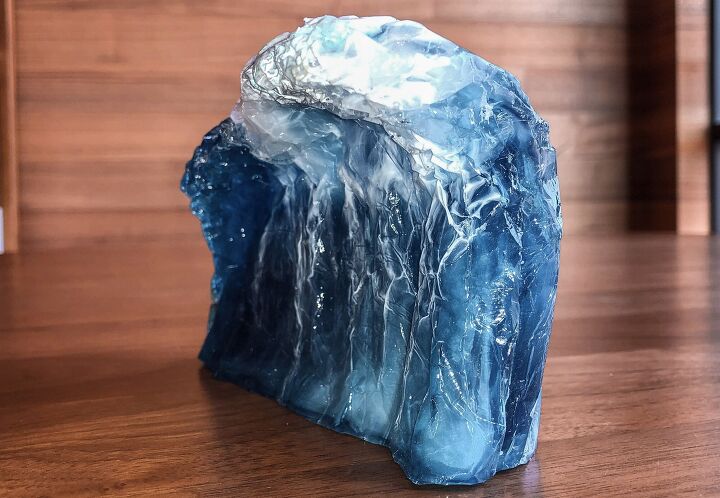
Now you should have a free standing, 3D resin wave to display proudly.
I actually intend to sell mine but haven't gotten around to listing it on my Etsy Store yet so if you're interested in buying it then just drop me a message, however, you've just seen how easy it is to make yourself! 👍🏻
Please do remember to check out my YouTube channel (link above) and consider subscribing! I'd love to see you over there in the comments and let me know if you came over from Hometalk ☺️
Thanks so much for taking the time to view my post today and until next time,
Happy crafting x

Resources for this project:
See all materials


Comments
Join the conversation
-
When I watched the video, it made more sense,and you can actually see the wave. Done beautifully.
-
Looks like fun to make. No idea what to do with it other than alongside Barbie Malibu beach house


Frequently asked questions
Have a question about this project?
Could you use an oil to keep it from sticking, or would it ruin the resin?
When the foil mold tears, maybe the finished wave could be used to shape another foil mold. ? This was really cool.