


Colorful Beach Inspired Dollar Store DIY Coasters
These colorful beach inspired DIY coasters are an easy and affordable project with supplies found at your local dollar store. Here’s how to make them!
Are you looking for a fun and easy project to add a touch of summer to your home?
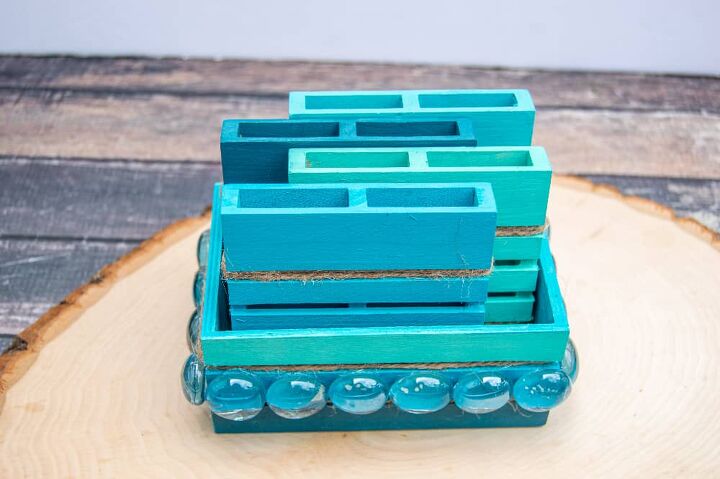
These easy coasters are cute, colorful and a beautiful addition to your home or to make and give as a gift.
Prices are soaring on everything, and it’s not just gas and groceries! Home furnishings and decor are becoming more expensive as well. Finding cute accessories that are a perfect fit for your home on a budget is more difficult than ever.
To help, we’re going to be sharing some fun new crafts here on Two Kids and a Coupon to help you be creative and decorate your space at the same time.
Beach Inspired Dollar Store DIY Coasters
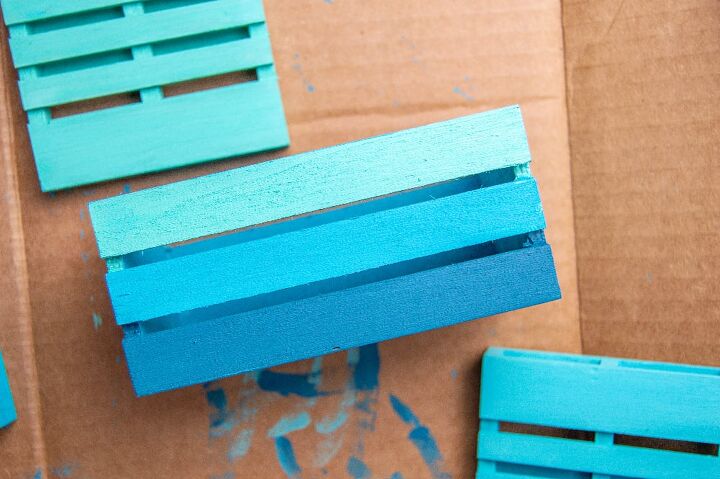
These easy and colorful coasters can be made for about $10 to $12 with supplies from your local dollar store. We used blue ocean inspired colors here, but feel free to swap them out with paints you might have at home or colors that match your own decor.
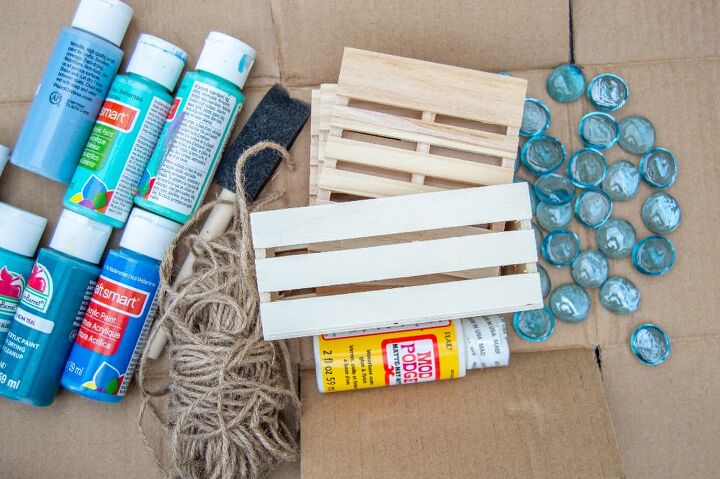
Here are the supplies you need to make this project. Items marked with a star* were found at our local Dollar Tree.
- 4 mini pallets*
- 1 mini wood crate*
- 20 decorative blue glass pebbles*
- Matte mod podge*
- Foam brushes*
- Twine*
- 4 different shades of blue acrylic paint (we used Tuscan Teal and Bimini Blue by Apple Barrel and Turquoise and Ocean Breeze by Craft Smart)
- Scissors
- Hot glue gun w/ glue sticks
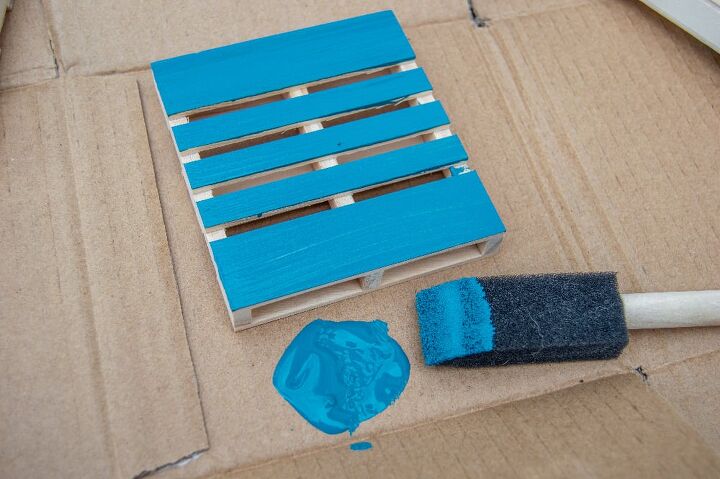
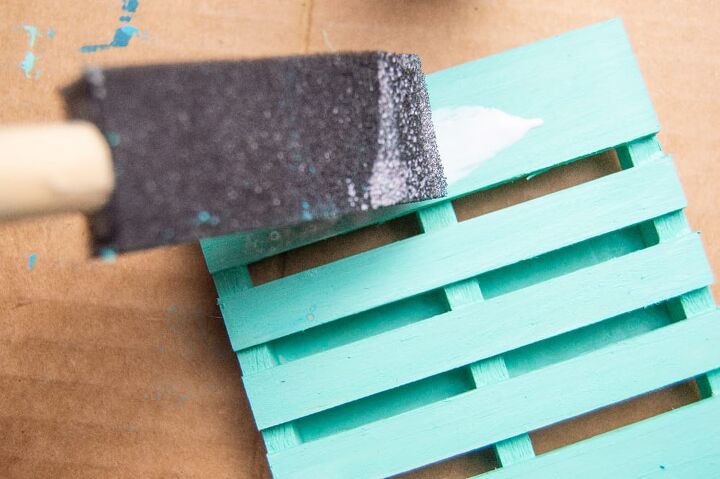
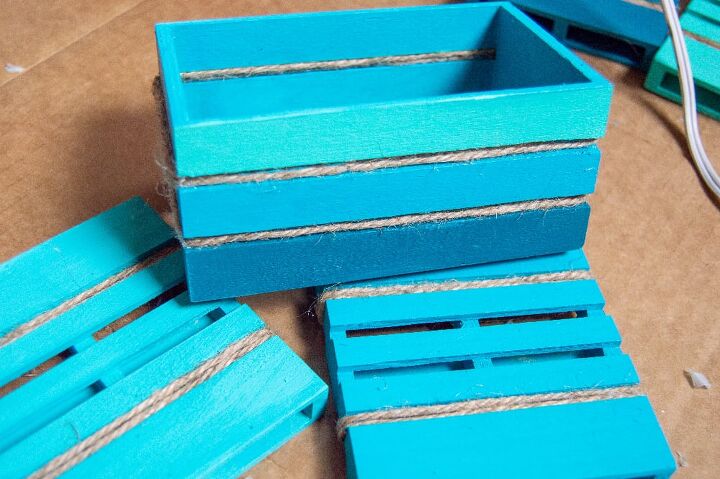
To get started on these DIY coasters, you’ll want to spread out a flat cardboard box, or some newspapers to help protect your painting surface. Choose your first color and using a foam brush, you will want to paint the front, back, sides, and inside of a pallet.
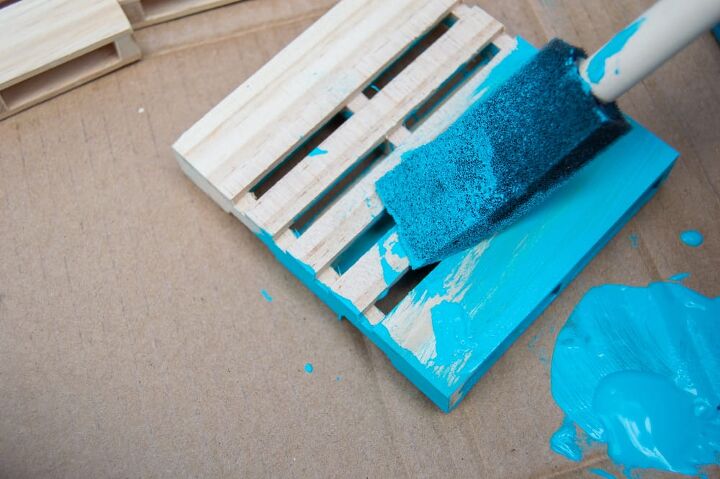
You will want to paint each pallet a different color and set them aside to dry. Having trouble painting the inside of the pallet? Use a small thin brush to reach into the smalls cracks and crevices.
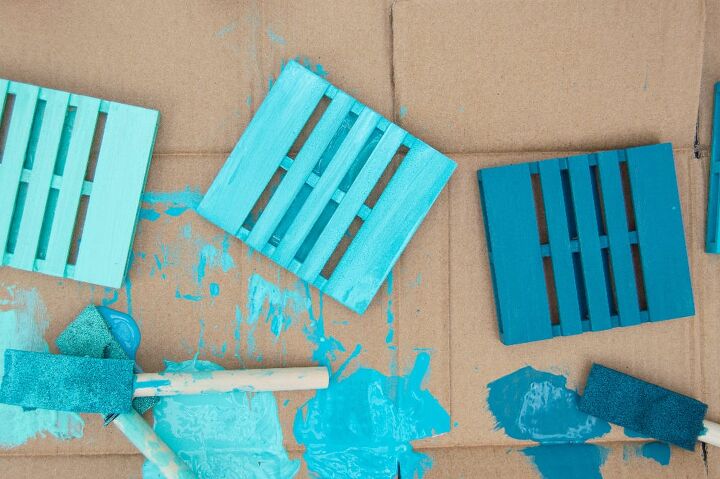
While the 4 pallet coasters are drying, you can prepare to paint the crate that will store your coasters.
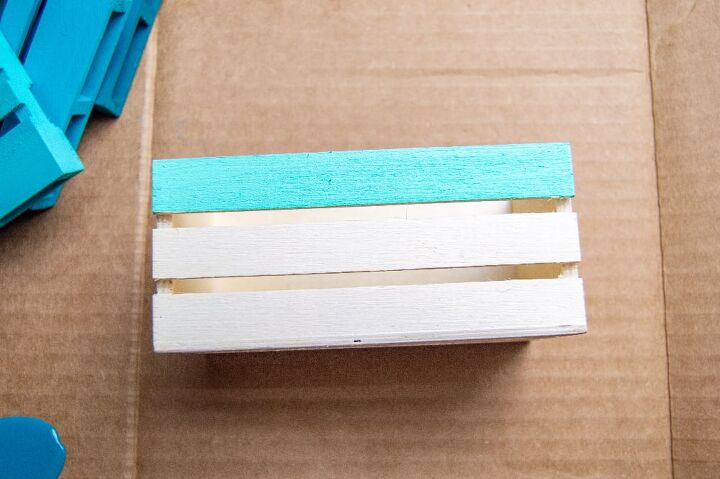
While your coasters are drying, it’s time to paint the little crate that is your coaster holder. You can paint this with whatever color combination that you choose.
If you’re wanting to match the same color combinations shown here, paint the front and back top slats Ocean Breeze. Next, paint the front and back bottom slats Tuscan Teal. And then paint the middle front and back slats, the sides, and the inside Turquoise.
Set this little crate aside and allow it to dry for at least 2 hours.
Once the coasters are dry, use a foam brush and carefully brush on a thin layer of Mod Podge all over the pallets and the crate.
Allow the coat to dry completely, and if possible overnight. This will ensure the stones will adhere to the crate.
Next, you’re going to add the finishing touches to your DIY coasters.
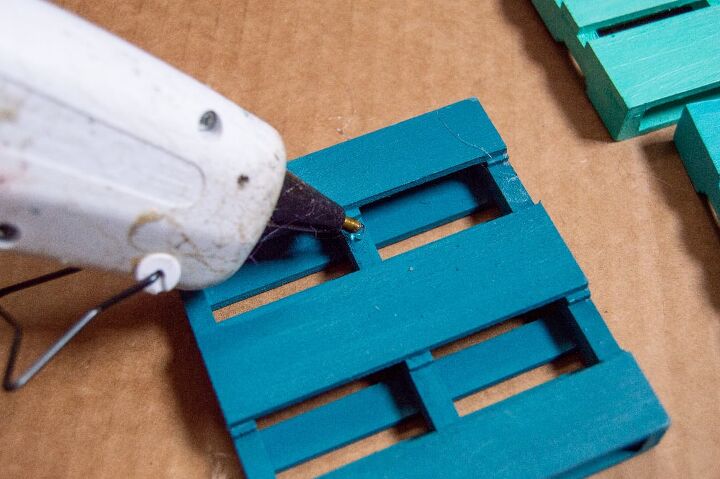
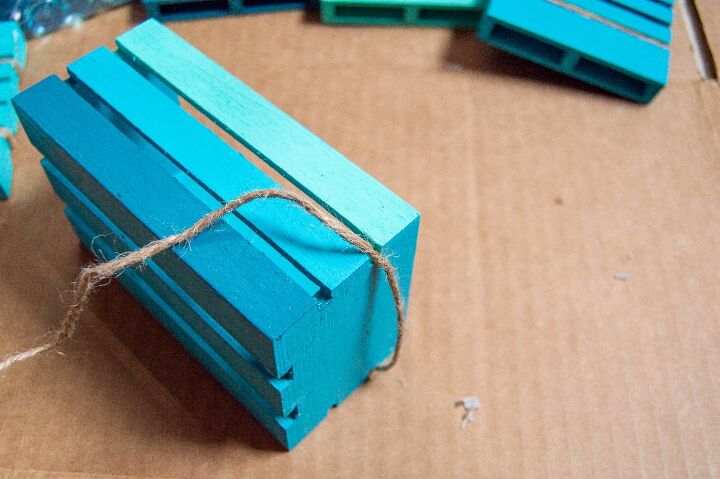
Turn a pallet over. You’ll notice that each of the little pallets has 4 small horizontal open spaces between the slats, and 2 large horizontal open spaces on the back.
Between each large horizontal open space, there are 3 small vertical pieces of wood, one on each side and one in the middle. You are going to add twine to the top and bottom sections.
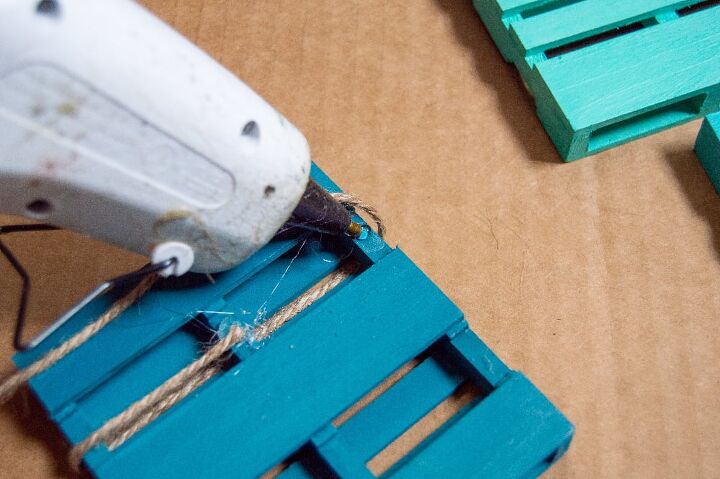
To secure the twine, add a dot of hot glue to the top vertical middle piece and press the twine down into the glue and hold for a few seconds.
The glue will be hot, so you will want to be very careful when using the hot glue gun. Use finger guards or something that can’t melt to press twine into the hot glue. If you’re doing this project with kids, you may need to help them with this step.
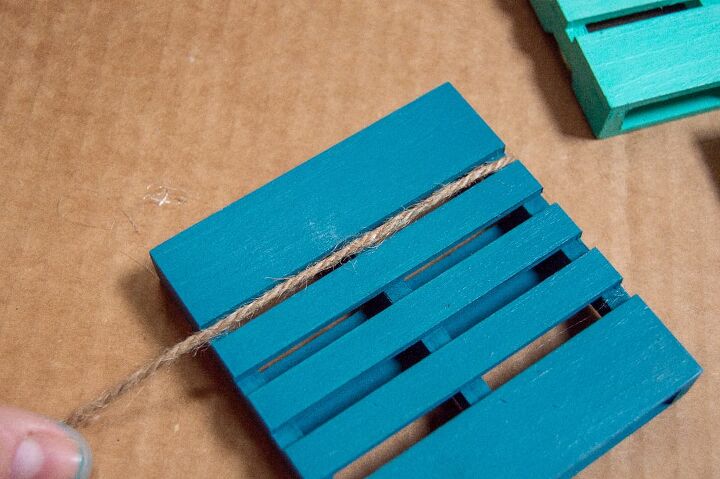
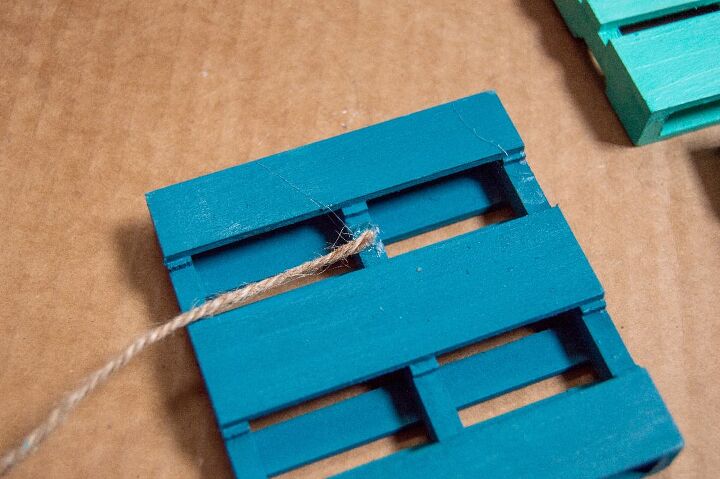
Securing the twine with glue on the back, wrap the twine around the front twice.
After you bring it back around to the backside of the pallet, trim off the twine, securing in the middle
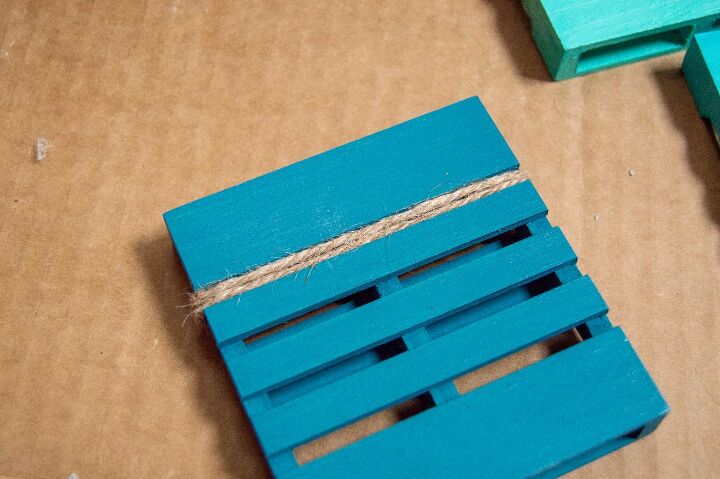
Repeat this on the bottom of the coaster.
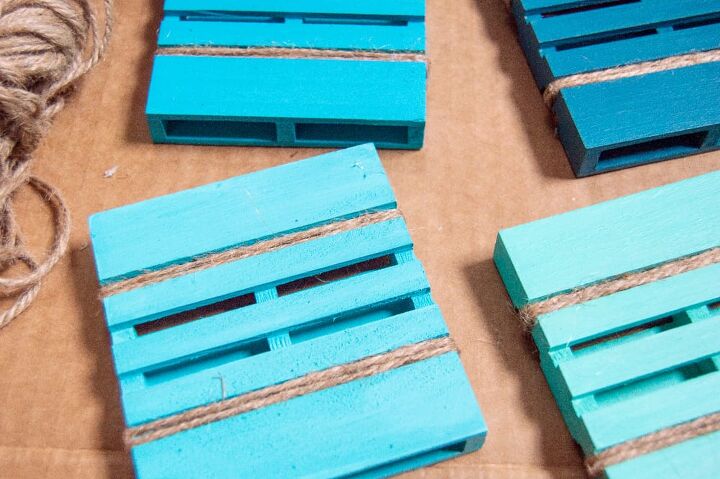
Continue these steps to add the twine to all of the pallets.
Now you are going to add twine to the crate.
The crate has two horizontal open spaces between the slats. Add a dot of glue to the right side edge of the wood between the first open space.
Press twine down and hold for a few seconds. Wrap around twice, securing with glue on the left and right between the slats as you go.
Repeat with the second open space, cutting off and securing the end.
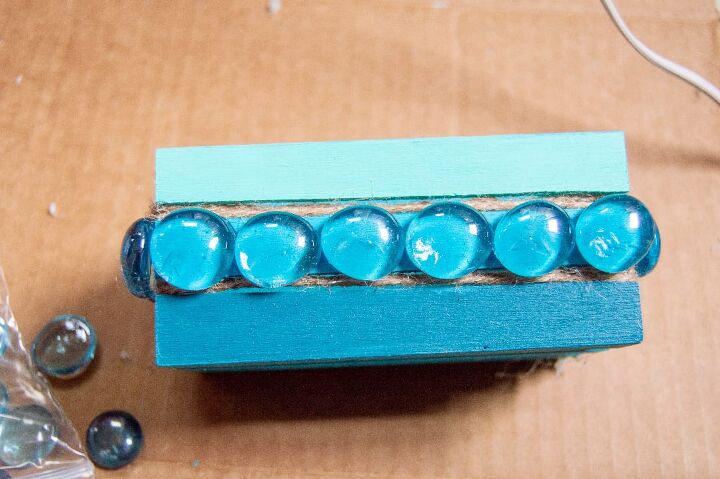
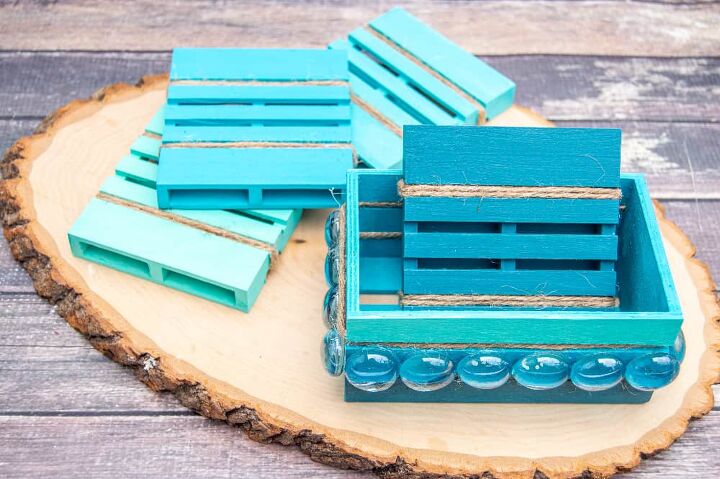
For the final finishing touch, glue the stones, flat side down, to the middle slat of the crate. We used six on the front and back and four on each side.
Depending on the size of your stones and your preferences, the number you use may differ. Don’t hesitate to make it your own. Use different colors, add different stones, sea shells, and more to help it match your decor.
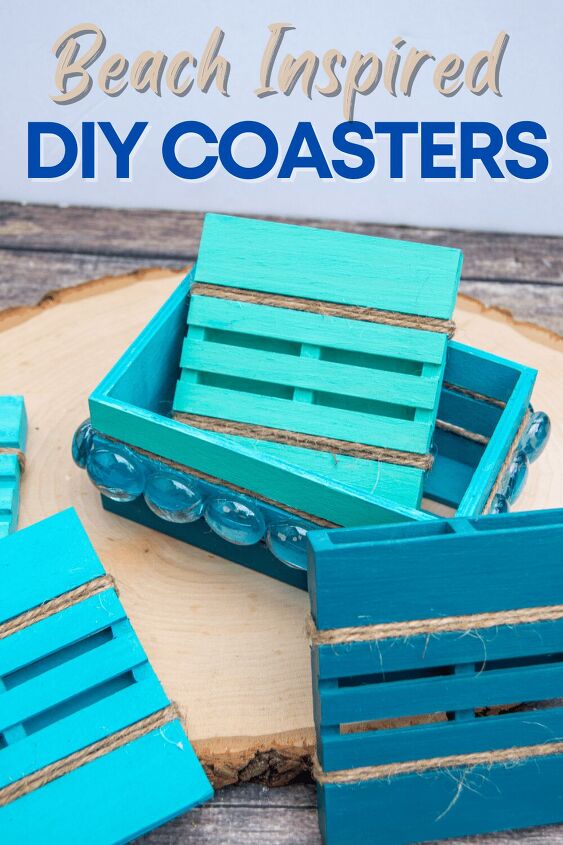
Want to save this DIY for later? Pin it to Pinterest using the graphic above or print it out using the printable project card below.
Materials
- 4 mini pallets*
- 1 mini wood crate*
- 20 decorative blue glass pebbles*
- Matte mod podge*
- Foam brushes*
- Twine*
- 4 different shades of blue acrylic paint (we used Tuscan Teal and Bimini Blue by Apple Barrel and Turquoise and Ocean Breeze by Craft Smart)
Tools
- Scissors
- Hot glue gun w/ glue sticks
Instructions
- Spread out a flat cardboard box, or some newspapers to help protect your painting surface.
- Paint the front, back, sides, and inside of a pallet.
- You will want to paint each pallet a different color and set them aside to dry.
- While the 4 pallet coasters are drying, you can prepare to paint the crate that will store your coasters.
- Paint the little crate that is your coaster holder.
- Set this little crate aside and allow it to dry for at least 2 hours.
- Once the coasters are dry, use a foam brush and carefully brush on a thin layer of Mod Podge all over the pallets and the crate.
- To secure the twine, add a dot of hot glue to the top vertical middle piece and press the twine down into the glue and hold for a few seconds.
- Securing the twine with glue on the back, wrap the twine around the front twice.
- After you bring it back around to the backside of the pallet, trim off the twine, securing in the middle
- Repeat this on the bottom of the coaster
- Continue these steps to add the twine to all of the pallets.
- Now you are going to add twine to the crate.
- The crate has two horizontal open spaces between the slats. Add a dot of glue to the right side edge of the wood between the first open space.
- Press twine down and hold for a few seconds. Wrap around twice, securing with glue on the left and right between the slats as you go.
- Repeat with the second open space, cutting off and securing the end.
- For the final finishing touch, glue the stones, flat side down, to the middle slat of the crate. We used six on the front and back and four on each side.
Recommended Products
As an Amazon Associate and member of other affiliate programs, I earn from qualifying purchases.

Kids Scissors
Do you have recipes or DIY that you would like to see here on Two Kids and a Coupon? We’re always looking for new suggestions! Leave us a comment below!
Disclosure: This DIY coasters craft post may contain referral or affiliate links that help support this site at no cost to you. As an Amazon Associate, I earn from qualifying purchases. Shop recommended items in our Amazon store at www.amazon.com/shop/2kidsandacoupon. All opinions and love of saving money are completely and totally our own.
Resources for this project:
See all materials


Comments
Join the conversation
-
These are very cute, functional, and beachy. Well done!


Frequently asked questions
Have a question about this project?