


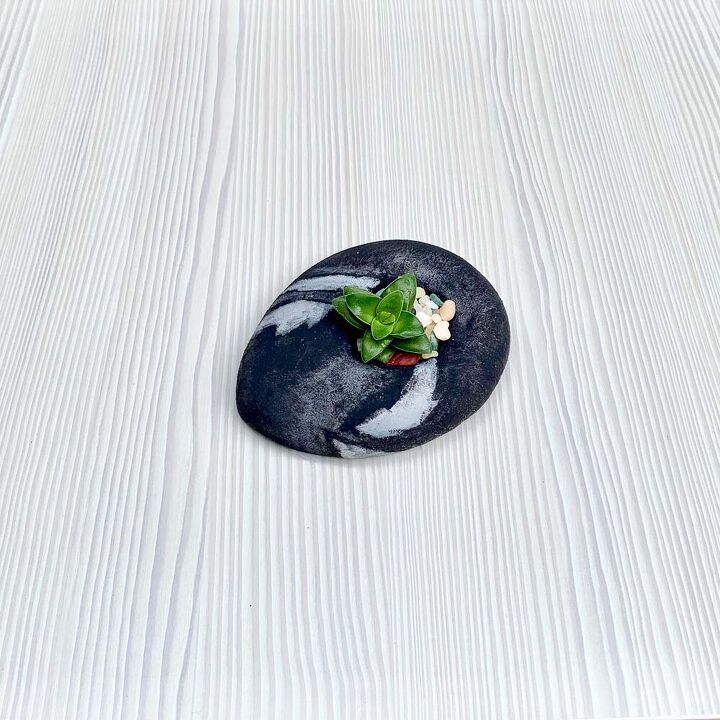
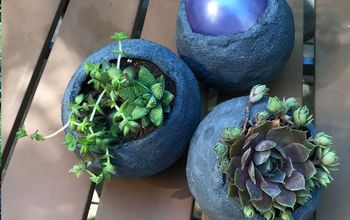
DIY Cement Stone Shaped Planter
Make a unique cement, stone shaped planter for succulents.
How do you make a smooth DIY stone planter? Just use cement and a stocking!
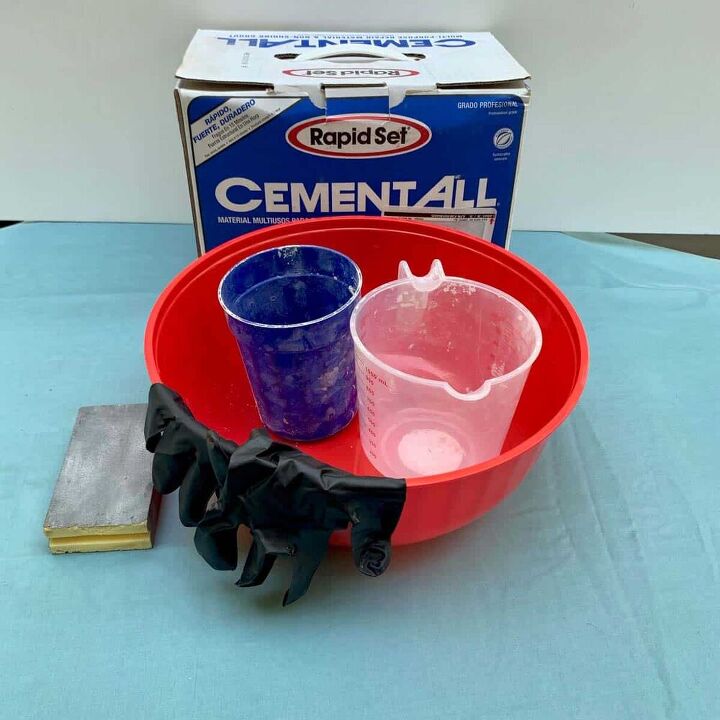
When I say that making this faux smooth stone planter using cement is easy, I really mean it.
Have you seen how short the list of materials is for this?
Who knew making smooth looking stones with cement could be so easy – without the use of mold?
Video For A Cement Planter in The Shape Of A Stone
Are you a visual contrast person? Some people just love visual contrast and others less so. I love it!
The way a dark colored planter brings out the green of a succulent is so appealing to me.
Move on to the tutorial to see how easy it actually is to make a DIY faux stone planter made with cement.
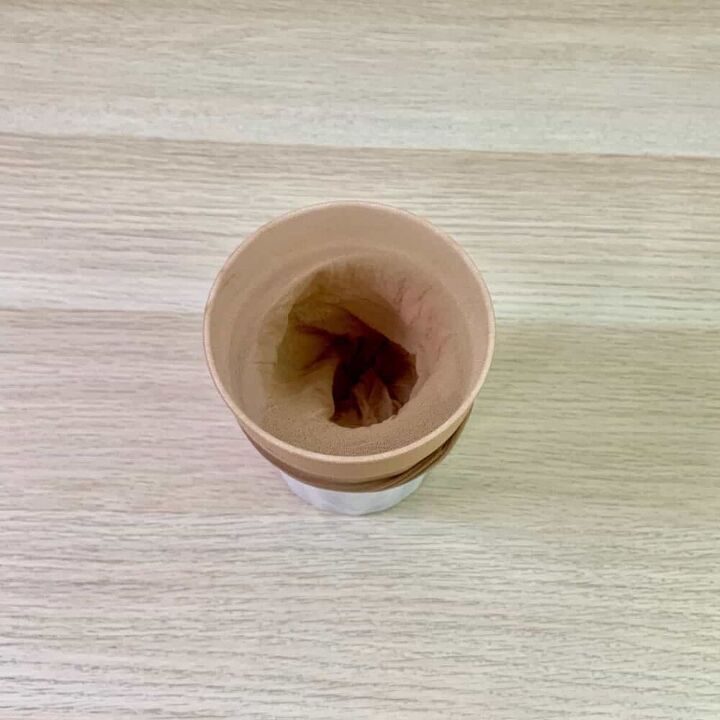
Step 1 | Trim & Prep The Stocking
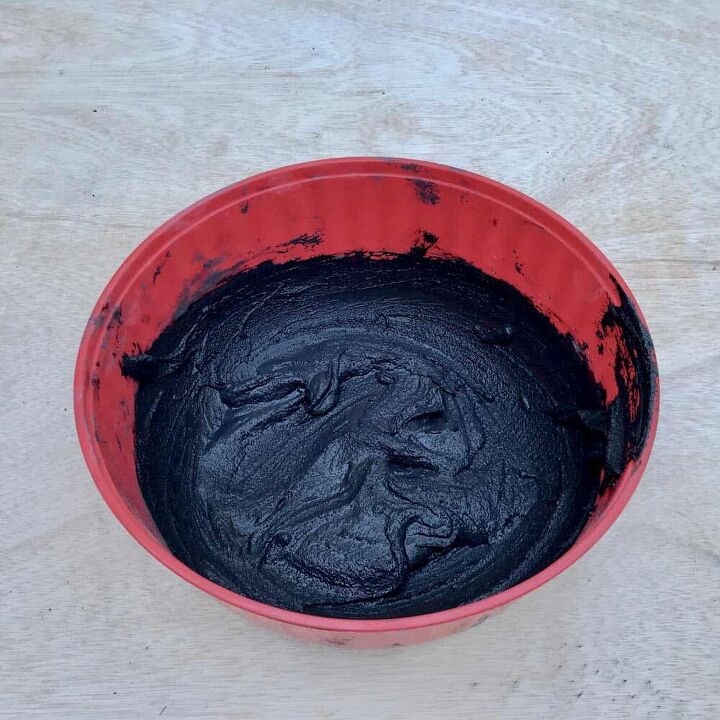
Step 2 | Mix The Cement For The Stone Planter
**If you love making concrete projects, then check out my Pocket Guide to Concrete Mixes! I tested 6 mixes and made a handy reference chart. It's a FREE download. 😉
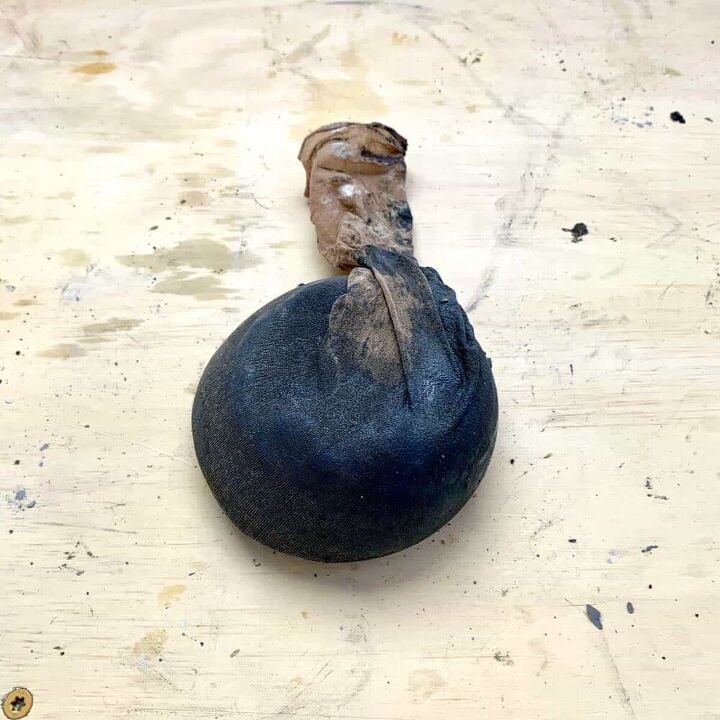
Cut the stocking so that you have about 3 or 4” from the toe to work with.
Use a cup to hold the stocking in place by putting the stocking inside and then pull the open end over the top rim of the cup.
Step 3 | Shape The Cement Into A Stone Shape
**If you are looking for more in-depth information on how to color cement crafts with pigments, I wrote a comprehensive article where I tested multiple types of pigments for mixing in before and applying after cure.
You can see the Concrete Pigment Tests here.
Pour about 2 cups of dry cement mix into a bowl, then add water. Mix it to a thick milkshake consistency. Next, add the black colorant and mix it well.
*To see how I created a marbling effect with the white pigment, please refer to the video.
Now pour or scoop the cement into the cup with the stocking. I added about a cup and half of wet cement to the stocking.
Pull the stocking off of the cup and place it onto your work surface. Pull up on it so it mounds up and let it relax into the stone shape.
Feel free to push and pull on it to get it the shape you want. I wanted it to be slightly oval so I just molded it with my hands.
Step 4 | Make The Insert Space For The Planter
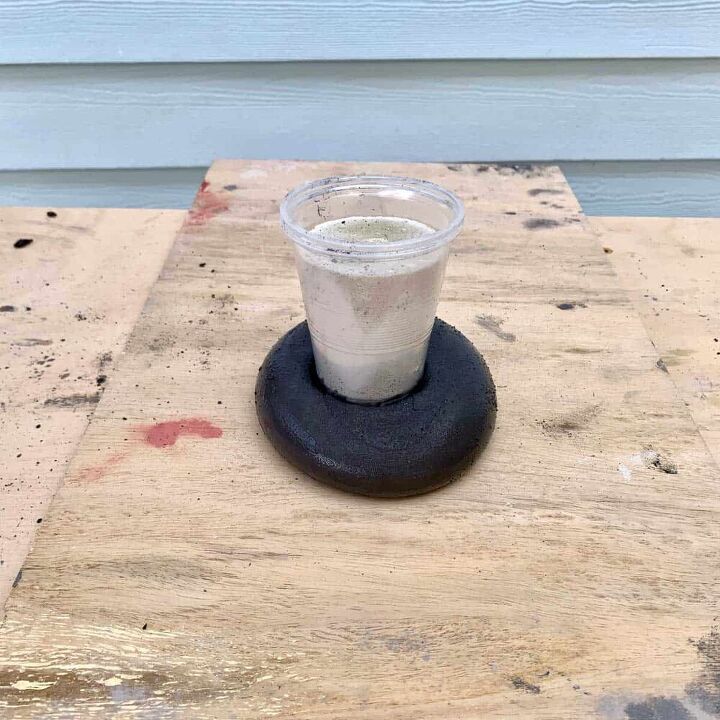
Once the shape is how you want it and the cement feels like it is setting, then open up the stocking and peel it back a bit and place the cup with the weights into the center or off center like mine.
You want to leave about ¼” of thickness at the bottom, so be sure not to go past ¼” when pressing down the weighted cup.
I tested this by pulling the cup out and pushing the straw through to see how far down it would go.
When you do this, the cement will naturally want to pull back up, that’s okay, just push the weighted cup back in.
Now pull the stocking back up over the cement and let the cup sit until the cement has set more.
If you pull up on the cup and the cement looks like it’s suctioning itself in again, then put it back in the hole and wait several minutes.
Once it doesn’t move but still has some pliability, then pull the cup out completely.
You may want to add a little bit of room in this cement stone planter so that you can have a little more soil in there.
If so, just use your gloved finger to push back and somewhat carve the cement so that the hole inside widens a bit, but not from the top.
Step 5 | Create The Stone Shaped Planter’s Drainage Hole

Insert the object you are using for drainage (pencil head, cotton swab, hot glue stick, or other) into the center and give it a twist to give it the drainage hole.
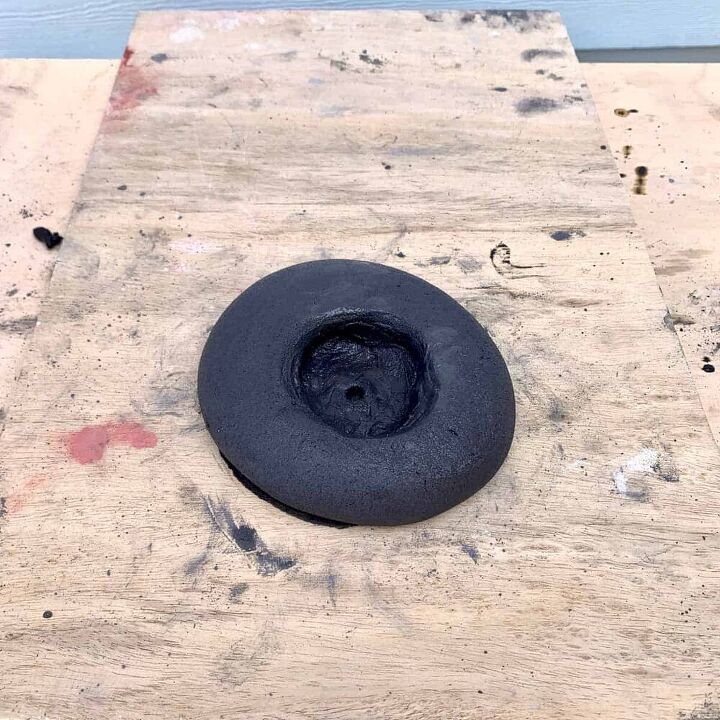
If you use a straw, as I did, the cement will stick inside the straw, so just pull it out and flip it over to the other side and press it in, and then remove it.
This should give you a clear hole.
Now remove the stocking. Take care not to touch the cement because it will leave marks that will dull it and make it have a slightly different texture as you can see here toward the top and right.
You can leave it on, but it will have a coarser texture all around.
Let this cure for an hour.
Final Step | Clean Up The DIY Stone Planter
If you have any rough spots or burrs on the bottom, use the sanding sponge to rub them off.
Resources for this project:
See all materials


Comments
Join the conversation
-
Oh yes. Love simple but unique projects!
nice job!!
-
Love the simplicity of the planter. I’m 68 and have not seen stockings in a couple decades. Do they still sell them? I’m sure a childs would do. Now those I have seen.


Frequently asked questions
Have a question about this project?
Couldn't you just paint the plain colored cement (with spray or acrylic paint), when it's finished drying?
Doesn’t the concrete kill the plants? I thought concrete planters needed to be lined to avoid the alkalinity killing the plants.