DIY Driftwood Art - DIY Home Decor Ideas

by
Engineer Your Space
(IC: blogger)
I needed some beach inspired artwork to finish off my dining room makeover but having no money left over in the budget, I had to get creative! Looking around the apartment for something to use, I found this piece of plywood leftover from a project which was the perfect size, but what to put on it? After looking on Pinterest for some inspiration, I found my answer: Driftwood! It's free and it meant a trip to the beach which I love. So I headed to the shore and after exploring a few beaches, I had my driftwood to get started!
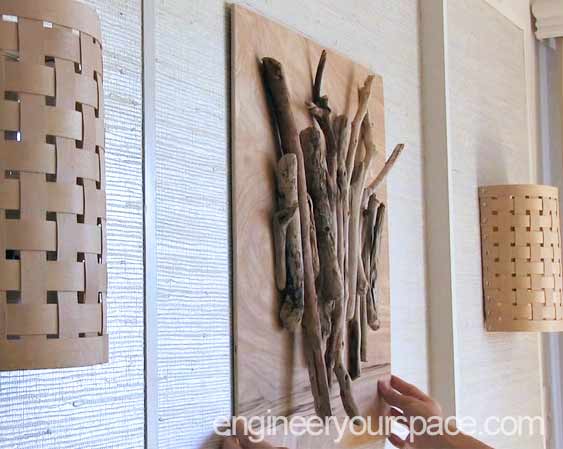
First I arranged my driftwood in a pattern I liked on a piece of plywood I had leftover from another project.
I sanded down the back of the driftwood to give a larger surface to glue. To make sanding easier, I stapled a piece of sand paper to a scrap piece of wood.
Then I used liquid nails to glue the driftwood to the plywood. That's it - very easy!
I love the way it looks in my dining room - it was the perfect complement to the grass cloth on the wall panels I made and it gives me the beachy vibe I wanted. If you want to see more details in this project and the dining room panels, click on the link below to my blog where there's a video of everything I did.
Enjoyed the project?

Want more details about this and other DIY projects? Check out my blog post!
Published October 20th, 2016 12:00 PM
Comments
Join the conversation
2 of 14 comments
-
 Betty Blue Easton
on Oct 19, 2018
Looks Fab x
-
-
 Sheryl Monaspa
on Dec 12, 2023
It's a great idea and it looks so fitting! Thanks for sharing - will try to do something similar.
-






Frequently asked questions
Have a question about this project?