


DIY Glitter Mason Jar

6 Materials
$15
3 Hours
Easy
In this tutorial, we'll teach you how to create your own glitter mason jar. We chose a Christmas theme due to the upcoming holidays but you could recreate this for any holiday or occasion. These would even look great at a wedding or baby shower!! You can choose any design and glitter color and make it your own.
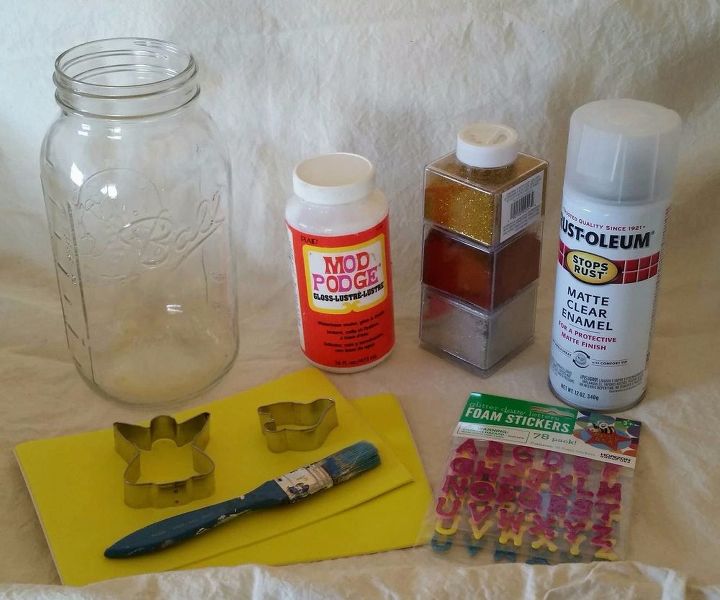
Begin by collecting your materials. You'll need a Mason jar or two; we started with a large jar but switched to a pint size. Make sure this is clean and dry! You'll also need a jar of Mod Podge or other glue, glitter color of your choice, a cheap paintbrush (one you don't mind not being able to reuse), and stickers.
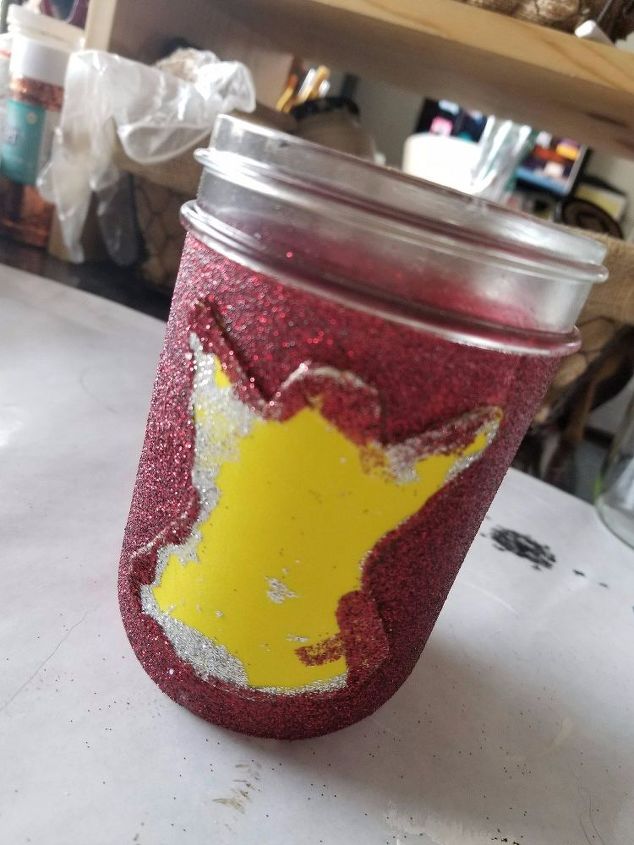
After a few not-so-successful attempts, we found the best stickers to use are foam stickers. They are thick enough that they don't get lost in the glitter. We bought our foam sheets at Wal-Mart but you can find them at any craft store. Be sure you get the one with a sticky back as they make sticky and non-sticky. Also, be sure to have a pair of nice sharp scissors! The foam was a little tough to cut through with mine.
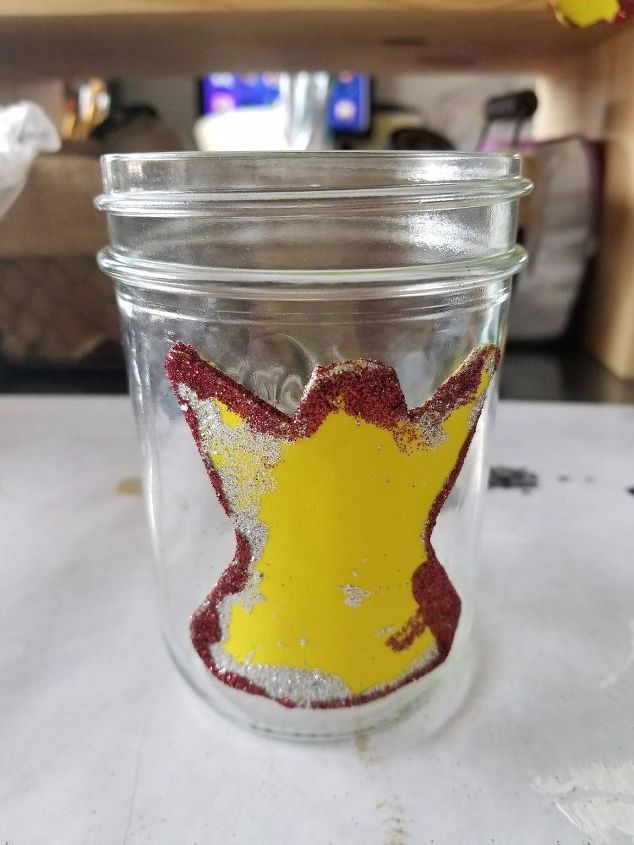
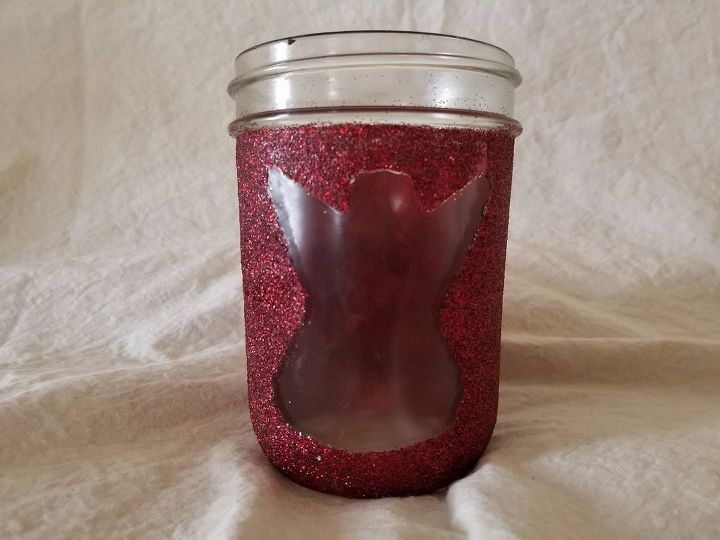
For your first step, arrange your stickers on your jar. Remember that the areas covered by the sticker will not have glitter on them! If you were to put a light inside the jar, these would shine through. We'll be peeling these stickers off in one of our last steps so don't worry about the color of your stickers! We used cookie cutters and sticky foam paper to make the angel. Be sure that these are pressed tightly to the glass, especially around your edges! We want nice clean lines when we peel off the stickers!
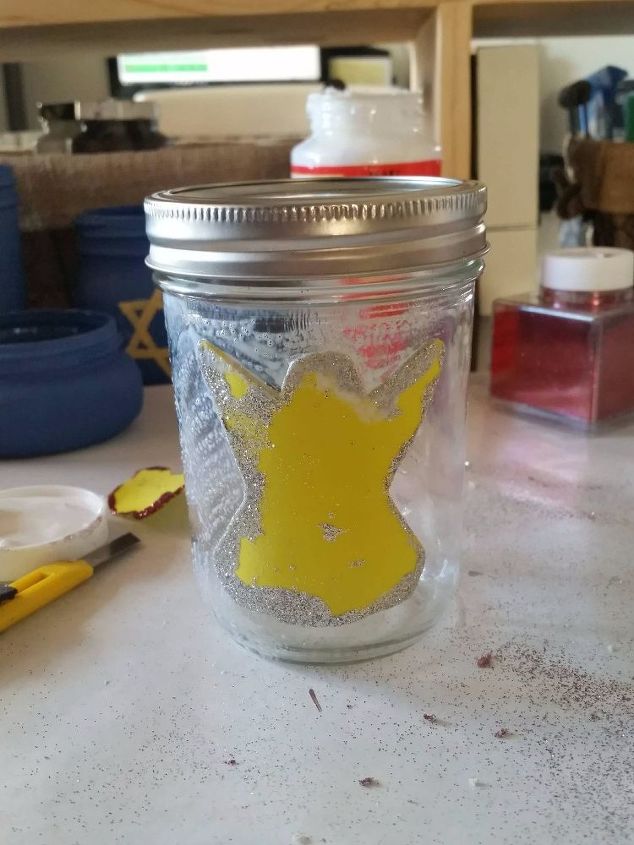
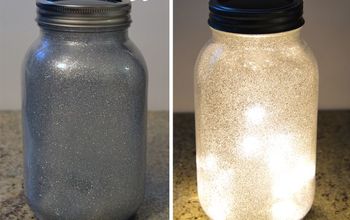
In small segments, use your brush to paint on the Mod Podge. Quickly, so it doesn't dry, sprinkle your glitter over the "painted" portion. I found that around the stickers, I needed more of a "patting" motion rather than a brushing. You'll want to have foil or paper down on your work surface to catch the excess glitter so as not to waste it. When you're finished, just use your paper to funnel the glitter back into the jar. Flip the jar over to remove excess glitter. If you'd like a thicker coat, you can press the glitter into the glue with your fingers before dumping the glitter off.
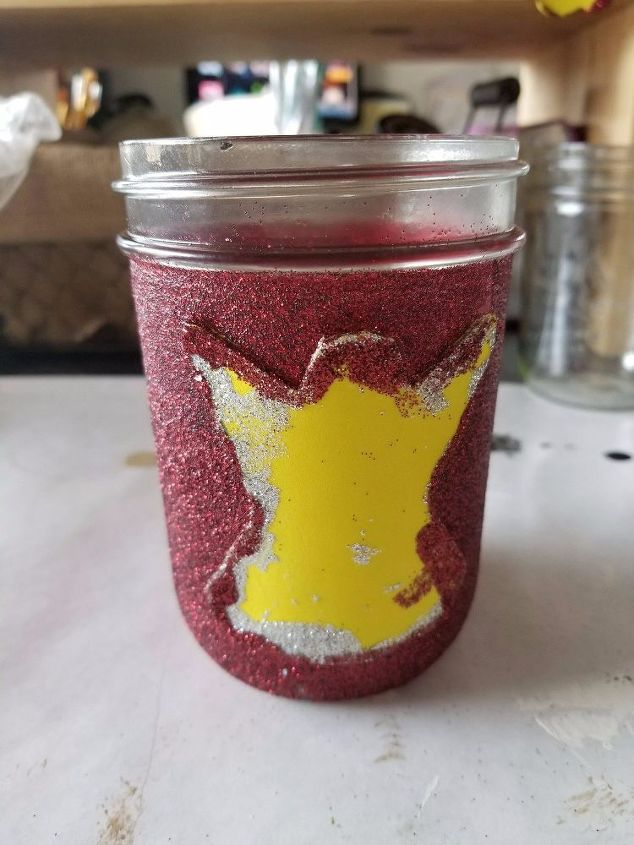
When you've got it all glittered, set it in a safe place to dry. Be gentle with it as the glitter is still easy to wipe or knock off. In fact, I'm getting glitter all over my keyboard typing this!
After letting it dry (we let it dry overnight), you'll need to peel off your stickers. For the cleanest lines, we took a razor blade and cut around the sticker. Once it's cut, just peel the sticker off. You may leave a little residue but that's fine.
Once the sticker is off, grab a clean paintbrush and dip it in a little water. Use this to remove any sticker residue. You can also use this to clean up your lines. If you have any spots where too much glitter was peeled away, just dab a little mod podge and glitter on it.
The good news is, if you don't like how it turned out, just soak in a bucket of water for a few hours. The mod podge will soften and peel right off your jar! We may have done this a few times before we were happy.
When you're happy with your shape, take your jar outside or to a well ventilated area. You'll want a clear spray paint- either gloss or matte depending on how shiny you'd like your glitter. The cleanest way is to put a rubber glove on the hand holding your jar. Spray a good coat of paint from rim to base, don't forget the bottom! Flip it over and let it dry on it's rim.

Once it's dry, put your rim back on. You don't need the lid, save that for a different project. Your jar can be used to hold things or you can place a tealight or votive candle inside. While we didn't paint the inside, it's probably safer not to use it for food or drinks. You can lightly wipe your jar but don't submerge or place in the dishwasher!
Hope you enjoyed our tutorial!
Resources for this project:
See all materials


Any price and availability information displayed on [relevant Amazon Site(s), as applicable] at the time of purchase will apply to the purchase of this product.
Hometalk may collect a small share of sales from the links on this page.More info


Frequently asked questions
Have a question about this project?