


DIY No-Sew Felt Pennant
I made this adorable DIY no-sew felt name pennant for the gallery wall in my son's room. He absolutely loves it, and it was so easy. I'm not a super crafty person, and I had no problem making it! You can see more more easy and affordably DIY projects on my blog, if you want some more inspiration!

You'll need two 12X18" pieces of felt in contrasting colors. Choose the color for the pennant (the other will be for the letters) and make a mark at the middle of one of the short ends. Then, take something with a straight edge (I used a level), and draw a line from each top corner down to that point. Cut along the lines to make a triangle. You can see more photos and details of what this looks like on the blog post.
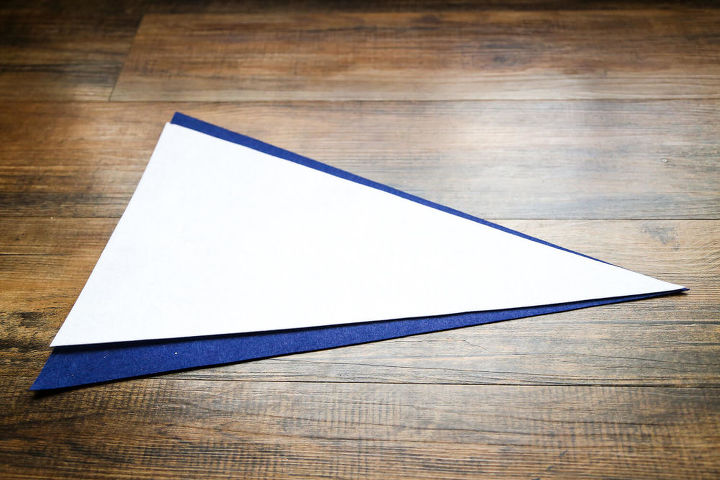
Do the same thing with the other piece of felt, but first mark about an inch in from each top corner so you end up with a slightly smaller triangle.
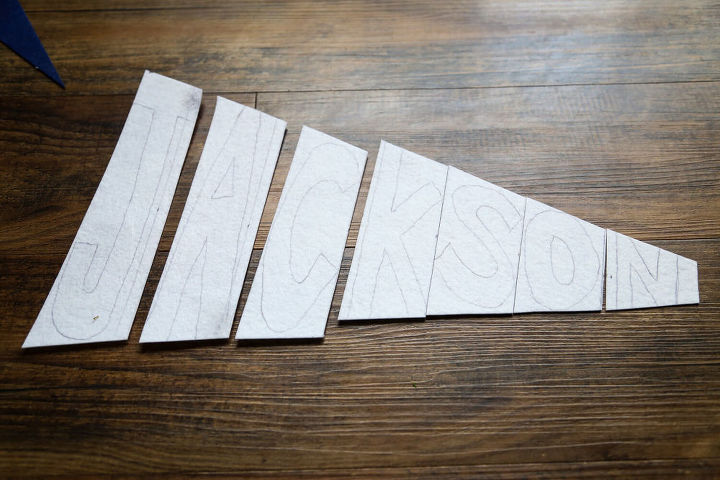
Divide your smaller triangle into roughly equal pieces, with one piece for each letter of the word you want to spell out. Use a pen or pencil to write a block letter on each piece.

Cut out your pieces and glue them onto the pennant! You can also cut a strip from the contrasting color to add to one end of the pennant, for an added detail to finish it off. You can add string to hang it, or just hang with thumbtacks!

Want more details about this and other DIY projects? Check out my blog post!
Comments
Join the conversation
2 of 7 comments
-
amazing
-
Great idea, thanks for sharing


Frequently asked questions
Have a question about this project?