


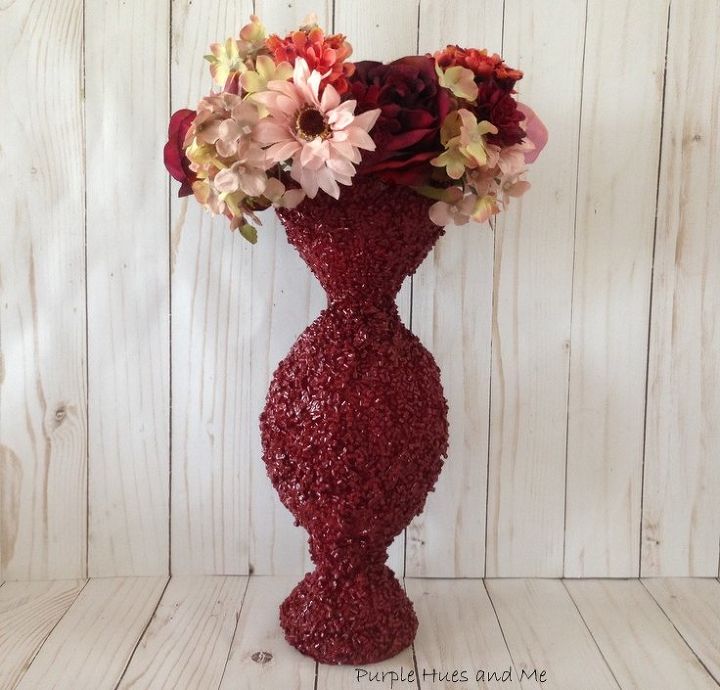
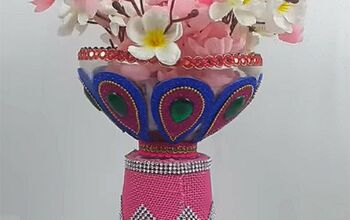
DIY Soda Bottle Beaded Vase
8 Materials
$4
2 Days
Easy
Don't you just love recycle projects? It's always fun to see the finished item and be amazed at how it went from "that to this!" Stay with me because I'm about to show you how to upcycle soda bottles into an adorable vase decorated with filler beads and paint - it's a very impressive look!
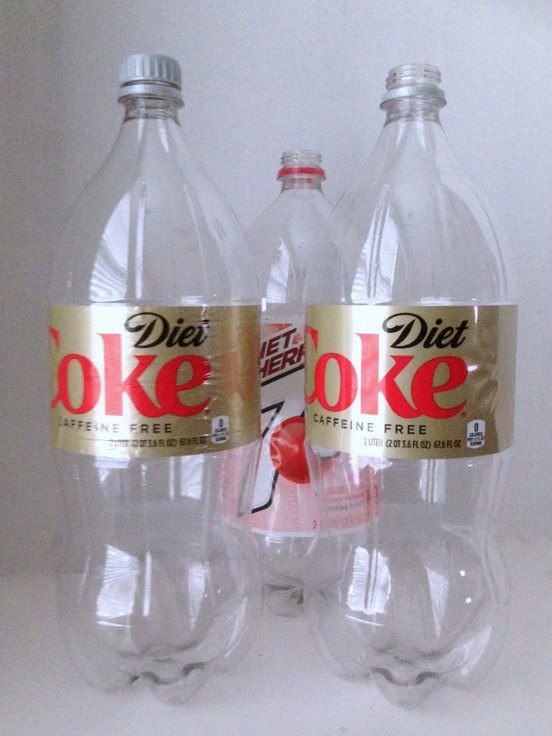
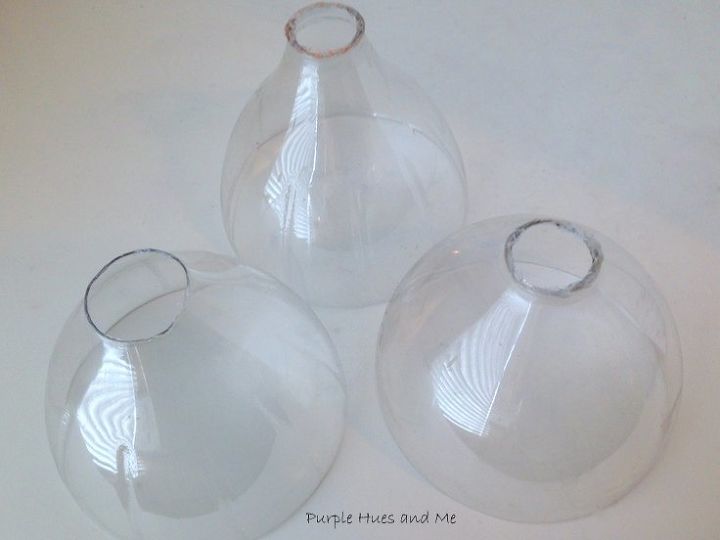
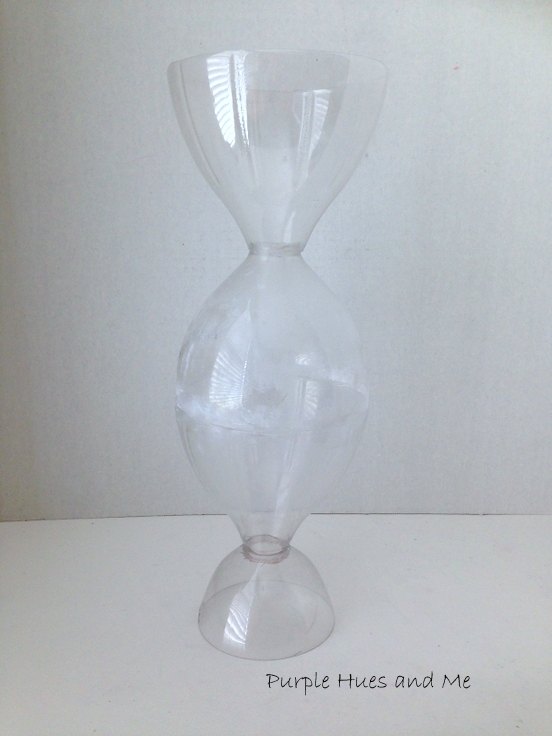
Let's begin by removing the labels, and washing and drying three, 2 liter, clear soda bottles. Once the bottles are dry, using a craft or utility knife, cut off the top portions following the ridge around the bottle or the imaginary line from the label that was once there. I wanted the base of the vase smaller than the rest so I cut off the top of a smaller bottle, too.
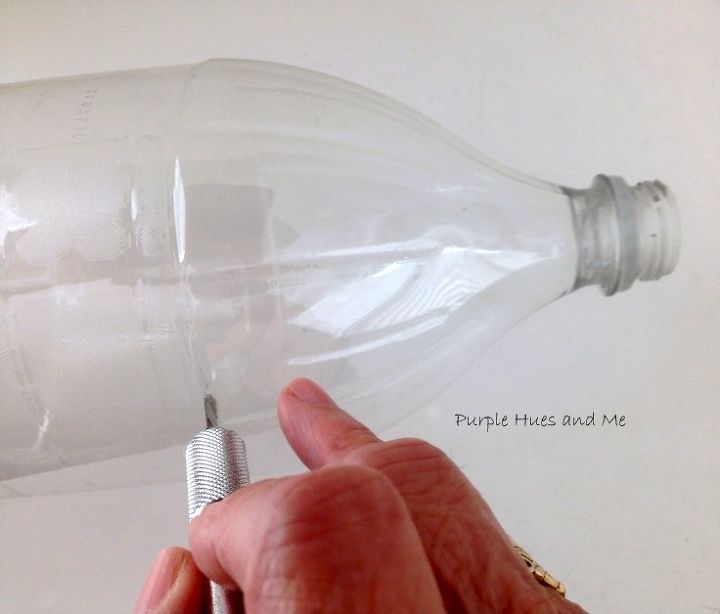
Next, cut off the top rim opening where the cap is. The plastic on this area is much tougher to remove so be very careful and take your time. A lot of pressure and a good knife is required.
Then, place two of the smaller openings of the top portions together for a good fit. Once satisfied with the fit, take apart and apply gorilla super glue gel around the edges and press back together. Do the same for the other two tops and let dry.
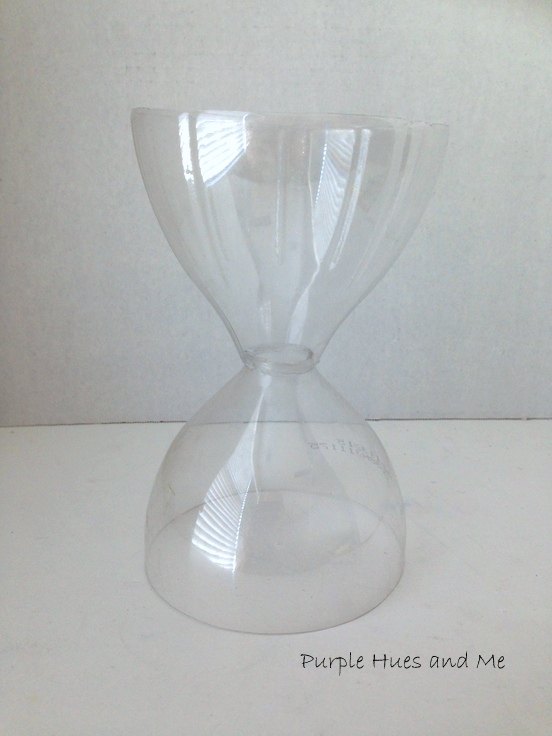
Next, press the two larger openings together, adjusting to fit. Then add glue gel around the edges and press the two together - holding in place (about 30 seconds) until sealed. Additional glue may be needed in areas where the edges meet. Let dry.
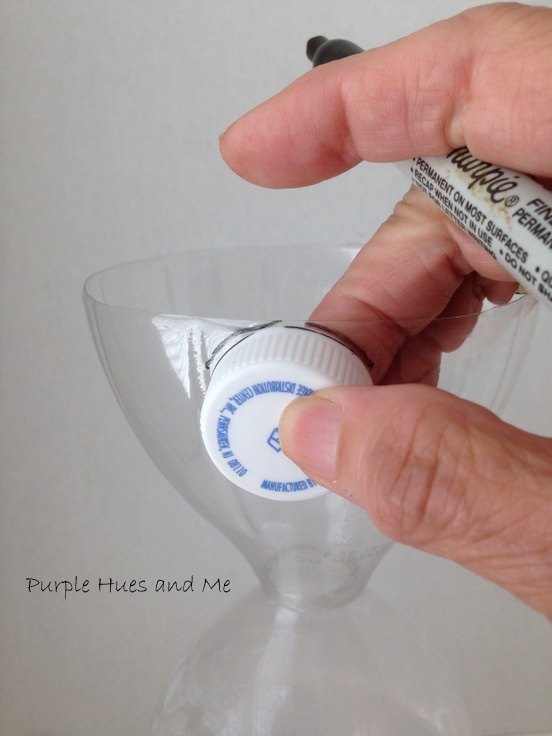
For a decorative effect, use a soda cap to draw half circles for a scallop around the top edge with a marker.
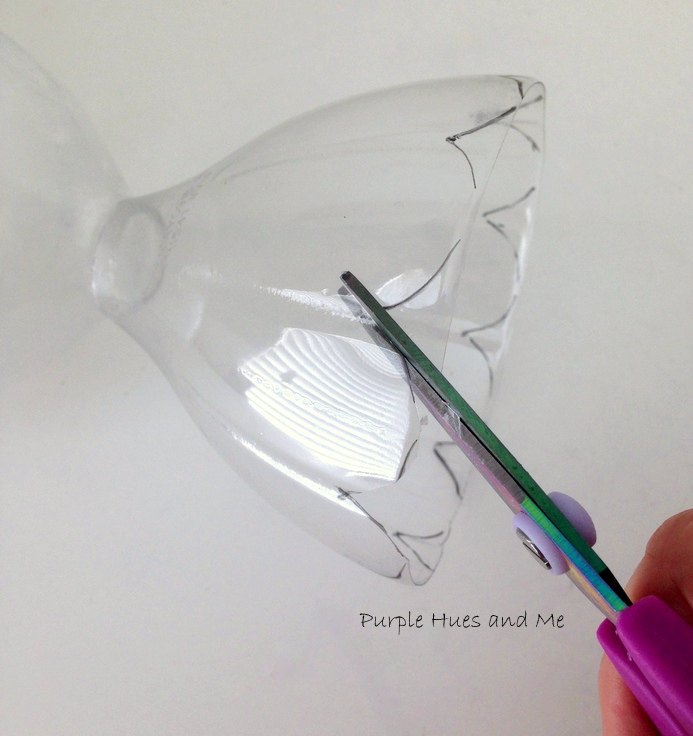
Then cut out the scallop trim following the lines using craft scissors. You can use alcohol to remove the markings that's left.
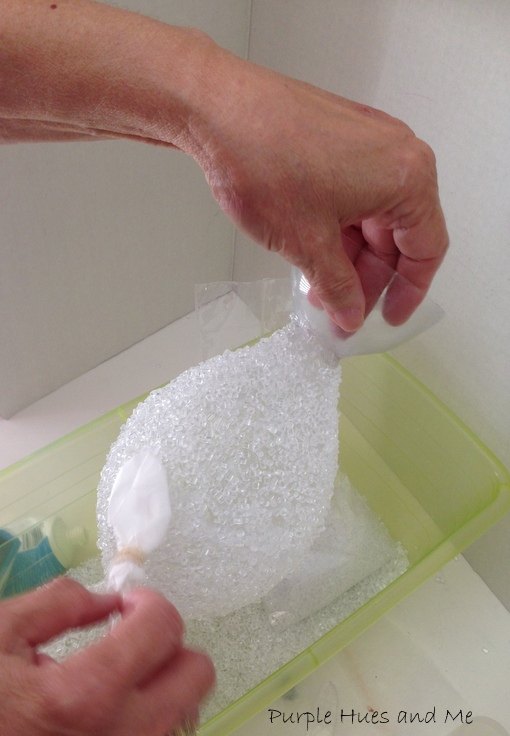
To apply the beads, place the vase in a container to catch the beads. Then starting at the top, paint on a generous amount of mod podge to the vase and sprinkle or pour the filler beads over the glue area.
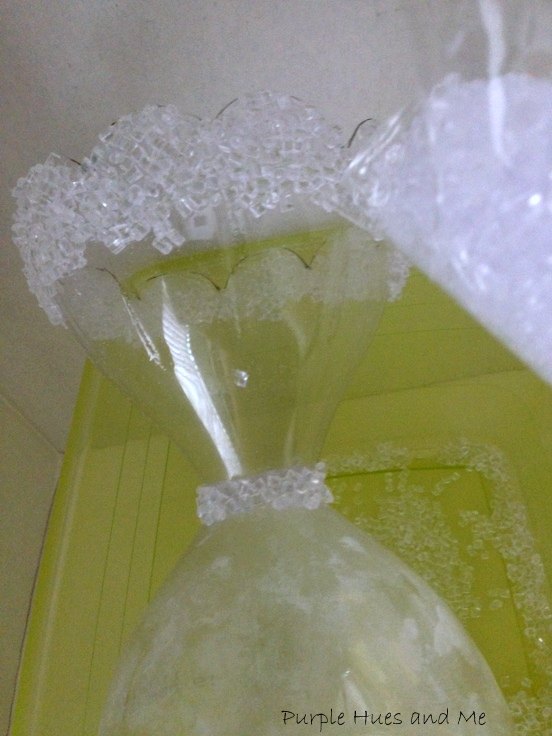
Continue adding mod podge and beads over one area at a time. It can be a slow process - so don't get impatient! Lol!
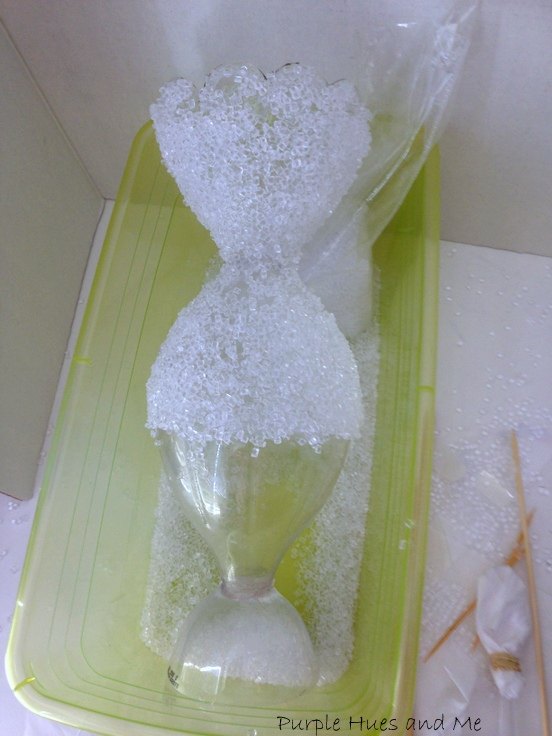
I wrapped a plastic spoon in parchment paper to help press the beads in place so I wouldn't get glue all over my hands. (This is the vase pictured upside down)
Once the entire vase is covered in beads, let set and dry overnight. Don't worry if there're a few beads falling off! Inspect the vase and apply more mod podge and beads to needed or missed areas. Once satisfied with the look, seal all the beads with more mod podge and let dry.
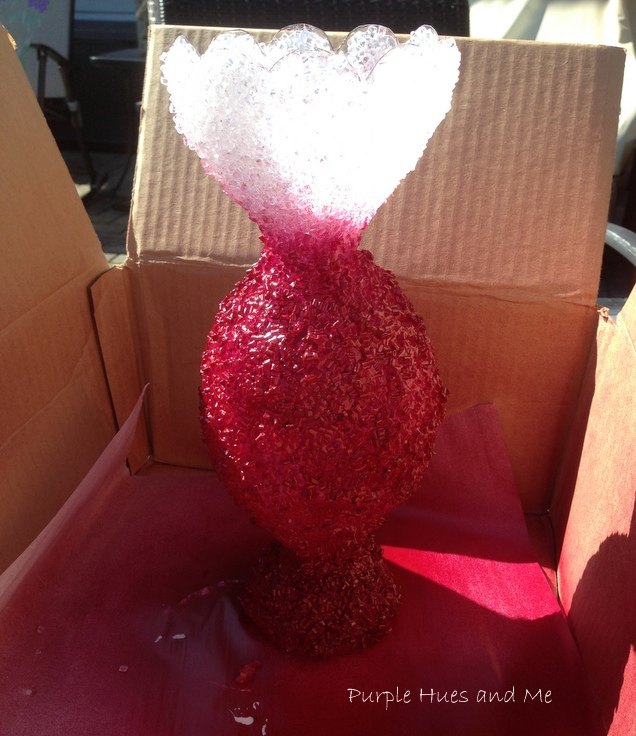
Sorry, I forgot to take a picture of the finish vase before painting it. I wanted the vase to be in a deep color that would compliment a fall color palette of soft plums, burgundies, pinks and orange florals. But you can leave it as is, for a beaded crystal type look.
And finally, spray paint the vase in a well ventilated area. I went outside to do this.
I'm loving this look!
Would you believe this vase is made from soda bottles if I hadn't told you?
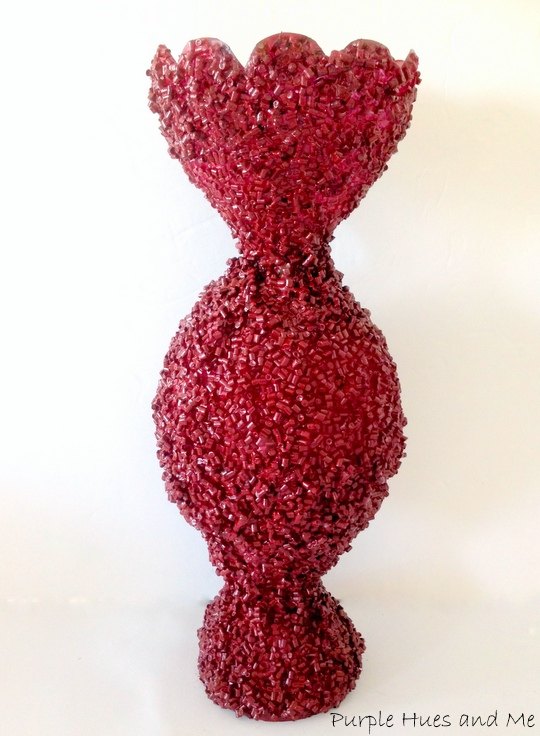
Just perfect for Fall!
Resources for this project:
See all materials


Any price and availability information displayed on [relevant Amazon Site(s), as applicable] at the time of purchase will apply to the purchase of this product.
Hometalk may collect a small share of sales from the links on this page.More info

Want more details about this and other DIY projects? Check out my blog post!
Comments
Join the conversation
4 of 26 comments
-
So very beautiful!!! You are very talented. 😃
-
I might try using Pom juice bottles as they have a nice curvy shape.


Frequently asked questions
Have a question about this project?
Very clever - can it hold water for real flowers?
Did you weight it at all so it doesn't tip over easily.