


Faux Terrazzo Coasters

Hello all and thanks for dropping by.
Today I'll show you how I made these matte, terrazzo looking coasters from 100% resin.
You may have seen terrazzo before made from cement with chips of marble, granite or something similar cast inside, the coasters I've made are fully resin with resin chips inside too. They're so easy to make and I'll explain how.
I also have a YouTube channel where this video just went up so check that out if you prefer to watch your tutorials. Please remember to 'like' and subscribe to my channel too 👍🏻

WHAT YOU'LL NEED
- Resin - As always, use my code HANNAH and this link to buy discounted resin (10% off) with free shipping from Rockstar Resins
- Coaster molds
- Mixing containers & sticks
- Heat gun
- Blow torch
- Sandpaper/orbital sander
Always use protective wear and follow the necessary safety measures when handling resin
STEP 1 - SIT BACK AND WATCH YOUTUBE
As I mentioned above, I have a YouTube channel where you can watch this tutorial and many more. Just click the video link above to get started.
Please also remember to like and subscribe to my channel for loads of crafty content including loads of my Hometalk projects and much more 👍🏻
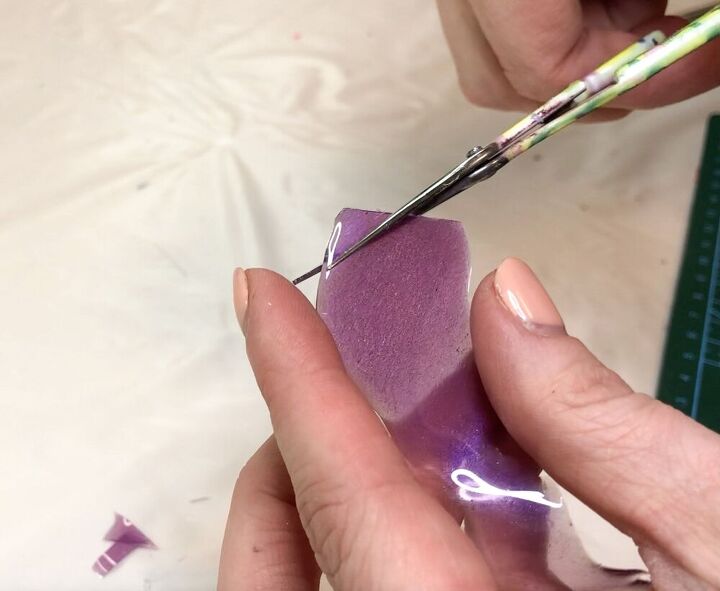
STEP 2 - MAKE YOUR CHIPS
If you're into resin crafts this will be a great way to use up all those scraps of resin cast-offs that you've probably gathered from previous projects thinking 'I'll use that for something....one day'. Well today's the day, my friend!
Pick some pretty colours and heat them up using a heat gun until the scraps go soft, then snip them up into little chips.
If you don't have any scraps yet because you're brand new to resin, maybe this project is one to have in the back of your mind so that you know exactly what to use your first lot of scraps for! Just whatever you do, don't throw them away 🙏🏻 there's so many things you can do with them after they've been reheated.
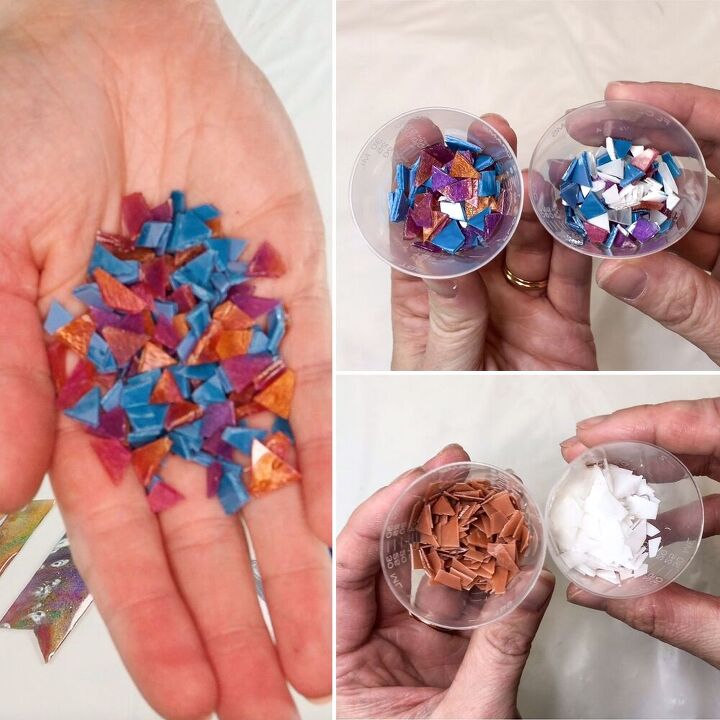
I already have a colour scheme in mind so I hunt for and chop up specific colours.
Because I'm making a couple of coaster sets (a black and white set and a terracotta and white set) I plan this out thoroughly to make the best of my scraps.
The terracotta and white chips you see above were actually made using the cured scraps from the mixing containers of the first set of coasters I made for this project!
Hopefully I can explain that better further on - she'll let you know when I'm referring to this again > 🙋🏼♀️
The other chips, the multicoloured ones, were from scraps I already had.
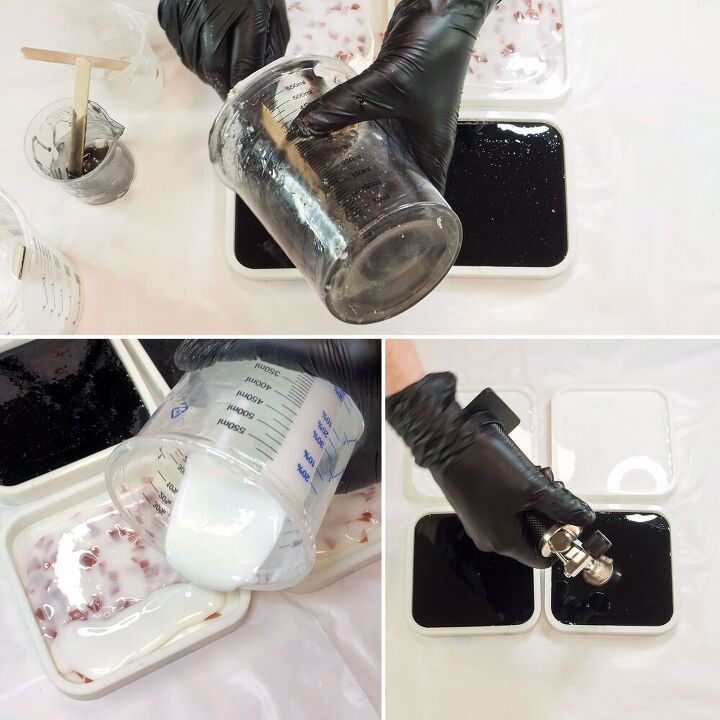
STEP 3 - MIX THE RESIN
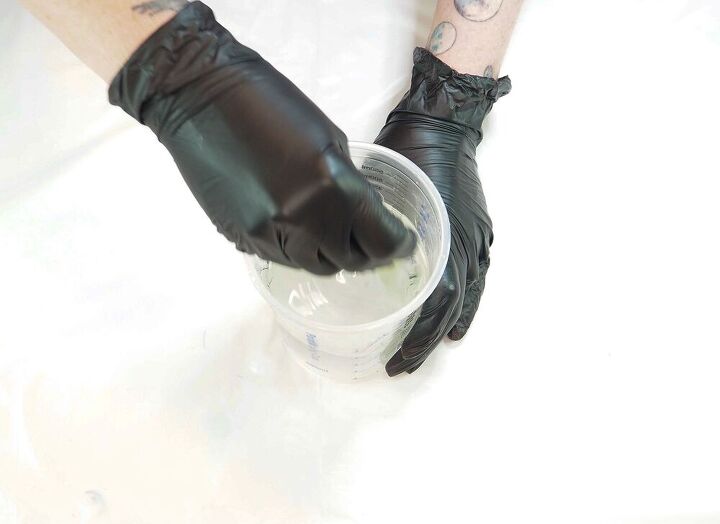
It's time to mix the new resin that will form the main coaster bases. I mix 300mls of resin thoroughly for at least 5 mins. I use Rockstar Resin's '5 Star 2:1 Thin Coat' resin for this but a lot of their products will work for this sort of project, I'm just loving this particular formula at the moment.
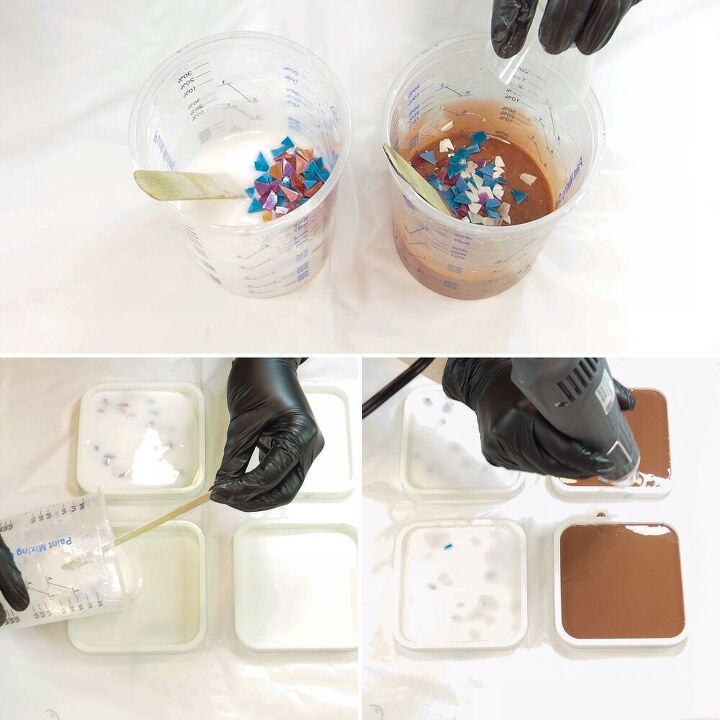
Split the resin in half so that you now have approx 150mls of resin in one container and 150mls in another.
Colour the first half an off-white colour and the 2nd half a terracotta colour. I made a video on exactly how I mixed up both of these colours if you're interested in seeing how. It's also up on my YouTube channel 👍🏻
STEP 4 - ADDING THE CHIPS
You may have noticed that in the coloured chips for these coasters (pictured earlier) there were also white and terracotta pieces (hence why I decided on this colour scheme).
So, after roughly splitting the chips in half into those 2 little containers, I painstakingly picked out the white chips from one half and picked out the terracotta from the other and swapped them over. I just felt this would have been a waste of these pieces if they had blended in with the new resin.
Now add in the little container of chips (without any white chips) into the white resin and the container of chips (without terracotta chips) into the terracotta resin, and mix them in.
Pour the resin into the molds so that you have 2 white and 2 terracotta. Spread the chips out evenly across the coaster bases and pop any little bubbles with the heat gun and blow torch.
Leave to cure.
It was at this point (after the resin in containers from the coasters above had cured) that I made the chips for this next set of coasters.
🙋🏼♀️ > I peeled out the resin skin from the inside of the white and terracotta containers and snipped them up into little pieces.
I kept all the white chips in one little container and all the terracotta in another (pictured earlier).
Now follow the same process from STEP 3 onwards again, but in a nutshell, Mix up another 300mls of resin, split this in half and colour the 2 halves black and white this time.
Add the white chips into the black resin and the terracotta chips into the white resin, pour the resin into the molds, pop bubbles and allow to cure.
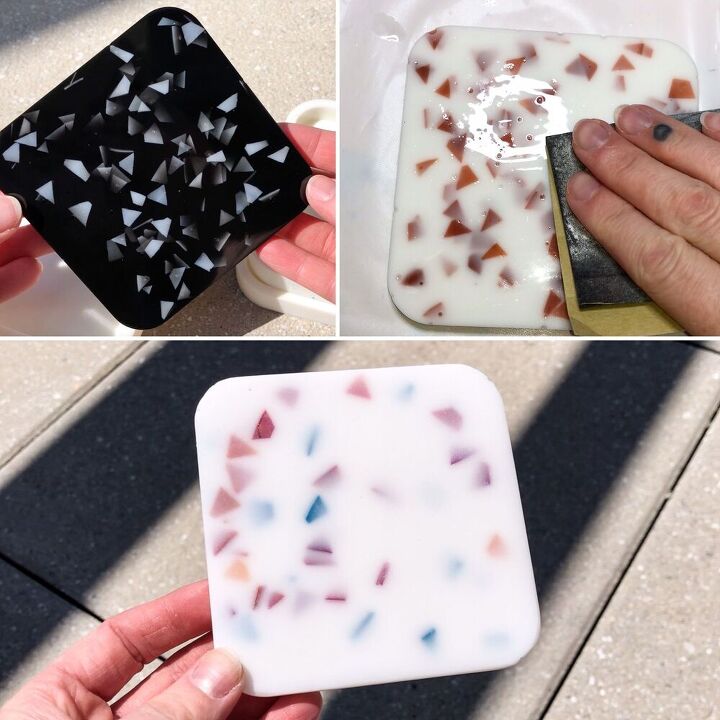
STEP 5 - SANDING
Demold your coasters once they've fully cured and turn them over (this will more than likely be the better side).
You'll most likely have shiny topped coasters at this stage unless your molds have a matte finish (very unlikely for coaster molds).
Hey, if you're loving the shiny finish, keep them that way, but if you want that matte clay like finish for the terrazzo look, give them a thorough sanding with sand paper or an orbital sander if you're fancy 💁🏼♀️ Sand both the top and underside and the edges for a more consistent look.
You should now have gorgeous, matte finish, faux terrazzo coasters!
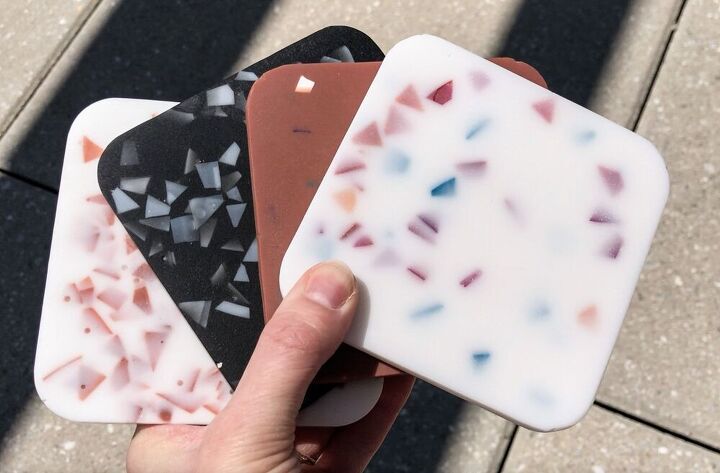
I said it was easy! And such a great way to use up resin scraps instead of throwing them away. They come in handy for adding pops of colour to so many projects. I know people on Instagram who sell bags of chips like this! Now you can just make your own!
I have added my coasters to my Etsy Store in case any one is interested in buying them along with lots of other handmade goodies.
It's all stuff I show you how to make on my YouTube Channel though so if something catches your eye but you're thinking 'I recon I could make that'...YES, yes you can! 😂
Thanks for stopping by and taking a look at my post today. Please feel free to drop any questions or comments down below and I'll happily get back to you.
Take care and happy crafting! x

Resources for this project:
See all materials


Comments
Join the conversation
-
Very festive looking! Good job 👍️


Frequently asked questions
Have a question about this project?