


How I Transformed a Flower Stem Into a Faux Houseplant

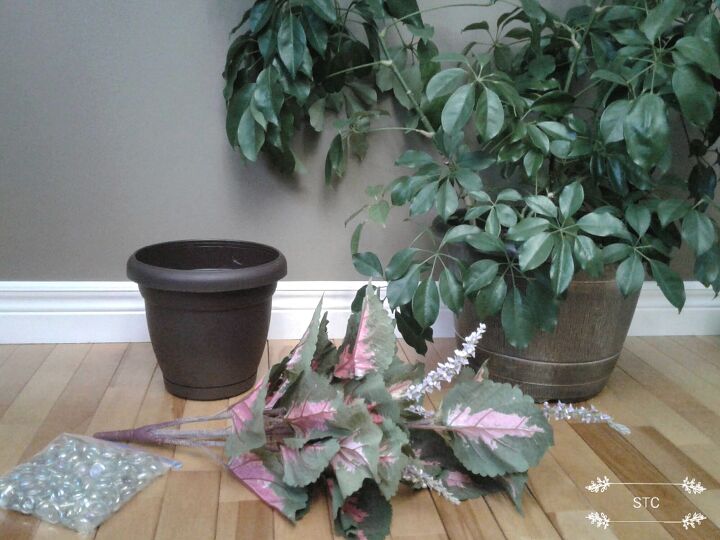
This is a post for those who didn't get the green thumb in their genetic code or they may like the look of houseplants but not the maintenance they require. Either way this is an easy and affordable way to add some green into your current home scene so let's get started! The Coleus stem you see laid there was discounted half price to just $5 so I bought two of them thinking that it would be easy to turn them into fake houseplants.
Hometalk Recommends!
I had some empty plastic flowerpots but how would I keep the big stem upright in such a lightweight pot? We have a saying around here that whenever we have a slight meal, leftovers or a processed food we look at the bright side and say, "Its better than a rock in the pot!" But in this case a rock in the pot is perfect, well maybe a few rocks would be needed!
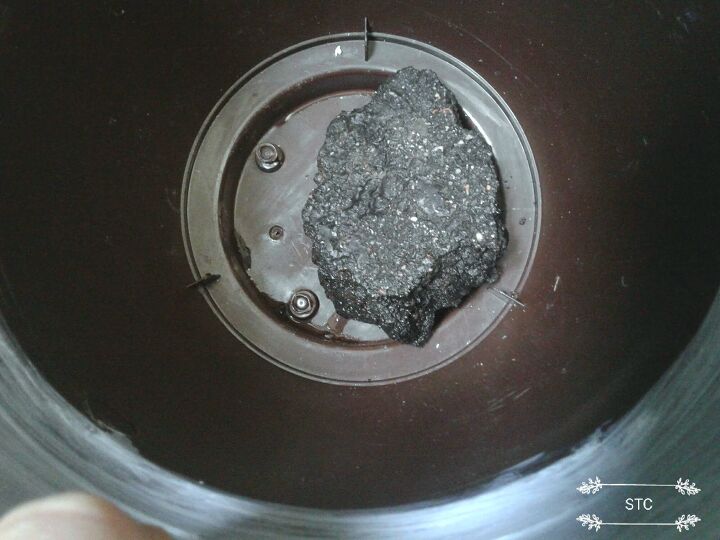
The chunk of asphalt seen there along with a few other chunks gave me the counter weight I needed for the top heavy plant. But now how would I conceal the weighty matter? Where there's a will...there's a way! I decided to make an insert for the flowerpots using a recycled Styrofoam tray.

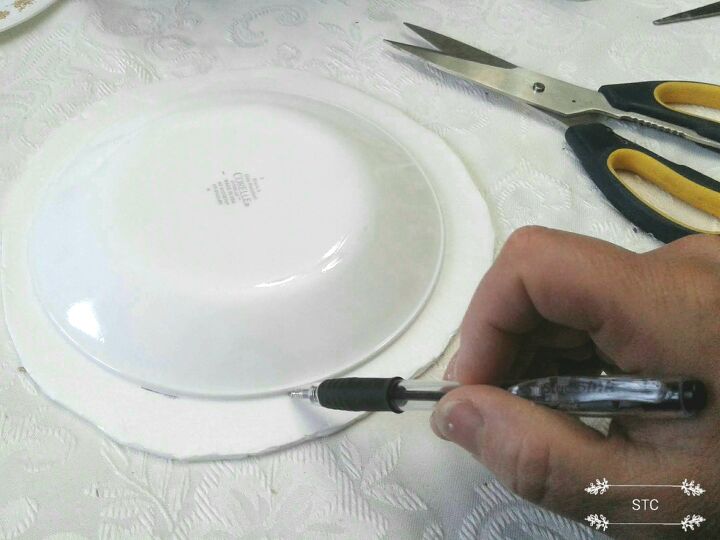
I cut out the maximum circle size that I could out of the tray at first I then used some of my dinnerware plates to determine the best size for the insert to be. Once I found the size I traced it onto the tray and that became my cutting line.
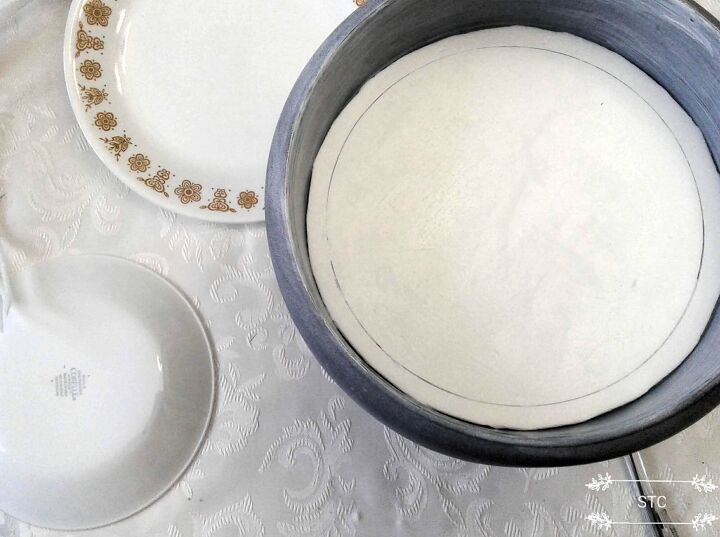
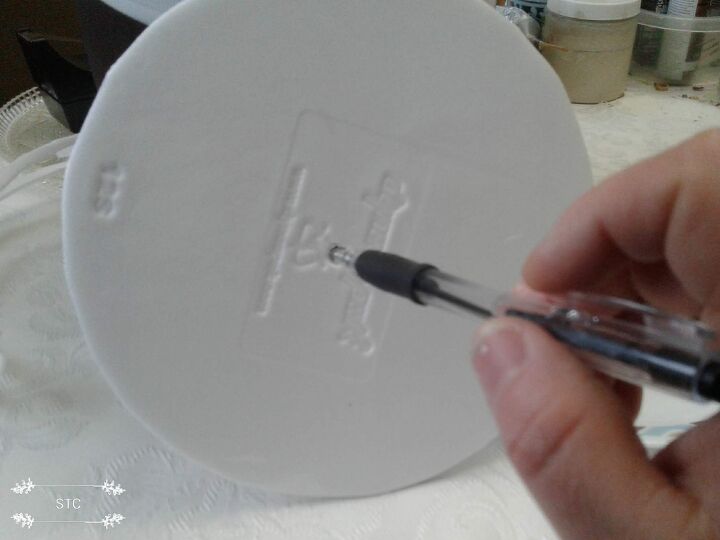
There's an inside ledge to the flowerpots so that's where I wanted this template to sit and rest upon. As you can see I cut an extra few cm. larger than my tracing line in order to sit higher inside the pot.
Now to poke a hole in the center for the stem to feed down into the base of the pot.
Ok so that looks pretty blah, nothing like soil that a real plant would be growing out of, I have the solution! I'll paint the soil onto the template...piece of cake! Dab, dab, swish, swish, plop, plop and smooch, smooch with brown and black acrylic paints.
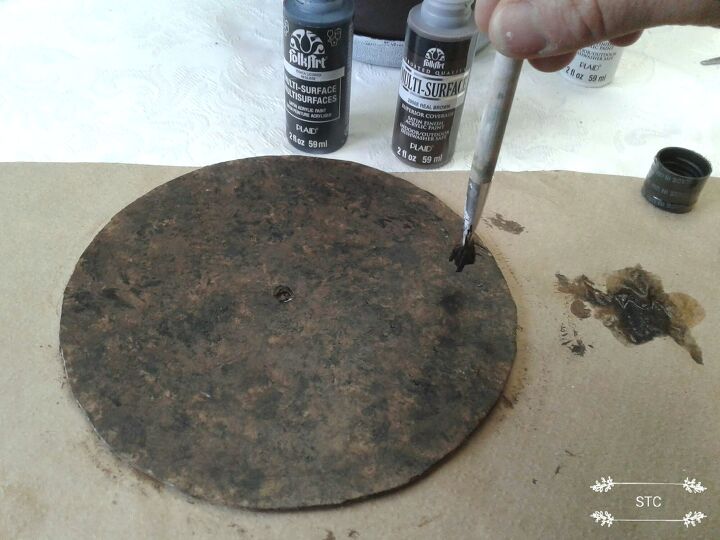
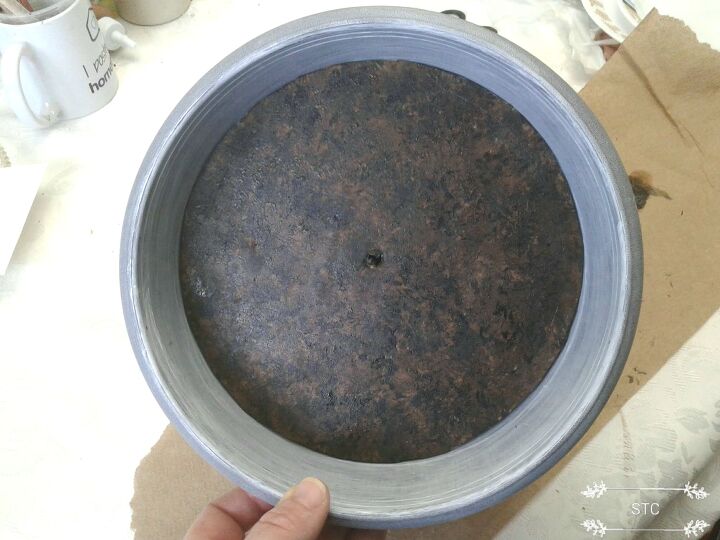
That mud slinging was fun, I mean it's starting to look like the real deal now!
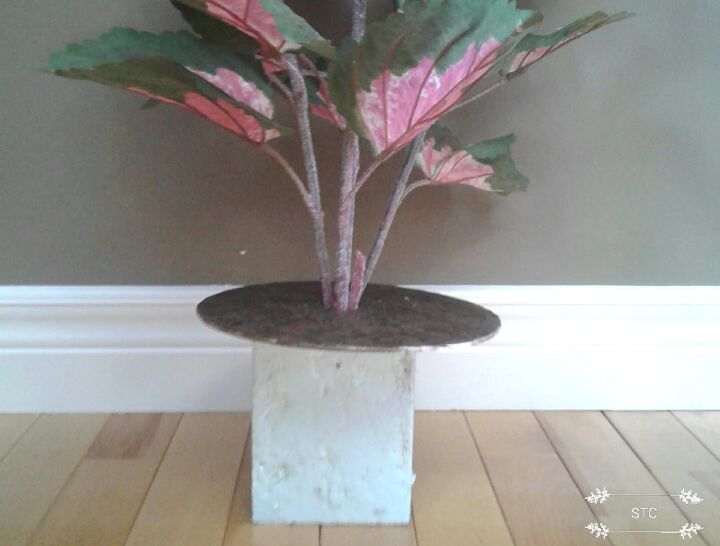
So now it's planting time...no digging required though! I used recycled styrofoam packaging material because it'll never be seen. The plant is poked through the mud replica insert then into the styrofoam block ready to be laid into the pot.
I am kinda drooling over my fake mud topping, if you know me you'll understand how passionate I am about good growing soil! Haha, this is foamy not loamy but it serves the purpose!
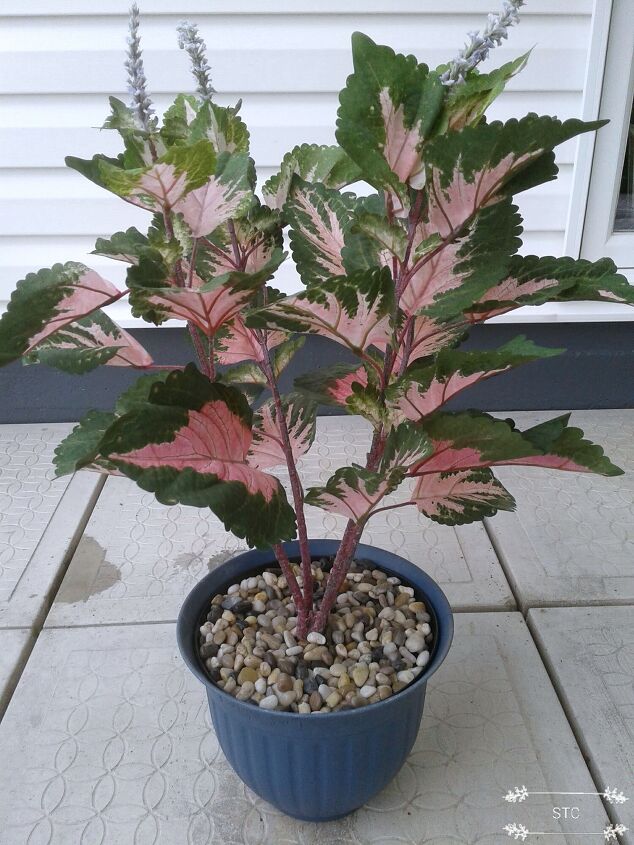
So in review the stem is secured into the styrofoam and the styrofoam is wedged between the asphalt chunks laid into the pot bottom. It stands up perfectly with the secure fit and it looks like the real deal!
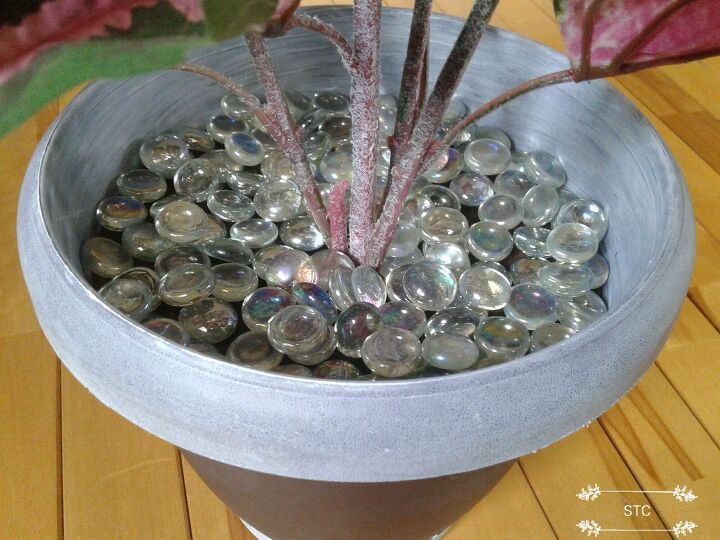
As a topping for the layers I used glass gems to make it a little more glamorous, you see it's a surprise gift for my mother in law!
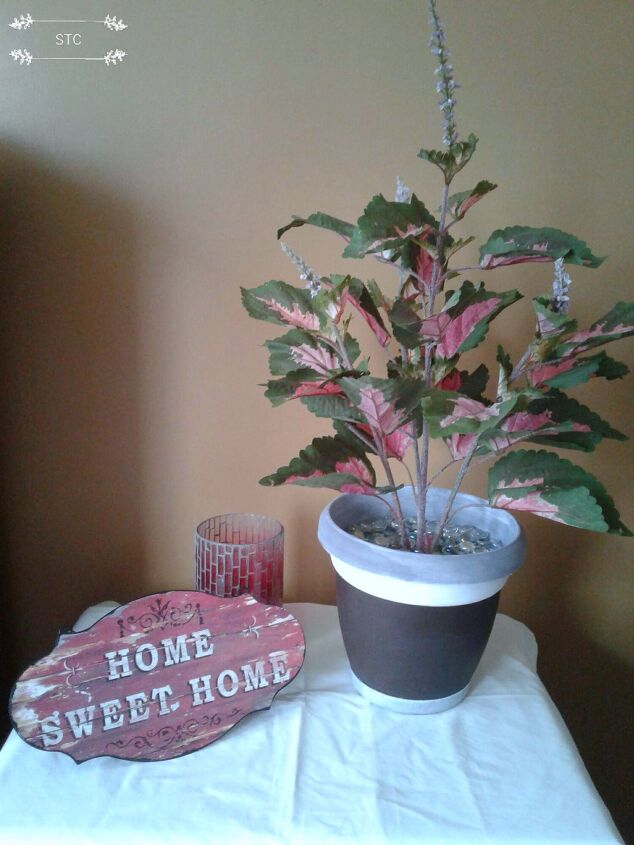
She loved it and once her guests saw it they thought it was real and asked to get a snip of her beautiful plant!!
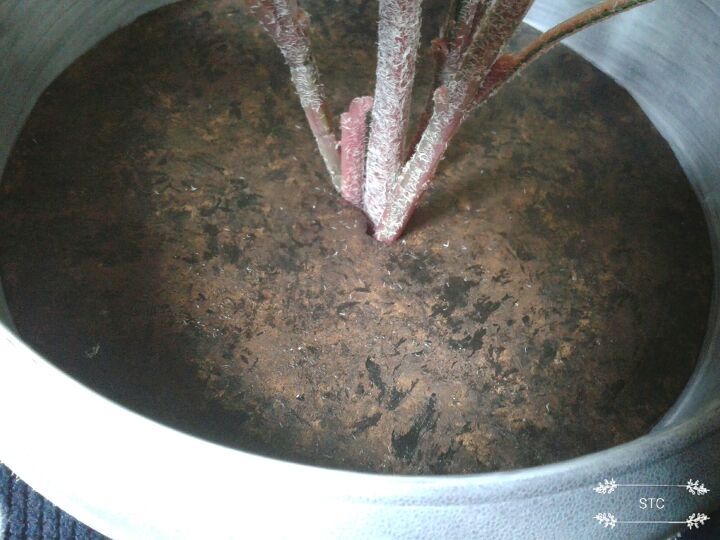
So I stepped up to the 'fake it' plate once more and chiseled out another one for her friend who loved hers so much! This time the top layer used was a stove burner cover!
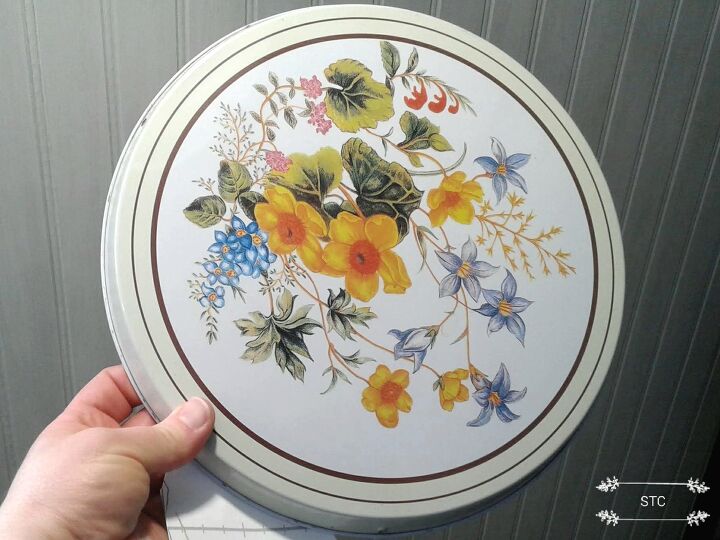
I simply flipped it over and it was the perfect size insert for the next flowerpot I chose to use. I drilled a center hole for the stem and then spray painted the underside of it with black flat paint, a couple of coats ensured good coverage. I had some small pebbles to accent the fake soil layer with so really very little of the cover would ever be seen.
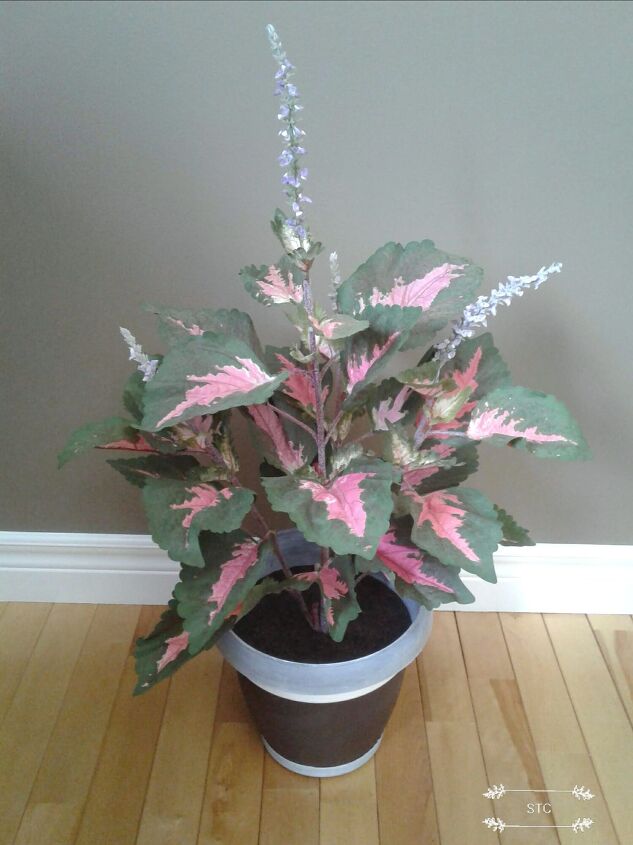
Here it is as I'm about to deliver it to my mother in law to surprise her friend with. I was rewarded with the gift of happiness from giving. The faux plants made them both happy and grateful, a win-win situation! Until next time...spread a little craft happiness. Thanks for popping by!
2025 UPDATE: I've since learned how to make fake potting soil!!! Check it out here if you would like your plant to look even more real! [url=https://www.hometalk.com/posts/decorate/rooms/how-to-make-fake-potting-soil-45175795
Resources for this project:
See all materials


Comments
Join the conversation
-
This is a perfect solution for replacing real plants with dirt that need watering. They are nice to have but a pain to keep up with. Well done!
-
My kind of houseplant


Frequently asked questions
Have a question about this project?