


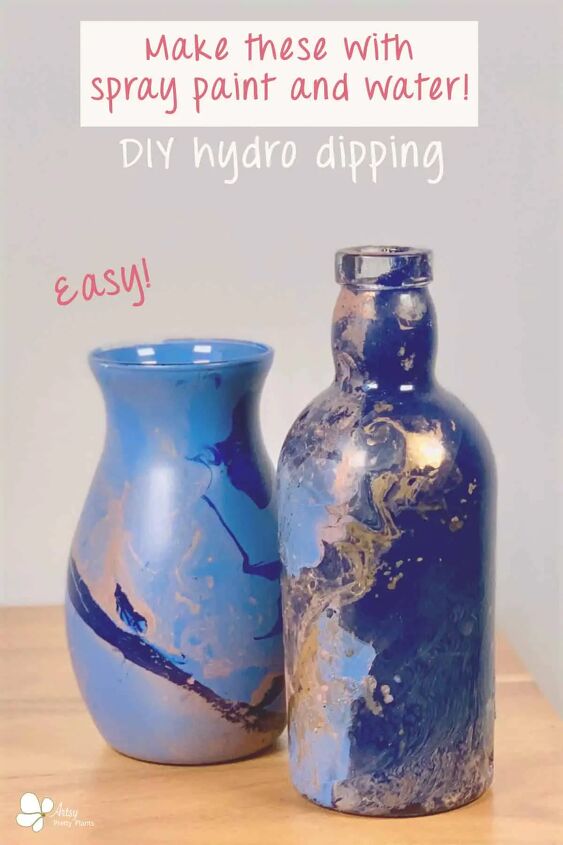
How To Hydro Dip Vases With Spray Paint (Easy DIY)
Do you have some blah-looking vases that are in need of a makeover? Or maybe you want fancy looking ones that you can get on a dollar-sized budget?
Then you gotta check out this fun DIY project on how to hydro dip vases using spray paint! It’s so easy, you wouldn’t believe it.
What I love most about doing DIY home decor projects is that you get to look around your own room and know that you made your own decorative items.
DIY Hydro Dip Vases Video Tutorial- Vase Makeover
Please subscribe to my YouTube channel to be notified when I have a new video tutorial!

I mean how great is it that you don’t have to buy things factory made items sold in a store.
Okay, sure, sure, the bland dollar store glass bowl or jar was made in a factory, but you just turned that bore-snore glass item into a classy faux marble vase!
If you’re new to the term hydro dip, it’s also known as water transfer printing, hydro graphics, water marbling or swirl painting.
Basically, it’s a painting technique where paint is applied to the surface of water which creates a film on top.
Then an object is submerged into the water and the film grabs sticks to the object as it moves through the water.
It’s kind of like a tattoo, you know, the kind you had as a kid. The kind that was on a piece of paper and the design was actually a film.
You applied the tattoo paper to your arm, rubbed water on top of it, peeled off the paper and the tattoo film stuck to your skin.
That’s pretty much the same principle here with hydro dipping.
This is my second foray into the hydro dip process. My first was when I hydro dipped cement planters.
I learned a lot during those trials, and when it came to working out the details on how to hydro dip vases, I learned it’s pretty much the same process.
You may want to check out the tutorial for these wine bottles I hydro dipped. The metallic gold finis h came out so neat!
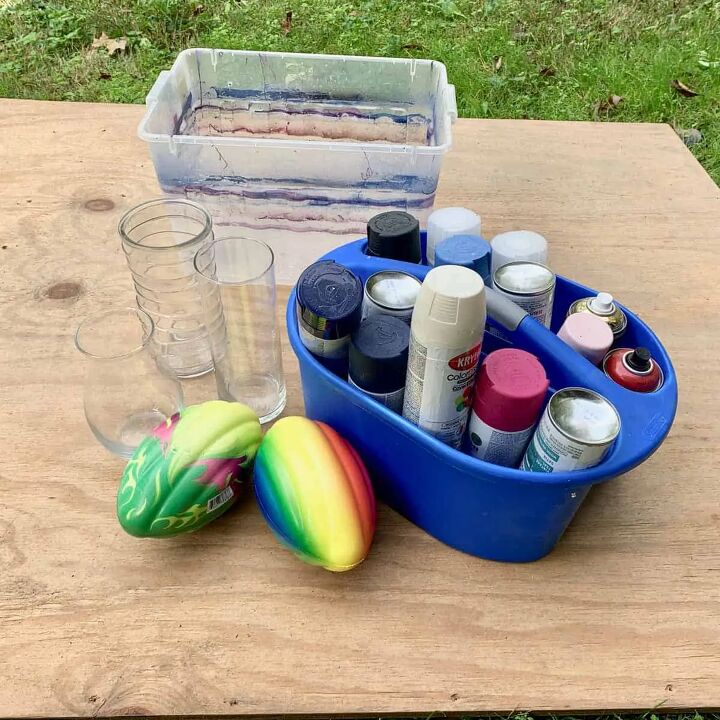
Materials Notes*
Gloves: Wear gloves, the cheapest you can find. I didn’t wear them because I only had the ones I use for concrete projects on hand, which are very thick and not inexpensive.
It’s best if you change them in between each hydro dip.
Container: Use a bin or tub you don’t mind getting paint on. The container needs to be taller and wider than your vase. I recommend at least 2 ½ times bigger in size.
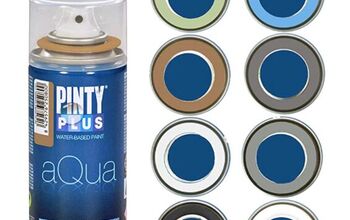
Hydro dipping paints: The spray paints must be acrylic and the sheen does best if it’s either gloss, metallic or satin.
Some brands of paint don’t work well at all for hydro dipping. Rustoleum metallics, gloss and satin work best.
Handles: My handles blocked the water from getting inside the vases, which made them float on the surface when I was trying to dip them.
That made them really difficult to control and manipulate in the water. So I don’t recommend using the foam toys shown in the materials photo, or the corkscrew.
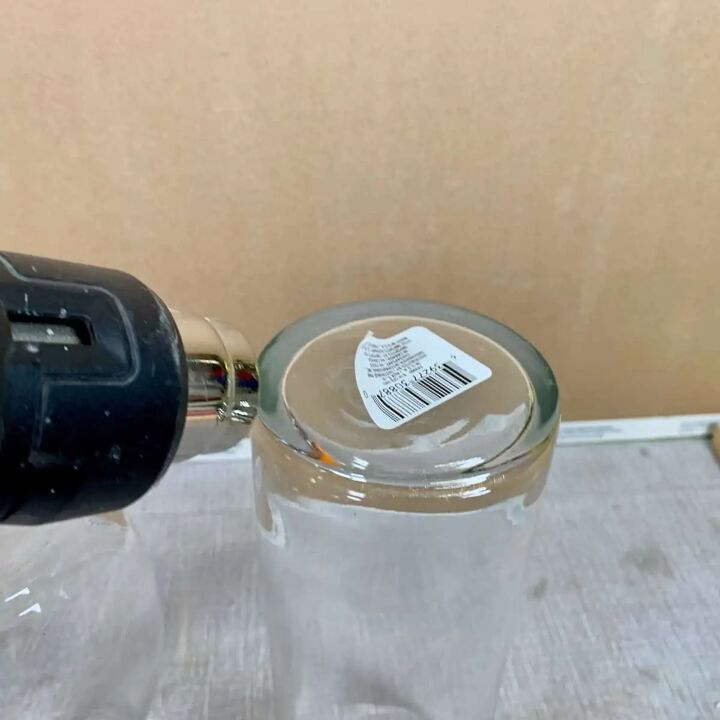
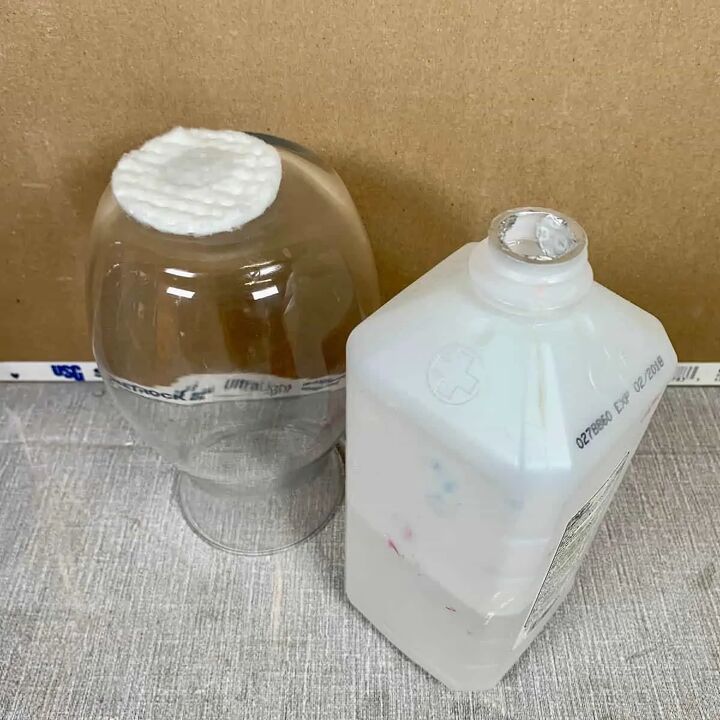
Step 1. Remove Any Stickers Or Labels
If there are stickers on your vases then you’ll need to remove them.
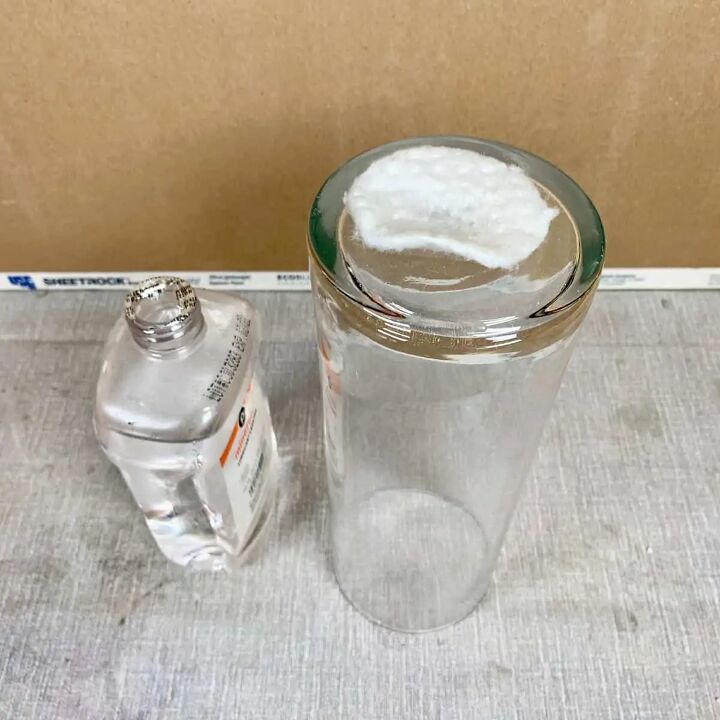
Materials you'll want to get:
- Heat gun (or hair dryer)
- Goo gone or mineral oil
- Old tooth brush
- Rubbing alcohol
- Cotton balls or pads
Even if there aren’t any, the vases will need to be cleaned, so you’ll follow the last part of this step for cleaning the glass.
If the label doesn’t peel off cleanly, use a heat gun (or hair dryer) to soften the adhesive.
Just run the heat gun on the medium temperature over the sticker, sweeping it back and forth until you see it start to peel up.
Once it peels, lift it off the glass, but take care not to touch the glass where the sticker is because it may be hot.
Let the glass cool down. Then use a cotton ball with goo gone or mineral oil to rub off the rest of the adhesive.
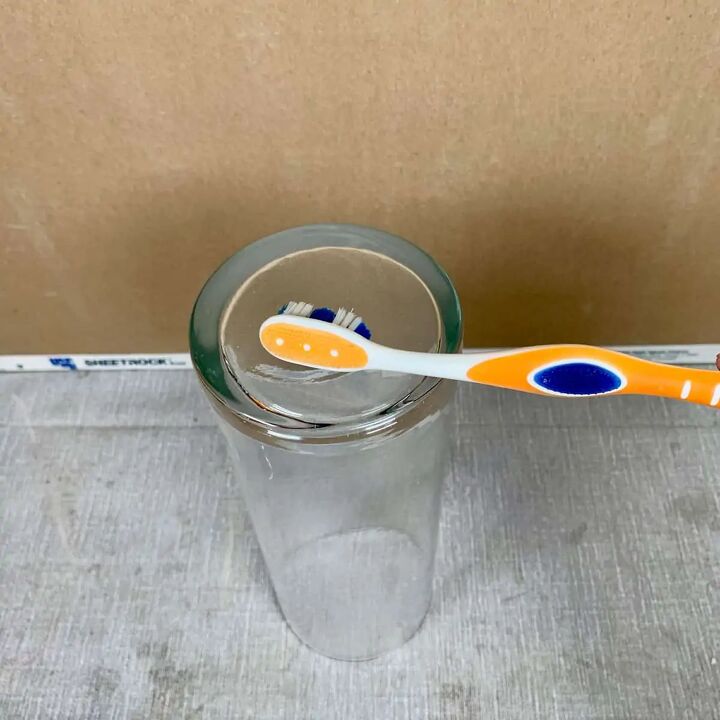
If some adhesive is still sticking to the glass, use an old toothbrush to rub it off.
Step 2. Clean The Vases
Wash the vases with dish detergent and wipe them dry with a paper towel or linen cloth.

If there is remaining oil from the mineral oil or goo gone, then use rubbing alcohol and a cotton ball to wipe it off.
It’s very important that there isn’t any oil remaining on the glass or the hydro dip paint won’t stick.
Step 3. Apply The Base Coat
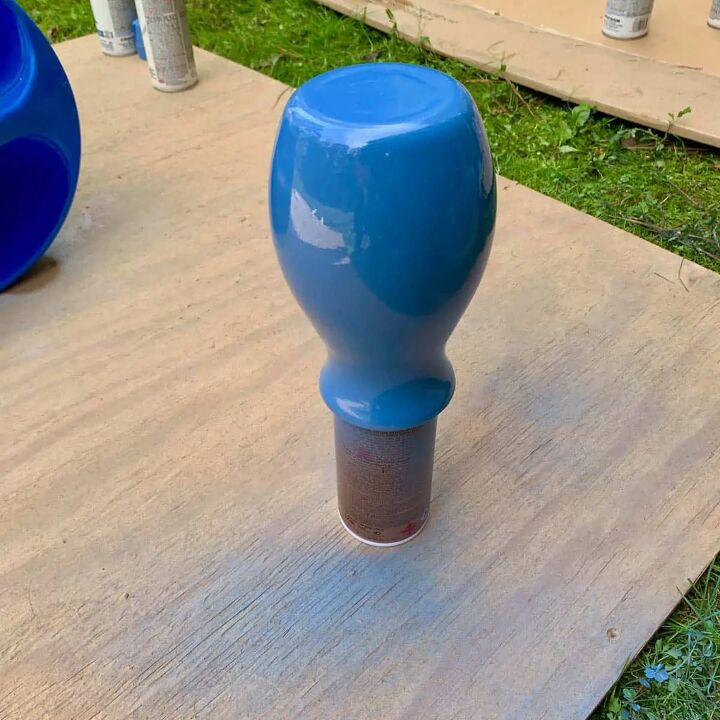
The surface of the vases is very slick and hydro dipped paint won’t adhere well to such slick surfaces, so you need to apply a primer (or base coat) to the entire surface.
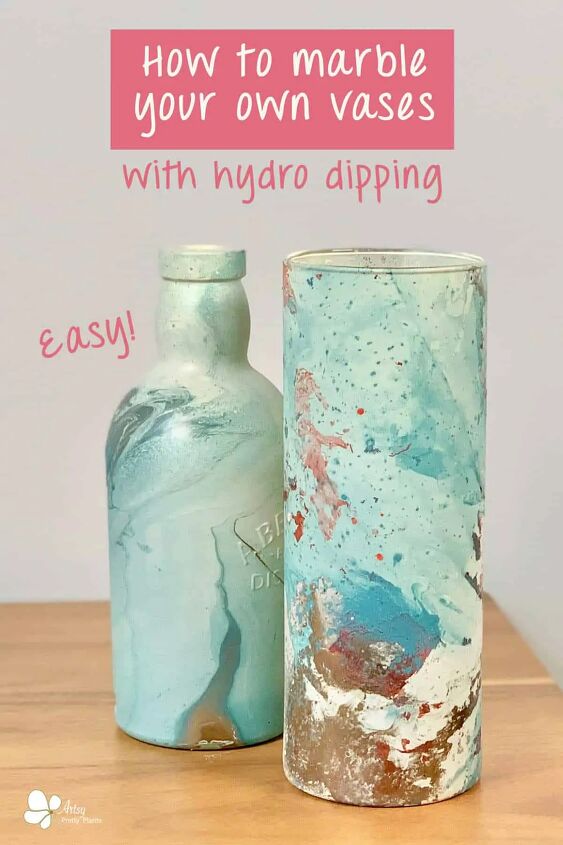
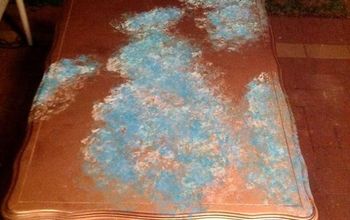
You can use a white off-white spray paint, or you can even make the base coat a different color. The photo above is a clear glass with a blue base coat –have fun with it.
They should be dry enough to touch after about 10 minutes. But even though they are dry to the touch, you need to wait closer to 30 minutes before you begin to hydro dip them.
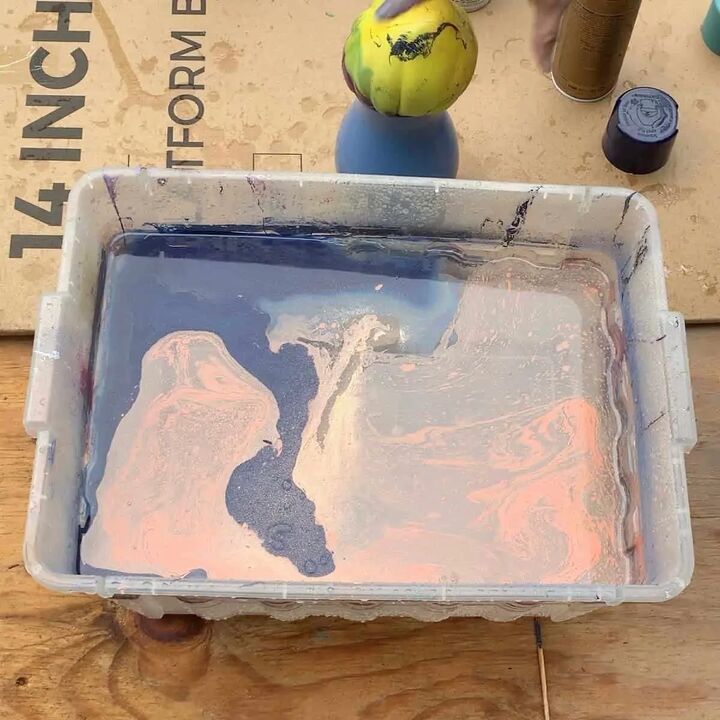
Step 4. Prep The Containers For Hydro Dipping
Fill the bin with water (I used my garden hose) and set up the spray paints next to the bin.
Remember that you will need to shake each can of spray paint before you dip. Go ahead and shake them all now so they will have a head start before you begin.
This way you won’t need to shake them for the full minute before every dip, but they will need to be shaken before each dip.
The length of time needed will depend on how long of a rest there is in between each use.
If you made handles, go ahead and insert them now into the vases.
Step 5. Hydro Dip The Vases
Different techniques in how you spray will produce a variety of different effects.
You can spray in a solid circle and then create concentric circles (circles within circles) with a different color and even again with a third color.
Other patterns you can create are spraying circles next to each other or spraying line patterns. You can also spray in quick spritzes to create spatters of dots.
Each will produce a different marble effect.
Here’s an example of how different spray patterns can come out on the vases.
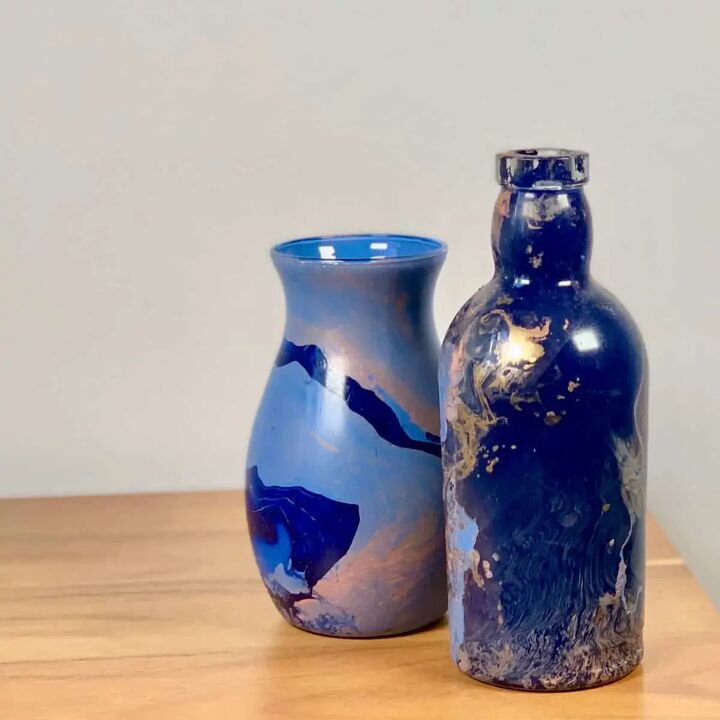
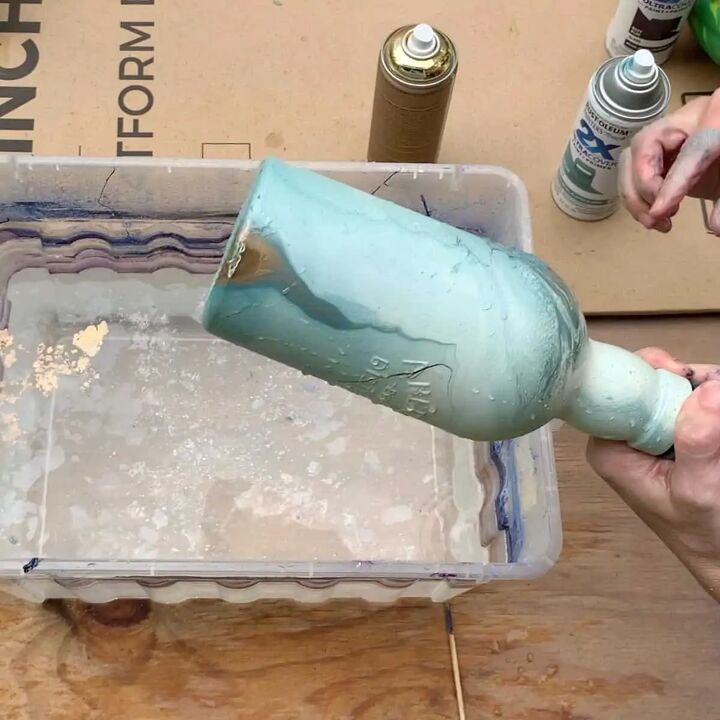
The vase that was dipped in the spray pattern above is the pear-shaped one in the photo on the left below. It was a clear glass vase that I base-coat painted blue.
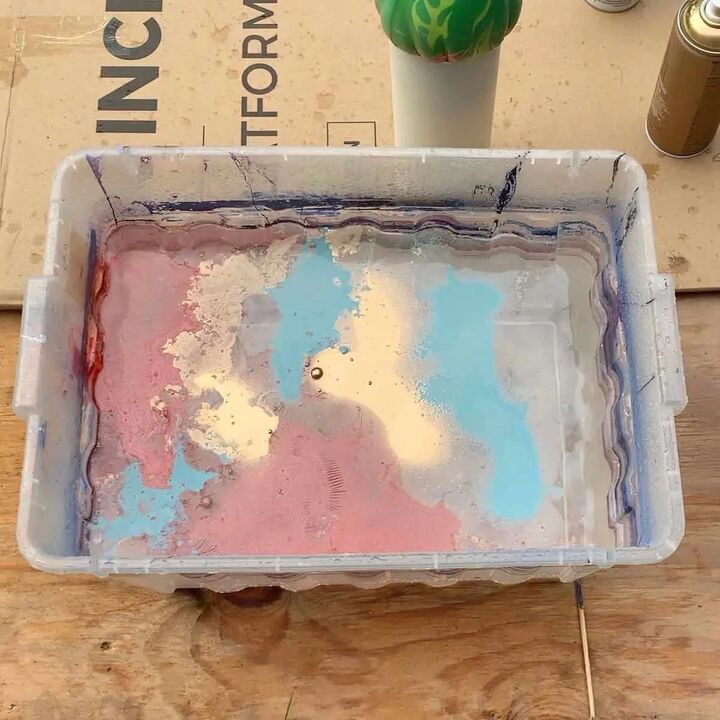
The spray pattern shown in the water bin above is for the cylindrical vase in the photo on the right below.
I did a spritzing technique with the red spray paint to give it that flecked look. I think the whole vase looks like a winter wonderland.
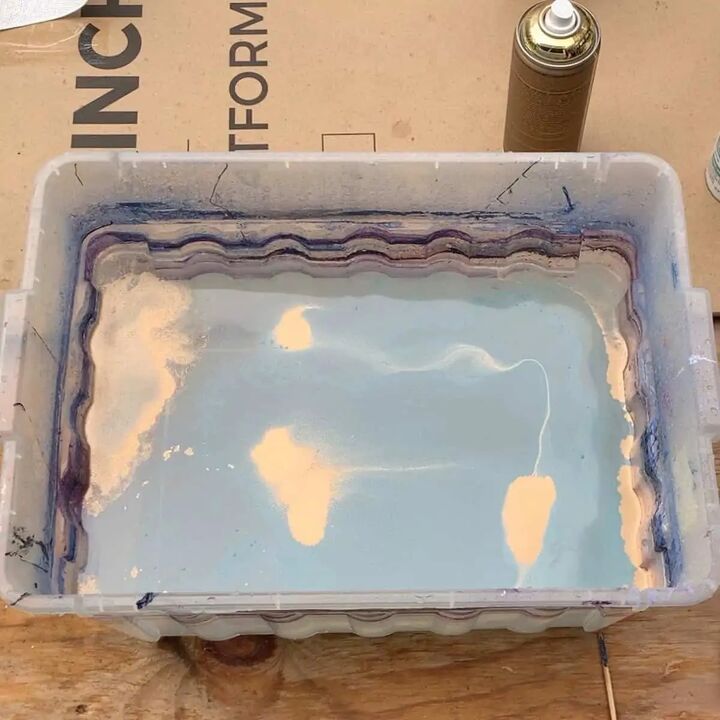
Spray the surface of the water slowly. If you are using metallic or hammered metal paints, be sure to spray light coats because they tend to thicken once they hit the water.
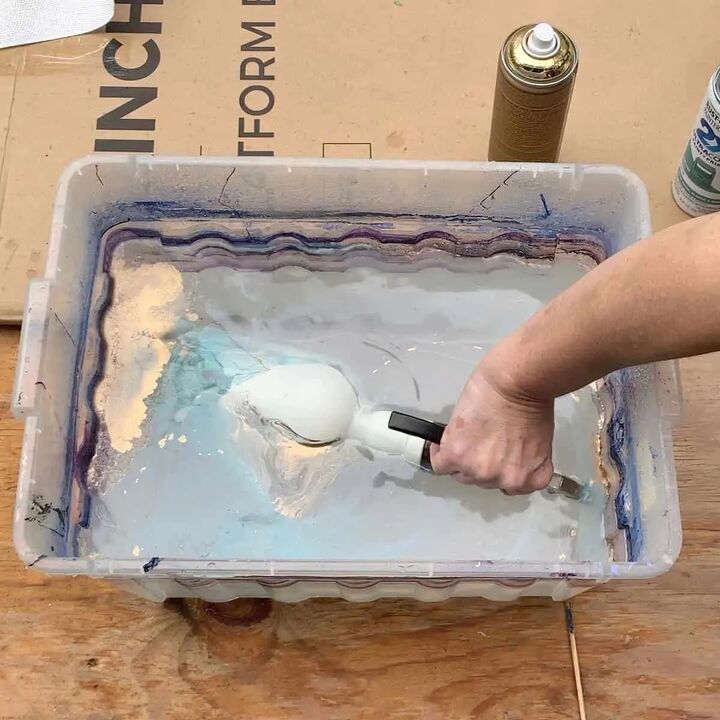
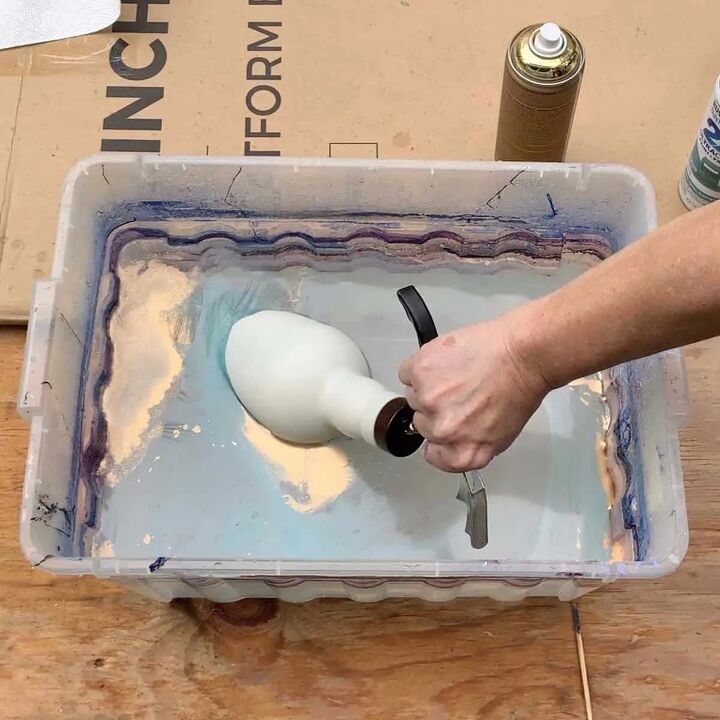
Once you have sprayed the desired pattern and colors onto the top of the water, you can start dipping the vase.
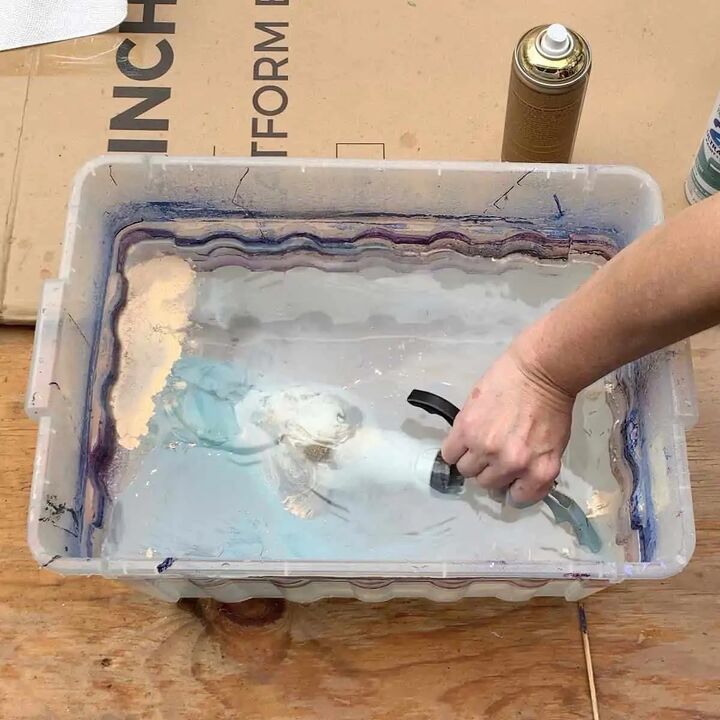
Submerge it slowly and as you go into the water, you can do it at an angle or straight in and you can twist it or keep it straight.
Again, the angle or lack of will create different patterns.
Be sure that once you get the glass vase fully submerged, that you wipe away the paint that remains at the surface before bringing it back up out of the water.
This is because the little bits of paint at the top get stringy or break up into small grains and can look unappealing.
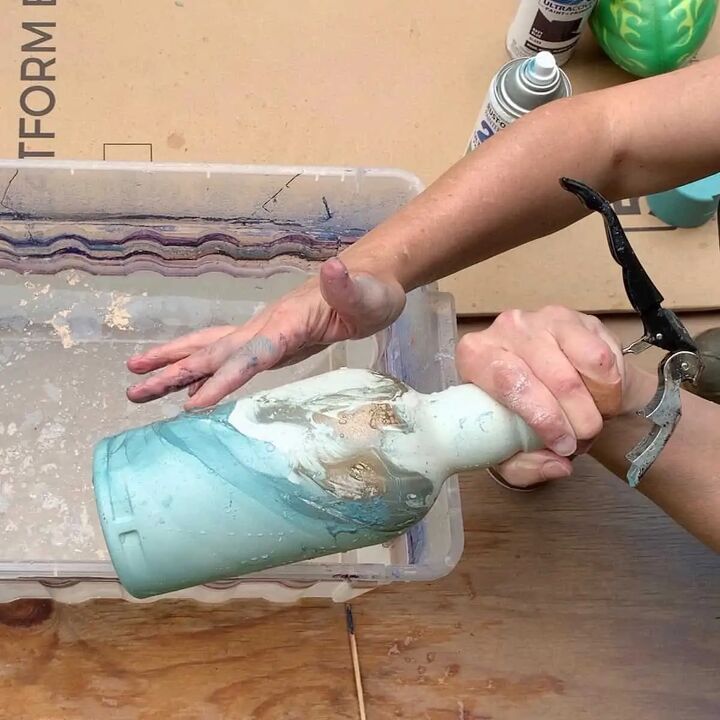
If you feel you have an area of the vase that looks bare because it didn’t get covered properly with some of the hydro dipped paint, you can do a second dip
Just use a paper towel to carefully dry it off by blotting it. You want to take care that you don’t rub off any existing paint.
Also, take care not to touch any existing paint when you go to dip it again. Then just spray some more paint onto the surface and follow the same hydro dip steps to cover the bare area.
Once you pull the hydro dipped vase out of the water, set it aside to dry. Try not to touch it until it’s fully dry because the paint can rub off easily while there’s still moisture on it.
Now you can move on to your next hydro dipped vase, but I highly recommend emptying out each bin and replacing it with fresh water if you want full control.
By refreshing the water, you will get better results because bits of remaining paint from the previous dip may stick to your next dipped piece.
If you are using the same colors, it may not matter as much.
It is also a good idea to use the green scrubby sponge to wipe any paint strings that may be sticking to the sides.

Step 6. Protect The Dipped Finish With A Top Coat
Continue dipping the remaining vases and set them aside. Once they are completely dry, you can coat them with a top coat to protect the paint from scratching.
I recommend waiting at least several hours to do this, I waited until the next day.
Set up your DIY hydro dipped vases, shake the acrylic top coat spray paint –per the instructions on the can and then spray each vase on all sides.
After about 20 minutes, check that they are dry to the touch, and then lay them on their sides and coat the bottoms.
If you’re totally hooked and want to do more hydro dipping projects, you’ll be pleased to know you can dip just about any type of material.
Here are some ideas for all kinds of things you can hydro dip:
- Wooden objects
- Wine bottles
- Glass or stainless water bottles
- Mason jars
- Christmas ornaments
- Electronic items
- Phone cases
- Flower pots
- Canvas totes
- Canvas sneakers
- Baseball hats
DIY home decor using recycled glass bottles
Resources for this project:
See all materials


Comments
Join the conversation
-
Major Win!! This is marvelous. I have done small items in nail polish but I like this waayy more. And I already buy spray paints at yard sales etc. so I have lots of colors I can use as accents. Thanks for the brilliant tutorial and Idea.
-
Very pretty. Well written instructions.


Frequently asked questions
Have a question about this project?
I love this. Subscribed to your YouTube.
Can you do wood?
What did you use for a handle?
Where did you pour the water with the paint when you were done?